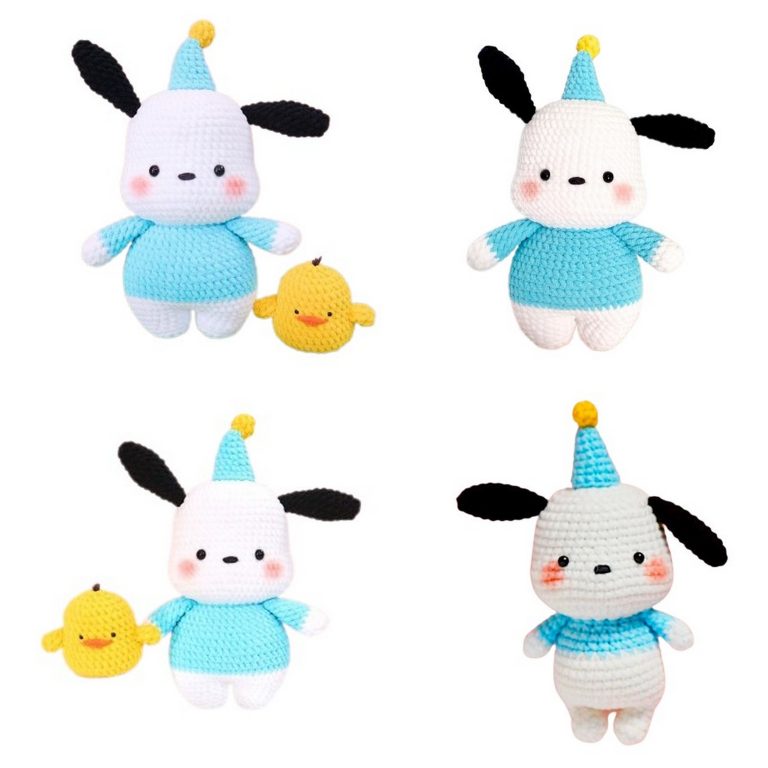
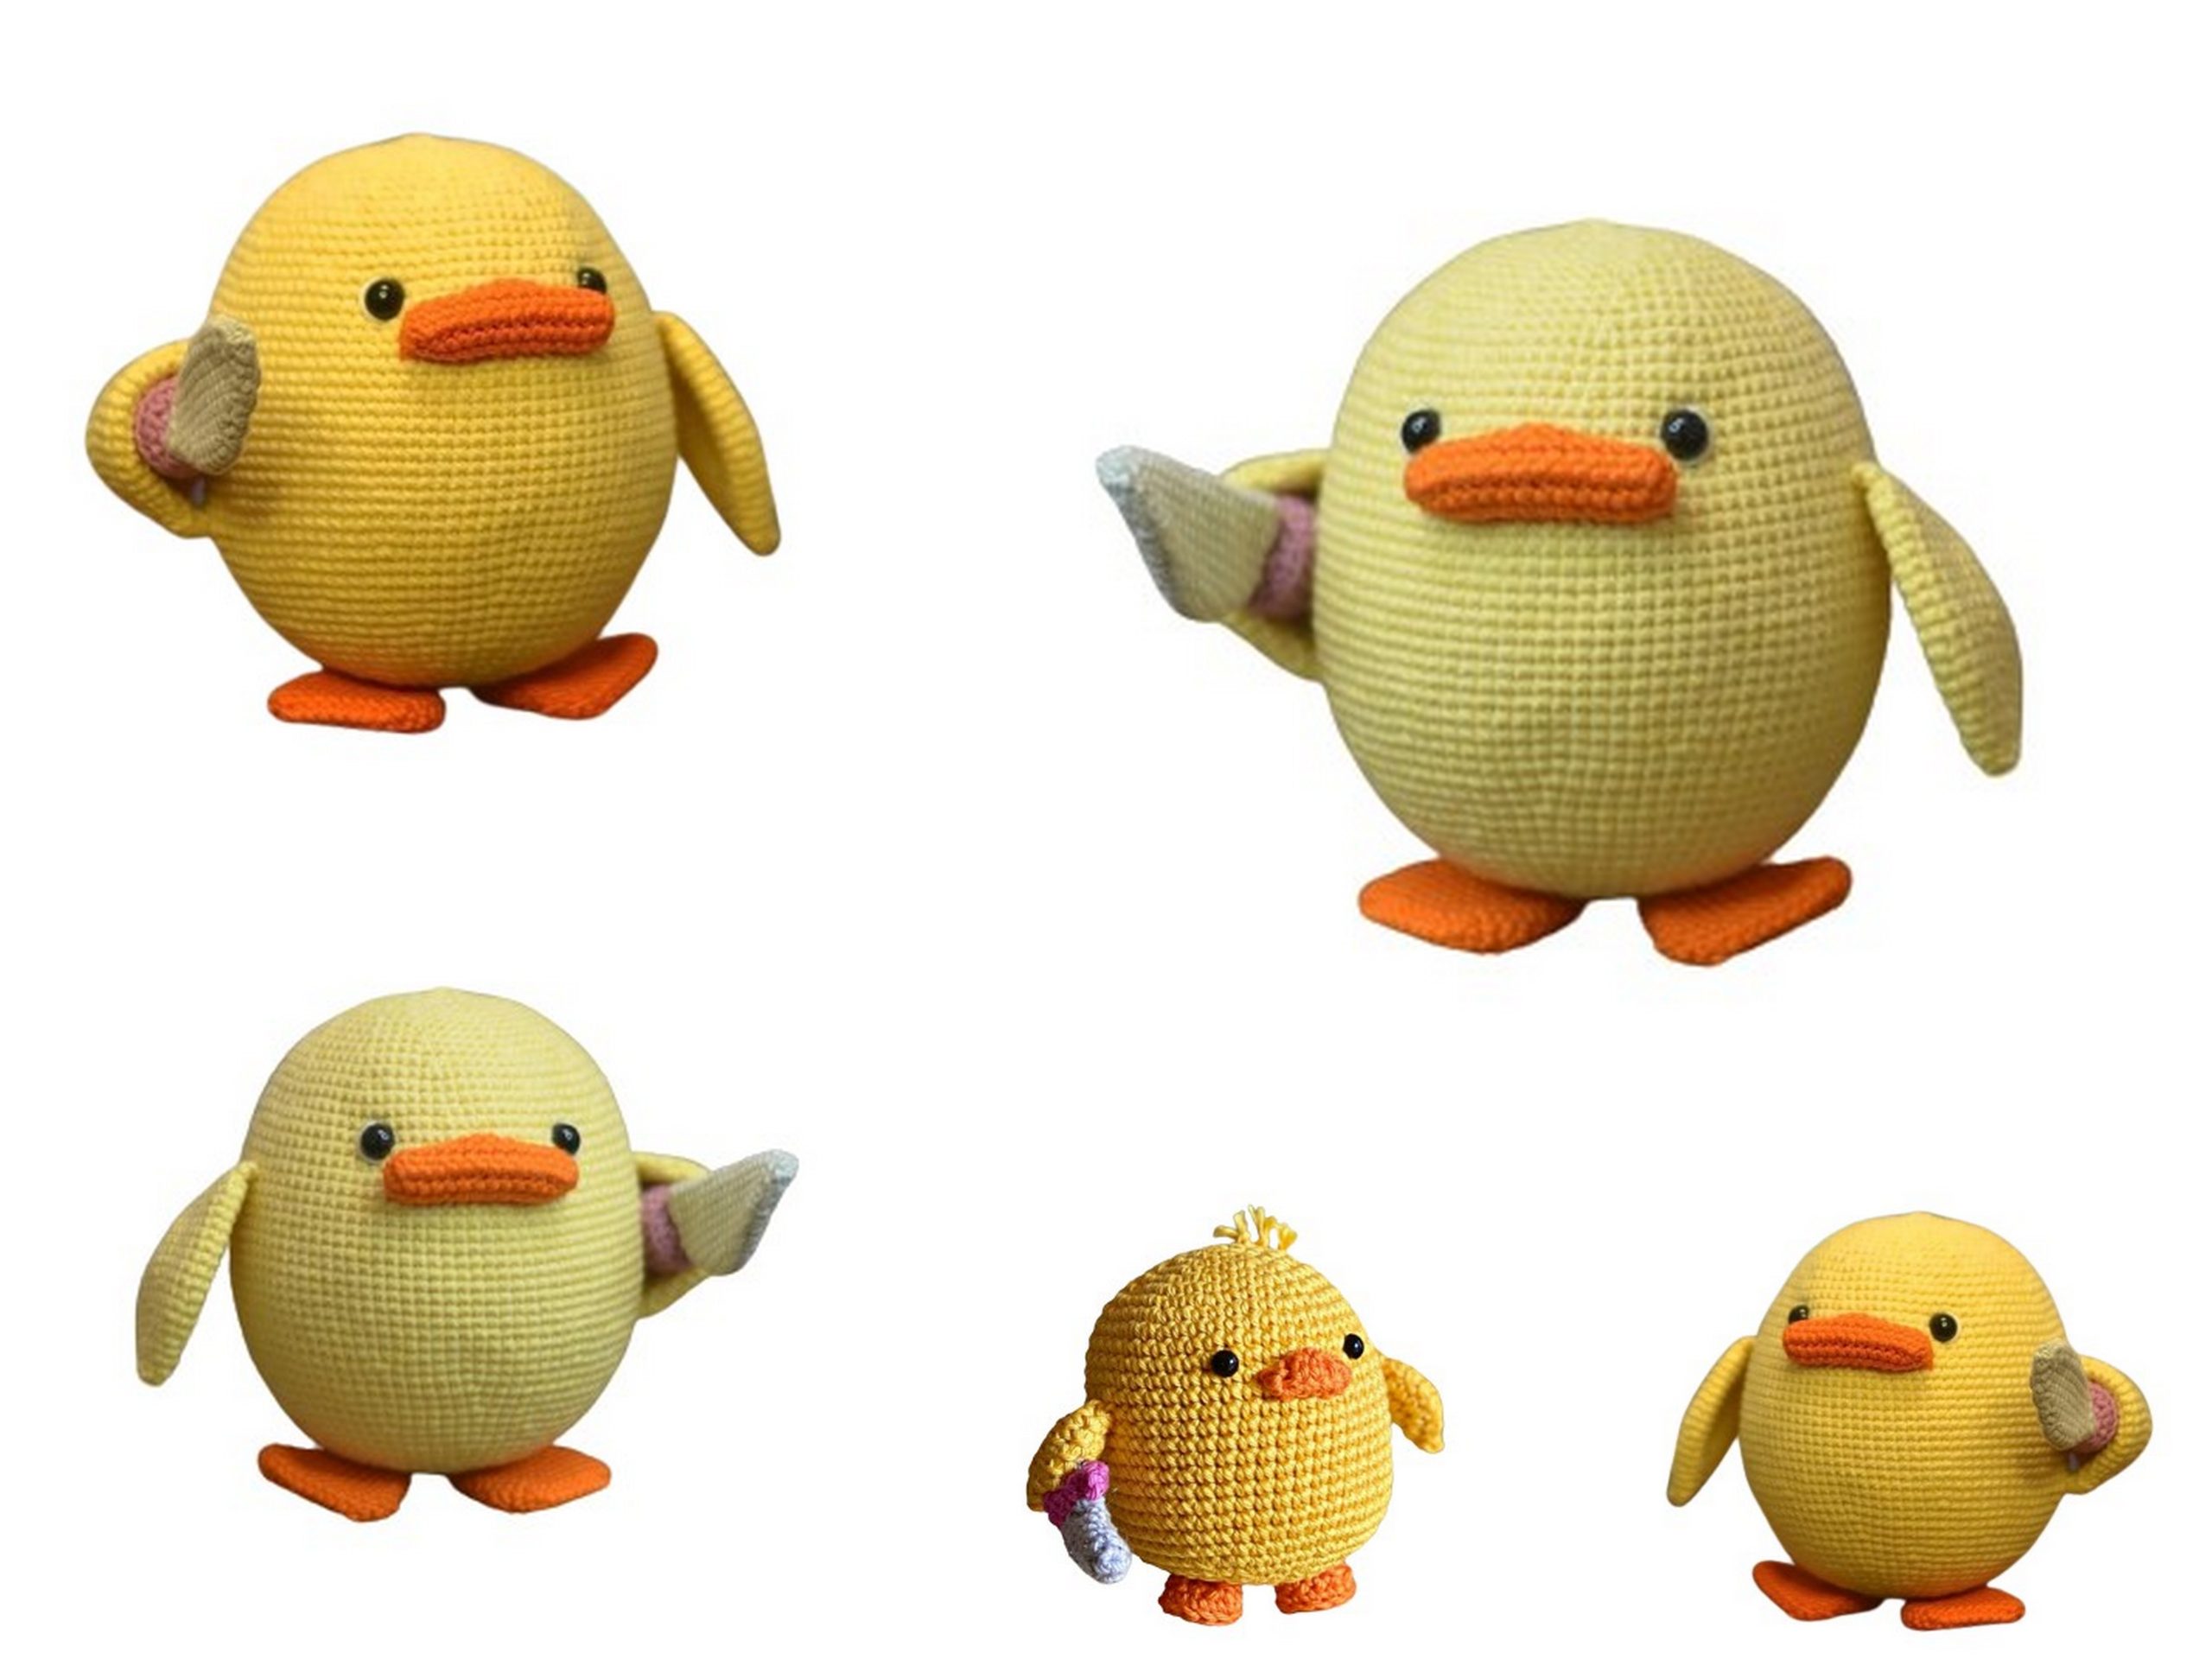
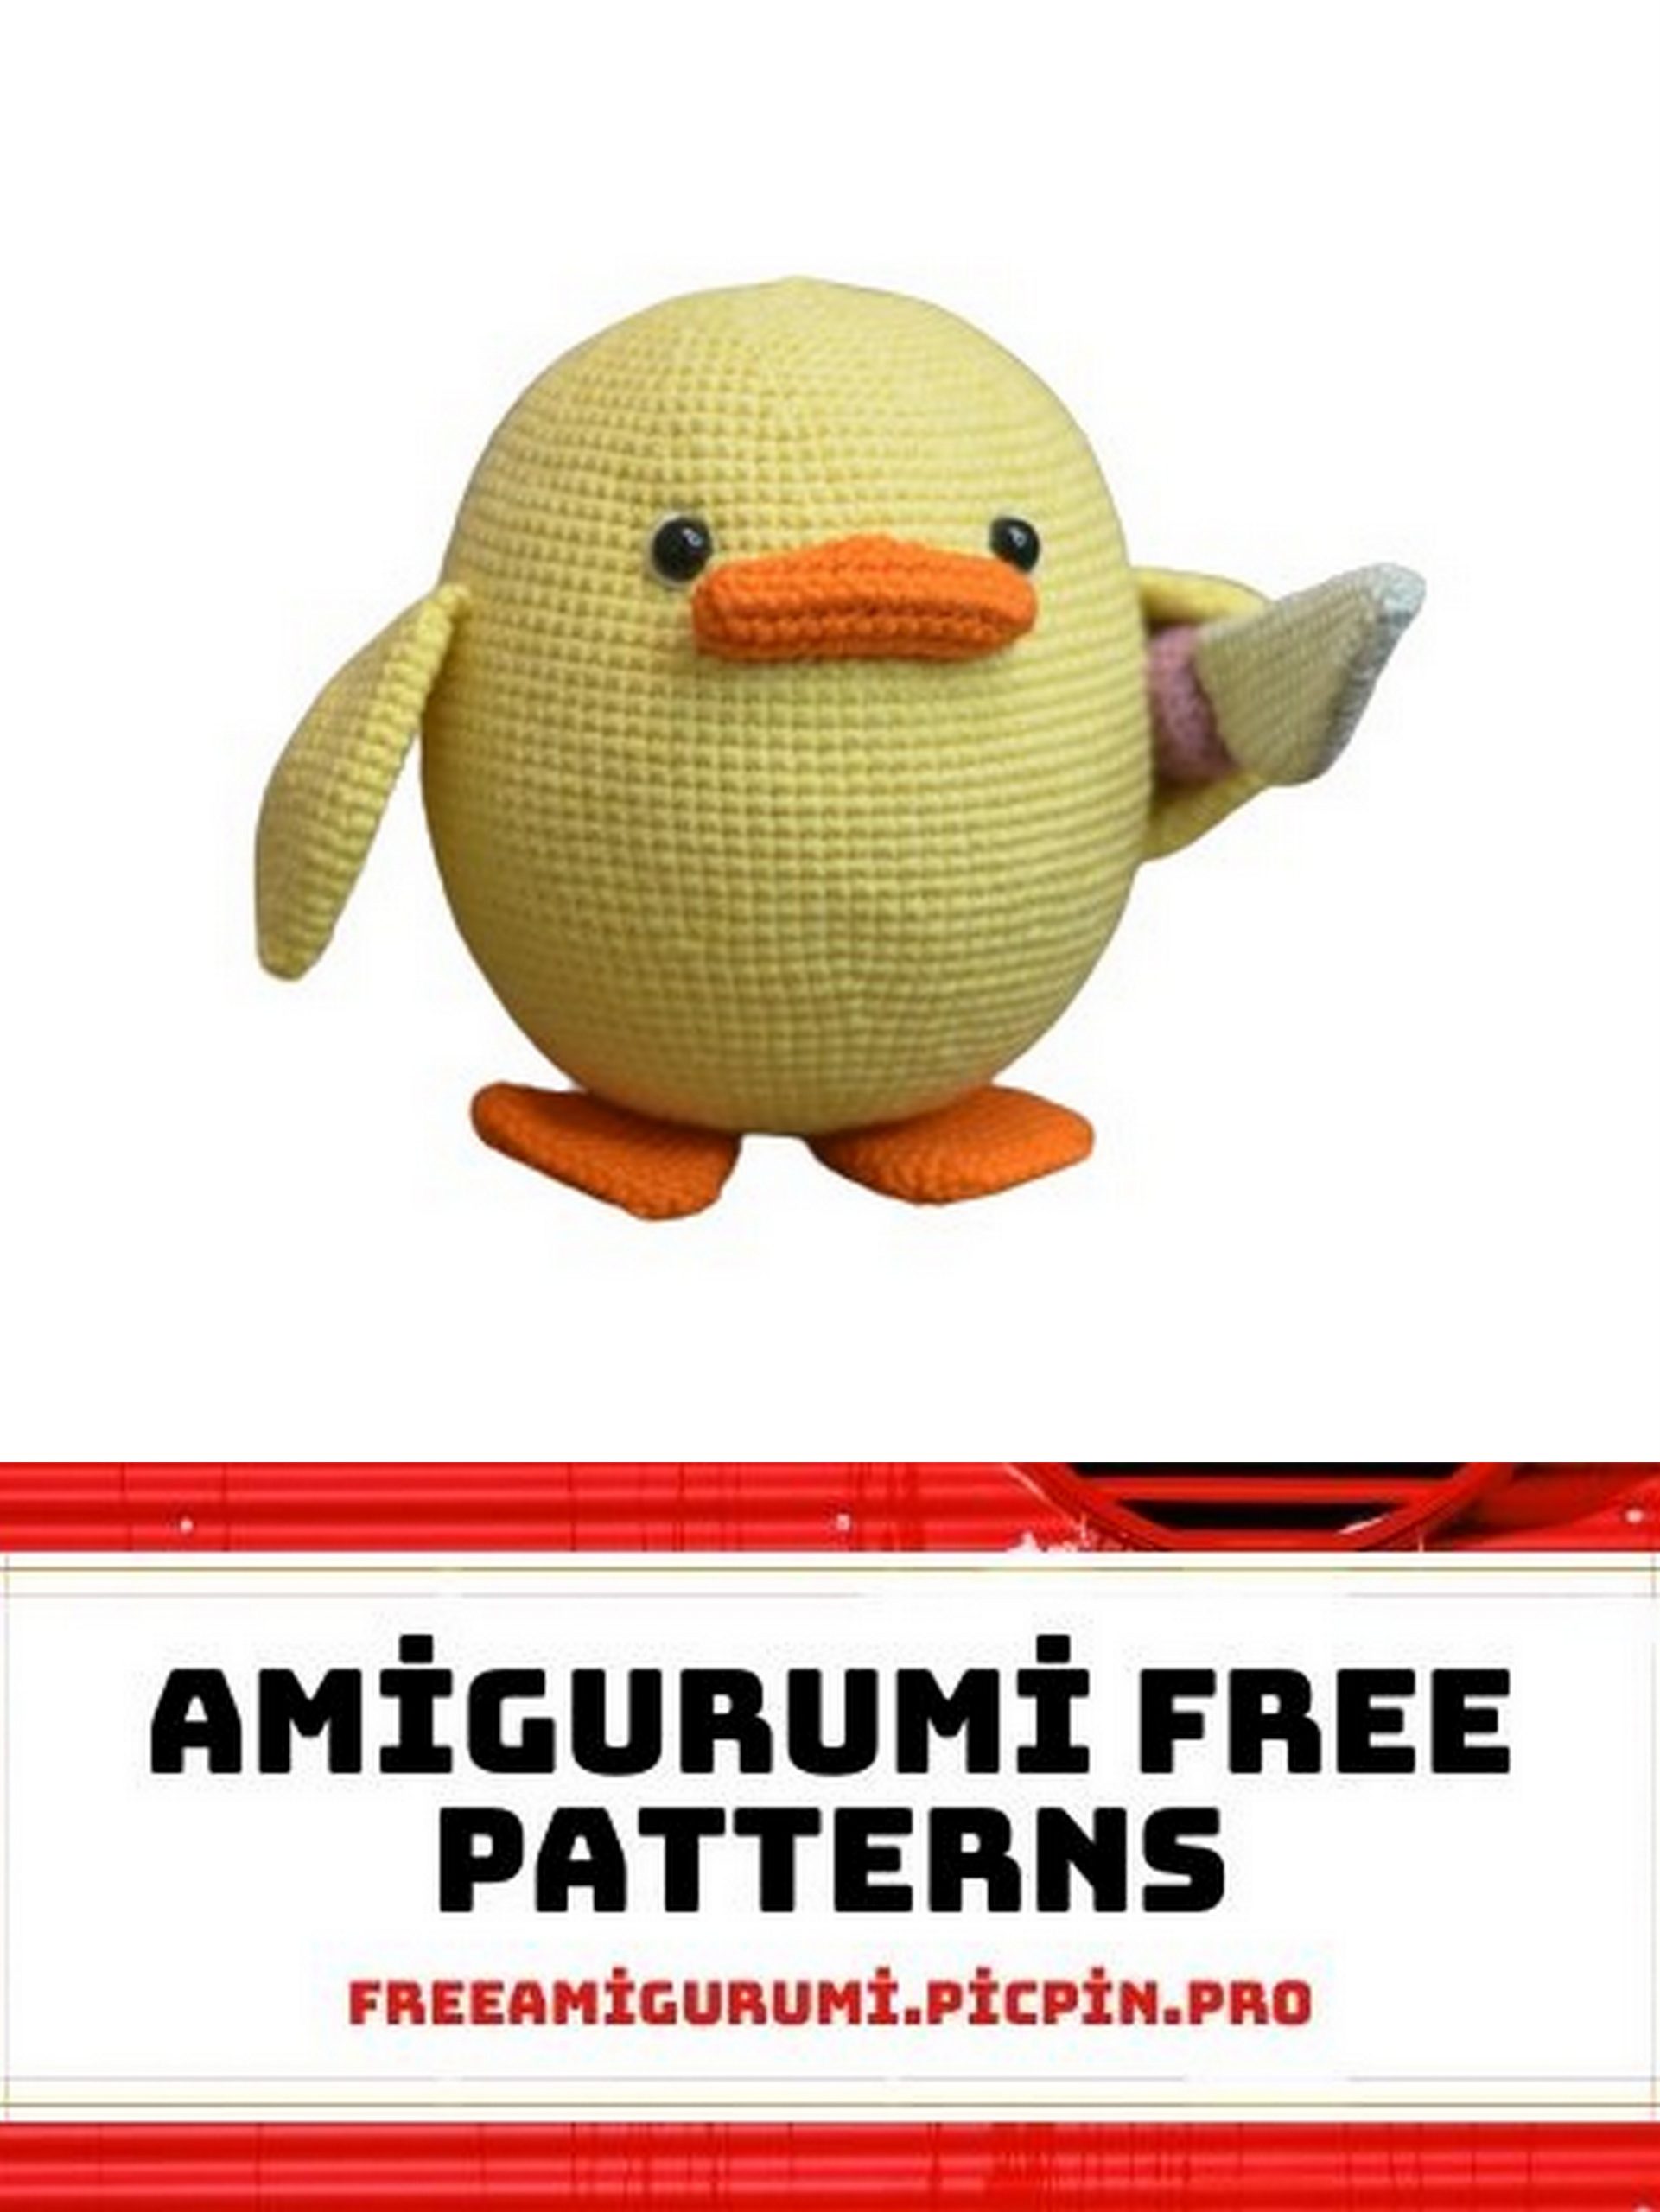
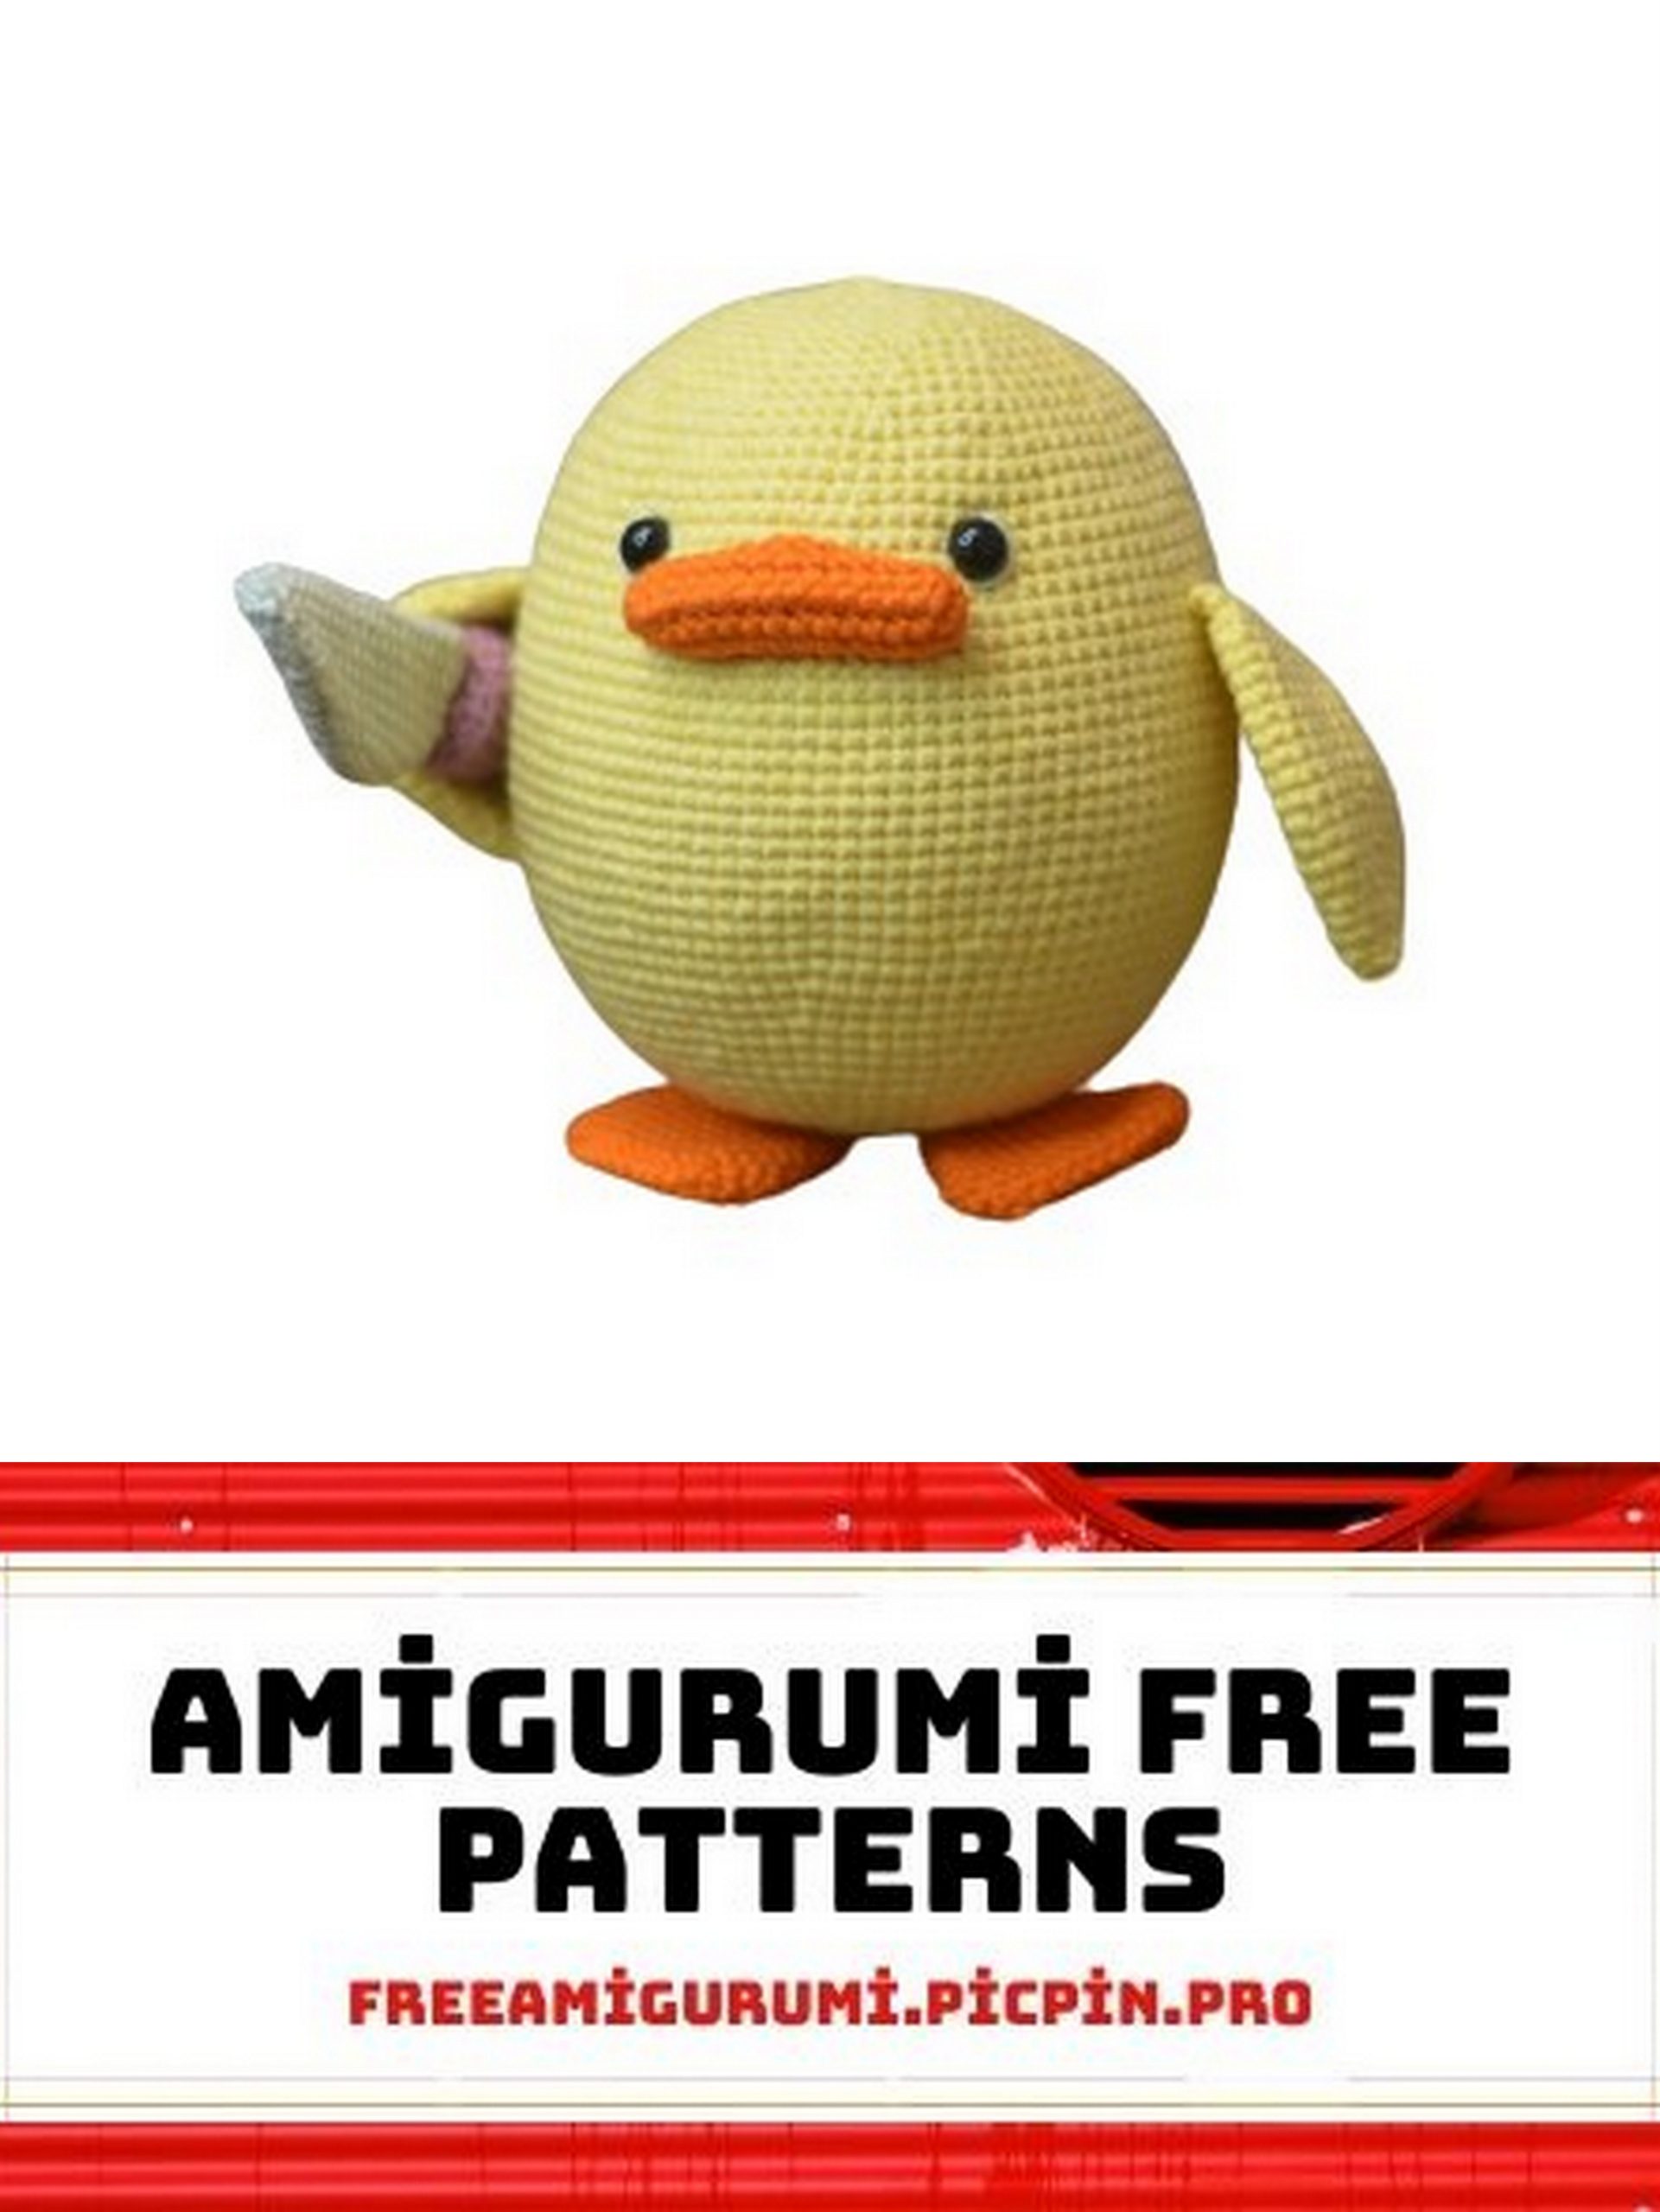
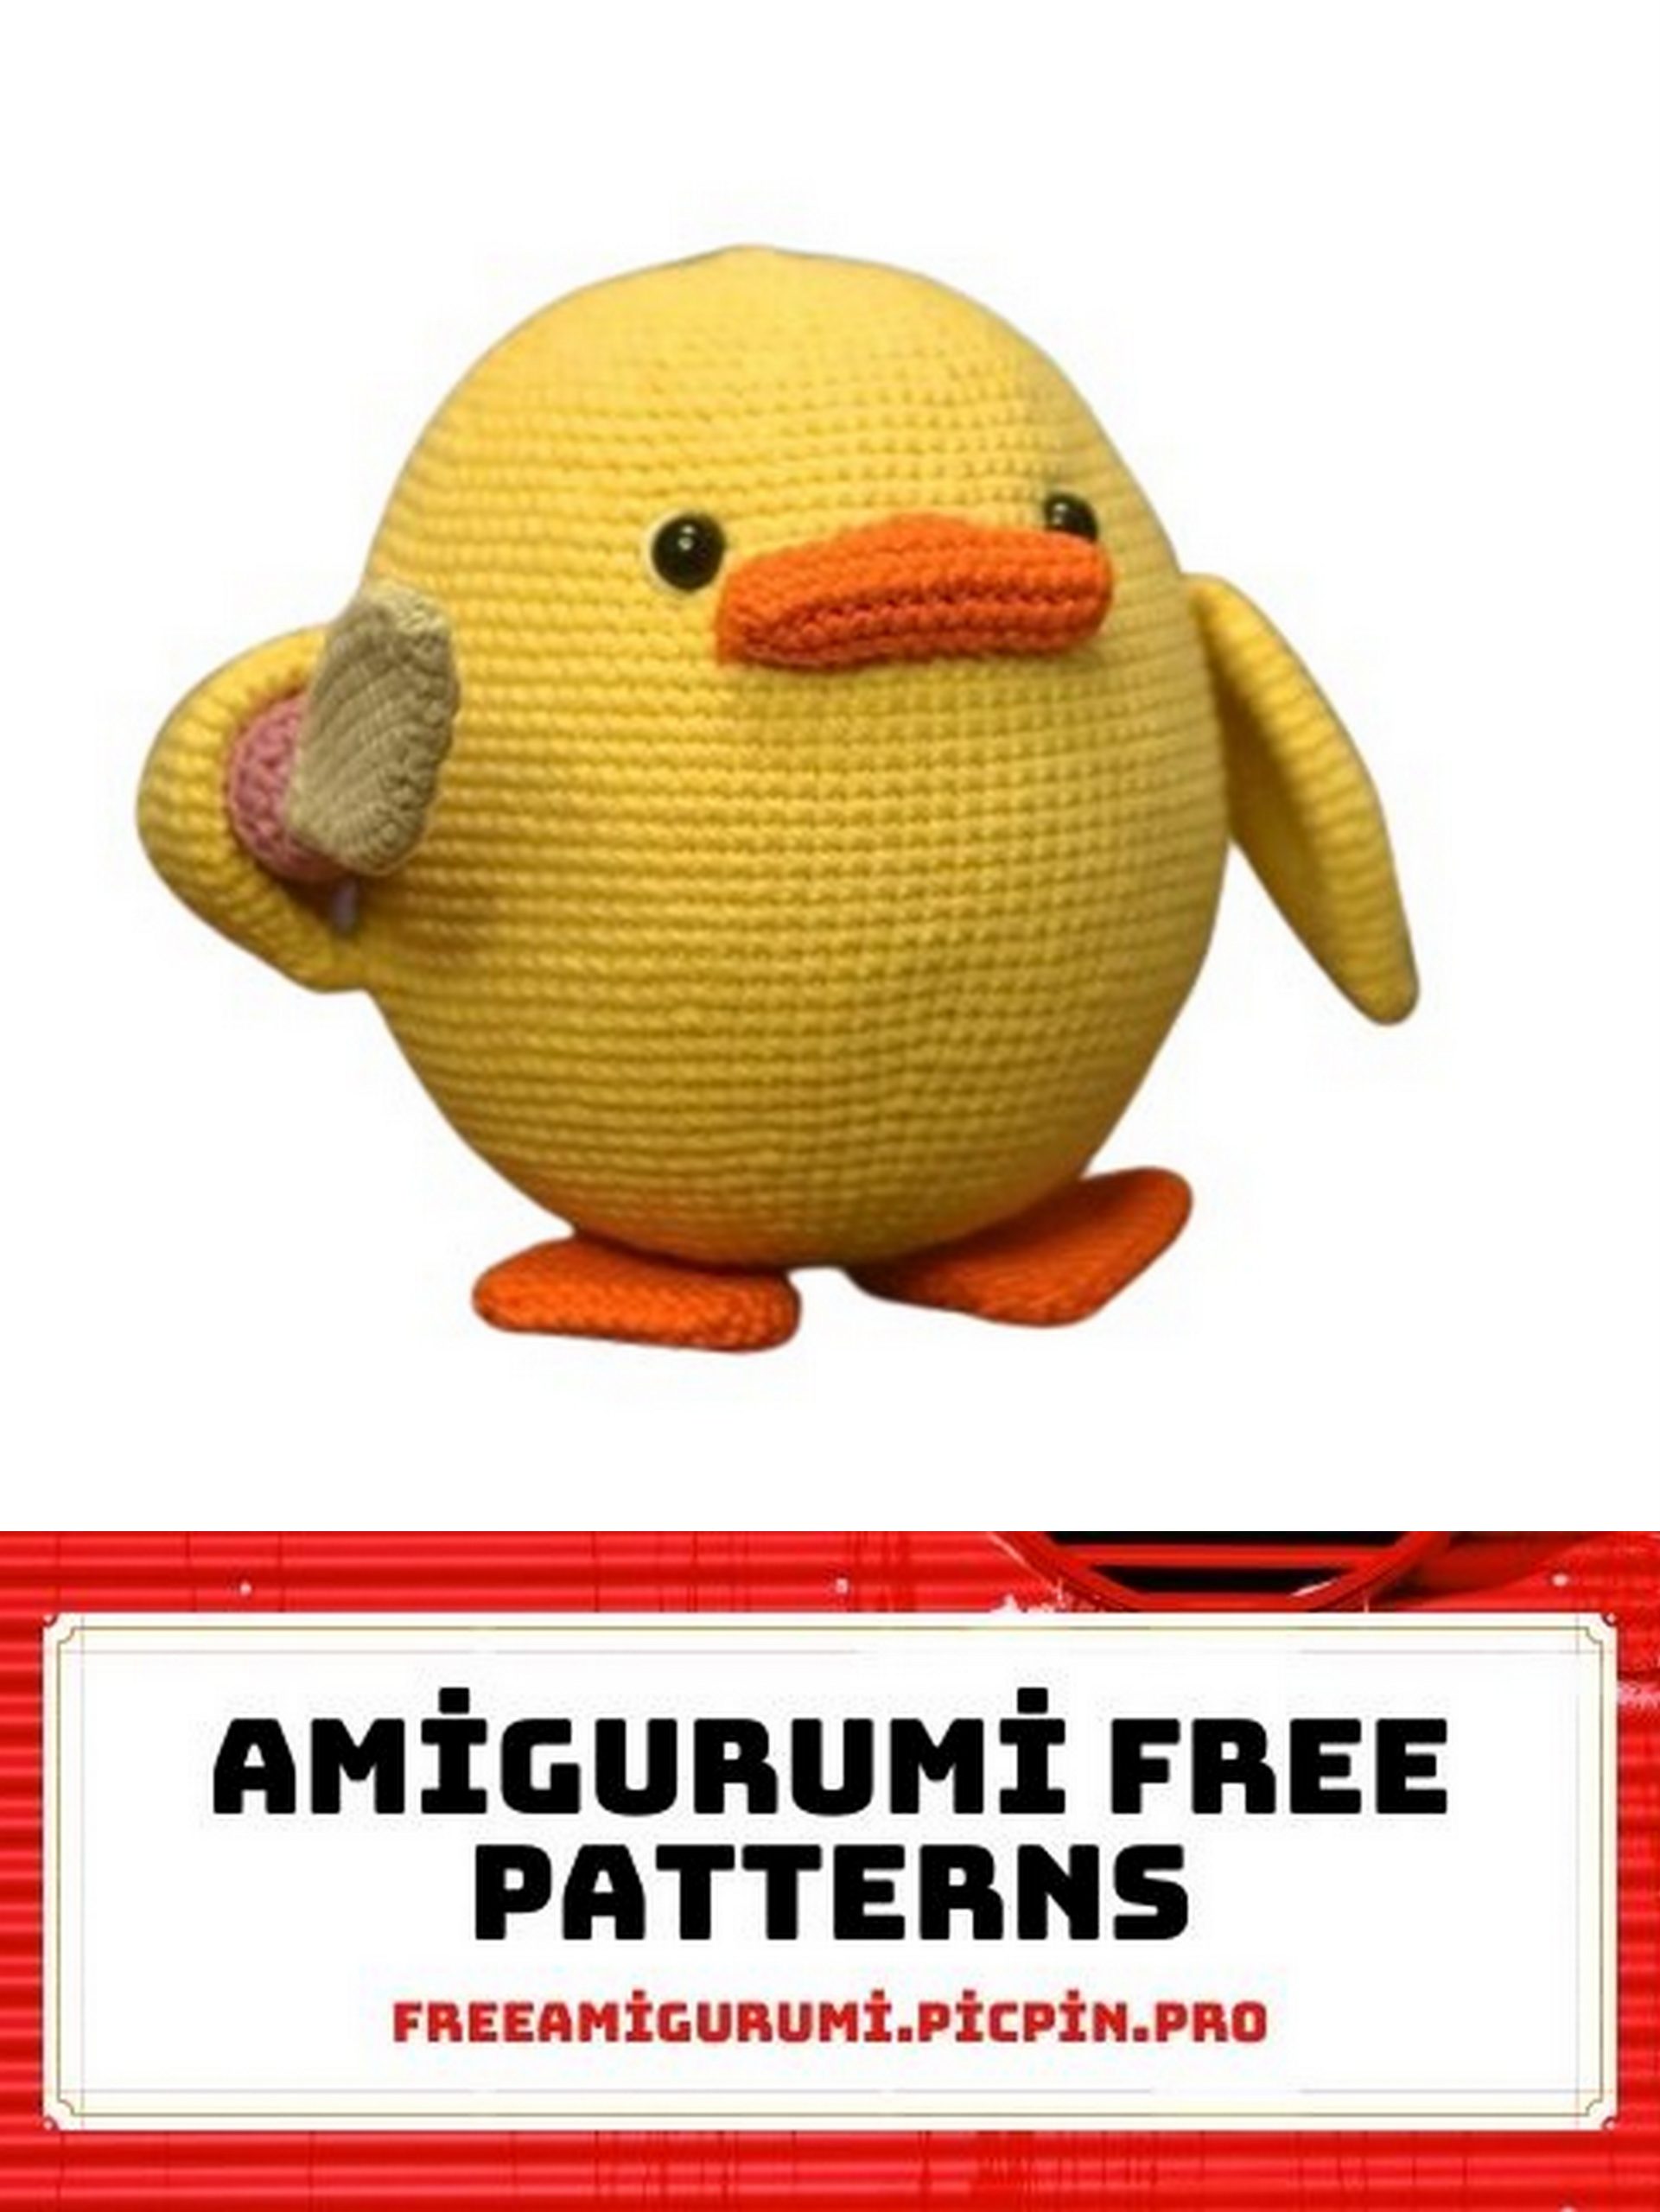
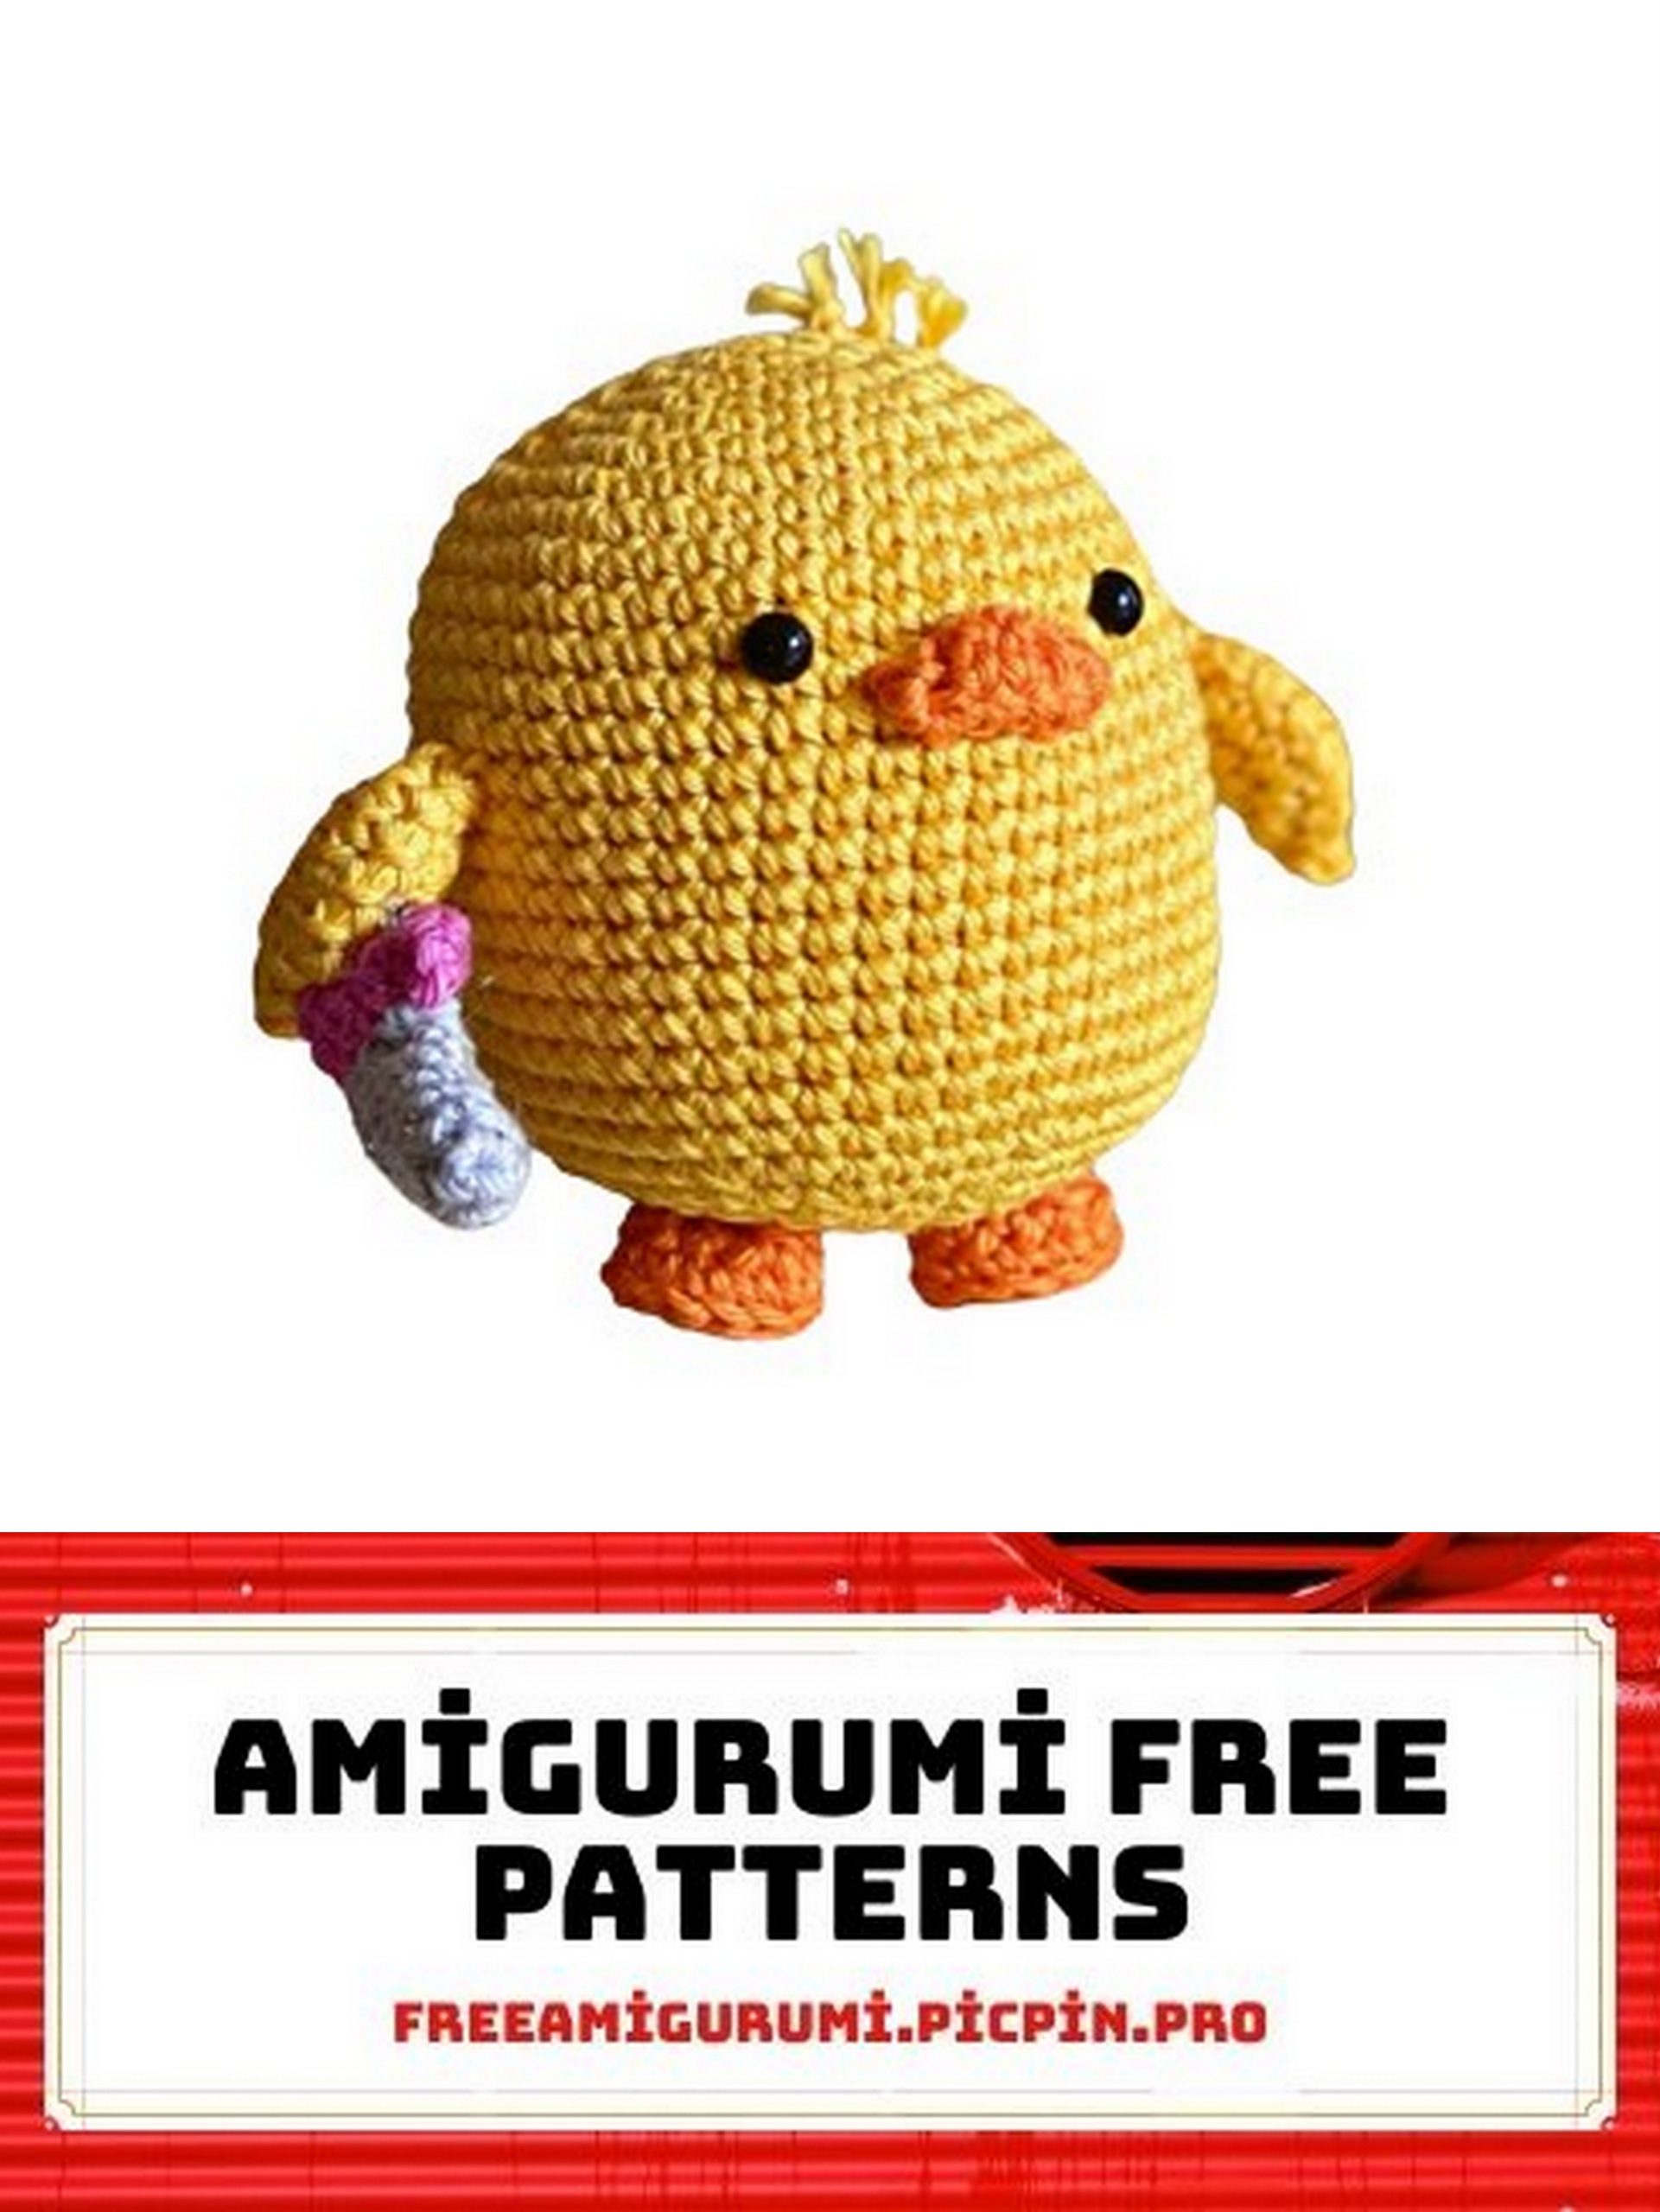
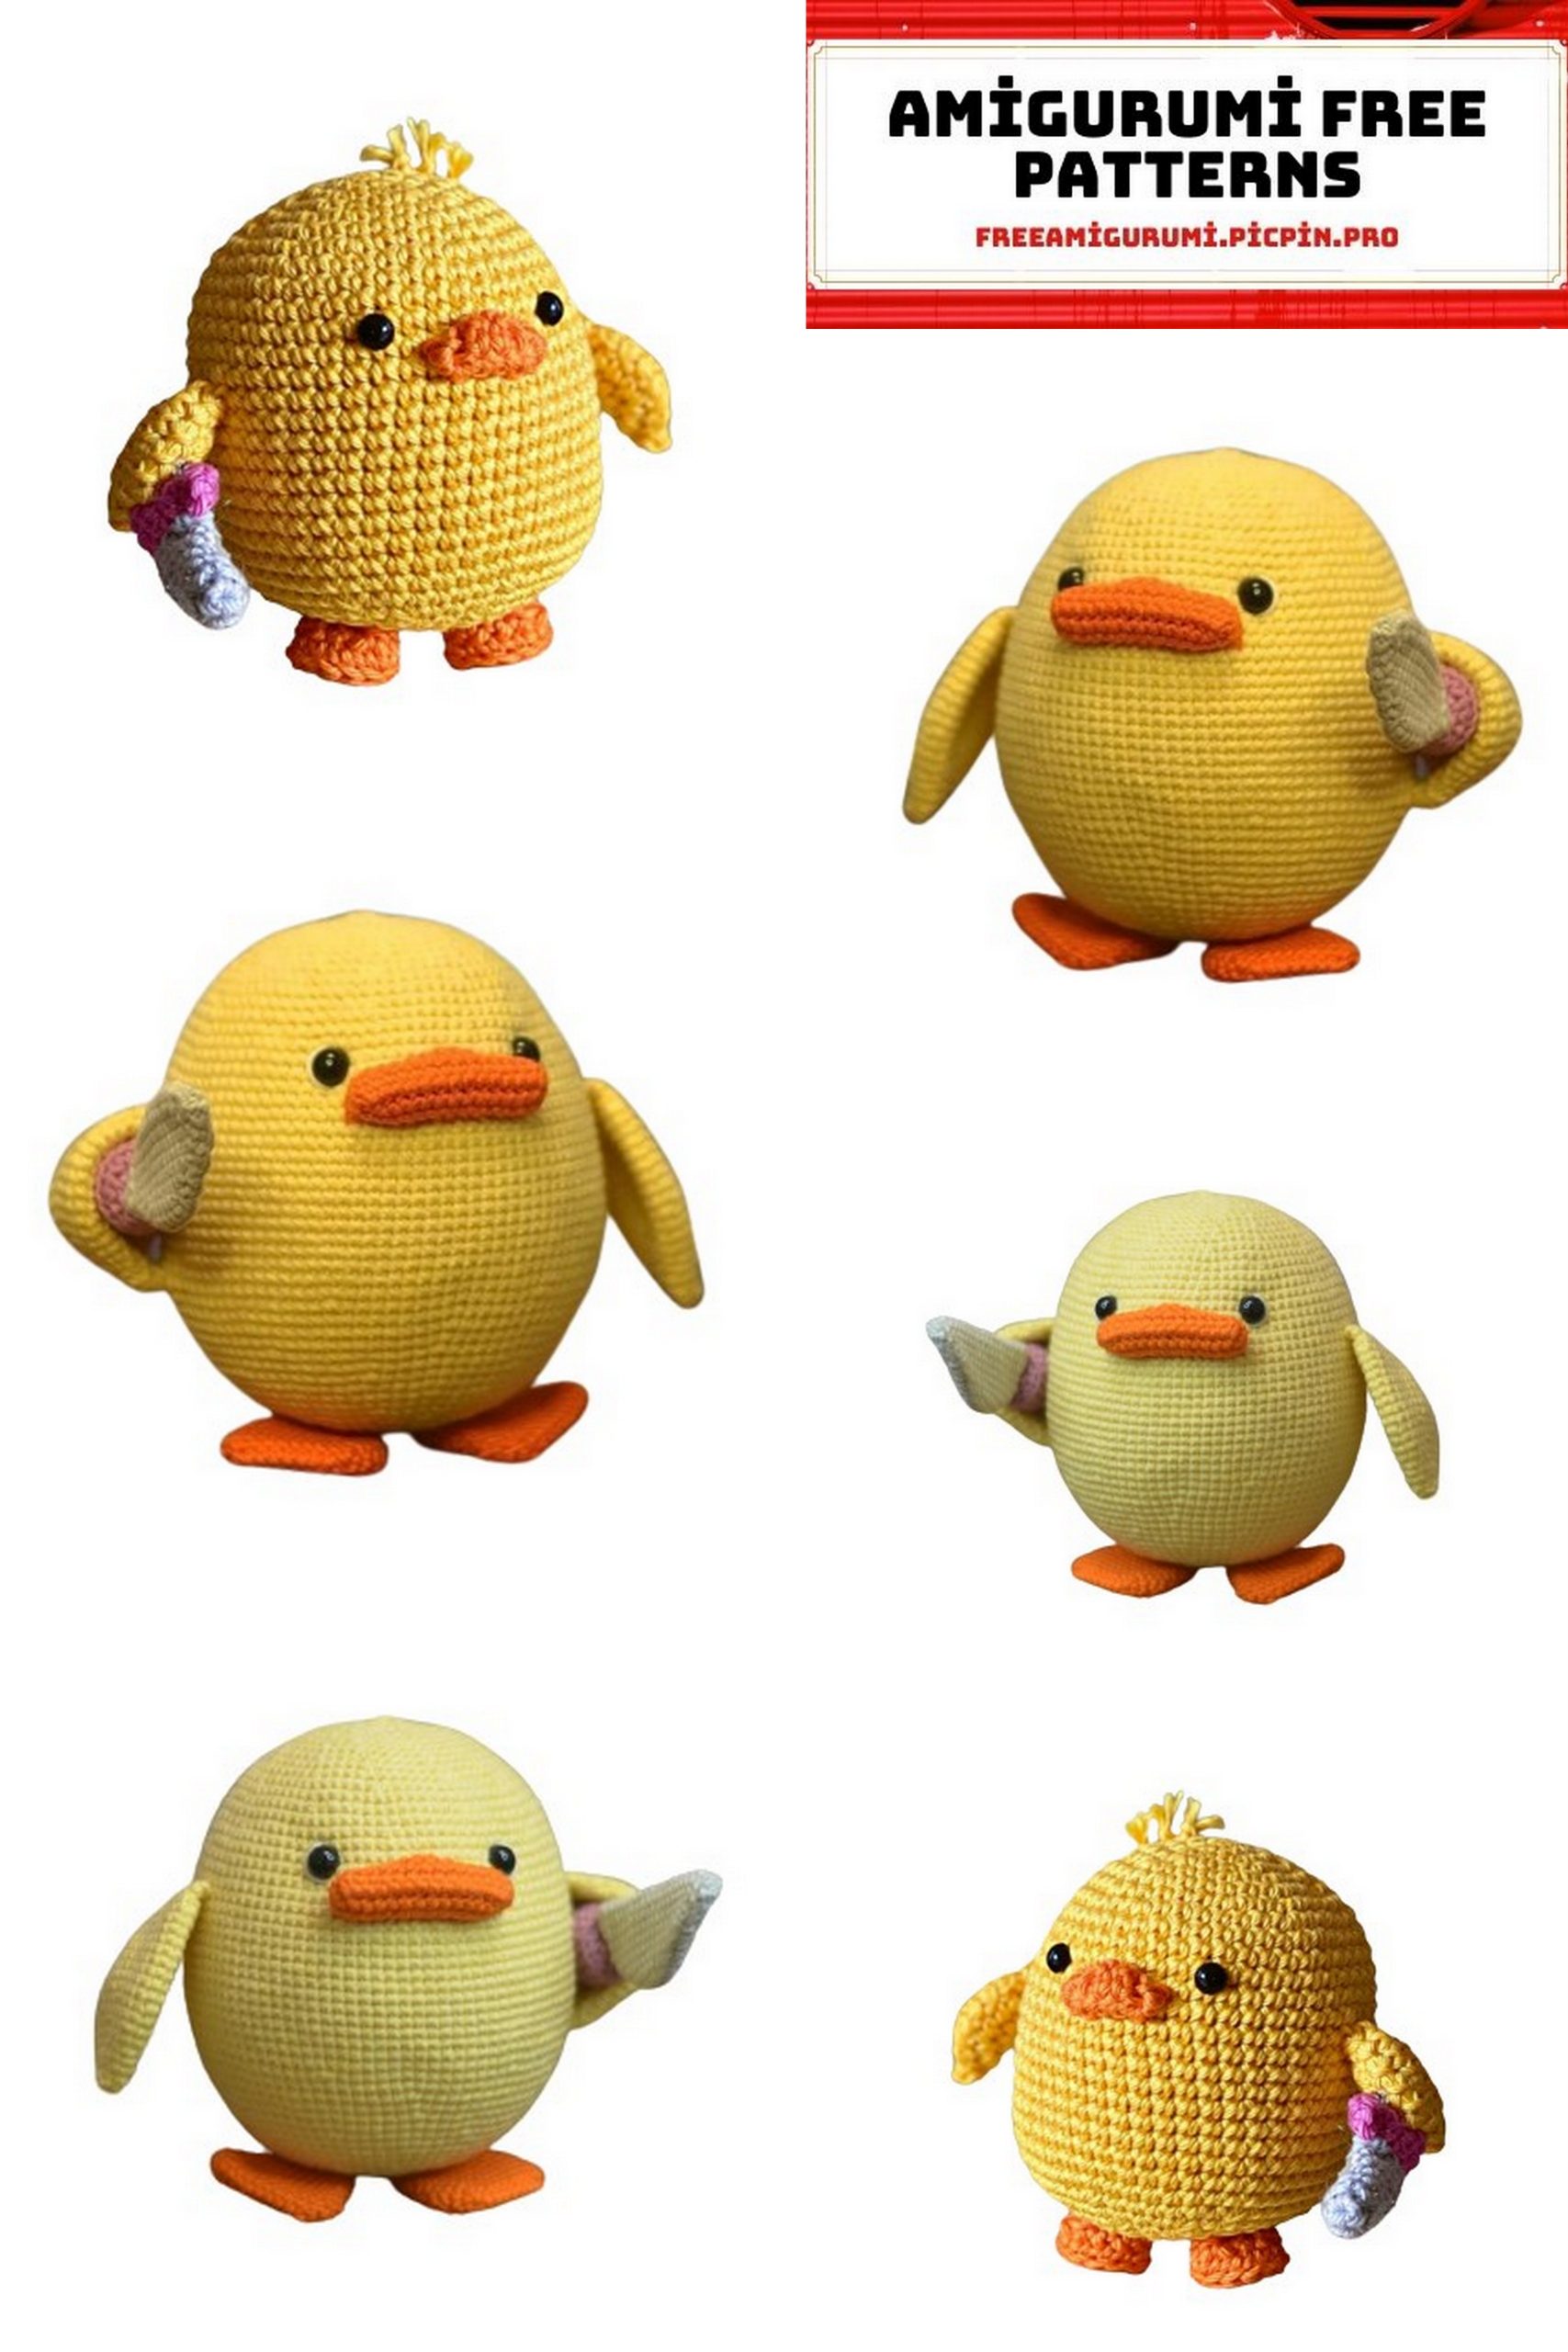
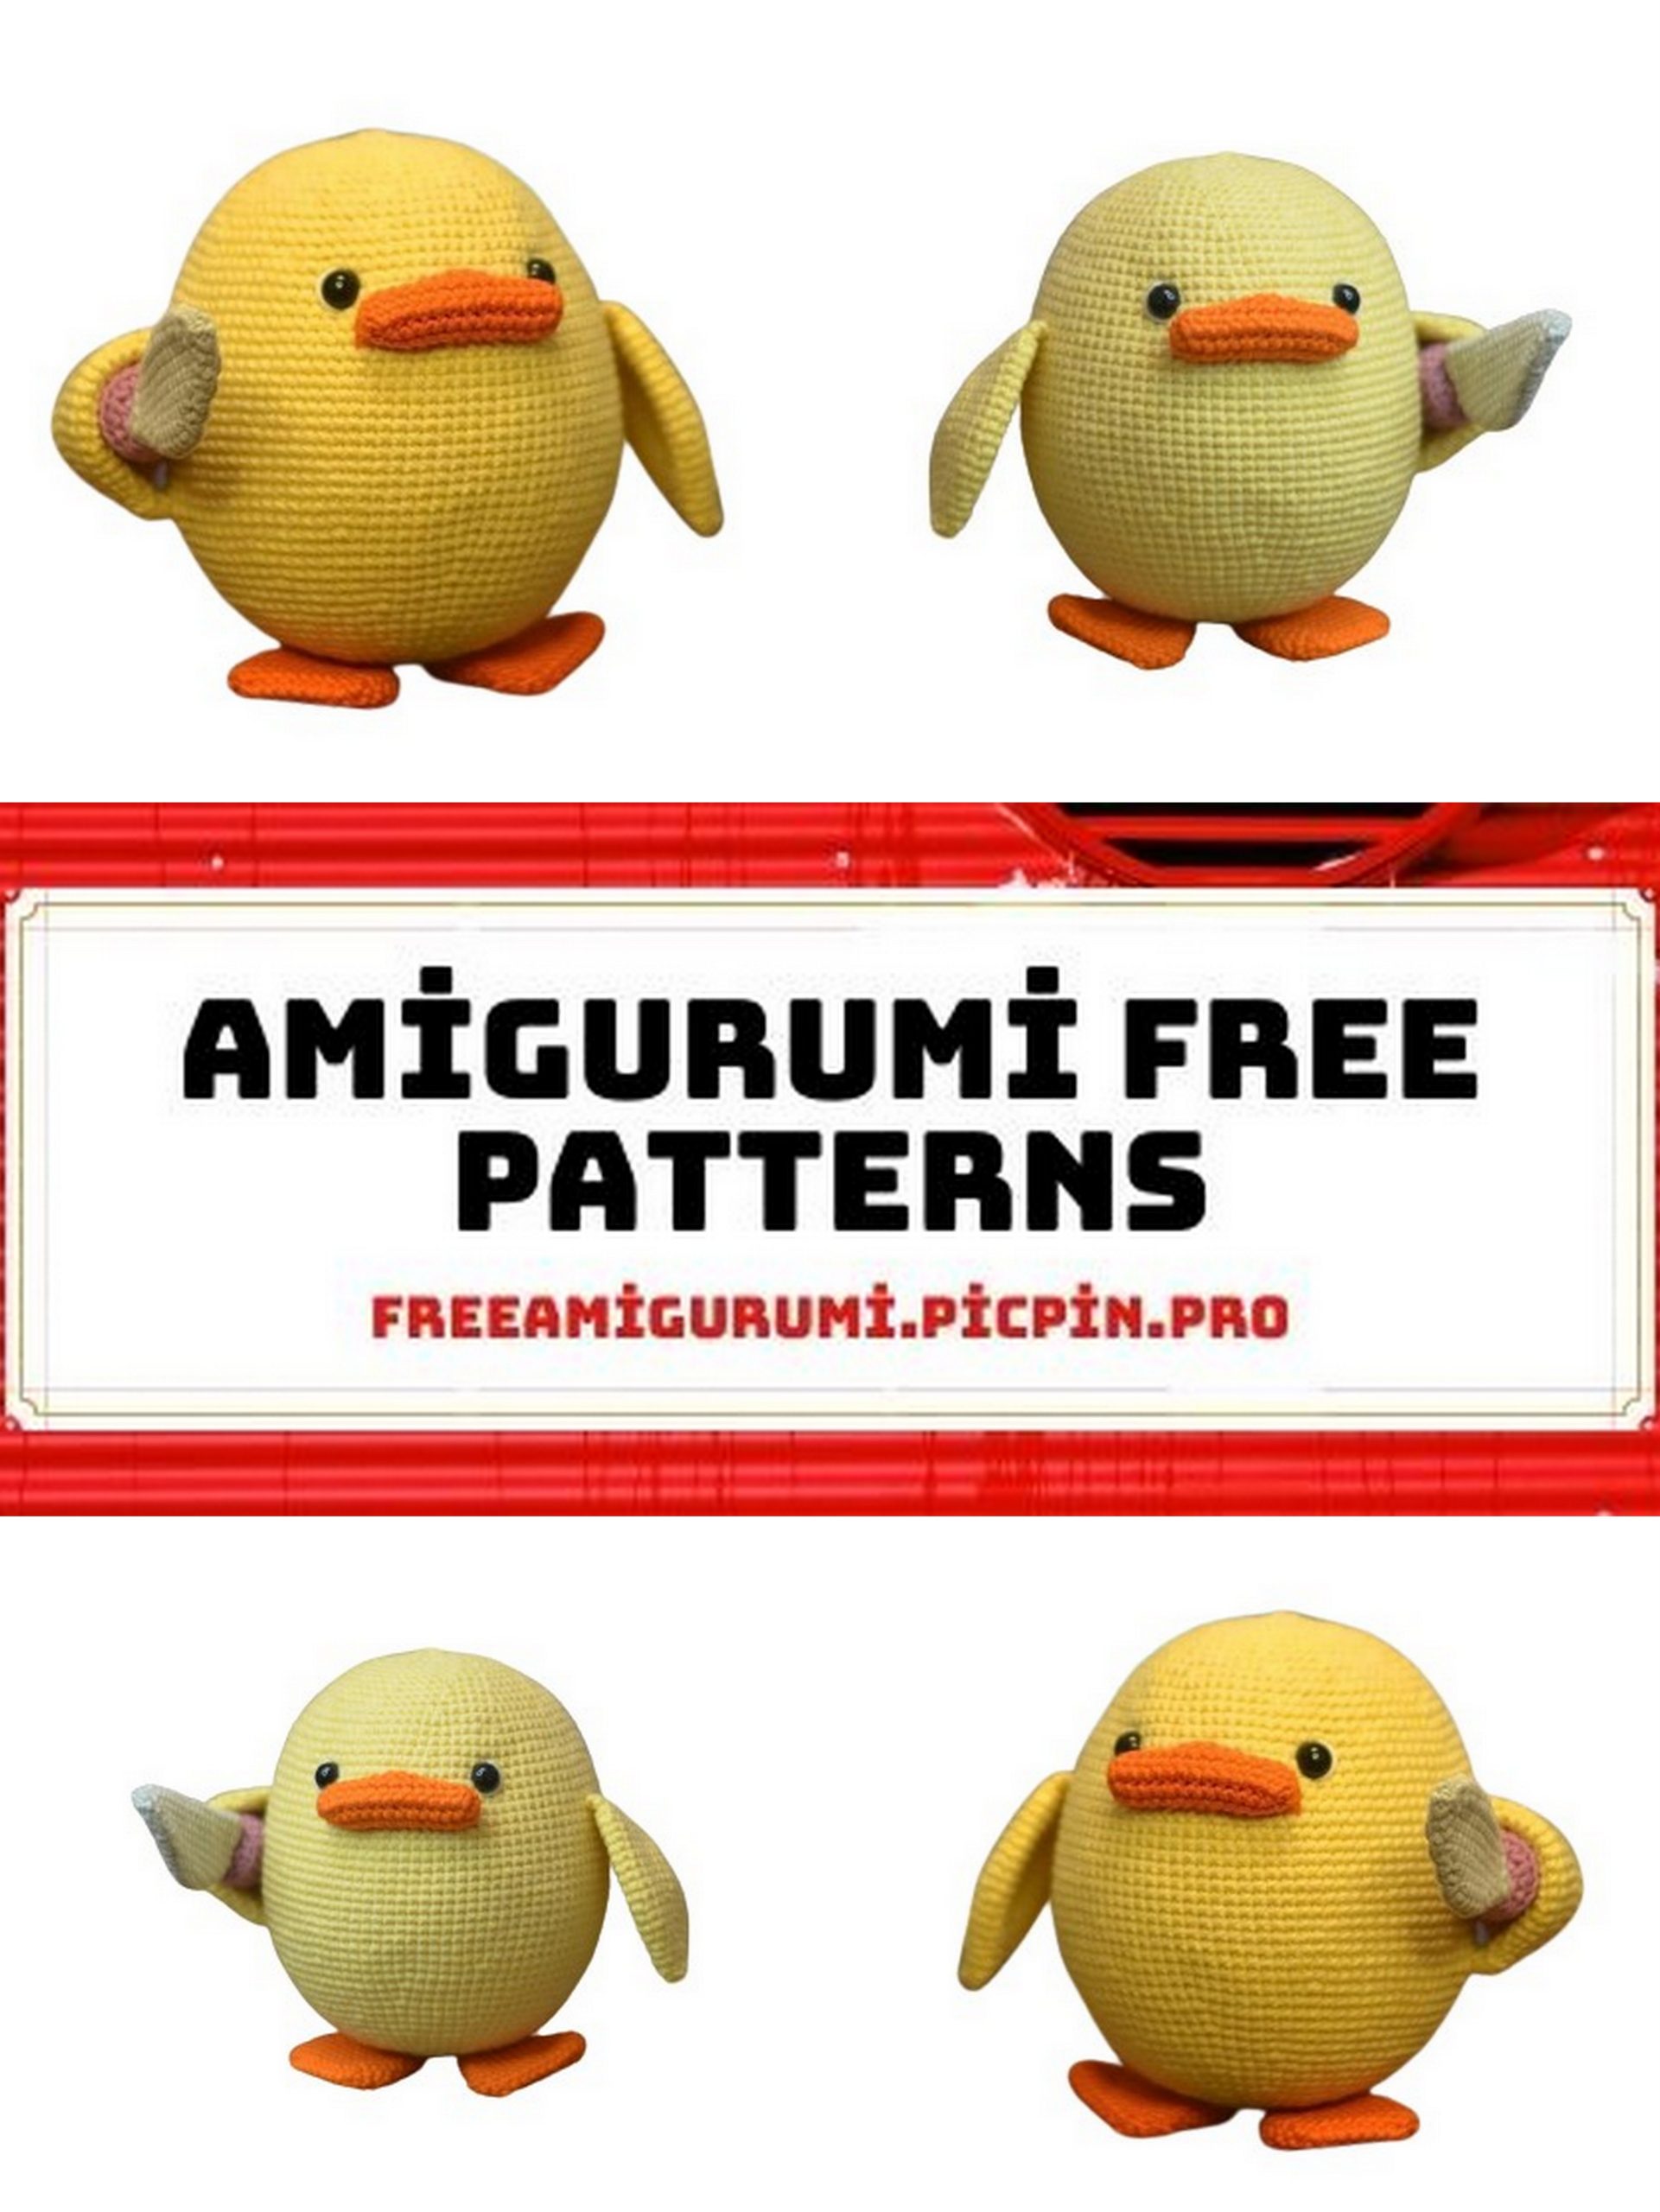
Adorable Fat Duck Amigurumi Free Pattern
Discover the joy of crocheting with our free pattern to make the most adorable fat duck amigurumi! Whether you’re a seasoned amigurumi artist or just starting out, this step-by-step guide will help you craft a lovable amigurumi duck plushie that’s perfect for cuddles and playtime. Let your creativity soar as you follow our detailed instructions. Get your yarn and hook ready, and let’s dive into the world of cute and chubby ducks!
Materials:
✓ Safety eyes, 8mm, 2 pieces
✓ Yarn: YarnArt Jeans #88 – main light-yellow color, #65 – pink for knife handle, #46 – gray for knife blade; Gazzal Baby Cotton #3419 – orange for paws and beak. And any white yarn for embroidering highlights near the eyes.
✓ Stuffing
✓ Crochet hook, size #1.75-2.0 (I used Clover #2)
✓ Sewing needle
When using these materials and crocheting tightly with a half-cross stitch, the toy will be approximately 11 cm tall.
Abbreviations:
MC – magic circle
CH – chain
BLO – back loop only
INC – increase
DEC – decrease
SC – single crochet
HDC – half double crochet
DC – double crochet
SLST – slip stitch
PATTERN
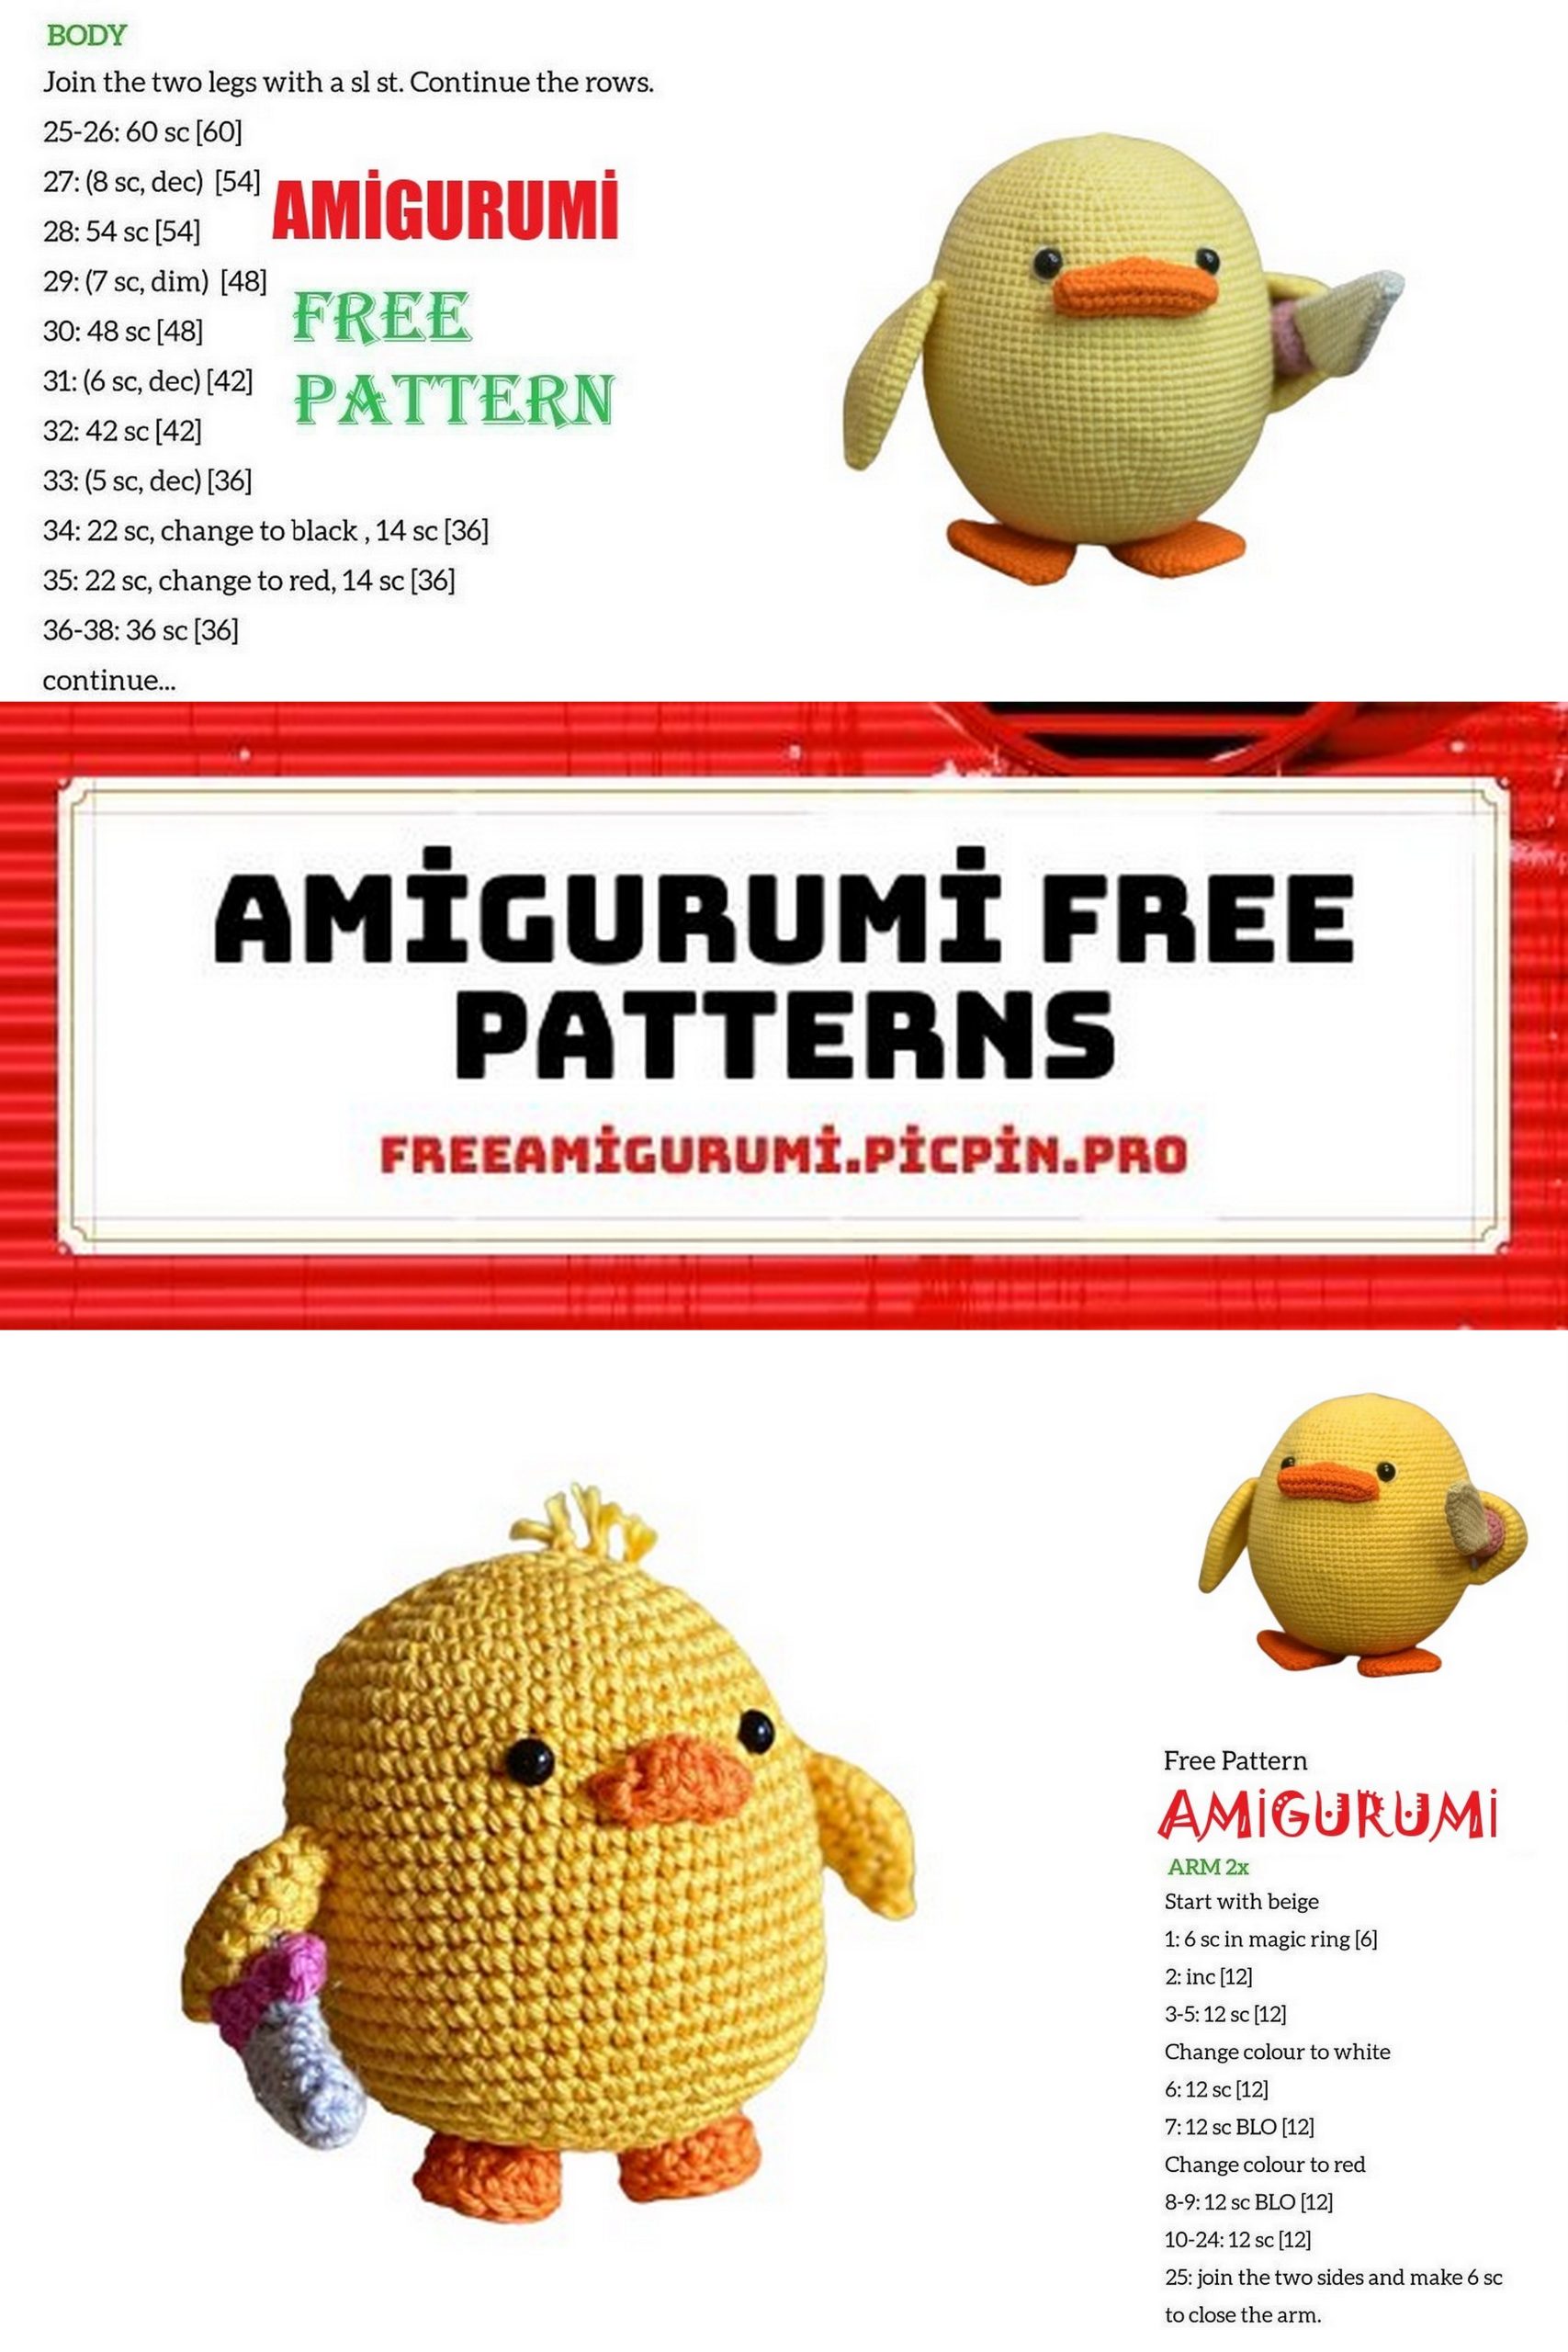
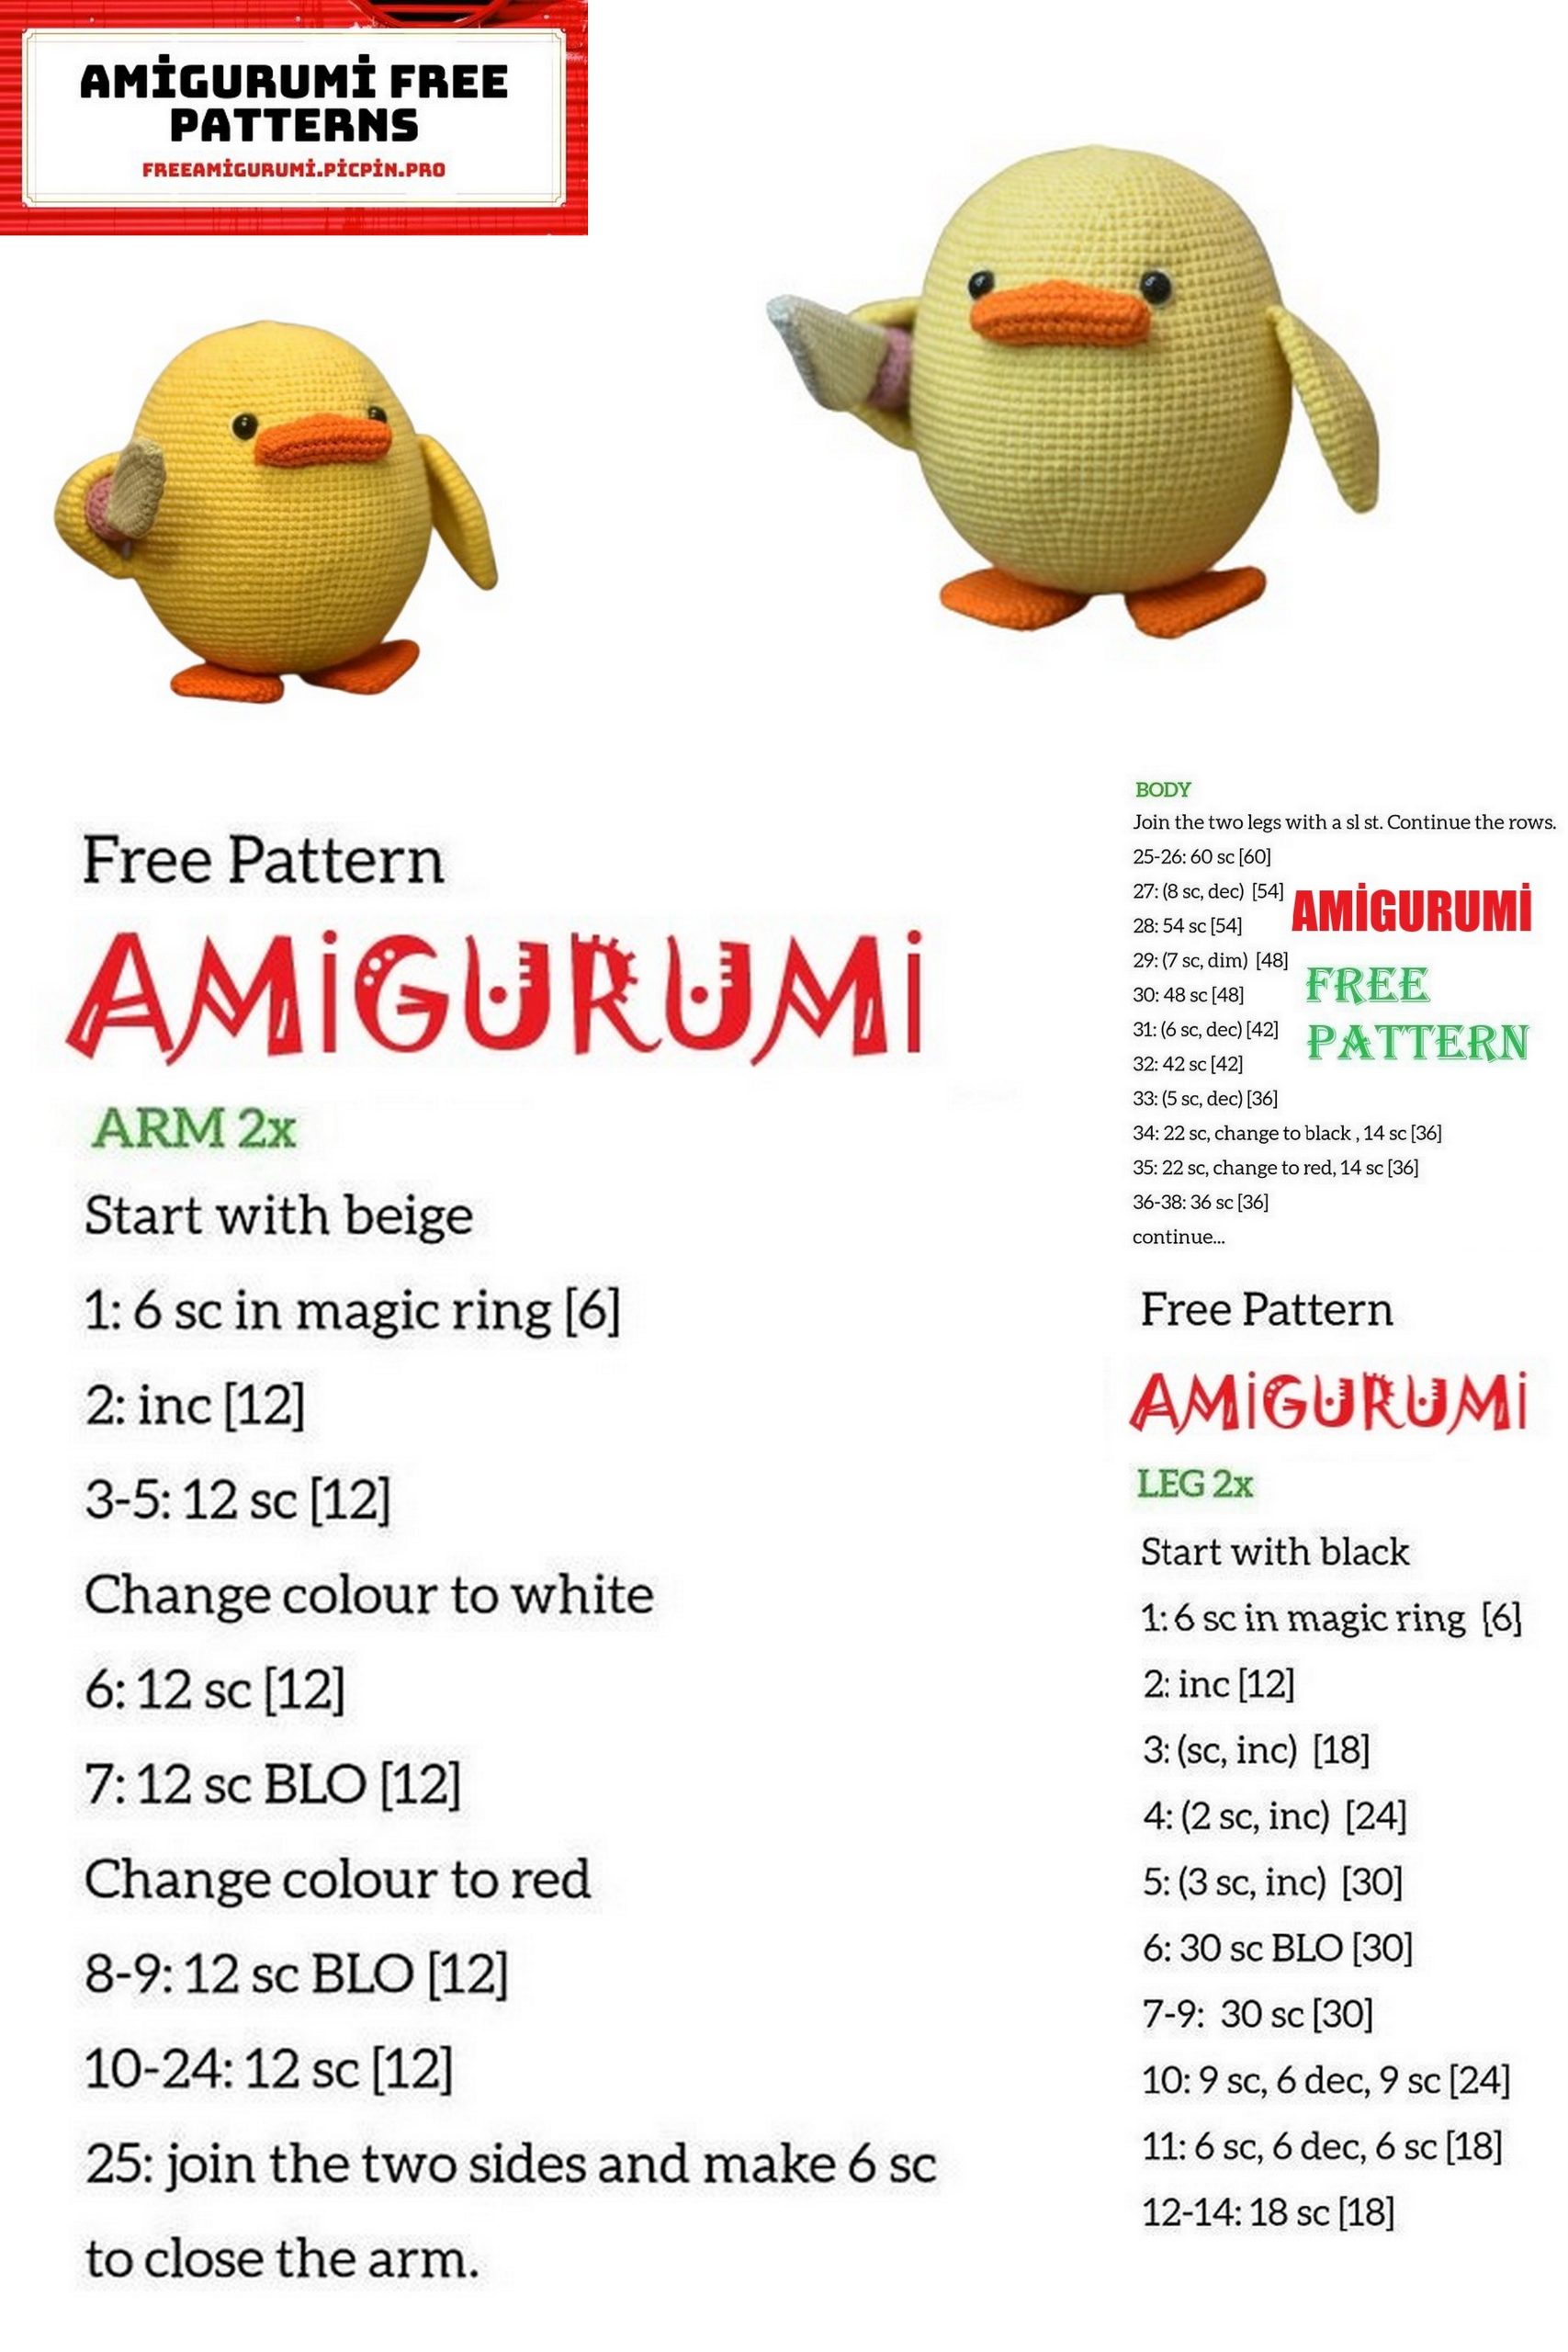
Body (yellow color):
Row 1: 7 SC in MC (7)
Row 2: 7 INC (14)
Row 3: (1 SC, INC)*7 (21)
Row 4: 1 SC, INC, (2 SC, INC)*6, 1 SC (28)
Row 5: (3 SC, INC)*7 (35)
Row 6: 2 SC, INC, (4 SC, INC)*6, 2 SC (42)
Row 7: (5 SC, INC)*7 (49)
Row 8: 3 SC, INC, (6 SC, INC)*6, 3 SC (56)
Row 9: (7 SC, INC)*7 (63)
Row 10: 4 SC, INC, (8 SC, INC)*6, 4 SC (70)
Row 11: (9 SC, INC)*7 (77)
Row 12: 5 SC, INC, (10 SC, INC)*6, 5 SC (84)
Row 13: 84 SC (84)
Row 14: (13 SC, INC)*6 (90)
Row 15: 90 SC (90)
Row 16: 7 SC, INC, (14 SC, INC)*5, 7 SC (96)
Rows 17-33: 96 SC (17 rows of 96 SC)
Between rows 33 and 34, insert/secure the safety eyes. The distance between the eyes is 19 SC.
Start stuffing the body as you crochet.
Row 34: 7 SC, DEC, (14 SC, DEC)*5, 7 SC (90)
Row 35: 90 SC (90)
Row 36: (13 SC, DEC)*6 (84)
Row 37: 84 SC (84)
Row 38: 6 SC, DEC, (12 SC, DEC)*5, 6 SC (78)
Row 39: 78 SC (78)
Row 40: (11 SC, DEC)*6 (72)
Row 41: 5 SC, DEC, (10 SC, DEC)*5, 5 SC (66)
Row 42: (9 SC, DEC)*6 (60)
Row 43: 4 SC, DEC, (8 SC, DEC)*5, 4 SC (54)
Row 44: (7 SC, DEC)*6 (48)
Row 45: 3 SC, DEC, (6 SC, DEC)*5, 3 SC (42)
Row 46: (5 SC, DEC)*6 (36)
Row 47: 2 SC, DEC, (4 SC, DEC)*5, 2 SC (30)
Row 48: (3 SC, DEC)*6 (24)
Row 49: 1 SC, DEC, (2 SC, DEC)*5, 1 SC (18)
Row 50: (1 SC, DEC)*6 (12)
Row 51: 6 DEC (6)
Stuff the toy firmly, close the opening, cut the yarn, and hide it. The body is ready.
Wings (yellow color), make 2:
Row 1: 6 SC in MC (6)
Row 2: 6 SC (6)
Row 3: 6 INC (12)
Row 4: 12 SC (12)
Row 5: (1 SC, INC)*6 (18)
Row 6: 18 SC (18)
Row 7: 1 SC, INC, (2 SC, INC)*5, 1 SC (24)
Row 8: 24 SC (24)
Row 9: (3 SC, INC)*6 (30)
Rows 10-18: 30 SC (9 rows of 30 SC)
Row 19: (3 SC, DEC)*6 (24)
Row 20: 24 SC (24)
Row 21: Fold the piece in half, crochet through both sides, 12 SC (12)
Do not stuff the wings. Leave a long tail for sewing. Position the wings so that one corner is between rows 29 and 30, and the other is between rows 25 and 26, then sew them on.
Tail (yellow color):
Row 1: 6 SC in MC (6)
Row 2: 6 SC (6)
Row 3: 6 INC (12)
Row 4: 12 SC (12)
Row 5: (1 SC, INC)*6 (18)
Row 6: 18 SC (18)
Row 7: 1 SC, INC, (2 SC, INC)*5, 1 SC (24)
Row 8: Fold the piece in half, crochet 12 SC through both sides (12)
Do not stuff the tail. Leave a long tail for sewing. Sew it to the body between rows 12 and 13.
Legs (orange color), make 2:
Chain 10.
Row 1: Starting from the 2nd CH from the hook, 8 SC, INC in the next 3 SC, continue along the other side of the chain, 7 SC, INC (20)
Row 2: INC, 7 SC, INC3, 7 SC, INC2 (26)
Row 3: 26 SC (26)
Row 4: 26 SC (26)
Row 5: (11 SC, DEC)*2 (24)
Row 6: 24 SC (24)
Row 7: (10 SC, DEC)*2 (22)
Row 8: 22 SC (22)
Row 9: (9 SC, DEC)*2 (20)
Row 10: 20 SC (20)
Row 11: (8 SC, DEC)*2 (18)
Row 12: 18 SC (18)
Row 13: (1 SC, DEC)*6 (12)
Row 14: 12 SC (12)
Row 15: 6 DEC (6)
Do not stuff the legs. Close the opening, cut the yarn, and hide it. Sew the legs to the bottom of the duck.
Beak (orange color):
Chain 15.
Row 1: Starting from the 2nd CH from the hook, 13 SC, INC in the next 3 SC, continue along the other side of the chain, 12 SC, INC (30)
Row 2: 30 SC (30)
Row 3: 20 SC, HDC, 2 DC, HDC, 6 SC (30)
Leave a long tail for sewing. Add a bit of stuffing while sewing. Attach the top of the beak between rows 33 and 34 and the bottom between rows 29 and 30.
Knife Blade (gray color):
Leaving a long tail for sewing, chain 6.
Row 1: Starting from the 2nd CH from the hook, 4 SC, INC in the next 3 SC, continue along the other side of the chain, 3 SC, INC (12)
Row 2: 12 SC (12)
Row 3: 5 SC, HDC in 3 SC, 6 SC (14)
Row 4: 14 SC (14)
Row 5: 6 SC, HDC in 3 SC, 7 SC (16)
Row 6: 16 SC (16)
Row 7: 7 SC, HDC in 3 SC, 8 SC (18)
Rows 8-12: 18 SC (5 rows)
Row 13: 7 SC, DEC in 3 SC, 8 SC (16)
Row 14: 16 SC (16)
Row 15: 6 SC, DEC in 3 SC, 7 SC (14)
Row 16: 14 SC (14)
Row 17: 5 SC, DEC in 3 SC, 6 SC (12)
Row 18: 12 SC (12)
Row 19: 4 SC, DEC in 3 SC, 5 SC (10)
Row 20: 5 DEC (5)
Close the opening, cut the yarn, and hide it.
Knife Handle (pink color):
Row 1: 6 SC in MC (6)
Row 2: 6 INC (12)
Row 3: (1 SC, INC)*6 (18)
Row 4: Work in BLO, 18 SC (18)
Rows 5-8: 18 SC (4 rows)
Row 9: Work in BLO, 18 SC (18)
Rows 10-13: 18 SC (4 rows)
Row 14: Work in BLO, 18 SC (18)
Rows 15-17: 18 SC (3 rows)
Row 18: Work in BLO, 18 SC (18)
Rows 19-22: 18 SC (4 rows)
Row 23: Work in BLO, (1 DEC, INC)*6 (12)
Row 24: 6 DEC (6)
Close the opening, cut the yarn, and hide it. Sew the knife handle to the blade.
Assembly:
After sewing all the pieces together, you can create a highlight in the eyes and embroider the eyes. To make the duck hold the knife in its wing, sew the tip of one of the wings to the body.
Enjoy your crocheting! If you have any questions or comments, please feel free to reach out to me. I’m here to help!