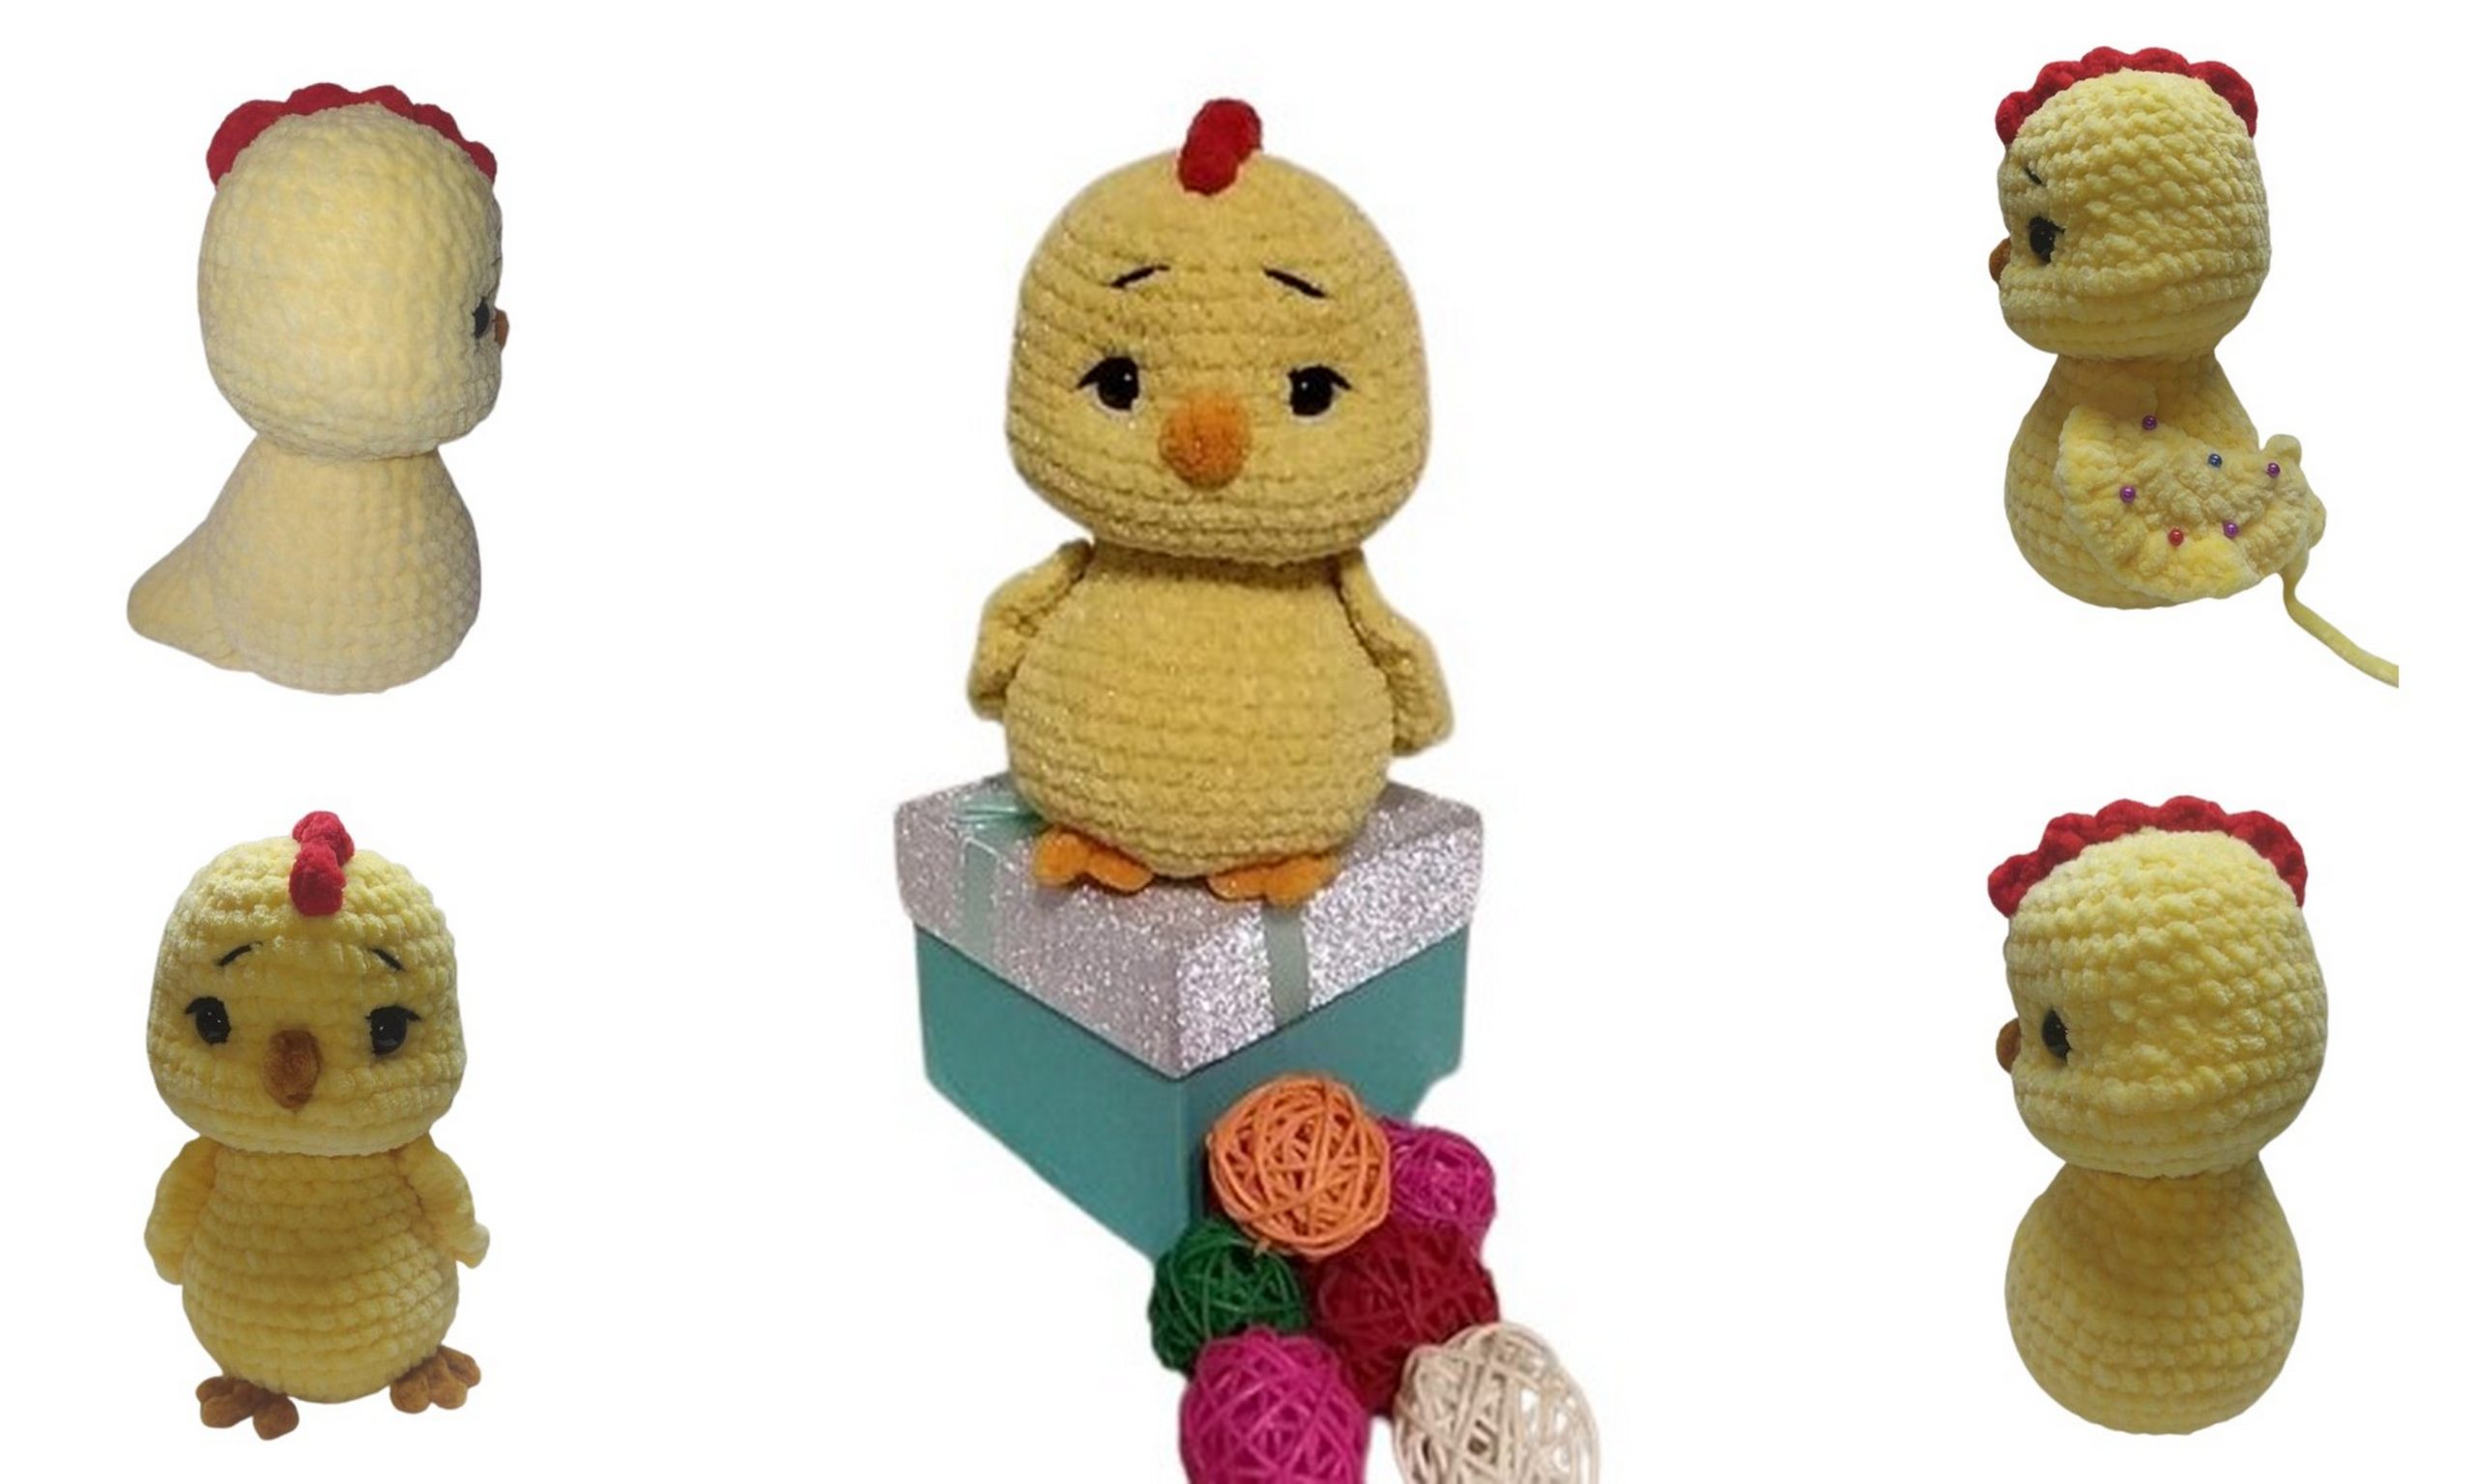
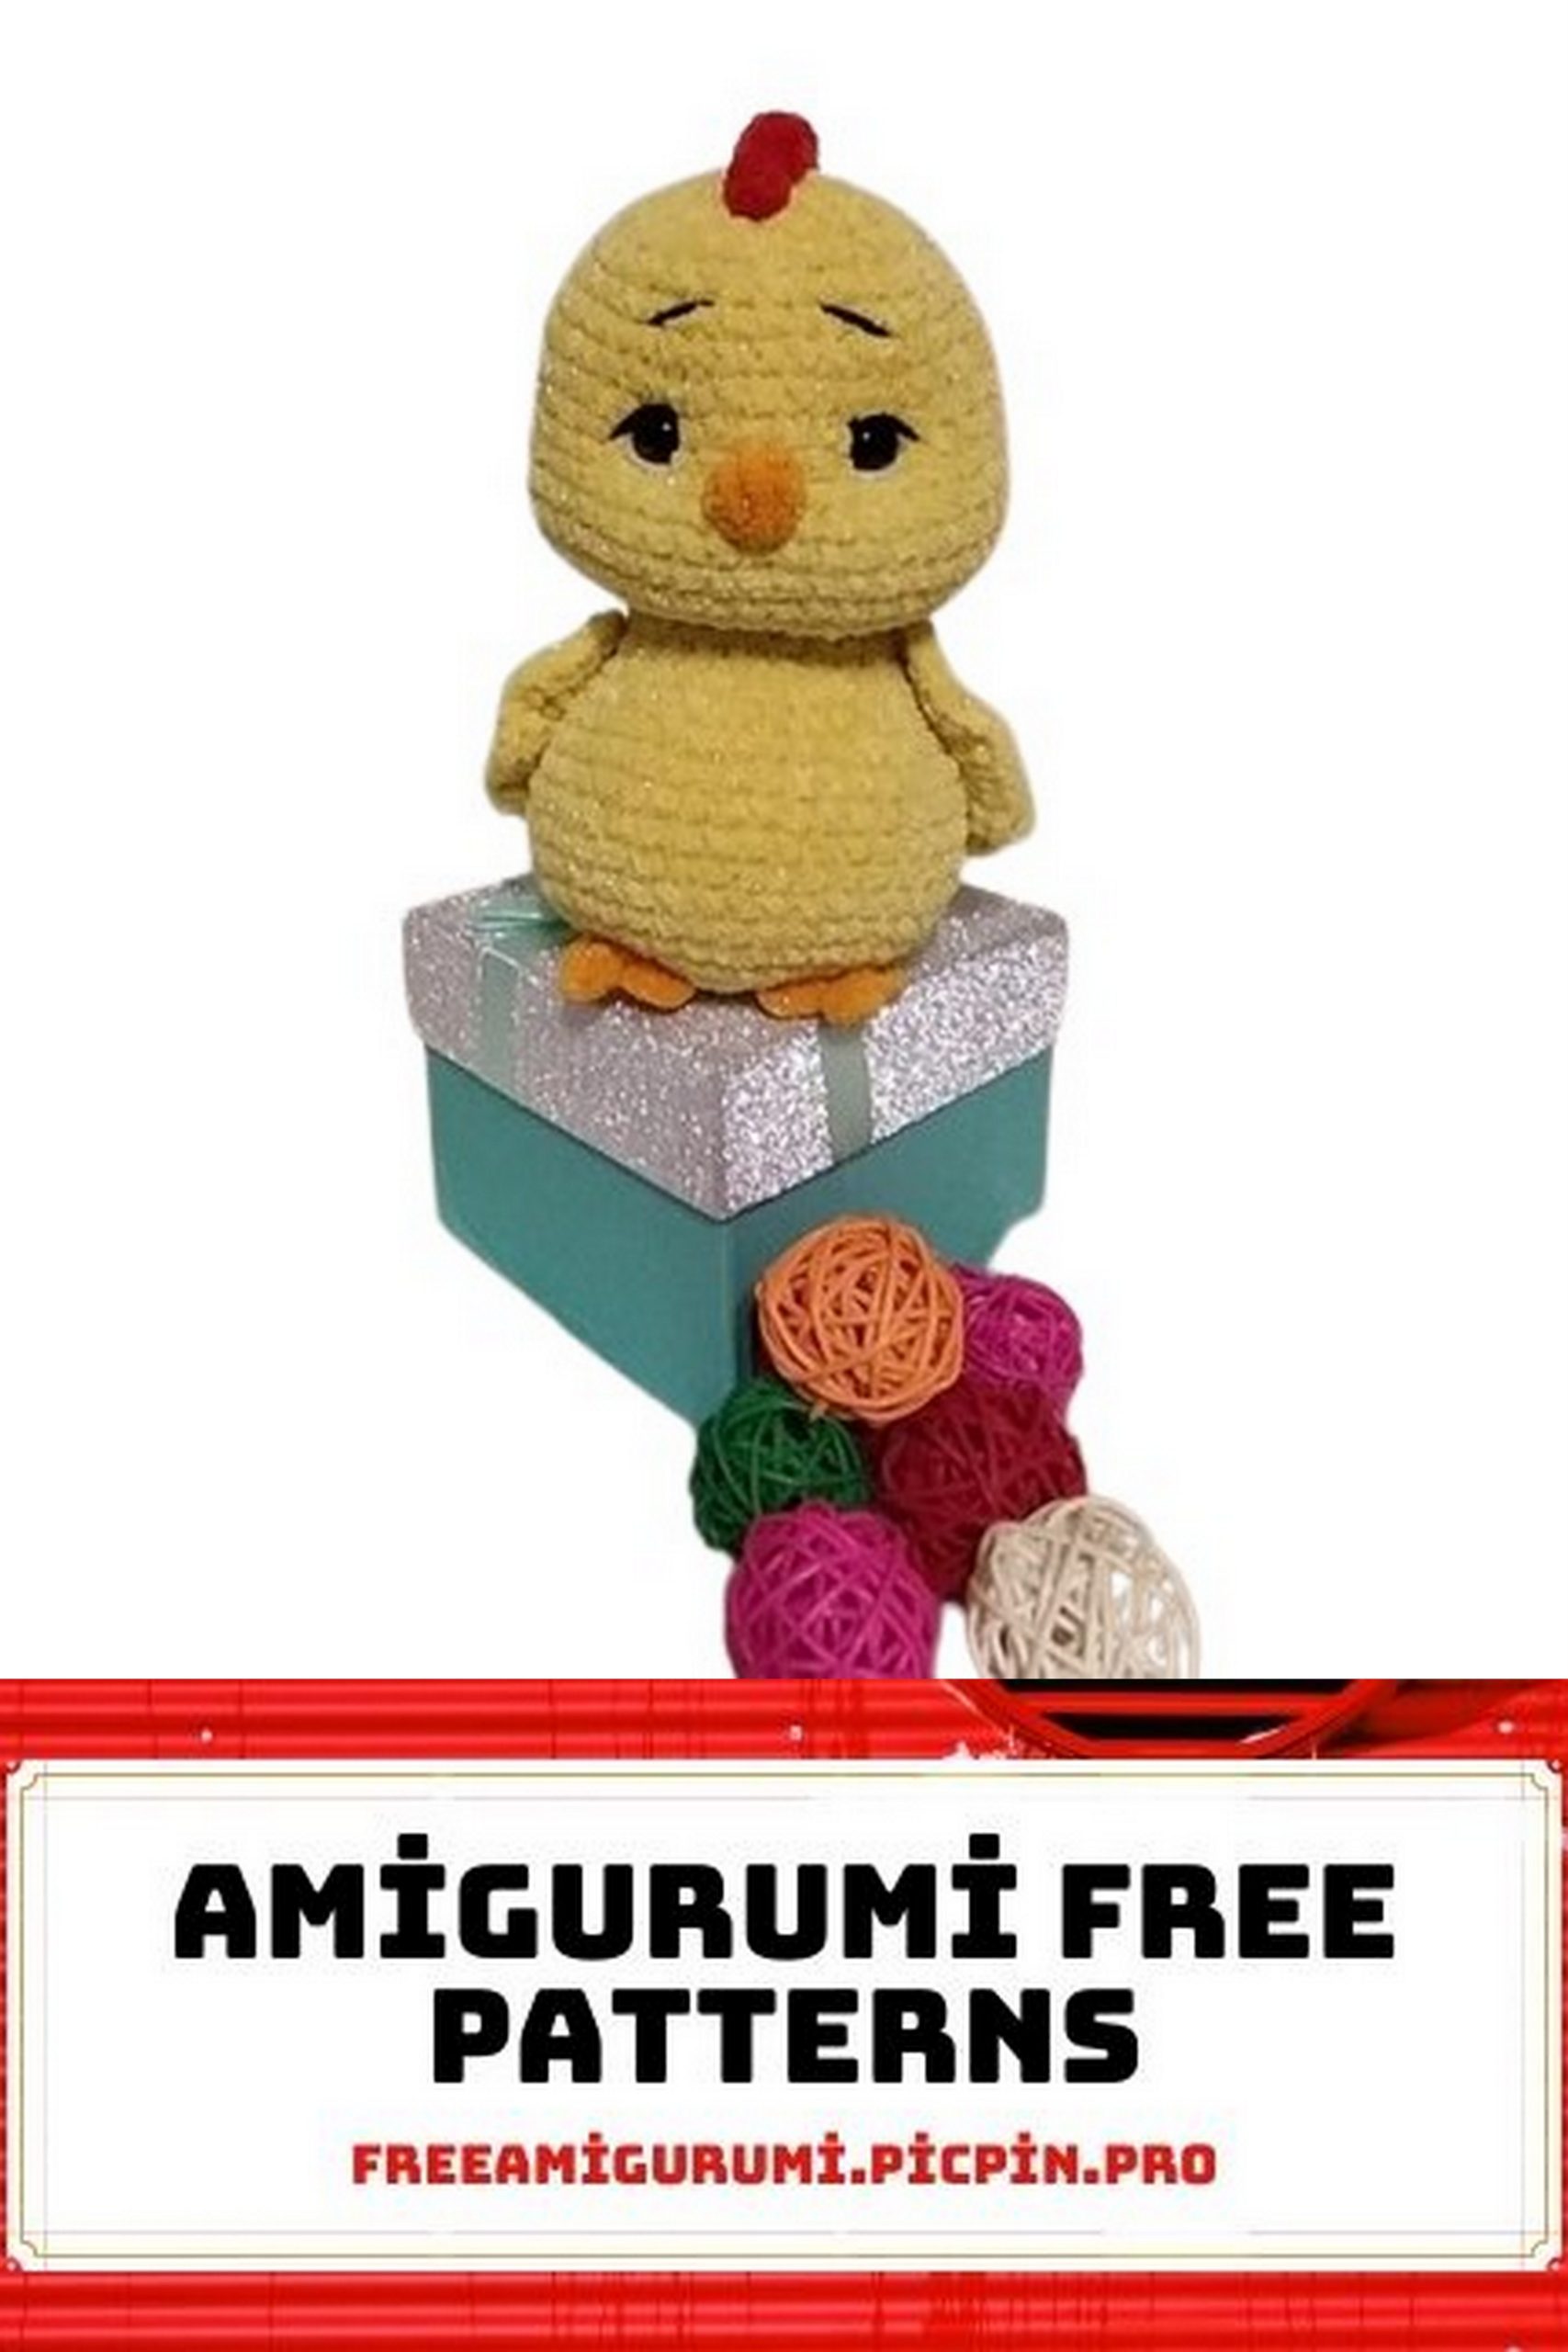
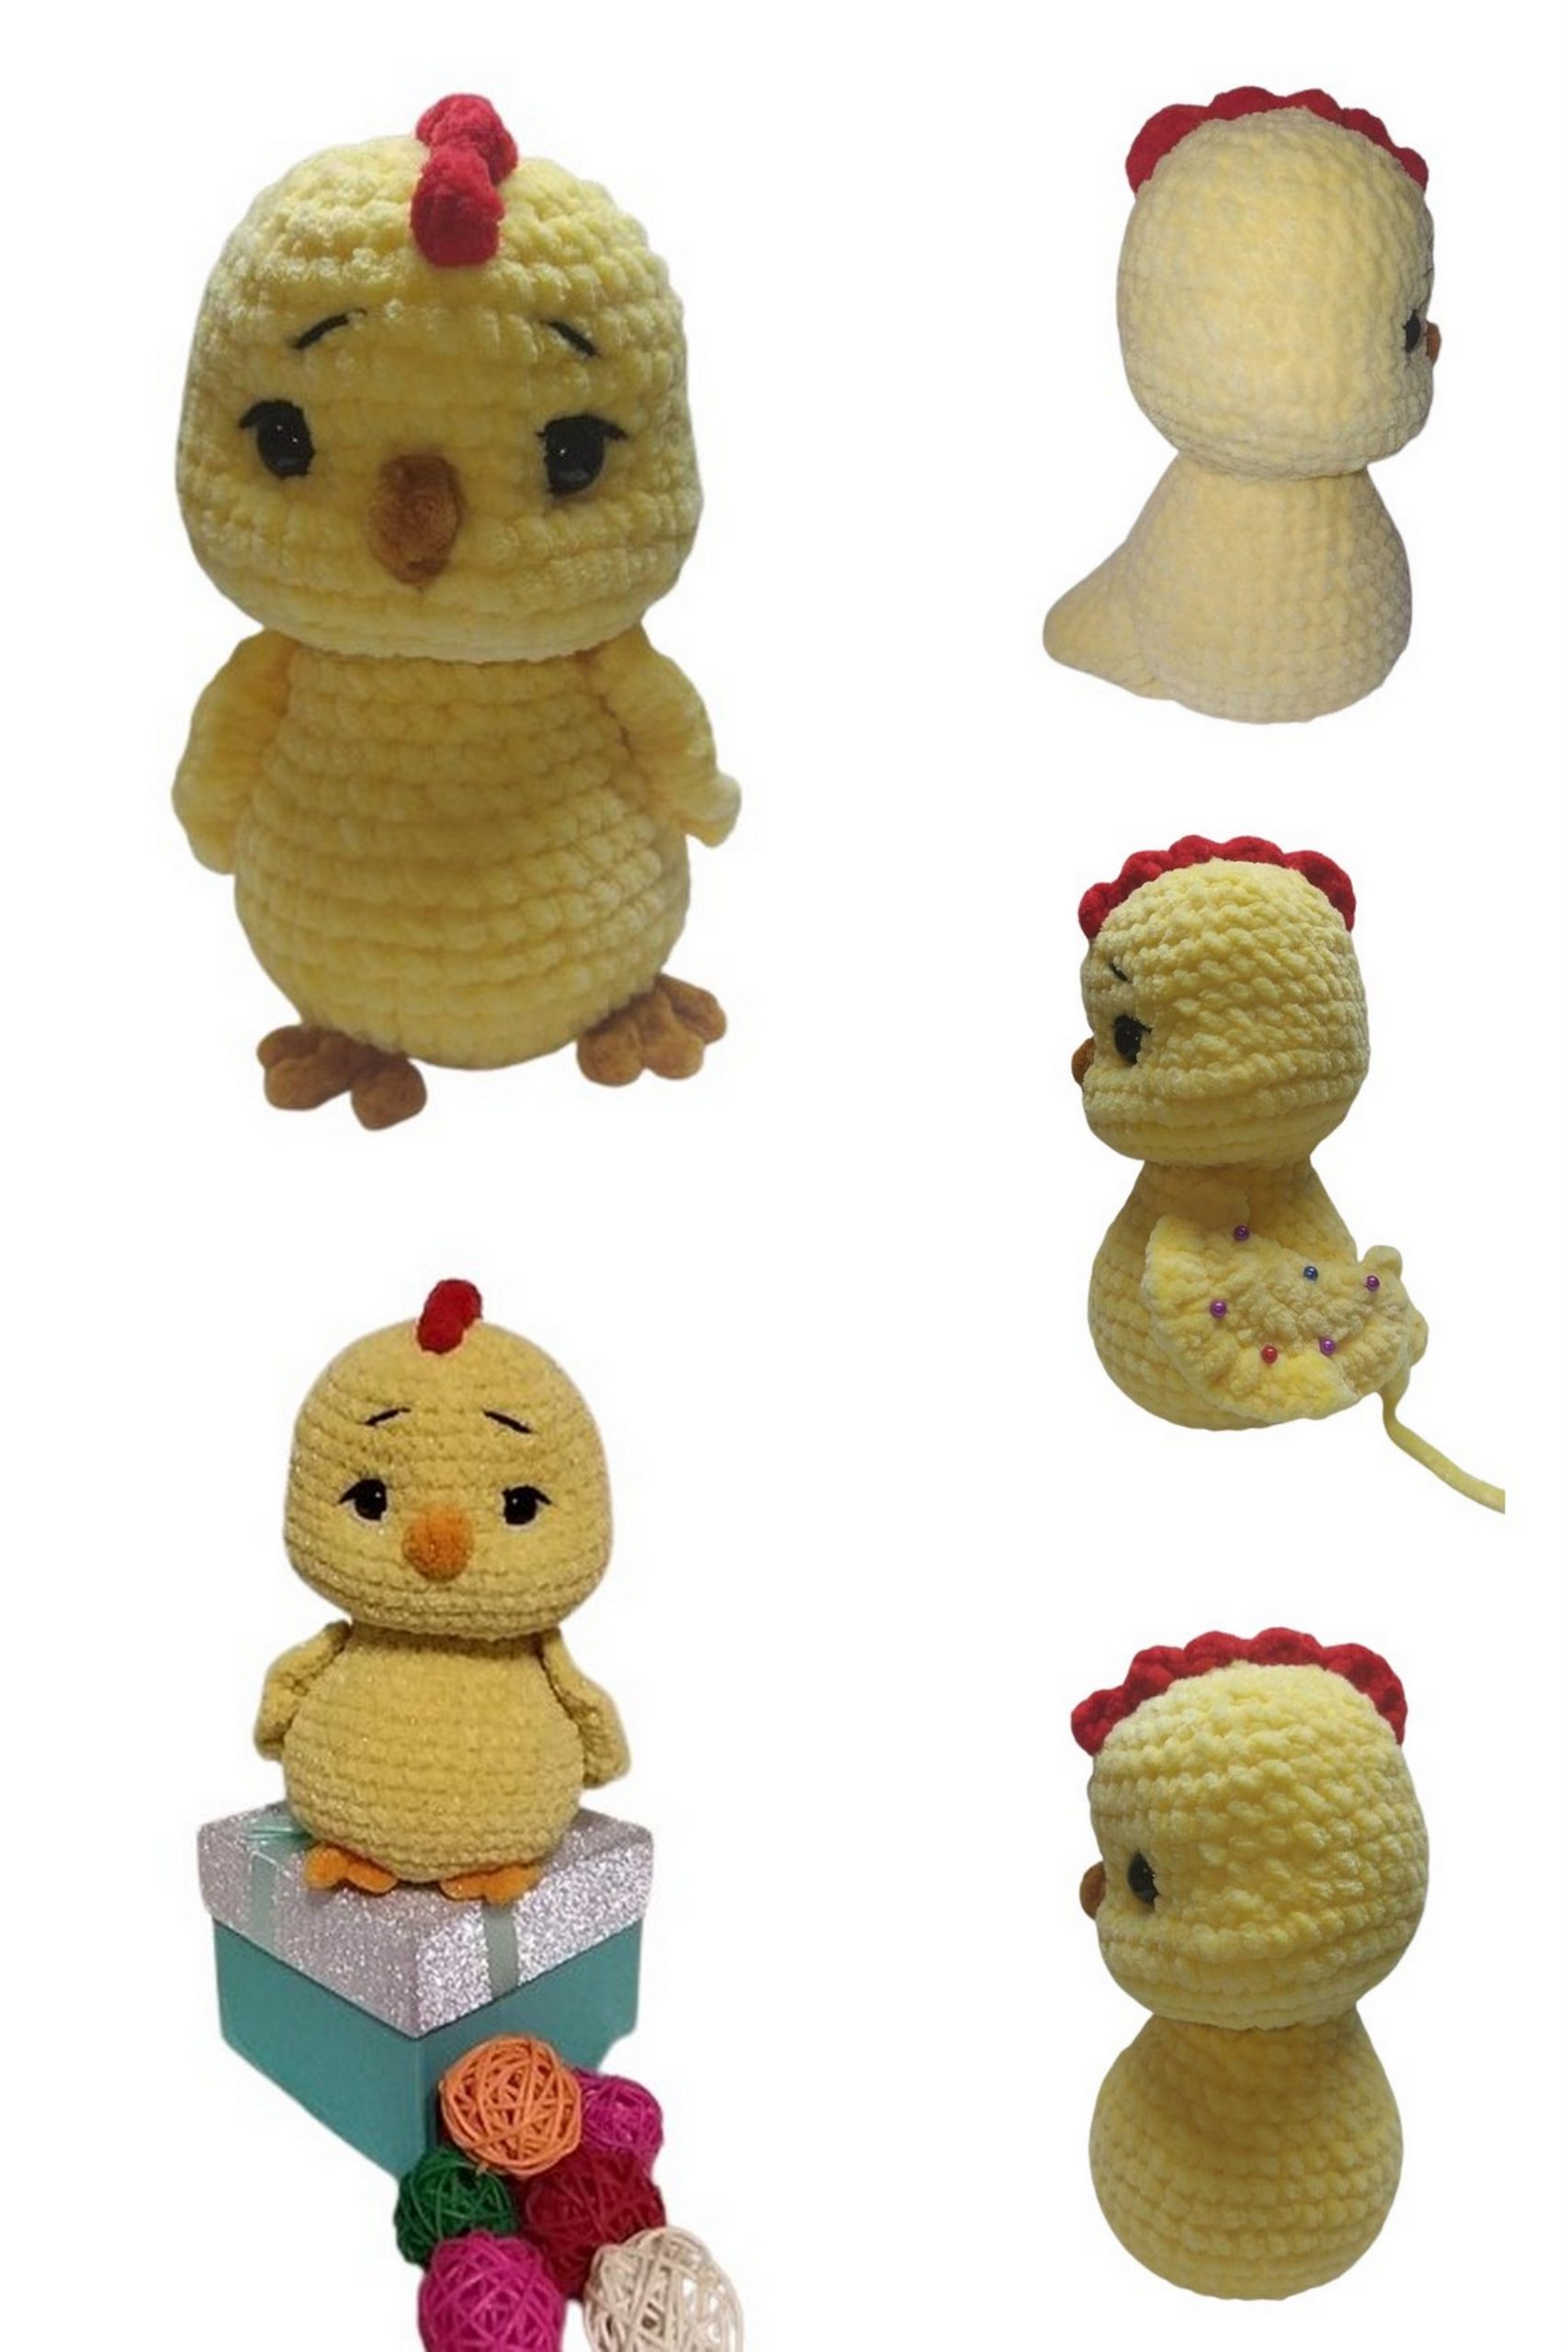
Velvet Chick Amigurumi Free Pattern: Craft Your Soft and Adorable Easter Companion!
Enter the cozy world of amigurumi with our amigurumi free pattern to create your very own Velvet Chick amigurumi! Whether you’re an experienced crocheter or just starting out, this pattern offers a delightful journey into the realm of cute and cuddly creations. Stitch by stitch, bring to life a soft and lovable chick, perfect for Easter decorations or as a charming gift for loved ones. Join us in this heartwarming crafting adventure and let’s crochet our way to creating an adorable Easter companion!
When using the specified materials and my gauge, the toys are approximately 14-16 cm tall.
Materials needed:
Yarn: WOLANS BUNNY BABY – main color for the chick (0.7 skein).
Yarn: WOLANS BUNNY BABY – red and brown color, 5-6 meters for the beak, legs, and comb.
Black and white YARNART JEANS for toy embellishments.
Crochet hook (I use size 3).
Semi-spherical black safety eyes, 10-12mm.
Polyester fiberfill stuffing.
Tapestry needle.
Scissors.
Marker (a contrasting color thread).
Strong thread for sewing.
Good mood 🙂
Abbreviations:
MR – magic ring
INC – increase
DEC – decrease
SC – single crochet
CH – chain stitch
BLO – back loop only
FLO – front loop only
SL ST – slip stitch
HDC – half double crochet
CHSP – chain space
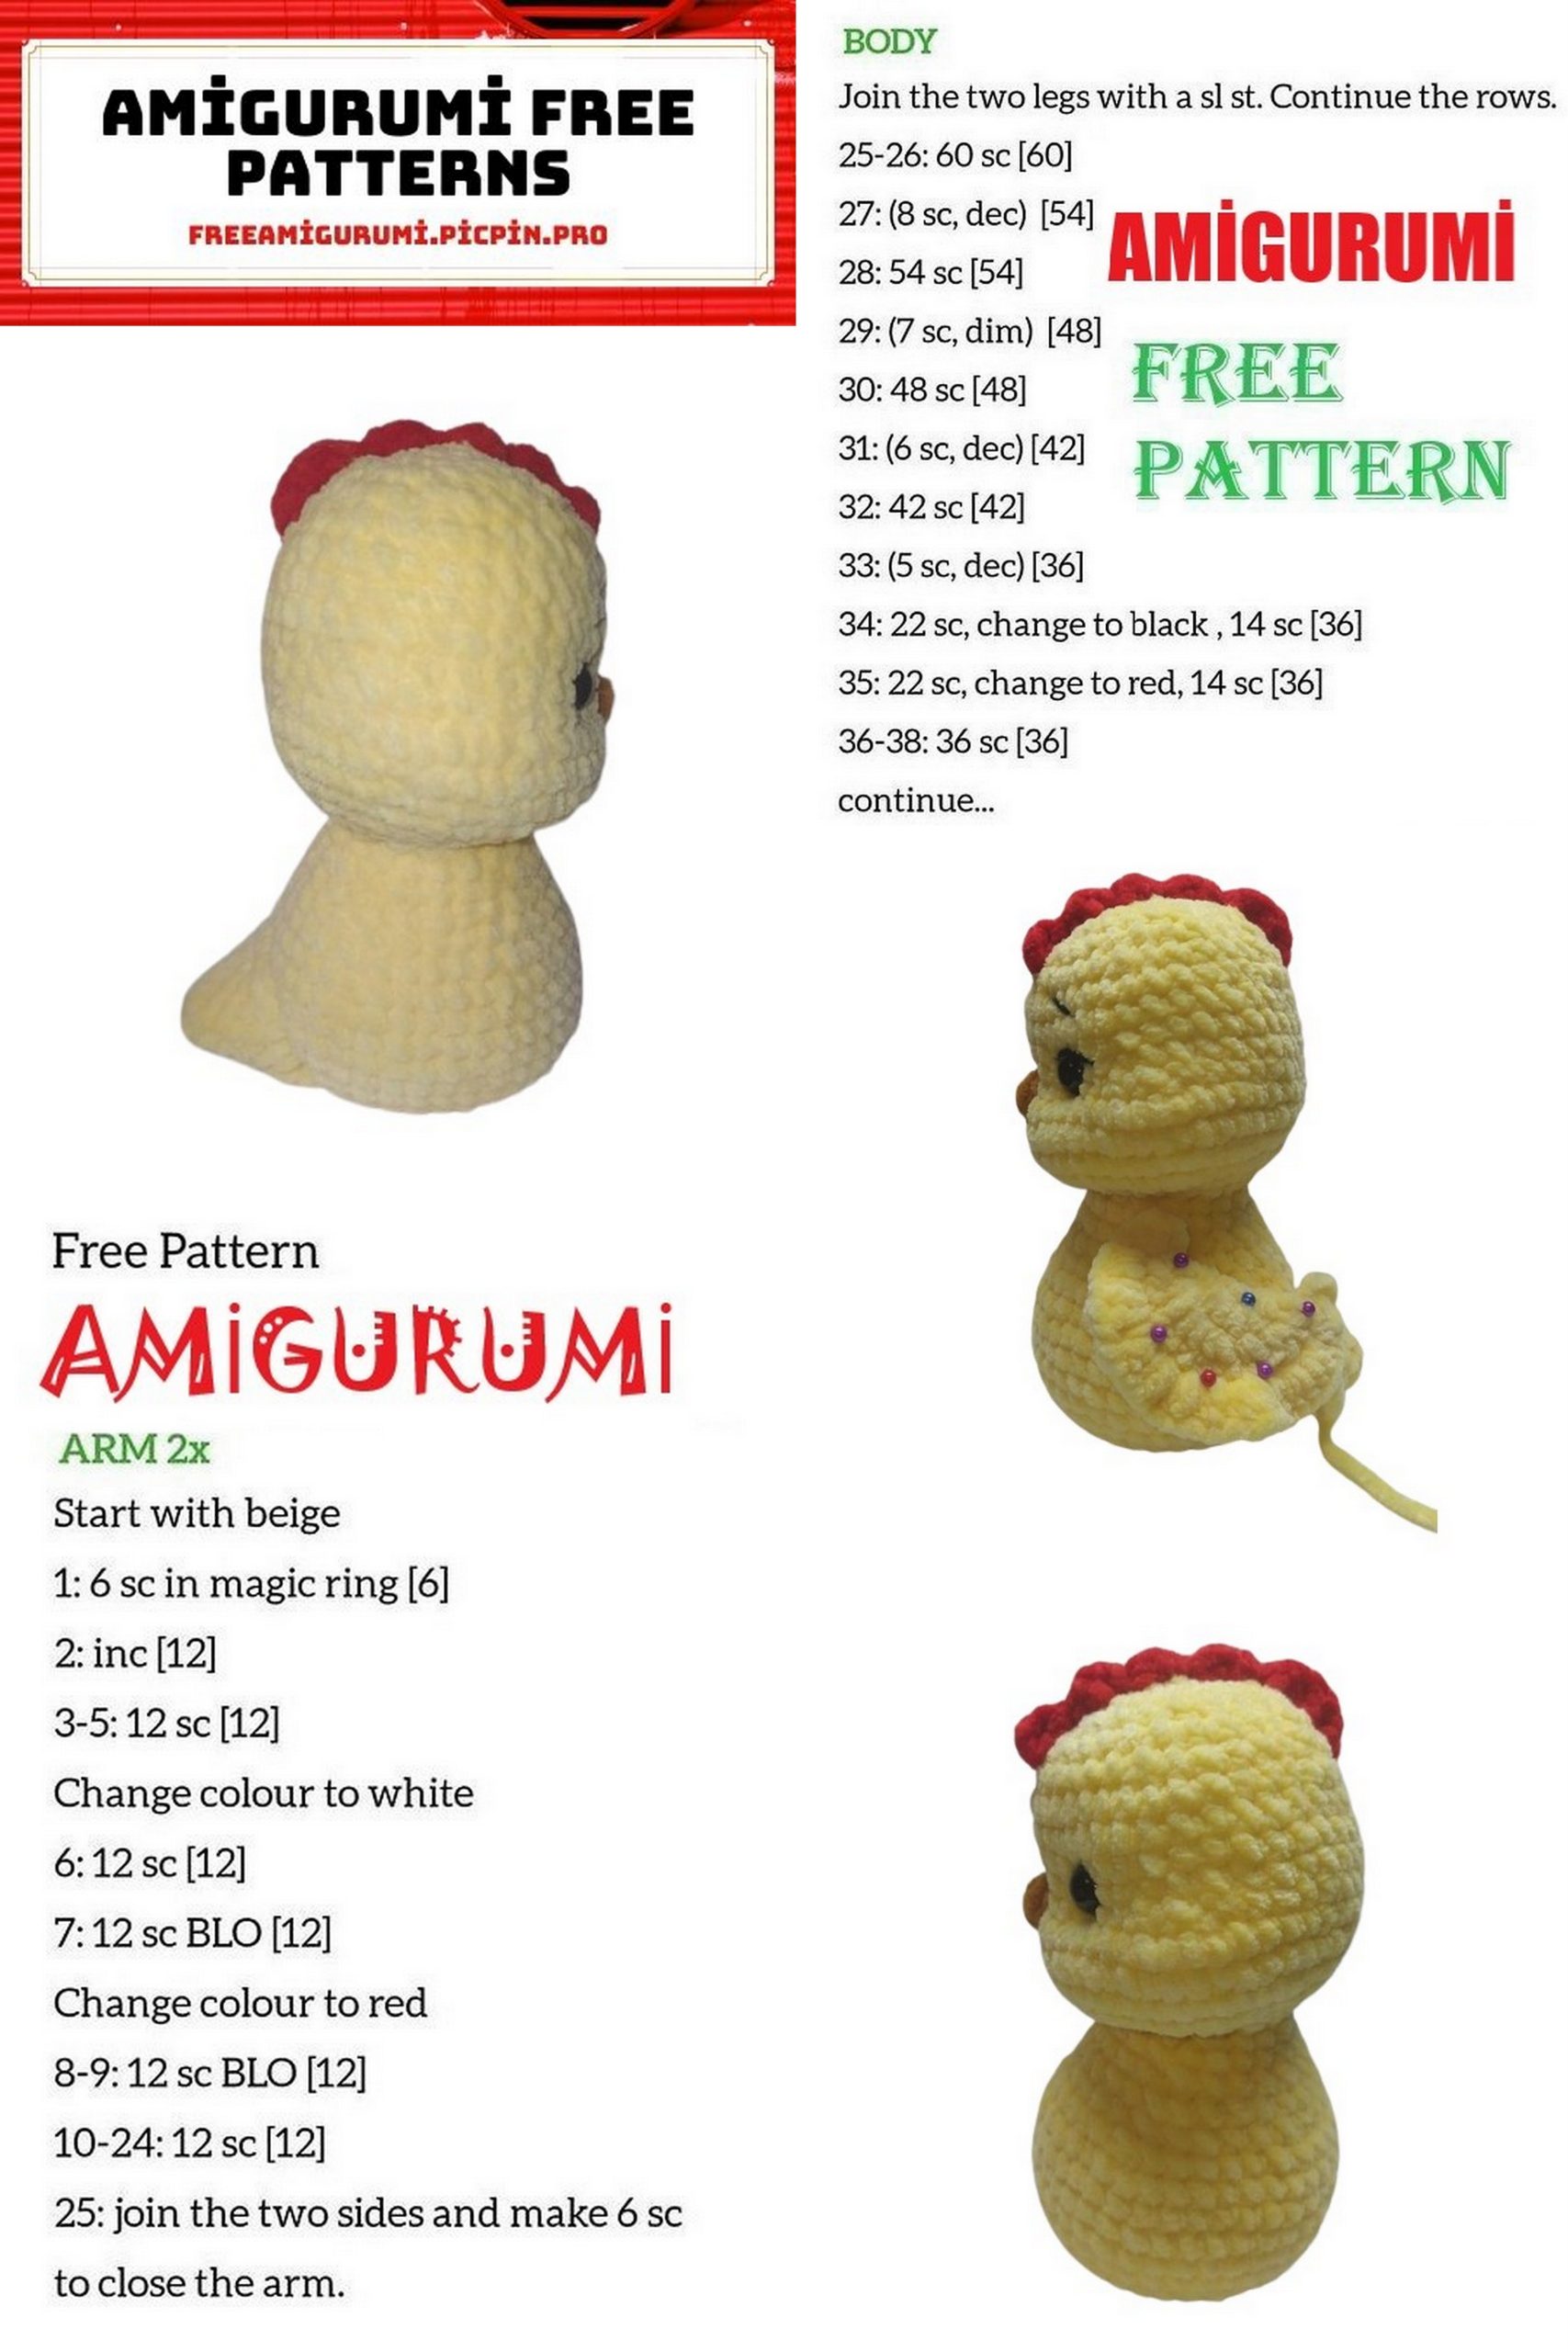
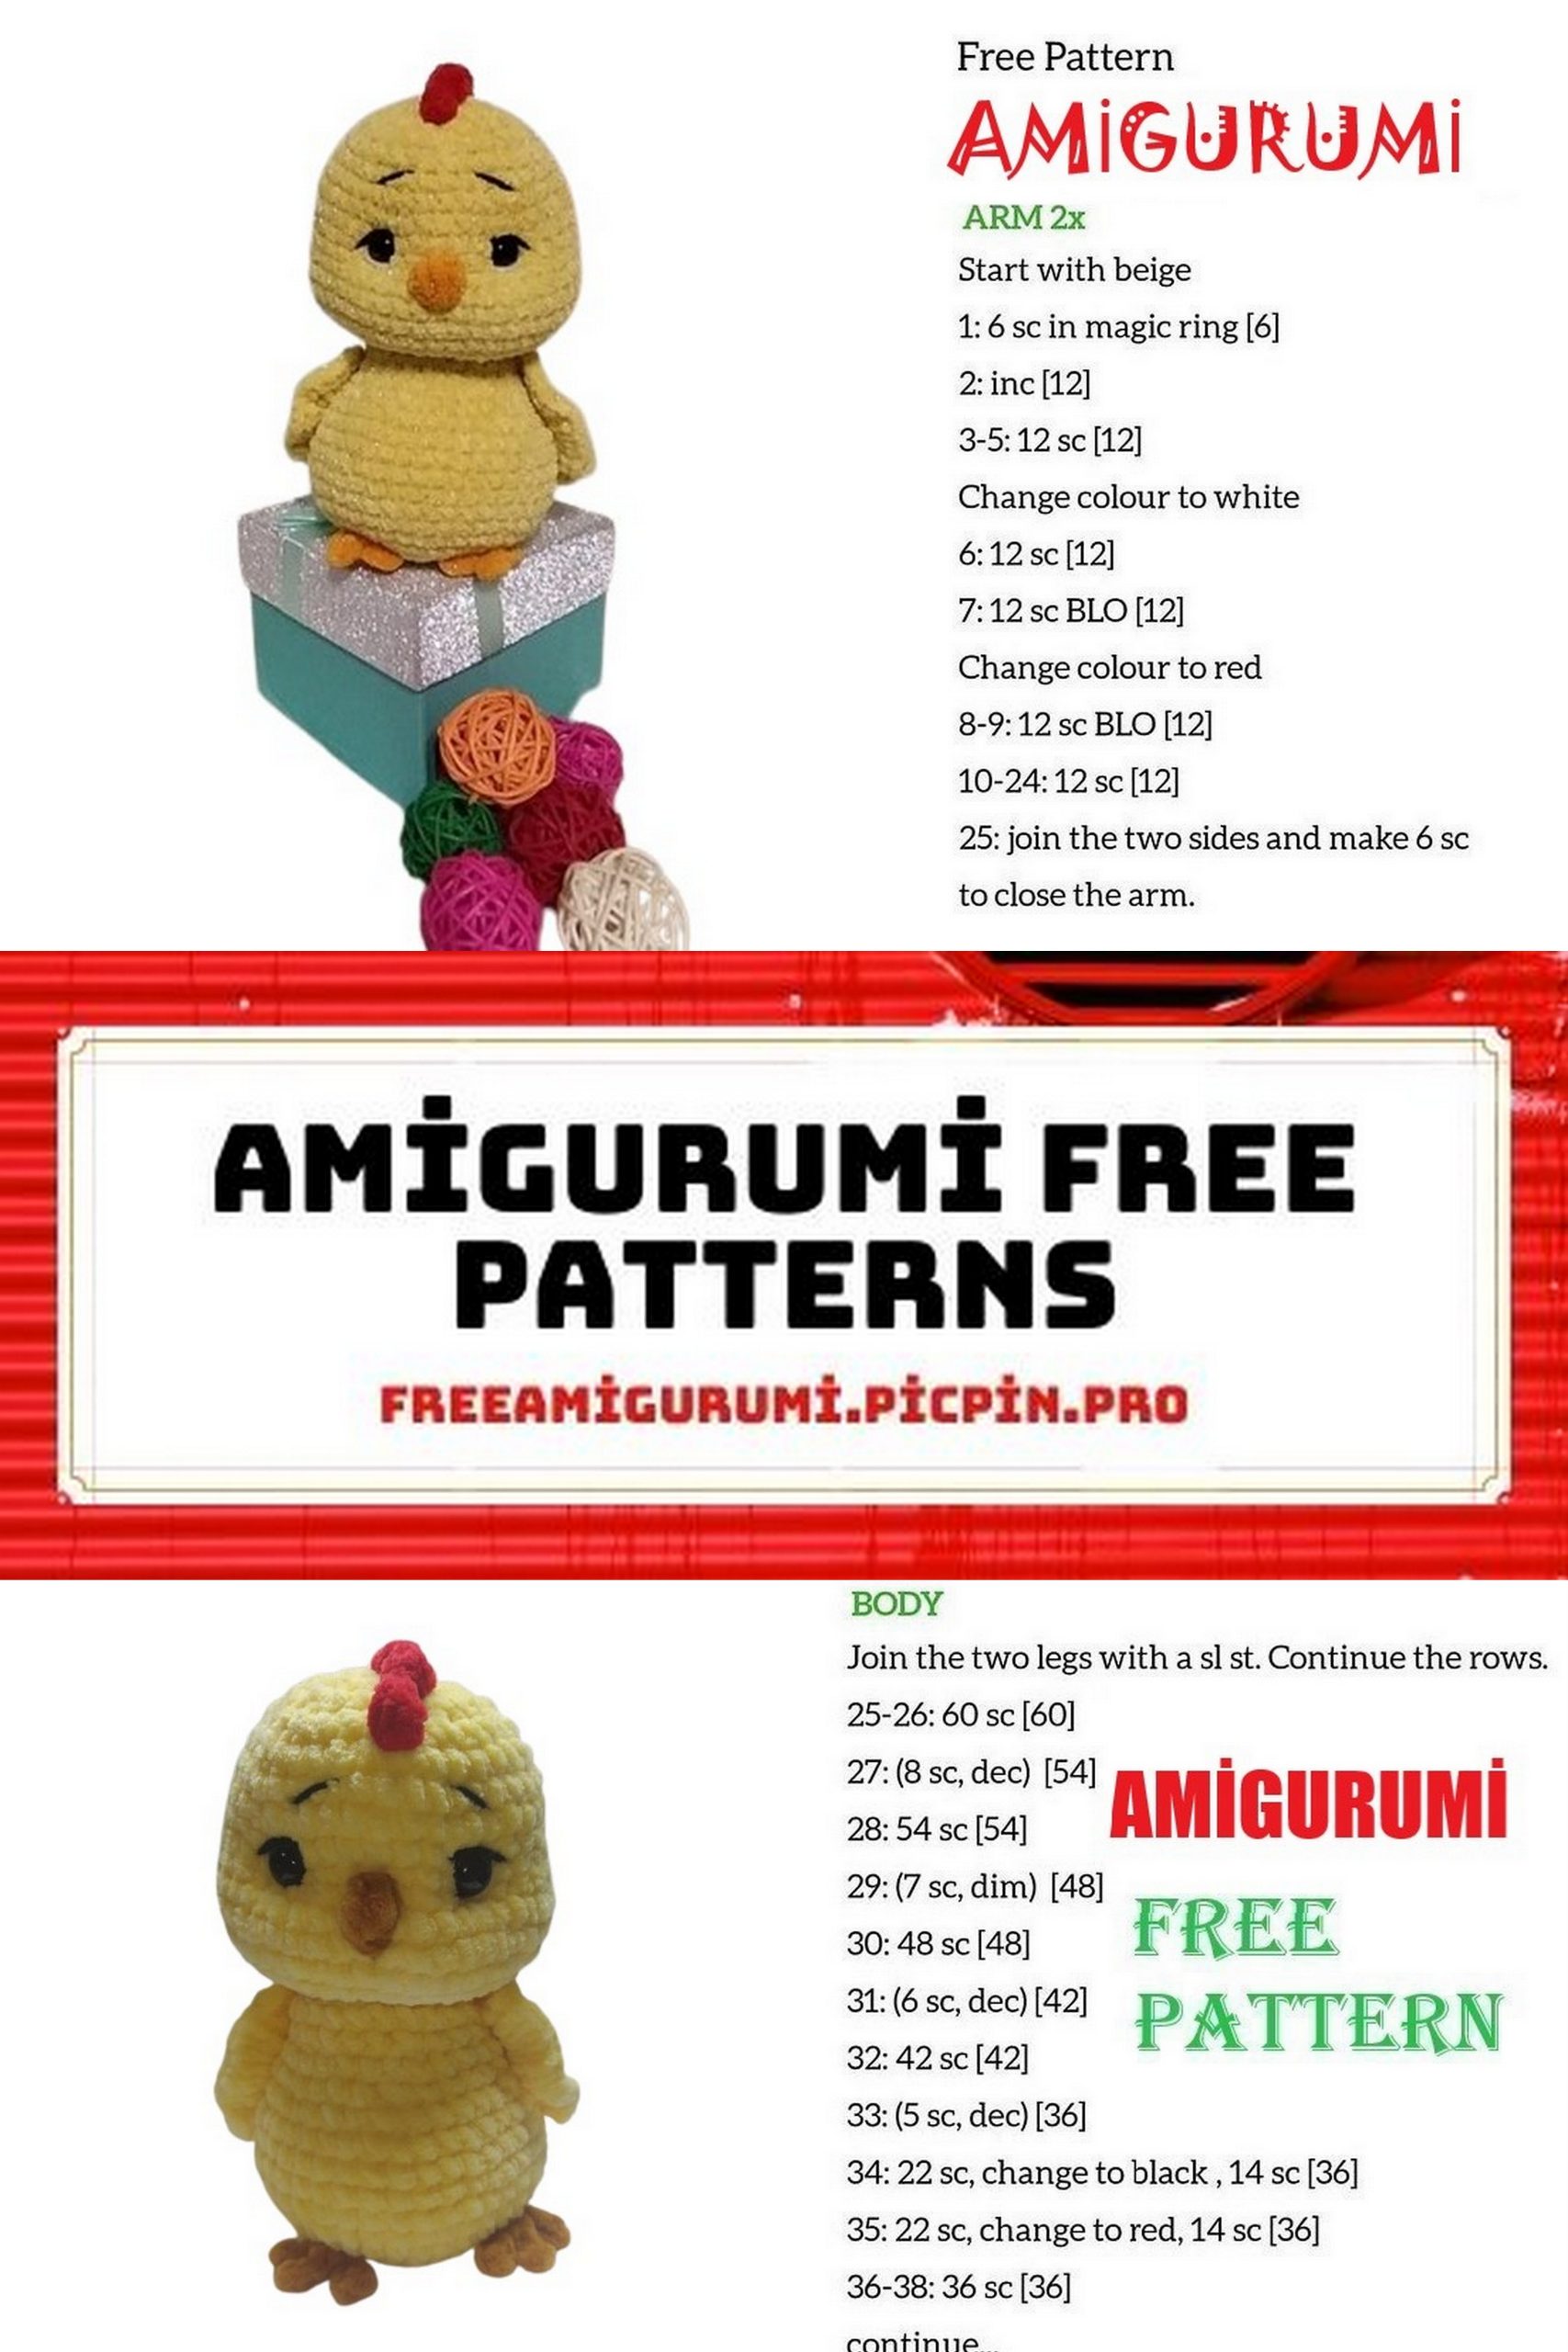
Chick – Peak
PATTERN
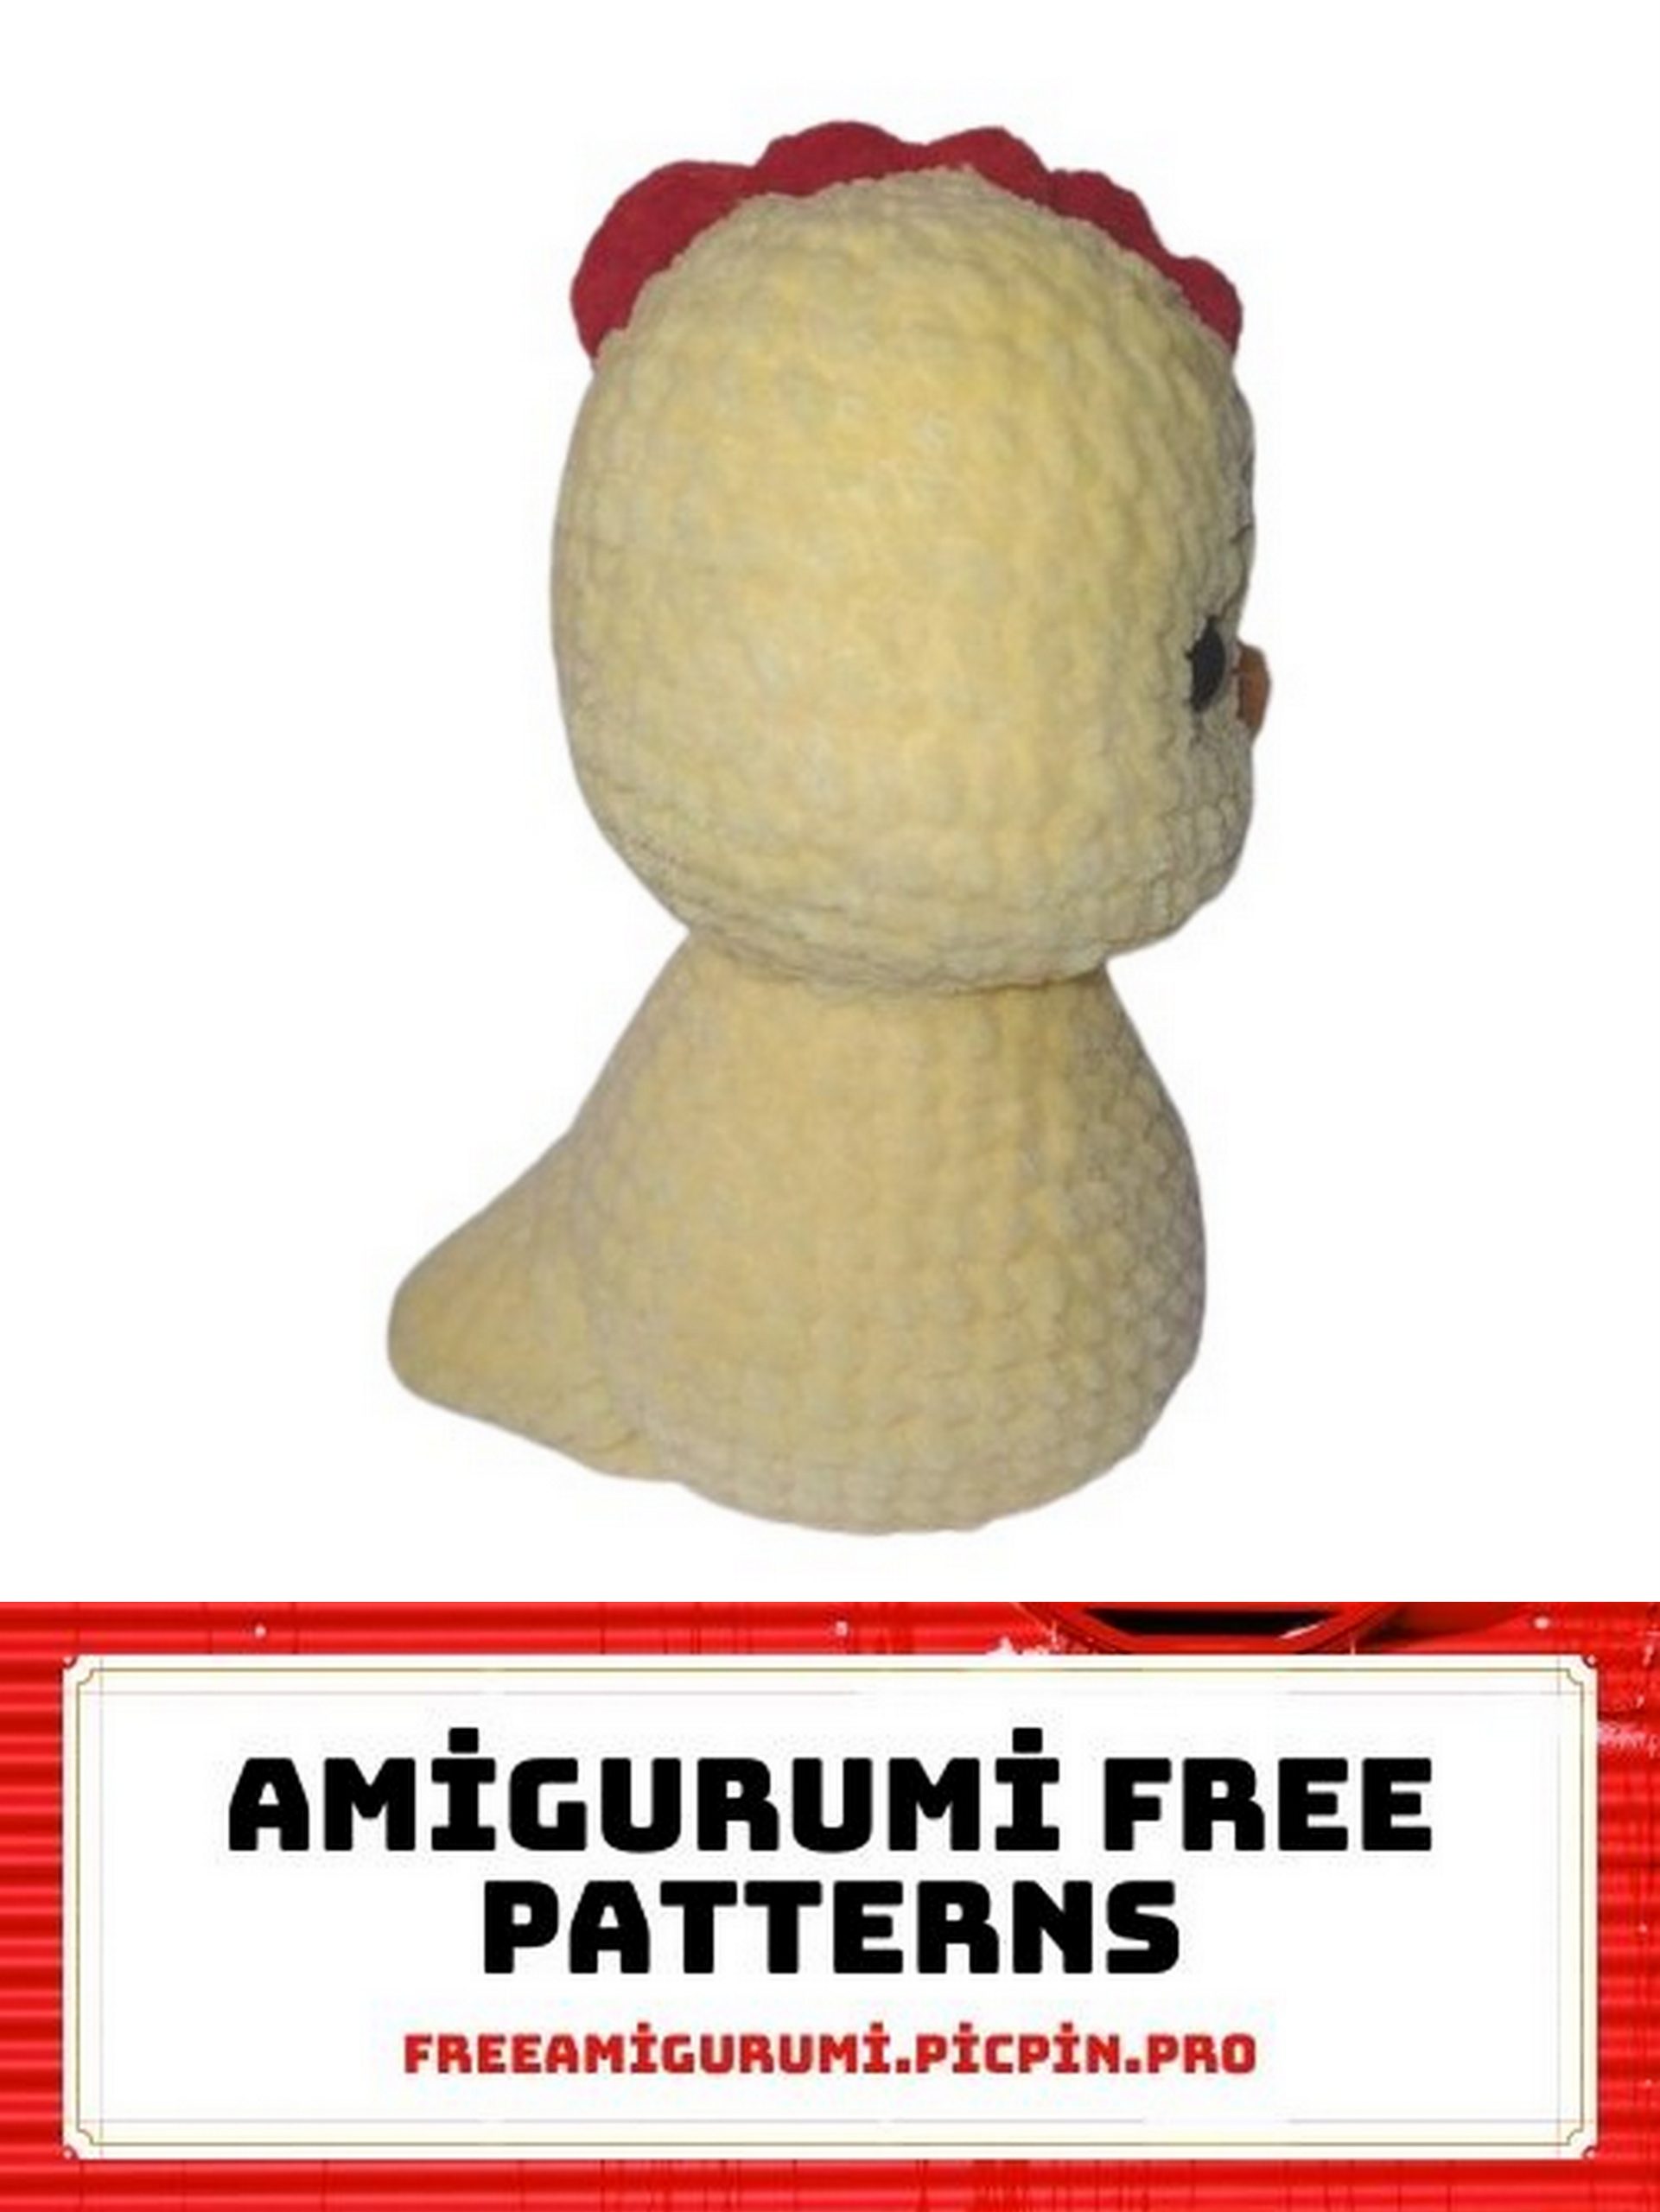
Body-Head
Crochet in a spiral, without turning chains. Stuff as you crochet.
Row 1: 6 SC into MR (6)
Row 2: INC in each stitch (12)
Row 3: (1 SC, INC) repeat 6 times (18)
Row 4: (2 SC, INC) repeat 6 times (24)
Row 5: (3 SC, INC) repeat 6 times (30)
Row 6: (4 SC, INC) repeat 6 times (36)
Rows 7-13: 36 SC (7 rows)
Row 14: (5 SC, DEC) repeat 6 times (30)
Row 15: (4 SC, DEC) repeat 6 times (24)
Row 16: 24 SC
Row 17: (3 SC, DEC) repeat 6 times (18)
Row 18: 18 SC
Continue without cutting yarn.
Row 19: 18 INC (36)
Row 20: (5 SC, INC) repeat 6 times (42)
Row 21: 18 SC, 3 INC, 18 SC, 3 INC (48)
Place markers for middle increases.
Rows 22-26: 48 SC (5 rows)
In the next row, we will make decreases to form the cheeks of the chick. The decreases are placed directly above the increases from Row 21 (use markers as a guide). Make adjustments if needed.
Row 27: 18 SC, 3 DEC, 18 SC, 3 DEC (42)
Rows 28-31: 42 SC (4 rows)
Row 32: (5 SC, DEC) repeat 6 times (36)
Row 33: (4 SC, DEC) repeat 6 times (30)
Row 34: 30 SC
Insert safety eyes at this stage, positioned in the middle between the lateral decreases, about 8-9 stitches apart from each other, between Rows 29 and 30. Eyes are 10-12mm.
Row 35: (3 SC, DEC) repeat 6 times (24)
Row 36: (2 SC, DEC) repeat 6 times (18)
Stuff the head.
Row 37: (1 SC, DEC) repeat 6 times (12)
Row 38: 6 DEC (6)
Fasten off, leaving a tail for closing the hole. Hide the tail inside the head.

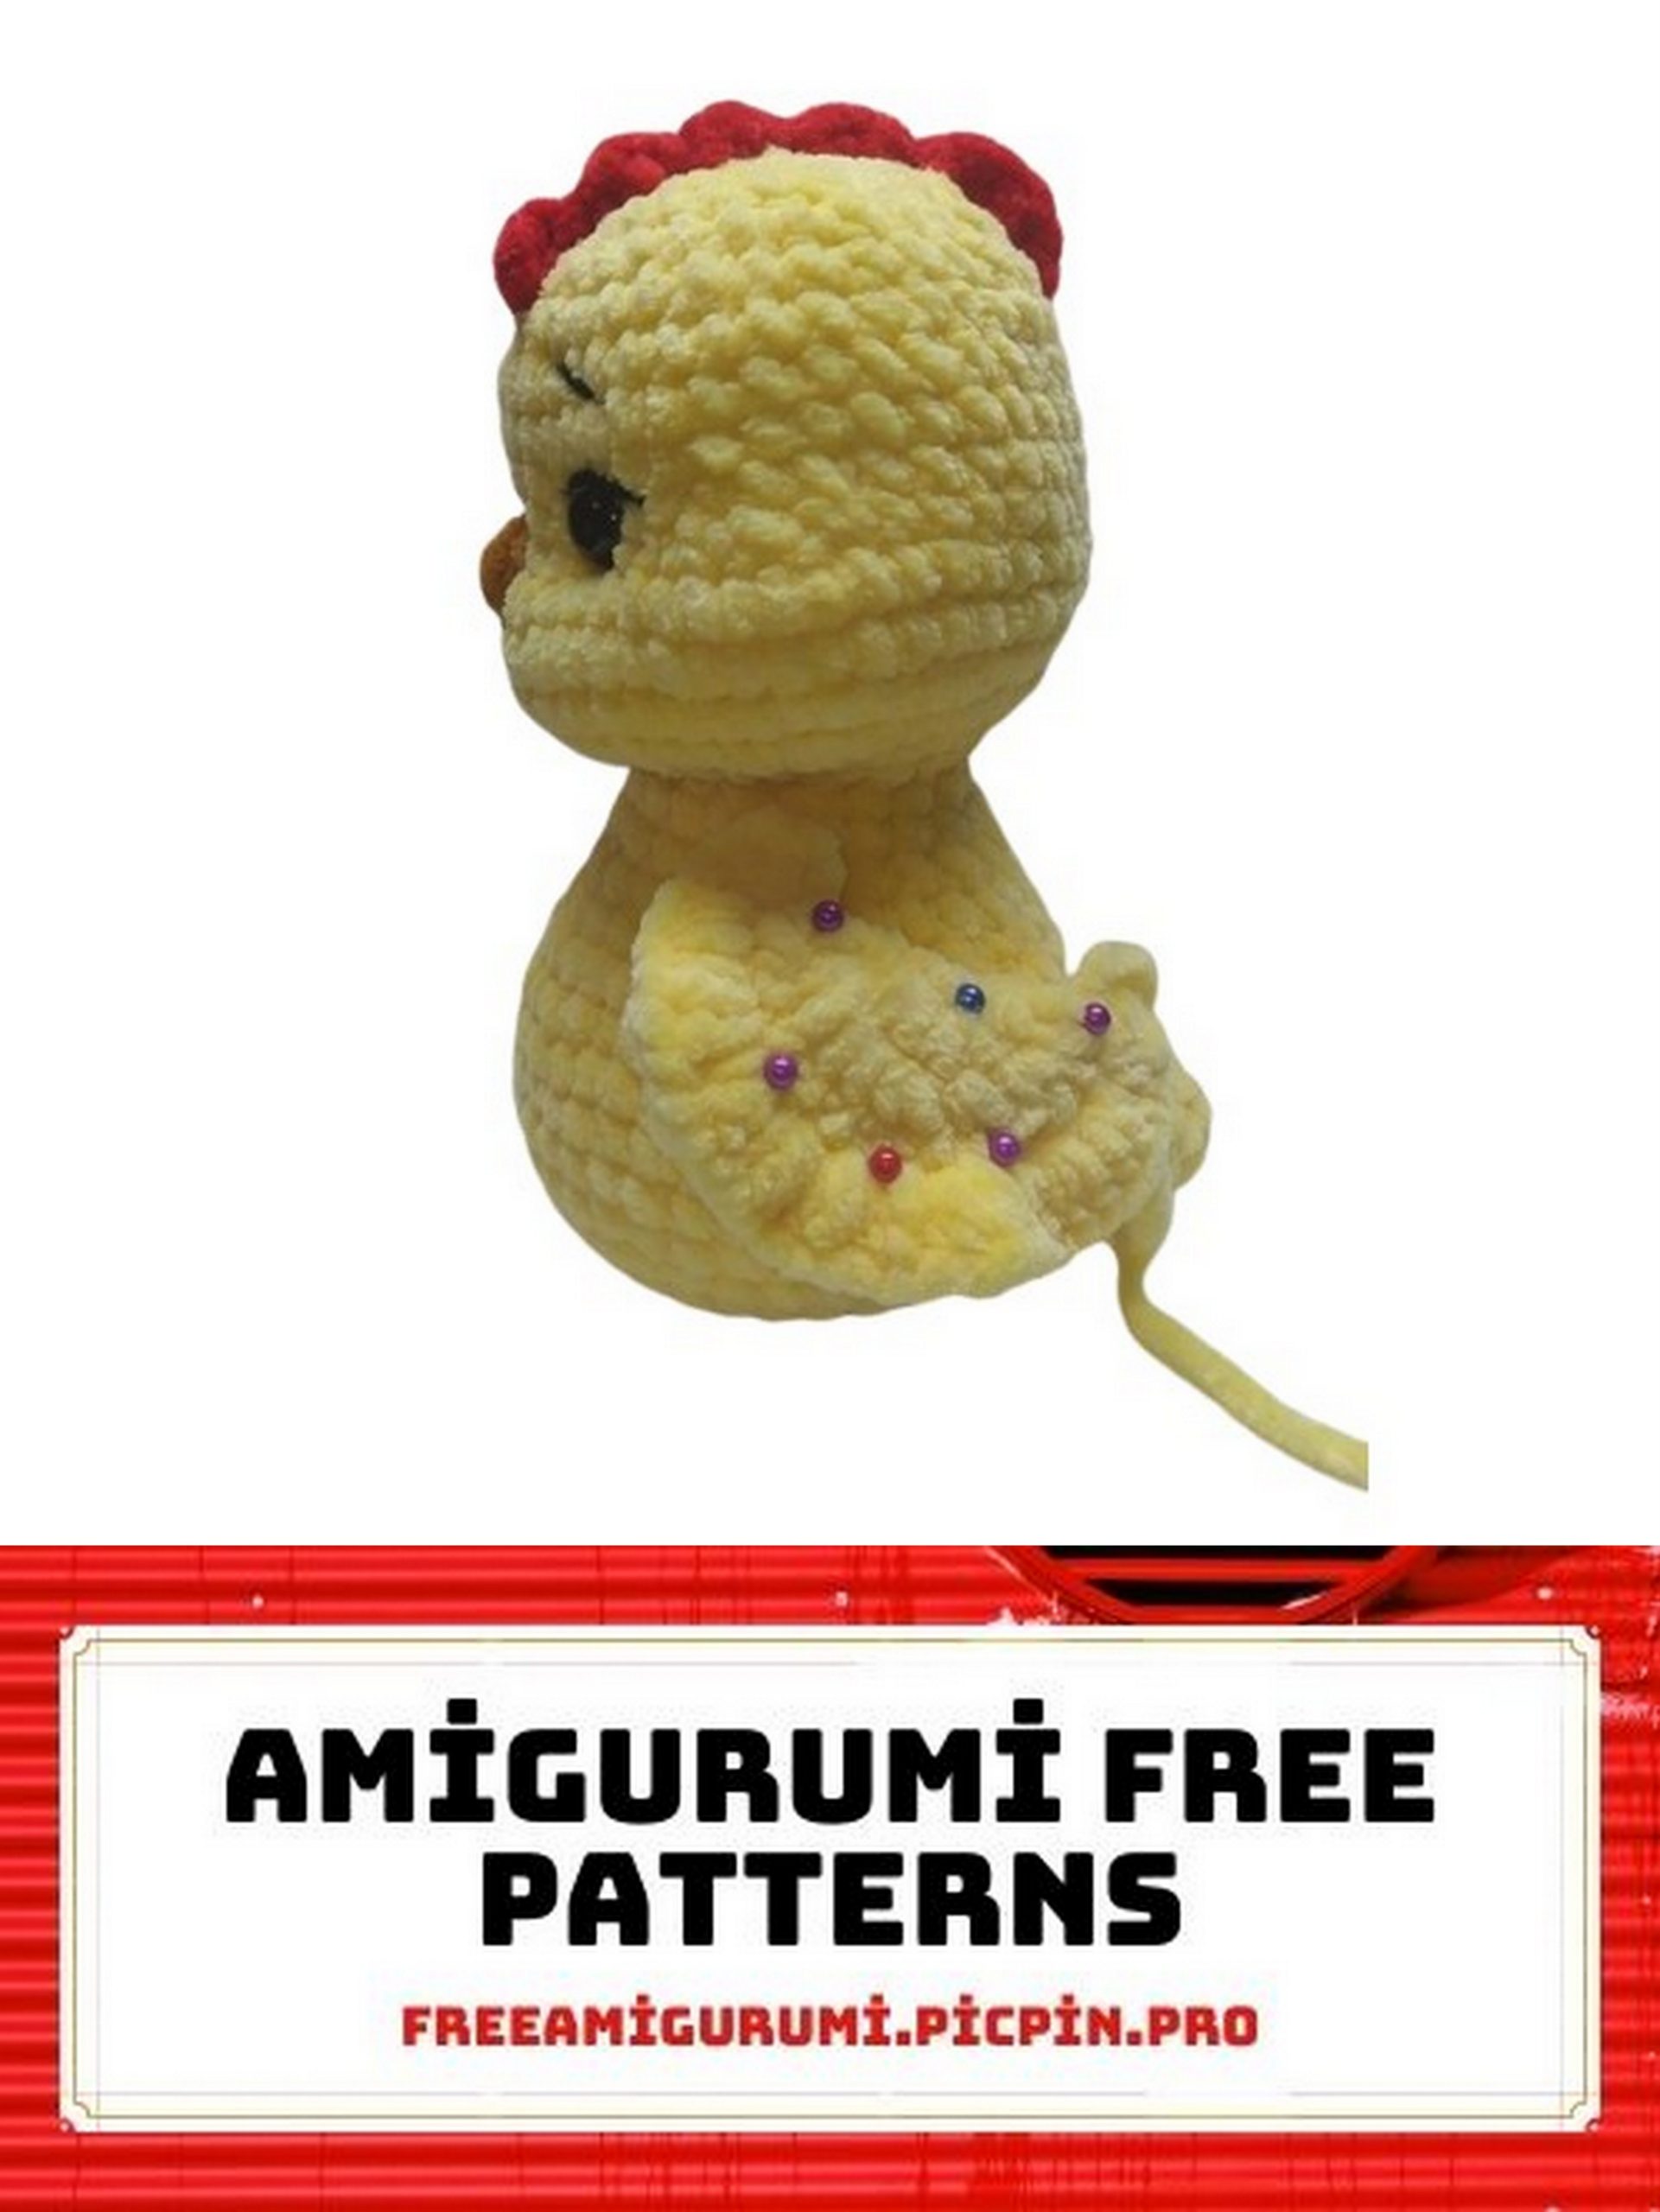
Make a small adjustment to the eye placement:
Insert the needle into Row 21, where the increases were made, 1 stitch away from the center. Bring it out at the lower outer corner of the first eye, then insert it at the lower inner corner of the eye, bring it out at the initial point, 1 stitch away, insert the needle, and repeat the process with the second eye.
Crochet the beak:
Leave a tail 10-15cm long at the beginning. CH 3. Work 3 incomplete DC with yarn over in the first CH. On the hook, you should have 4 loops. Yarn over and pull through all loops. Fasten off, leaving a 15cm tail for sewing. Sew the beak at the level of Rows 27-29, strictly in the center.
Crochet the comb:
Mark with pins where you will attach the comb. Crochet with red yarn. Work 3 HDC in one spot, make a SL ST in the next row, repeat 4-5 times. Fasten off, cut the yarn, and hide the tails inside the head.
Embroider the whites of the eyes, eyebrows, and lashes.
Crochet the tail:
Row 1: 6 SC into MR (6)
Row 2: (1 SC, INC) repeat 3 times (9)
Row 3: (2 SC, INC) repeat 3 times (12)
Row 4: (3 SC, INC) repeat 3 times (15)
Row 5: (4 SC, INC) repeat 3 times (18)
Row 6: (5 SC, INC) repeat 3 times (21)
Row 7: (INC, 1 SC) repeat 5 times, 11 SC (26)
Fasten off, leaving a tail 20-25cm long if you are sewing with the same yarn. Stuff the tail slightly. Position it centrally at the back and sew it at the level of Rows 5-11 of the increases, facing upwards.
Crochet wings (make 2):
Crochet with the main color yarn.
Row 1: 6 SC into MR (6)
Row 2: INC in each stitch (12)
Row 3: INC in each stitch (24)
Fold the piece in half and crochet 12 SC, working through both sides. CH 2, turn, HDC in each stitch of the previous row. Fasten off, leaving a 25cm tail if you’re sewing with the same yarn. Position the wings slightly tilted downwards on each side and sew around the perimeter of the third row.

Crochet legs:
Mark where you’ll attach the legs, between Rows 6 and 7 of the body, with 8 stitches between the markers.
Attach the yarn in the first marked spot, CH 4, HDC in the second CH from the hook and next two, make a SL ST in the same stitch where the yarn is attached. CH 4 again, HDC in the second CH from the hook and next two, make a SL ST in the same stitch where the yarn is attached. CH 4 again, HDC in the second CH from the hook and next two, make a SL ST in the same stitch where the yarn is attached. Fasten off, hide the tails inside the body, connect and sew them together.
Your chick is ready!