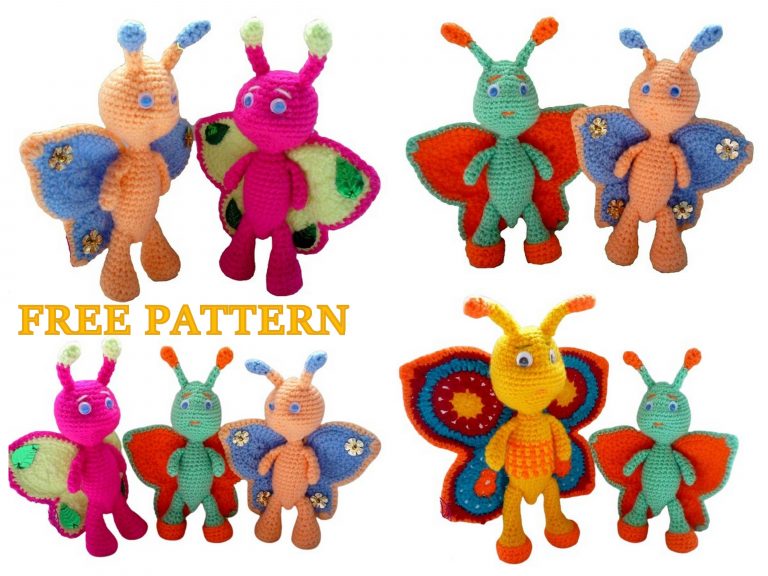
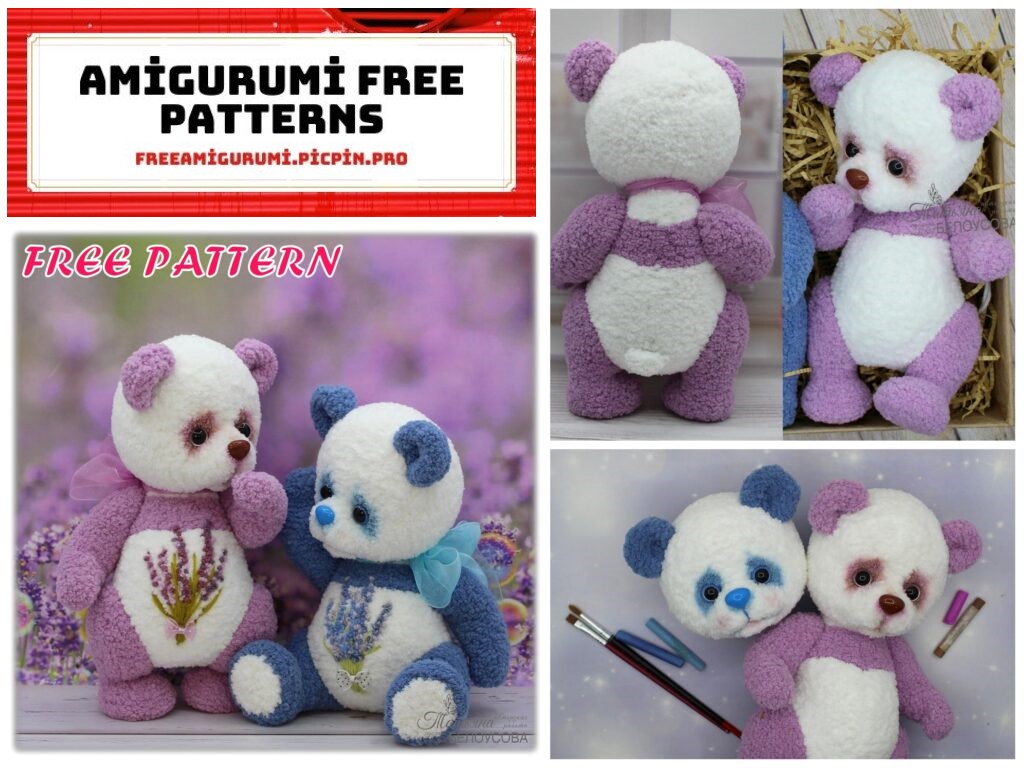
Plush Panda Knitting Amigurumi Free Pattern
We continue to bring you the perfect amigurumi free patterns. In this article, we shared with you a wonderful amigurumi panda pattern.
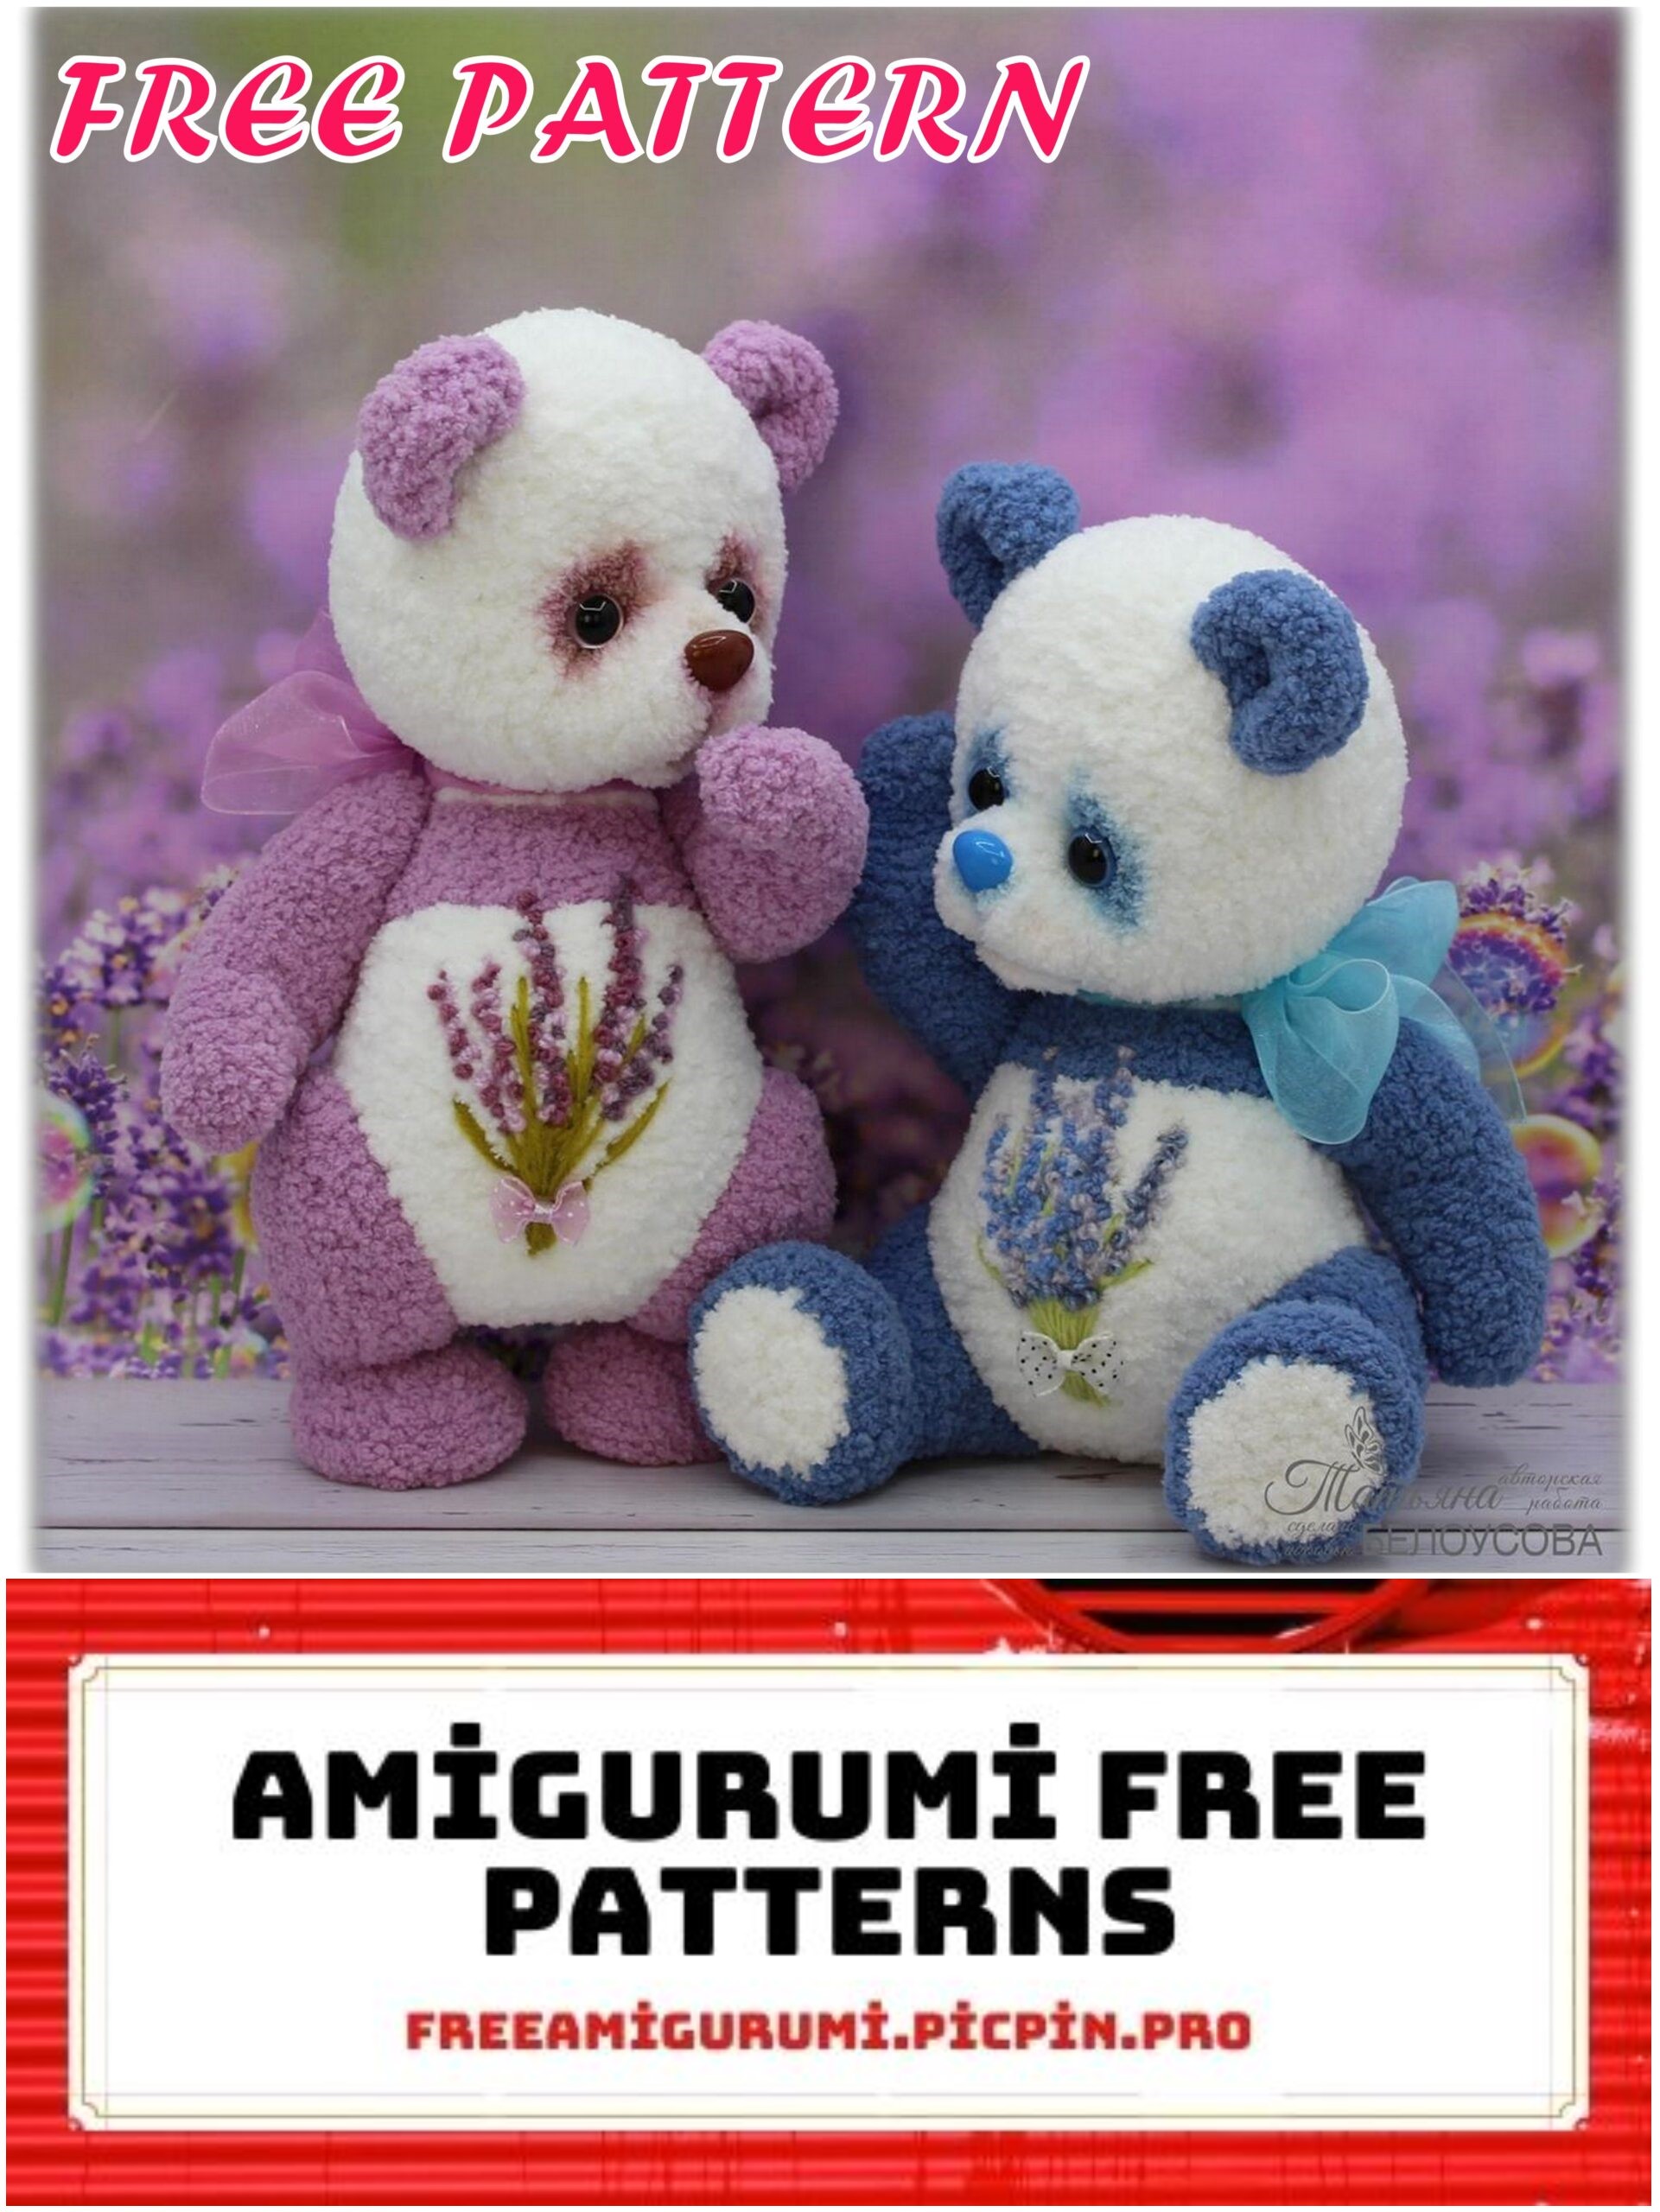
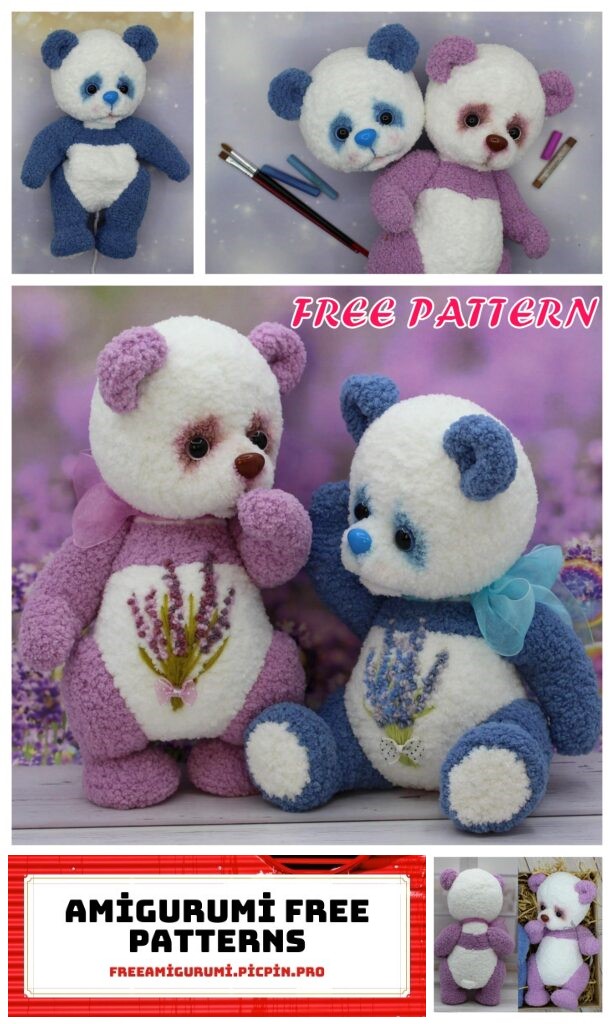
The bears are 29 cm tall.
Abbreviations:
– knit – knitting
– purl – purl
– cr – edging – we knit as usual, remove the first loop, knit the last purl. Unless otherwise stated.
– hosiery – if we knit on 2 knitting needles – 1 row of front loops, one row of purl loops. If we knit in a circle – only the front loops.
– garter stitch – all front loops, if we knit in a circle, then 1 row of front loops, 1 row of purl loops.
– inc, knit from 1 pet 2 – (knit 2 from 1 loop, behind the front and back walls)
– dec – knit decrease – 2 loops together front, dec purl – 2 loops together with purl
– 3 sts vm knit – knit 3 stitches together with a front stitch
– (…) * 2p – brackets indicate repetition of actions. Repeat loops in brackets 2 times.
After the = sign is the total number of loops!
Instruments.
Stocking needles No. 2.5 – 5 pcs. Hook number 2.
Markers. You can use regular pins, or colored yarn.
Thick needles for sewing parts and embroidery, ordinary sewing needle.
Scissors.
Glue “Moment crystal”.
Small pliers, or split pin driver.
Tweezers for stuffing in hard-to-reach places.
Hot melt glue.
Tint brush.
Materials.
For the body Softy Plus – 100% micropolyester, 100 g. 120 m – color No. 55 (white) from 60 g, color No. 374,
or 47 – from 60 gr.
For the cap, Nako Bebe Mix yarn – 100 g – 370 m, color No. 86841 – a little over 30 g, a little
lilac for bubo.
Spout 19 * 14 mm.
Eyes with a diameter of 15 mm.
For fastening hands, t-pins 2.5 * 28 mm – 2 pcs, washers 4 * 12 mm – 4 pcs, discs 35 mm 4 pcs.
For legs, t-pins 2.5 * 28 mm – 2 pcs, washers 4 * 12 mm – 4 pcs, discs with a diameter of 55 mm – 4 pcs.
To fix the head, a t-pin 2.5 * 28 mm – 1 pc, washers 4 * 12 mm – 2 pcs, discs 35 mm – 2 pcs.
Or joints – for handles, diameter 35 mm – 2 pcs, for legs – diameter 55 mm – 2 pcs, for head –
diameter 35 mm – 1 pc.
Filling holofiber – synthetic balls.
For insoles in feet – cardboard, or any other material.
Wire for reinforcing the legs.
Pastel for tinting.
Ribbon, 5 cm wide for a bow on the neck, a small bow or thin ribbon for decoration
embroidery.
For embroidery.
For flowers, lilac panda – Angora Gold NEW yarn from Alize – in 100 gr – 550 m, color No. 28, 257, 27.
Blue panda – color No. 40, 71, 221. For leaves – VITA “BRILLIANT” – in 100 g – 380 m, color No. 4964.
Angora Delicate – 100 gr – 500 m, color no. 1110.
ATTENTION, VERY IMPORTANT! We knit all the increments from the loop.
See legend for details.
We knit bears and not tight and not weak. The loops should knit loosely, but the knitting needle itself should not jump out of the loops.
The torso. 1 piece.
To form a hole through which we will attach the paws, head and stuff
down first we knit on 2 knitting needles, then on 4 knitting needles in a circle.
We put all markers on the seamy side, it will serve as the front side.
The basis is hosiery. We start with the ass. The beginning of the row runs along the back.
Cast on 8 sts with white yarn. We knit on 2 needles.
1 row: – (inc) * 8 times = 16 Increases from the edge.
2nd row: – cr, 14 purl, cr = 16
3rd row: – (1 knit, inc) * 8 times = 24 Increases together with edging.
4th row: – cr, 22 purl, cr = 24
5 row: – cr, (inc, 3 knit) * 5 times, inc, 1 knit, cr = 30
6 row: – cr, 28 purl, cr = 30
7 row: – cr, 1 knit, (inc, 4 knit) * 5 times, inc, 1 knit, cr = 36
8 row: – cr, 34 purl, cr = 36
9th row: – cr, 2 knit, (inc, 5 knit) * 5 times, inc, 1 knit, cr = 42
10 row: – cr, 40 purl, cr = 42
11 row: – cr. 8 knit, inc, (3knit, inc) * 2 times, 2 knit, (inc) * 2 times, 2 knit, (inc, 3 knit) * 2 times, inc, 8 knit, cr = 50
12th row: – cr, 48 purl, cr = 50
13 row: – cr, 12 knit, marker (here we will attach the legs), 24 knit, marker (legs), 12 knit, cr = 50
For those who, instead of cotter pins, use joints for toys in row 13, you need to do
yarns, which are knitted in the next row so that a hole is formed –
– cr, 12 knit, yarn, dec, 20 knit, dec, yarn, 12 knit, cr = 50
14,16 row: – cr, 48 purl, cr = 50
15.17 row: – cr, 48 knit, cr = 50
Distribute loops on 4 needles (13,12,12,13). Then we knit in a circle:
18 row: – (1 knit, dec, * 2 times, 15 knit, (inc, 1 knit) * 2 times, (1 knit, inc) * 2 times, 15 knit, (dec, 1 knit) * 2 times = 50
19 – 31 rows: – 13 knit rows
32 row: – 14 knit, (dec, 2 knit) * 6 times, 12 knit = 44
33,34 row: – knit
35 row: – (dec, 9 knit) * 4 times = 40
36 row: – cut off the white thread, knit colored – purl = 40
37 row: – knit
38 row: – (8 knit, dec, * 4 times = 36
Row 39: – knit
40 row: – (4 knit, dec, * 6 times = 30
Row 41 – 48: – 8 knit rows. In row 41, mark 8 and 23 loops – here we will attach the handles. For
for those who use 41 row joints, we knit like this:
– 7 knit, yarn, dec, 12 knit, dec, yarn, 7 knit = 30. Here, and further on to the next row of yarns, we knit so that a hole is formed, through which you need to remove the screw from the joint.
49 row: cut the colored thread, knit white – purl = 30
50 row: – (dec, 3 knit) * 6 times = 24
51 row: – knit
52 row: knit rotary rows to form the neck. Here we go through the beginning
row. After we connect, you need to return to the place
– 7 knit, turn, 1 pet to remove, 13 purl, turn,
1 st to remove, 11 knit, turn, 1 st to remove, 9 purl, turn,
1 st to remove, 8 knit, turn, 1 st to remove, 7 purl, turn,
Remove 1 st, knit to the beginning of the row
53 row: – knit
54 row: – (2 knit, dec, * 6 times, = 18
55 row: – knit
56 row: – (dec, 1 knit) * 6 times = 12
Row 57: – knit
58 row: – (dec, * 6 times.
For cotter pin fastening – cut the thread, pull through all the loops, pull off, fasten.
Mark the center where we tightened the loops, here then we will remove the cotter pin and attach the head. Turn the part to the wrong side.
For fastening with joints – cut off the thread, stretch it through all the loops. No need to tighten!
Turn the part to the wrong side. After removing the joint, tighten and secure.
Legs. 2 details.
First we knit on 2 knitting needles, then on 4 knitting needles in a circle. The basis is hosiery.
We put all markers on the seamy side, it will serve as the front side.
Both knit the same, except for the withdrawal of joints or cotter pins. We start with the sole.
The beginning of the row runs along the back of the leg, in the middle.
Cast on 8 loops with colored or white (if you need to highlight the sole) yarn. We knit for 2
knitting needles.
1 row: – (inc) * 8 times = 16
2nd row: – cr, 14 purl, cr = 16
3rd row: – cr, 2 knit, (inc, 1 knit) * 2 times, (inc) * 2 times, (1 knit, inc) * 2 times, 2 knit, cr = 22
4th row: – cr, 20 purl, cr = 22
5 row: – the white thread can be cut off, we knit a colored thread – cr, 1 knit, (inc, 2 knit) * 3 times, (2 knit, inc) * 3 times, 1 knit, cr = 28
6 row: – separate the sole – cr, 26 knit, cr = 28
7 row: – cr, 26 purl, cr = 28
8 row: – distribute the loops on 4 knitting needles (7 pet each), knit in a circle – 1 row of knit
To form a sock, we knit rotary rows:
9 row: – 23 knit, turn, 1 st to remove, 17 purl, turn, 1 st to remove, knit to the beginning of the row
10-12 row: – 3 knit rows
13 row: – 8 knit, (dec, * 6 times, 8 knit = 22
14th row: – 7 knit, (dec, * 4 times, 7 knit = 18
15 row: – knit
16 row: – dec, 16 knit = 17
17 row: – knit
18th row: – 8 knit, inc, 8 knit = 18
19, 20 row: – knit
21 row: – 6 knit, inc, 1 knit, (inc) * 2 times, 1 knit, inc, 6 knit = 22
Rows 22 – 25: – 4 knit rows
26 row: – inc, 9 knit, (inc) * 2 times, 9 knit, inc, = 26
27 – 35 rows: – 9 knit rows
36 row: 7 knit, marker (here we will draw the cotter pin), 19 knit = 26. For the second leg we knit mirror – 19 knit, marker, 7 knit For those who use joints 36 row – 6 knit, dec, yarn, 18 knit = 26. For the second leg we knit mirrored – 18 knit, yarn, dec, 6 knit = 26
37, 38 row: – knit
39 row: – (11 knit, dec, * 2 times = 24
40 row: – knit
41 row: – (2 knit, dec, * 6 times = 18
42 – 44 row: – 3 knit rows
45 row: – (1 knit, dec, * 6 times = 12
46 row: – knit
47 row: – (dec, * 6 times
Cut the thread, pull it through all the loops. Secure.
Turn out the work, observing the right-left insert the cotter pin with the disc and washer, or joint,
fill not very tight! Especially at the top of the disc. The leg should be flat and should be like
would grow together with the body and not protrude. You can make a cardboard insole or
other material. Sew the sole.
Pens.
We knit on 4 knitting needles in a circle. The basis is hosiery.
We put all markers on the seamy side, it will serve as the front side.
Both knit the same, except for the withdrawal of joints or cotter pins.
We start with the palm.
The beginning of the row runs along the back of the foot, in the middle.
Cast on 6 loops with colored yarn, distribute over 3 or 4 knitting needles. We knit in a circle.
1 row: – (inc) * 6 times = 12
2nd row: – knit
3rd row: – (5 knit, inc) * 2 times = 14
Rows 4-9: – 6 knit rows
10 row: – inc, 3 knit, (inc, 4 knit) * 2 times = 17
Rows 11 – 15: – 5 knit rows
16 row: – 4 knit, inc, (5knit, inc) * 2 times = 20
17 – 20 row: – 4 knit rows
21 row: – 5 knit, inc, 8 knit, inc, 5 knit = 22
Elbow, swivel rows:
22 row: – 4 knit, turn, remove 1 pet, 7 purl, turn,
1 st to remove, 8 knit, turn, 1 st to remove, 9 purl, turn,
Remove 1 st, knit to the beginning of the row
23 – 32 row: – 10 knit rows, 22 stitches on the needles
33 row: – 5 knit, marker (here we will display the cotter pin), 17 knit = 22, for the second handle mirrored – 17 knit, marker, 5 knit = 22
For those who use joints row 33 – 4 knit, dec, yarn, 16 knit = 22, for the second handle
mirrored – 16 knit, yarn, dec, 4 knit = 22
34 – 36 row: – 3 knit rows
37 row: – (4 knit, dec, 3 knit, dec, * 2 times = 18
38,39 row: – knit
40 row: – (1 knit, dec, * 6 times = 12
41 row: – knit – type of legs in photo number 1
Fasten the thread at the beginning of the row, without removing the needles, turn the foot to the wrong side.
Photo № 2 – make a frame from wire with eyelets for a cotter pin and a foot. Put the washer, disc, frame on the cotter pin, observing right-left side of the paws. Fill, but not tight!
42 row: – (dec, * 6 times = 6
Cut the thread, pull it through all the loops. Fasten and hide in the product. Legs are ready!
Ears.
We knit on 4 knitting needles in a circle.
The basis is hosiery. Both ears fit the same way.
We start from the bottom. The beginning of the row runs along the edge of the ear.
Cast on 26 loops with colored yarn. Leave the tip a little more than 30 cm.It will come in handy for
ear design. Distribute on 4 knitting needles, knit in a circle.
1 – 3 row: – knit
4th row: – dec, 9 knit, (dec, * 2 times, 9 knit, dec = 22
5 row: – knit
6 row: – dec, 7 knit, (dec, * 2 times, 7 knit, dec = 18
7 row: – dec, 5 knit, (dec, * 2 times, 5 knit, dec = 14
8 row: – dec, 3 knit, (dec, * 2 times, 3 knit, dec = 10
9th row: – dec, 1 knit, (dec, * 2 times, 1 knit, dec = 6
Cut the thread, pull it through all the loops. Secure. Turn the ears to the wrong side (photo No. 1).
- Sew crochet.
- Fold the edges of the ear inwards (see photo) and secure with the same thread.
Head. 1 piece.
We start with the spout. We knit in a circle.
We put all markers on the seamy side, it will serve as the front side.
The basis is hosiery.
The beginning of the row runs along the back of the head, in the middle.
Cast on 6 loops with white yarn, distribute on 4 knitting needles, knit in a circle.
1 row: – (inc) * 6 times = 12
2nd row: – knit
3rd row: – (1 knit, inc) * 6 times = 18
4th row: – knit
5 row: – (inc, 2 knit) * 6 times = 24
6-9 row: – 4 knit rows
Lower lip, swivel rows. Mark the row for sewing with a marker.
10 row: – 4 knit, turn, 1 pet remove 3 purl, marker, 4 purl, turn,
– 1 st to remove, 6 knit, turn, 1 st to remove, 5 purl, turn,
– Remove 1 st, 4 knit, turn, remove 1, purl, turn, remove 1 st, knit to the beginning of the row.
11 row: – 5 knit, (inc, 1 knit) * 3 times, inc, marker (center of the muzzle), inc, (1 knit, inc) * 3 times, 5 knit = 32
Lower lip, swivel rows. Mark the row for sewing with a marker.
12 row: – 3 knit, turn, 1 pet remove 5 purl, turn,
– 1 st to remove, 6 knit, turn, 1 st to remove, 7 purl, turn,
– 1 st to remove, 8 knit, turn, 1 st to remove, 4 purl, marker, 5 purl, turn,
– 1 st to remove, knit to the beginning of the row
13 row: – knit
14th row: – 5 knit, (inc, 1 knit) * 5 times, (inc) * 2 times, (1 knit, inc) * 5 times, 5 knit = 44
Row 15-17: – 3 knit rows
We design the lower lip:
We turn the work to the front side, continue knitting:
18th row: – 2 knit, dec, 6 knit, (inc, 3 knit) * 3 times, (3 knit, inc) * 3 times, 6 knit, dec, 2 knit = 48
19, 20 row: – knit
21 row: – (7 knit, inc) * 3 times, (inc, 7 knit) * 3 times = 54
Rows 22 – 38: – 17 knit rows. In the 27th row, mark the beginning of the row with a marker (for articular attachment – yarn, dec, 52 knit) Here we will attach the head to the body.
39 row: – (dec, 7 knit) * 6 times = 48
40 row: – knit
41 row: – (6 knit, dec, * 6 times = 42
42 row: – knit
43 row: – (dec, 5 knit) * 6 times = 36
44 row: – knit
45 row: – (4 knit, dec, * 6 times = 30
46 row: – knit
47 row: – (dec, 3 knit) * 6 times = 24
48 row: – knit
49 row: – (2 knit, dec, * 6 times = 18
50 row: – knit
Cut the thread, pull through all the loops. No need to tighten! Through this hole we will
stuff your head.
Close the hole at the beginning of the row, fasten all the threads well. Turn the part to the wrong side.
In the photo of the muzzle design, I specially left the knitting needles so that the head lay straight and all the tightenings were visible. Although, you can also not shoot. After all the tightenings, if necessary, you can add fluff or remove excess.
Registration muzzles:
№ 1 – In the place marked with a marker, remove the cotter pin or joint. We fill the muzzle tightly enough. Use a knitting needle or crochet to pull the fluff to the nose and cheeks, especially to the bottom. The muzzle should be slightly triangular.
2 – Will go down from the marker 1 row. All eye pins will be located at the level of this row. Then, we retreat to the right by 14 mm – point number 1, and another 12 mm to the right – point 2. For the second eye, do the same. The design of the face can be changed, if it goes down one more row below, then it will be shorter, if higher, then it will be longer.
3 – Insert the needle deep in the mouth, in the middle and draw it out at point # 1. Leave the tip to secure the first and last tightening.
4 – Then, we introduce the needle to point # 2, and come back. We tighten, we tie both ends.
No. 5,6 – We repeat this tightening, but only in the other direction. Here and subsequent tightenings for reliability can be repeated twice. We do not cut the thread, then there will be tightenings for the muzzle.
№7 – We introduce the needle to the point where we have the typesetting row, and go back to the center of the mouth. Pull, but not hard! With this stitch we form a groove to separate the muzzle.
With the next stitches, we deepen this groove. The stitches can be sewn freely.
8 – Move up about 1 cm and withdraw the needle in the eye tightening area.
№9,10 – Come back, pull off.
№ 10,11 – Repeat the same thing, but only we bring all the tightenings from the nose to the area of the second eye.
Thanks to these straps, the muzzle will go down. It is not necessary to do these tightening, it is a matter of taste, they just change the position of the head.
13 – Insert the needle in the middle at the edge of the disc and draw it out in the area of the eye pads.
14 – Making a small stitch and go back.
№15.16 – We do the same, but only from the other side. Pull the threads, tie and hide in the product.
№ 17 – Stuff the head well, with the remaining tip crochet the hole.
№18 – This is how the muzzle looks like after all the tightening.
19 – Trying on the eyes and nose. It is best to glue them after applying the tone.
№ 20 – If the eyes are not deep enough, you can make another tightening. Insert the needle in the occipital region, in the middle near the edge of the disc, and pull out into the eye pins. Make a small stitch and come back. Repeat all this the other way. Pull off the ends of the threads, tie and hide in the product.
No. 21.22 – sew on the ears.
Tail.
We knit on 2 needles. The basis is hosiery.
Cast on 5 loops. Knit 6 rows of hosiery (1 row knit, 1 row purl).
Close the loops, cut the thread so long that it is enough to sew and sew to the butt. Fold the tail in half and sew.
Assembly and body design.
Apply the tone in the eye area, the inside of the mouth, nose and cheeks with dry pastels.
You can emphasize the groove on the face – embroider a strip from nose to mouth.
After that, you can glue the eyes and nose with hot glue or “Moment crystal”. It is better to glue eyes with colored staining with hot glue, the paint can be damaged from the moment. If you glue with the Moment, then very carefully, apply only to the leg, and insert into the hole.
Use discs to fasten the head and limbs to the body. Fill tightly, especially near the neck and be sure to pull the fluff up to the belly, it should stick out. Sew up the hole in the ass, sew on the tail.
Cap.
We knit on 4 knitting needles in a circle. The basis is hosiery. Knitting needles number 2.5.
The length of the cap can be arbitrary. You can decrease or increase the number of rows between decreases.
Cast on 80 stitches, distribute on 4 knitting needles, 20 stitches each.
1 – 20 row: – knit
21 row: knit holes for ears – 23 knit, close 8 pet, 18 knit, close 8 pet, 23 knit = 80
22 row: – 23 knit, air loops dial 8 pet, 18 knit, dial 8 pet, 23 knit = 80
23 – 30 rows: – 8 knit rows
31 row: – 20 knit, dec, 36 knit, dec, 20 knit = 78
32 row: – knit
33 row: – (dec, 11 knit) * 6 times = 72
34 – 38 row: – 5 knit rows
39 row: – (10 knit, dec, * 6 times = 66
40 – 45 row: 6 knit rows
46 row: – (dec, 9 knit) * 6 times = 60
Row 47 – 51: – 5 knit rows
52 row: – (8 knit, dec, * 6 times = 54
Row 53 – 57: – 5 knit rows
58 row: – (dec, 7 knit) * 6 times = 48
Row 59 – 63: – 5 knit rows
64 row: – (6 knit, dec, * 6 times = 42
Row 65 – 69: – 5 knit rows
70 row: – (dec, 5 knit) * 6 times = 36
Row 71 – 76: – 6 knit rows
77 row: – (4 knit, dec, * 6 times = 30
78 – 100 row: – 23 knit rows
101 row: – (dec, 8 knit) * 3 times = 27
Row 102 – 111: – 10 knit rows
112 row: – (7 knit, dec, * 3 times = 24
113 – 122 row: – 10 knit rows
123 row: – (dec, 6 knit) * 3 times = 21
Row 124 – 133: – 10 knit rows
134 row: – (5 knit, dec, * 3 times = 18
135-149 row: 15 knit rows
150 row: – (4 knit, dec, * 3 times = 15
Row 151 – 175: – 25 knit rows
176 row: – (dec, 3 knit) * 3 times = 12
177 – 201 row: – 25 knit rows
202 row: – (2 knit, dec, * 3 times = 9
Row 203 – 252: – 50 rows of knit stitches
Cut the thread, pull it through all the loops. Fasten, hide in the product. Make a bubo from the yarn and attach it to the cap.
The hat is ready!
Embroidery.
We embroider all the flowers with the “French knot”. See photo. Here are some small tips to make the embroidery successful. Only unlike the classic knot, where the thread is wrapped no more than 2 times around the needle, I wind it 3-4 times. We need this so that the knot does not sink in fluffy yarn and is visible on toys.
- Leave a distance between the beginning of the stitch and where you insert the needle into the body, otherwise your knot will go to the wrong side.
- Pull the thread slowly and carefully. If you do this quickly, knots can form on the thread, which are then difficult to untangle.
- Keep the working thread taut until the last moment. This will not only save the thread from tangling, but will also allow you to make the knots of the correct clear shape.
- Use a needle with a sharp point. Such a needle easily passes through the warp threads,
which allows you to enter it at any convenient place. While embroidery needles
with a blunt end can only enter between the warp threads.
– No. 1 – we fasten the thread.
– No. 2 and 3 – we embroider twigs. It is better to lay the thread in the toy.
– No. 4 – we wind 4 turns on the needle.
– No. 5 – we introduce the needle in rows with our first thread and take it out in the place where it will be
the second knot is located.
– No. 6 – this is how the finished bundle looks like.
No. 7, 8 – we embroider the second knot in the same way.
No. 9 – this is how we embroider all the branches.
No. 10 – change the thread and embroider more knots.
№ 11 – we repeat the same knots, but only in the third color.
No. 12 – we attach the thread and begin to embroider the stems.
№ 13,14,15 – embroider the stems with short and long stitches. Embroider
imitation of leaves.
№ 16 – we connect all the stems, we make an imitation of a bouquet. The thread goes through without touching
belly, just collect all the strings together.
No. 17 – the embroidery is ready!
No. 18 – we embroider the blue bear in the same way, only in a different color.
We tie a ribbon and glue a bow.
The bears are ready!
Enjoy your knitting!