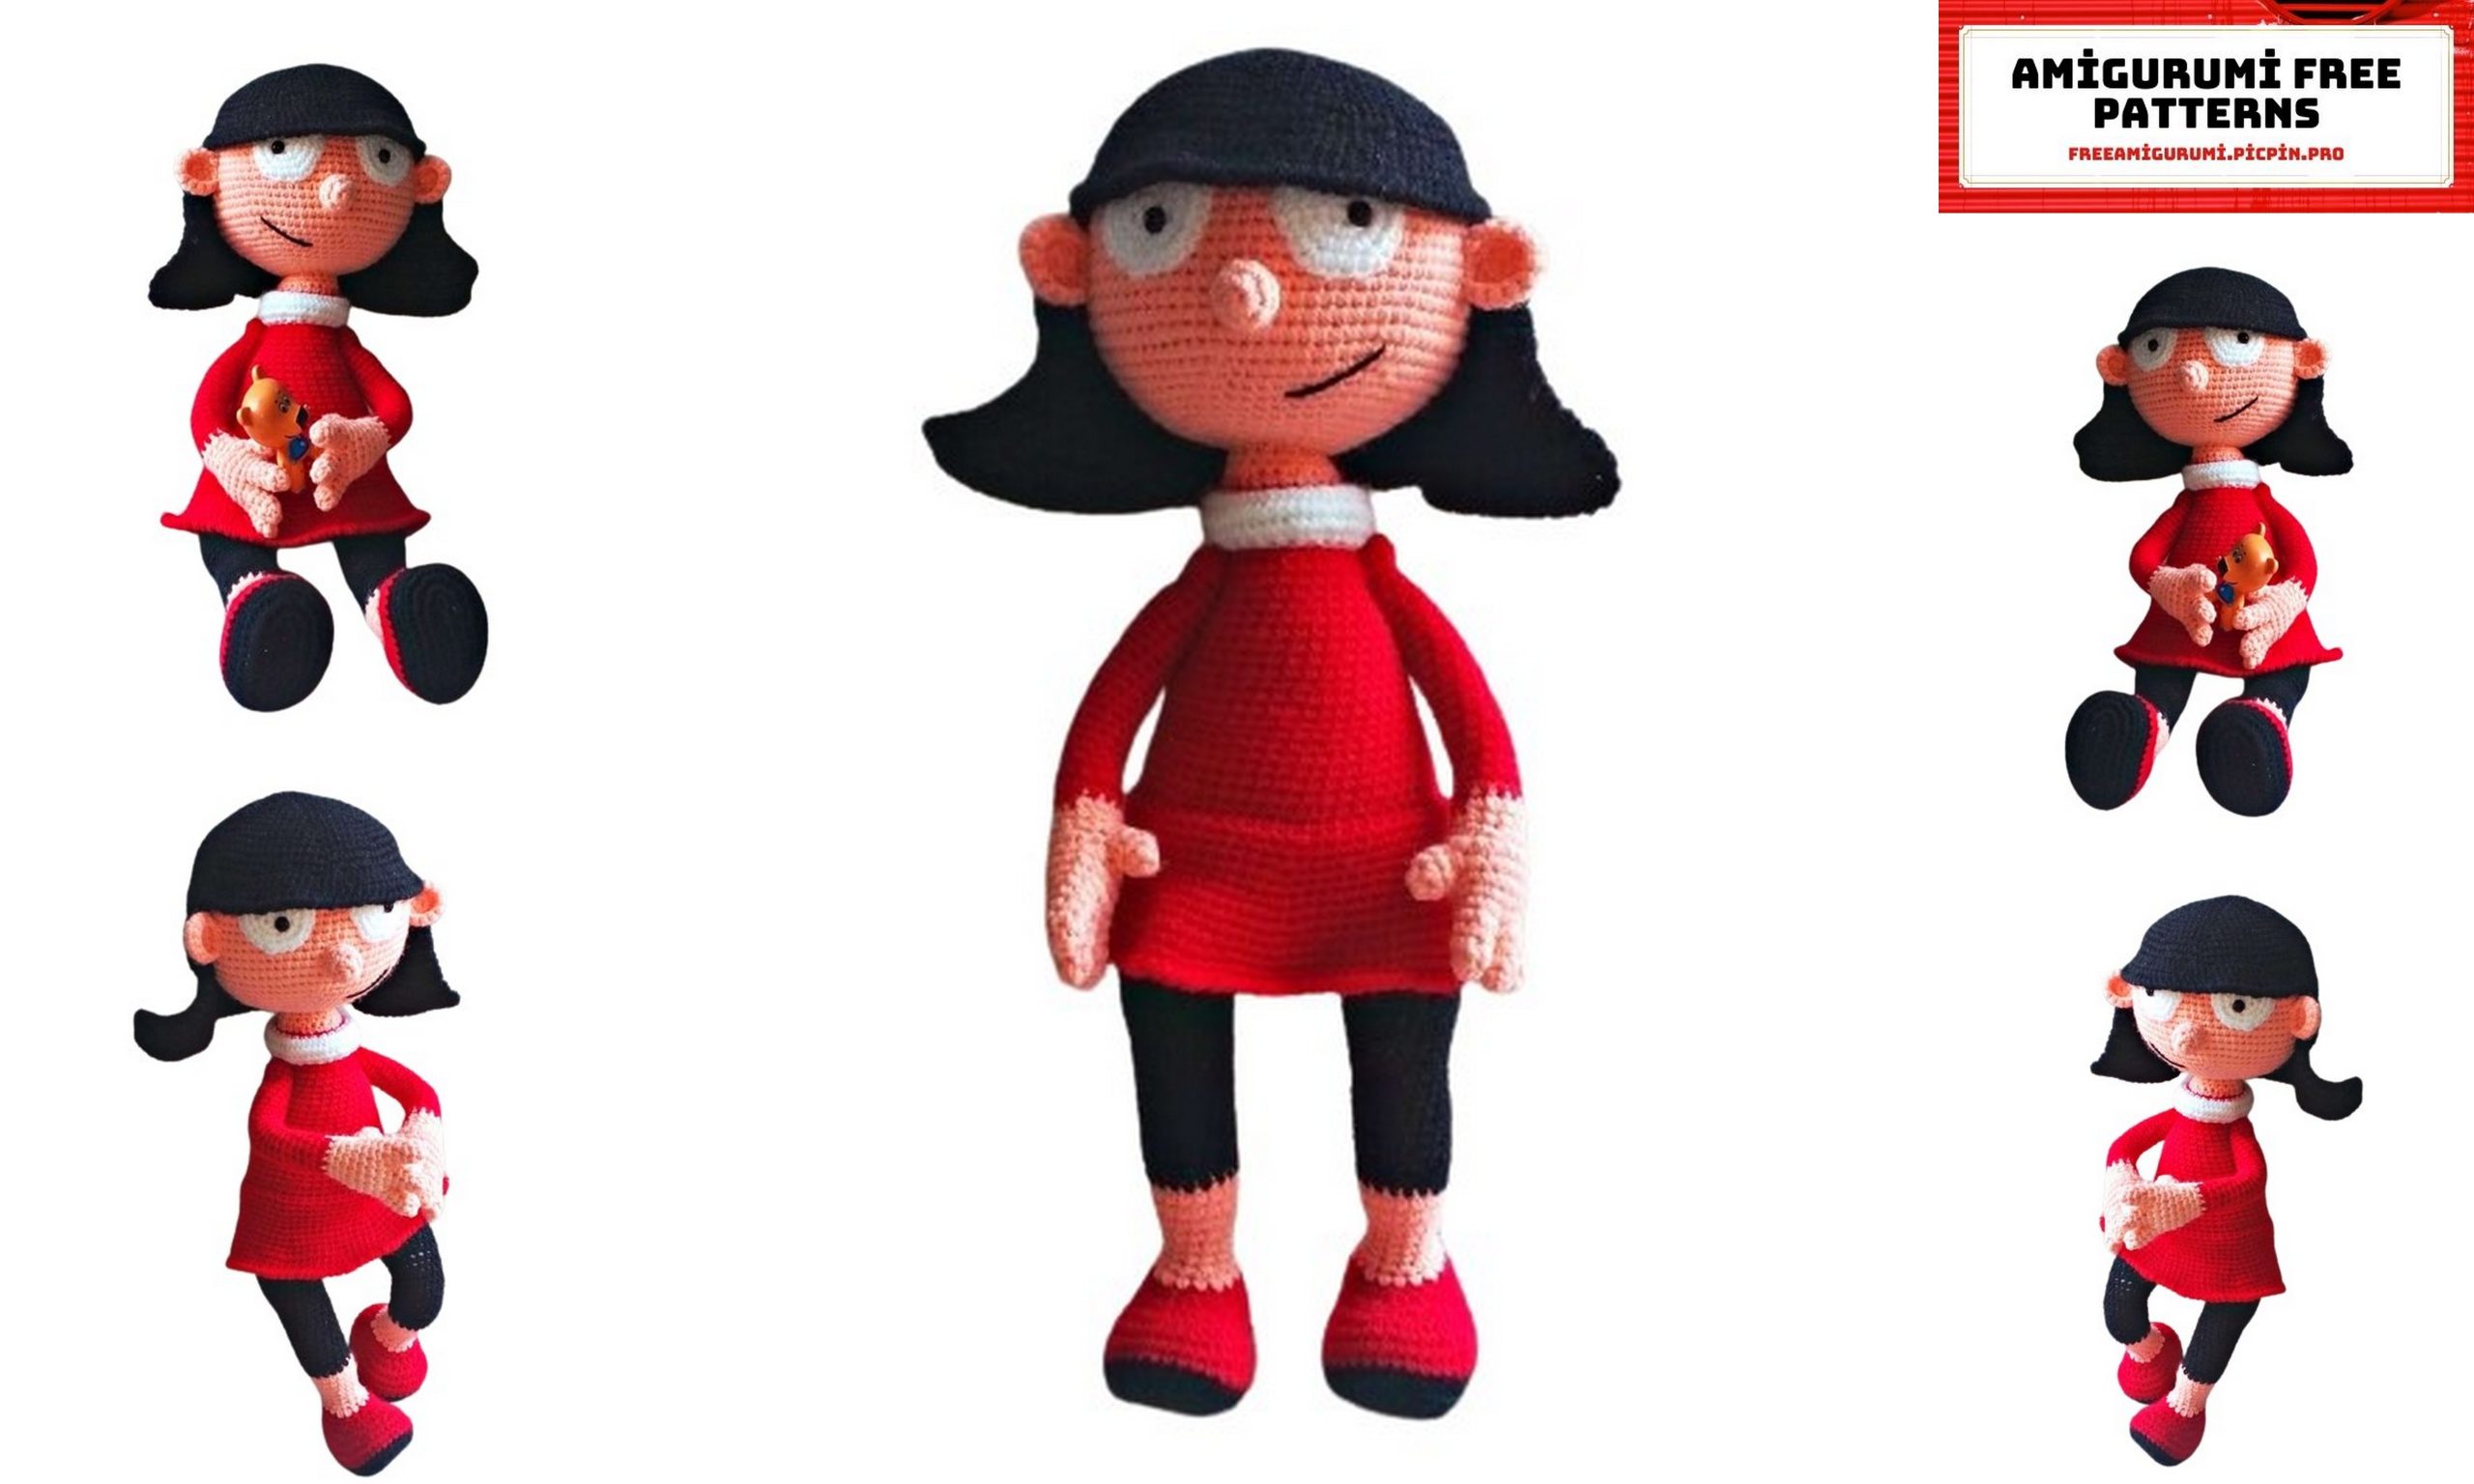
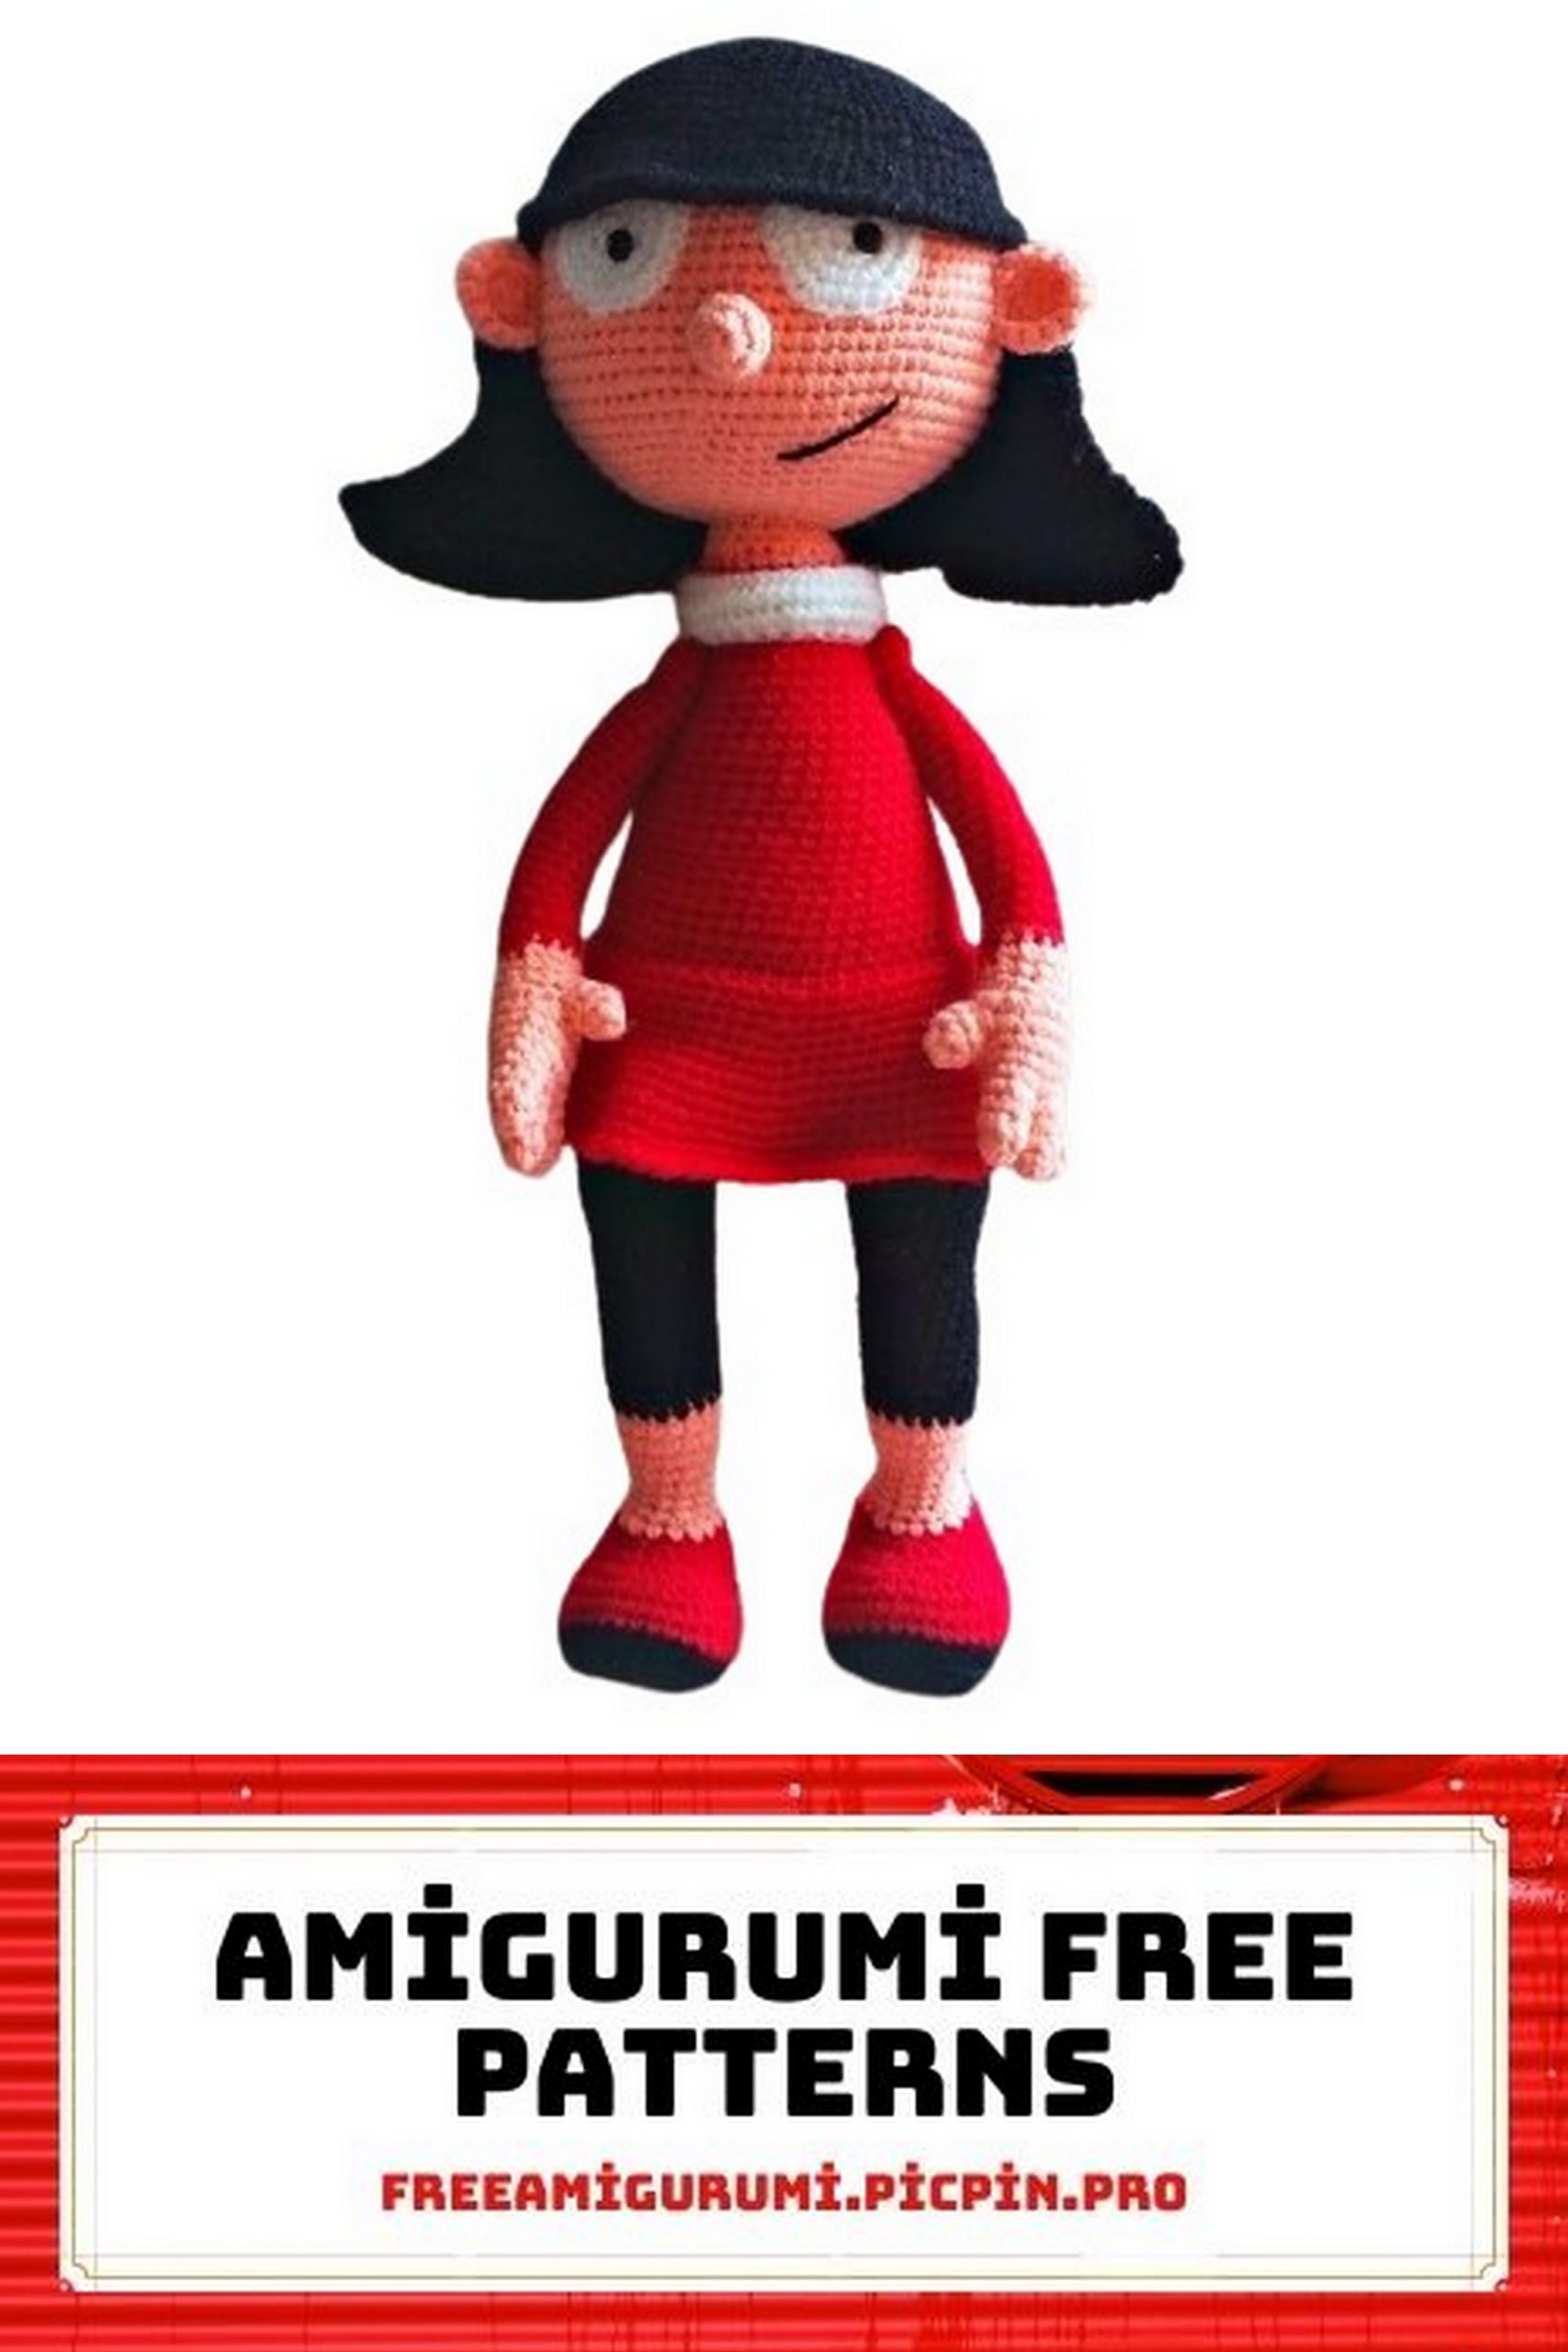
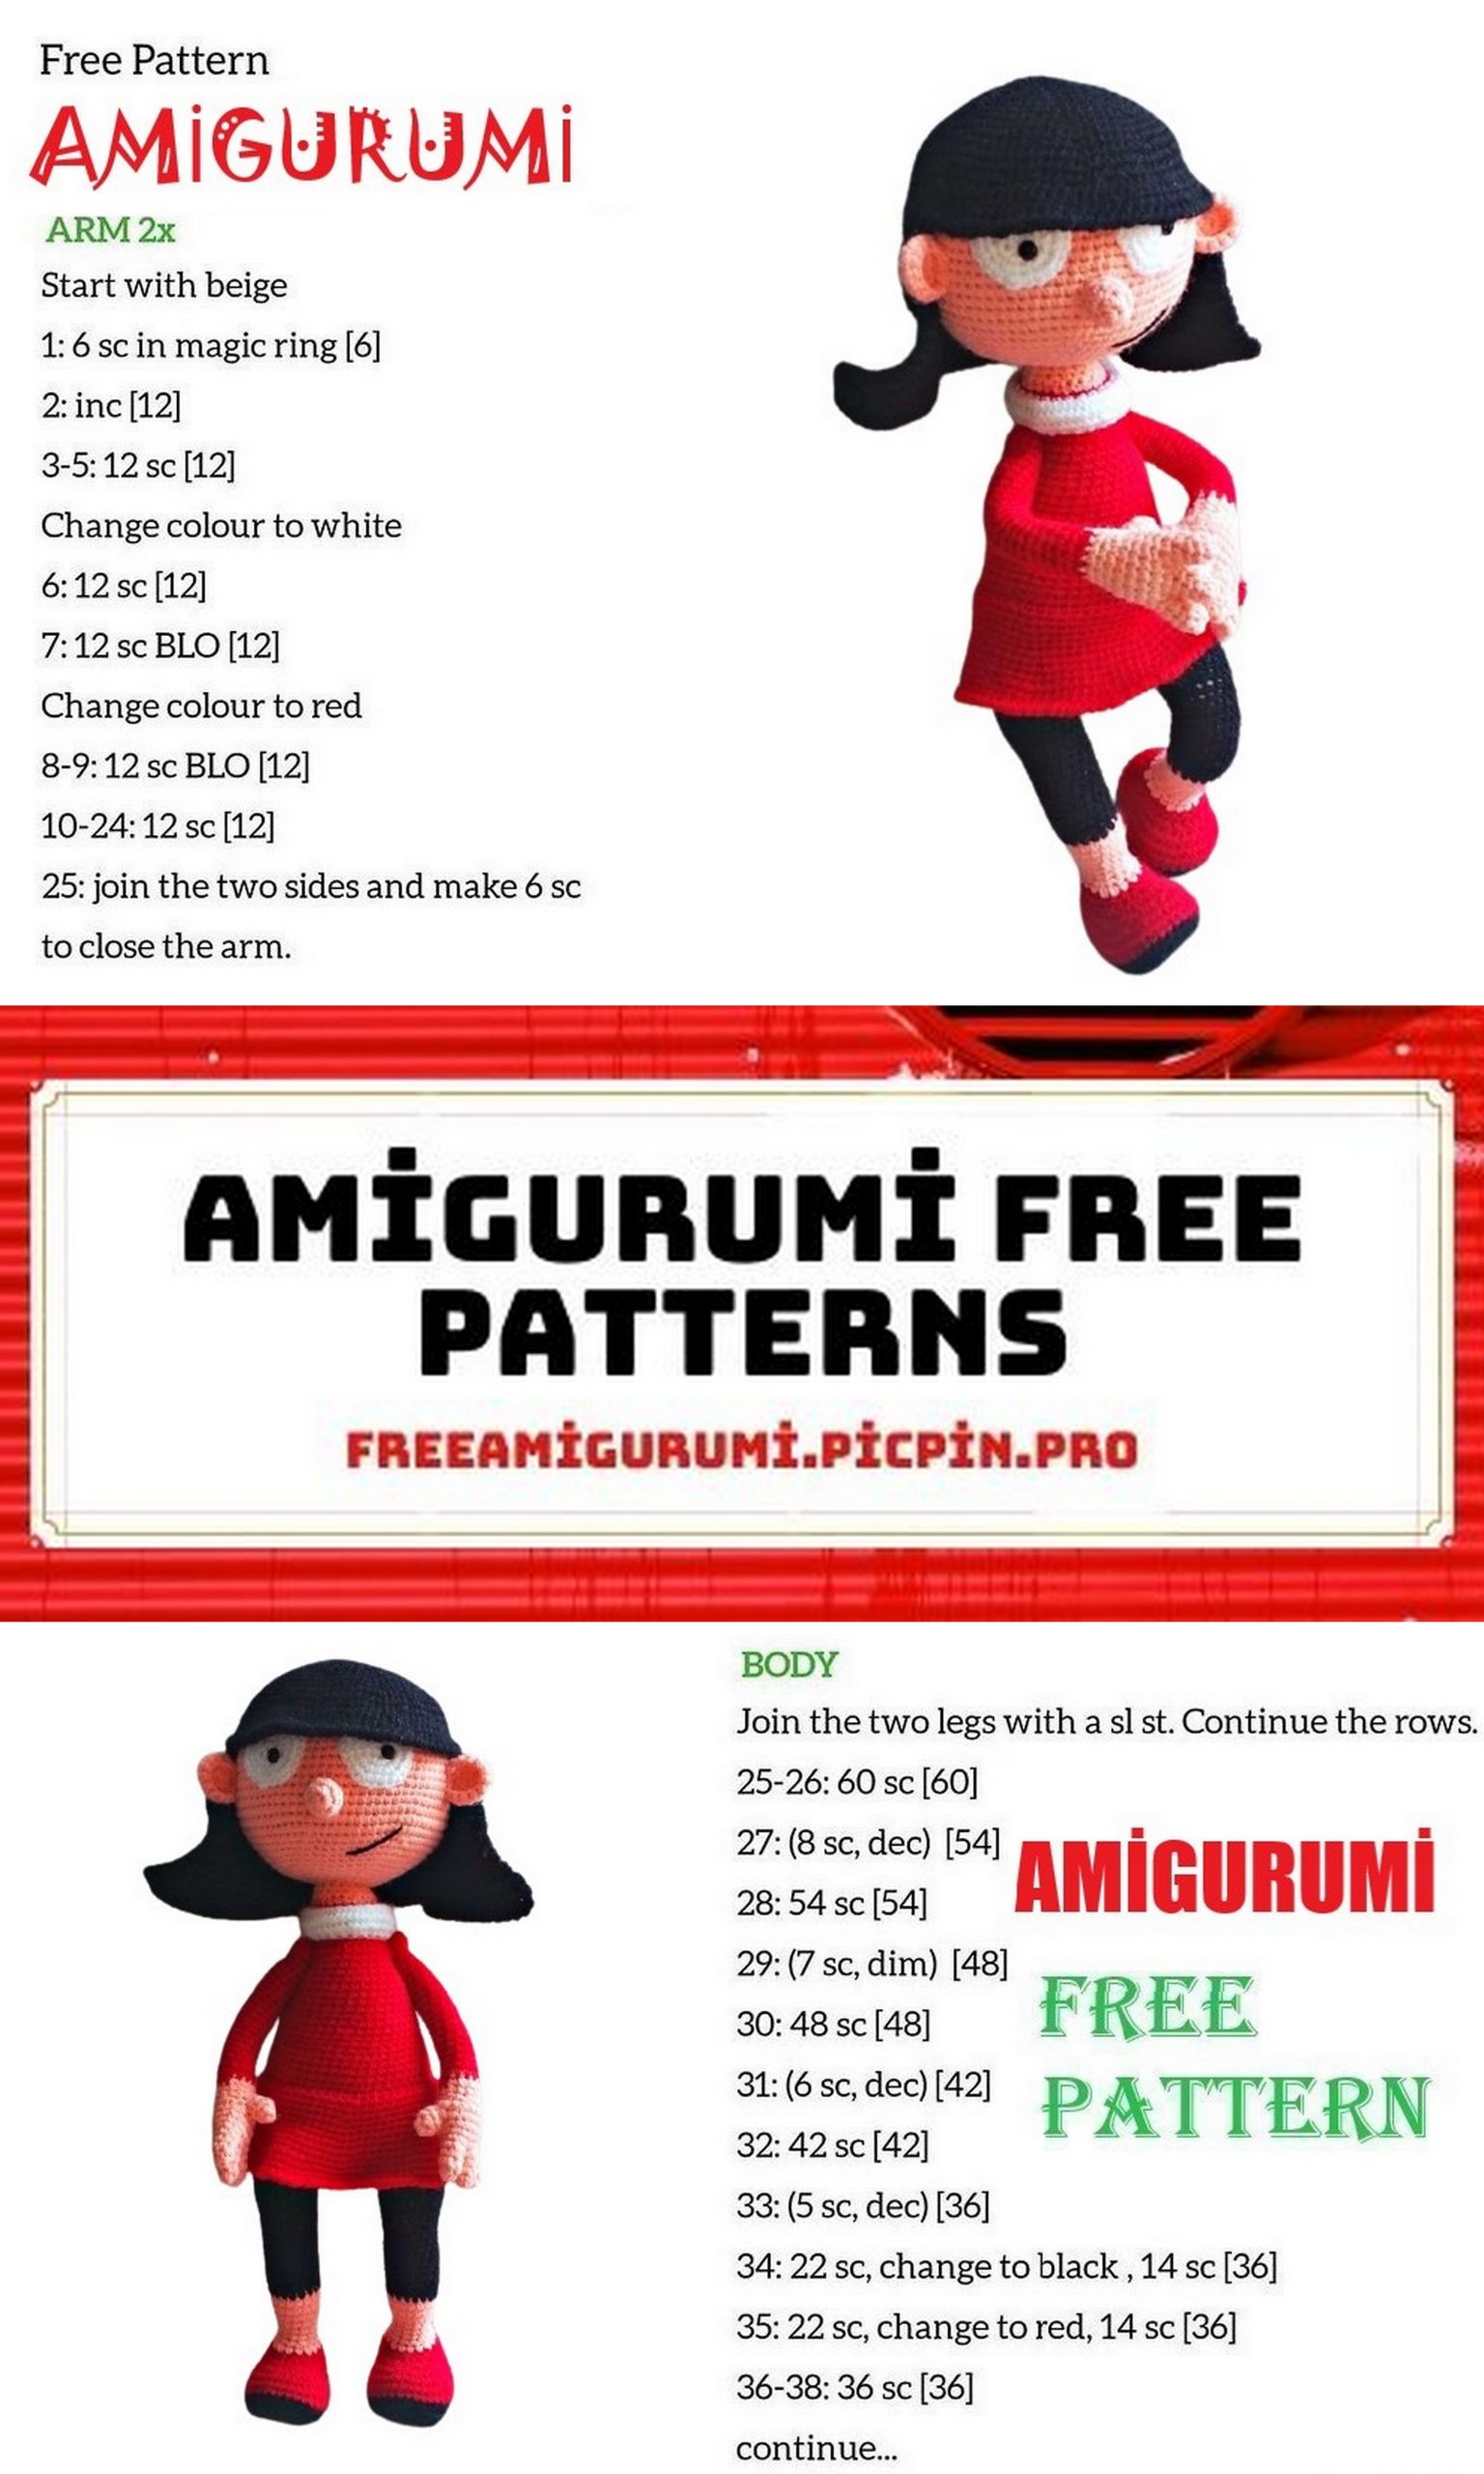
Free Amigurumi Doll Ronda Pattern: Create Your Own Crochet Doll
Welcome to the enchanting world of amigurumi! If you’re a crochet enthusiast with a passion for crafting unique and adorable dolls, you’re in for a treat. In this post, we’re thrilled to share a free amigurumi doll pattern featuring the lovable character, Ronda.
Amigurumi, the Japanese art of creating small, stuffed creatures with crochet or knitting, offers endless possibilities for creativity. Whether you’re a beginner or an experienced crocheter, this Ronda amigurumi doll free pattern is perfect for you. With our detailed instructions, you’ll be able to bring this charming doll to life in no time.
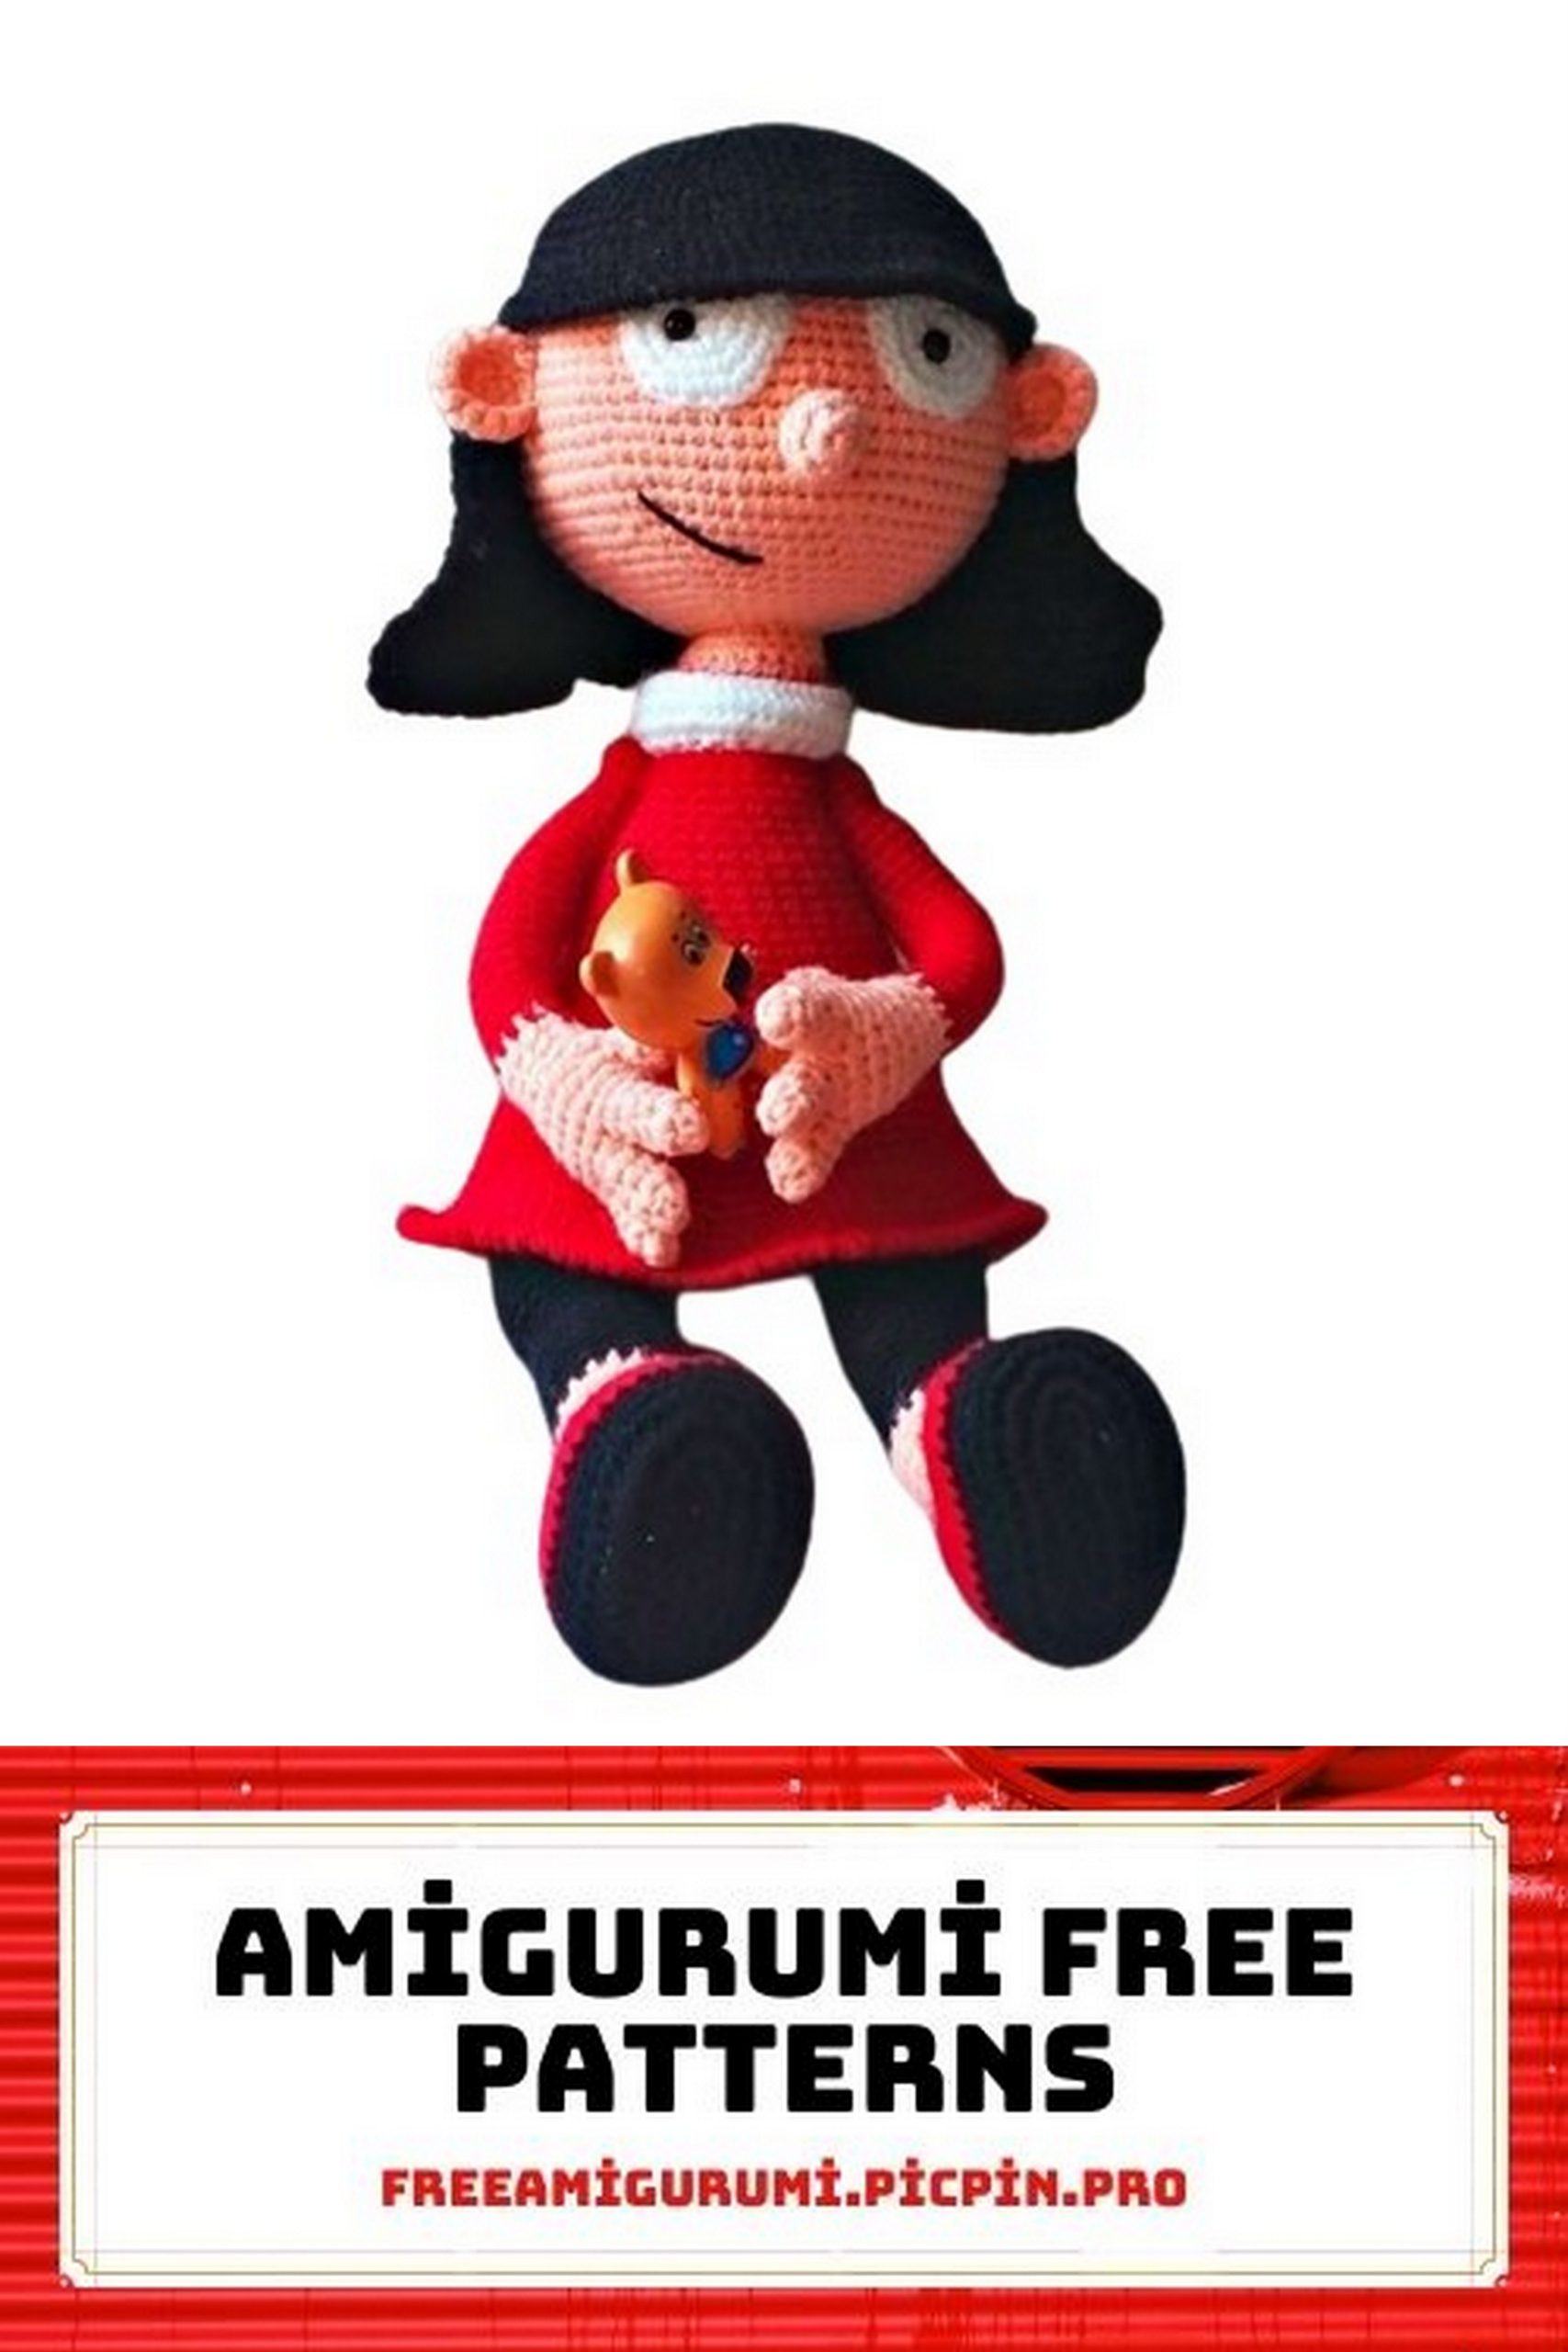
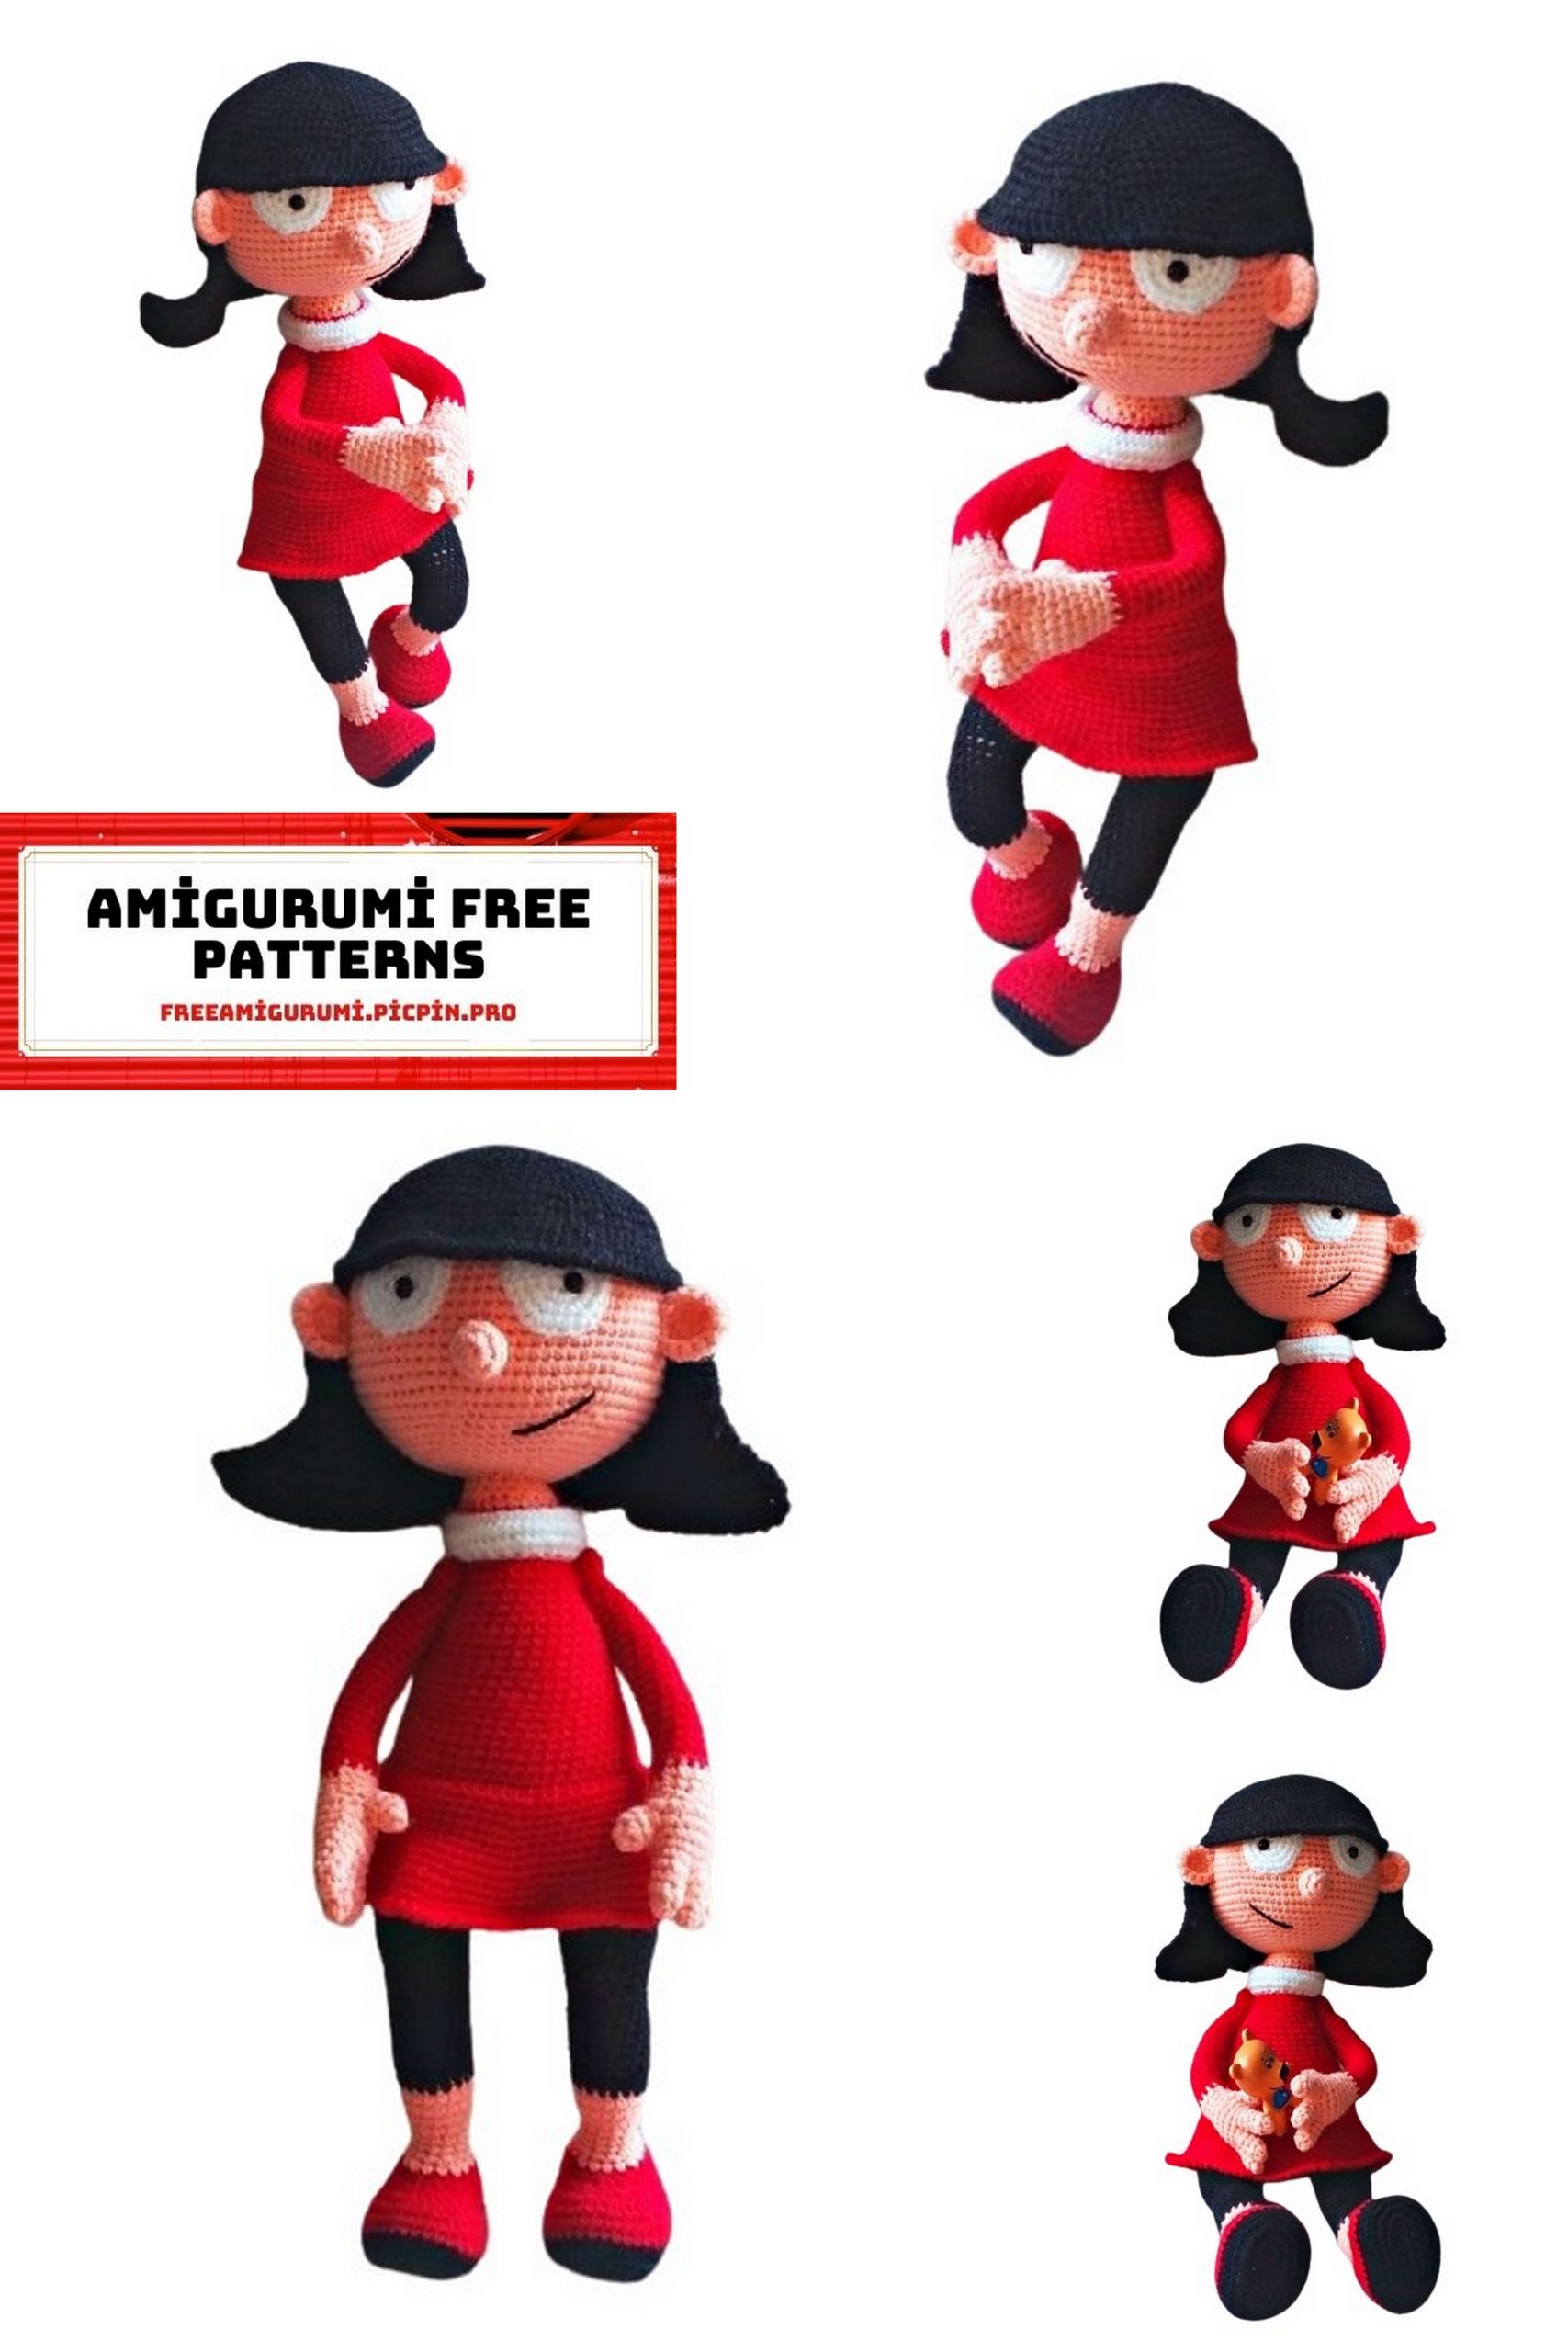
Ronda is an endearing amigurumi doll with a personality all her own. You can customize her appearance by choosing your favorite colors, adding unique accessories, and experimenting with different yarn textures. This project is not only a delightful way to hone your crochet skills but also an opportunity to let your creativity shine.
Crafting your very own amigurumi doll Ronda can be a wonderful gift for a loved one, a cherished addition to your doll collection, or a fantastic project to share with fellow crochet enthusiasts. So, gather your crochet supplies and embark on this exciting journey of creating your own crochet companion.
Scroll down to access the amigurumi free pattern and start crocheting your adorable Ronda doll today. Let your imagination run wild and bring this charming character to life with every stitch. Happy crocheting!”
Note
Crochet continuously in spiral rows, do not join at the end of the row with a slip stitch, and do not turn the work unless indicated otherwise.
Use a marker or contrasting thread at the beginning of the row to help you mark the first stitch of each new row.
You can use any materials to make this toy – the size of the toy may vary depending on the materials used.
Stuff the toy firmly to maintain its shape.
This tutorial does not include crochet lessons. Basic crochet skills are required to make this toy.
Materials Needed:
Yarn Pehorka Children’s Novelty:
Black
Red
White
Flesh color
Crochet hook 1.75 mm
Black half beads
Stuffing (hollow fiber, synthetic stuffing)
Wire for the frame (optional)
Adhesive plaster for isolating the wire
Sewing needle
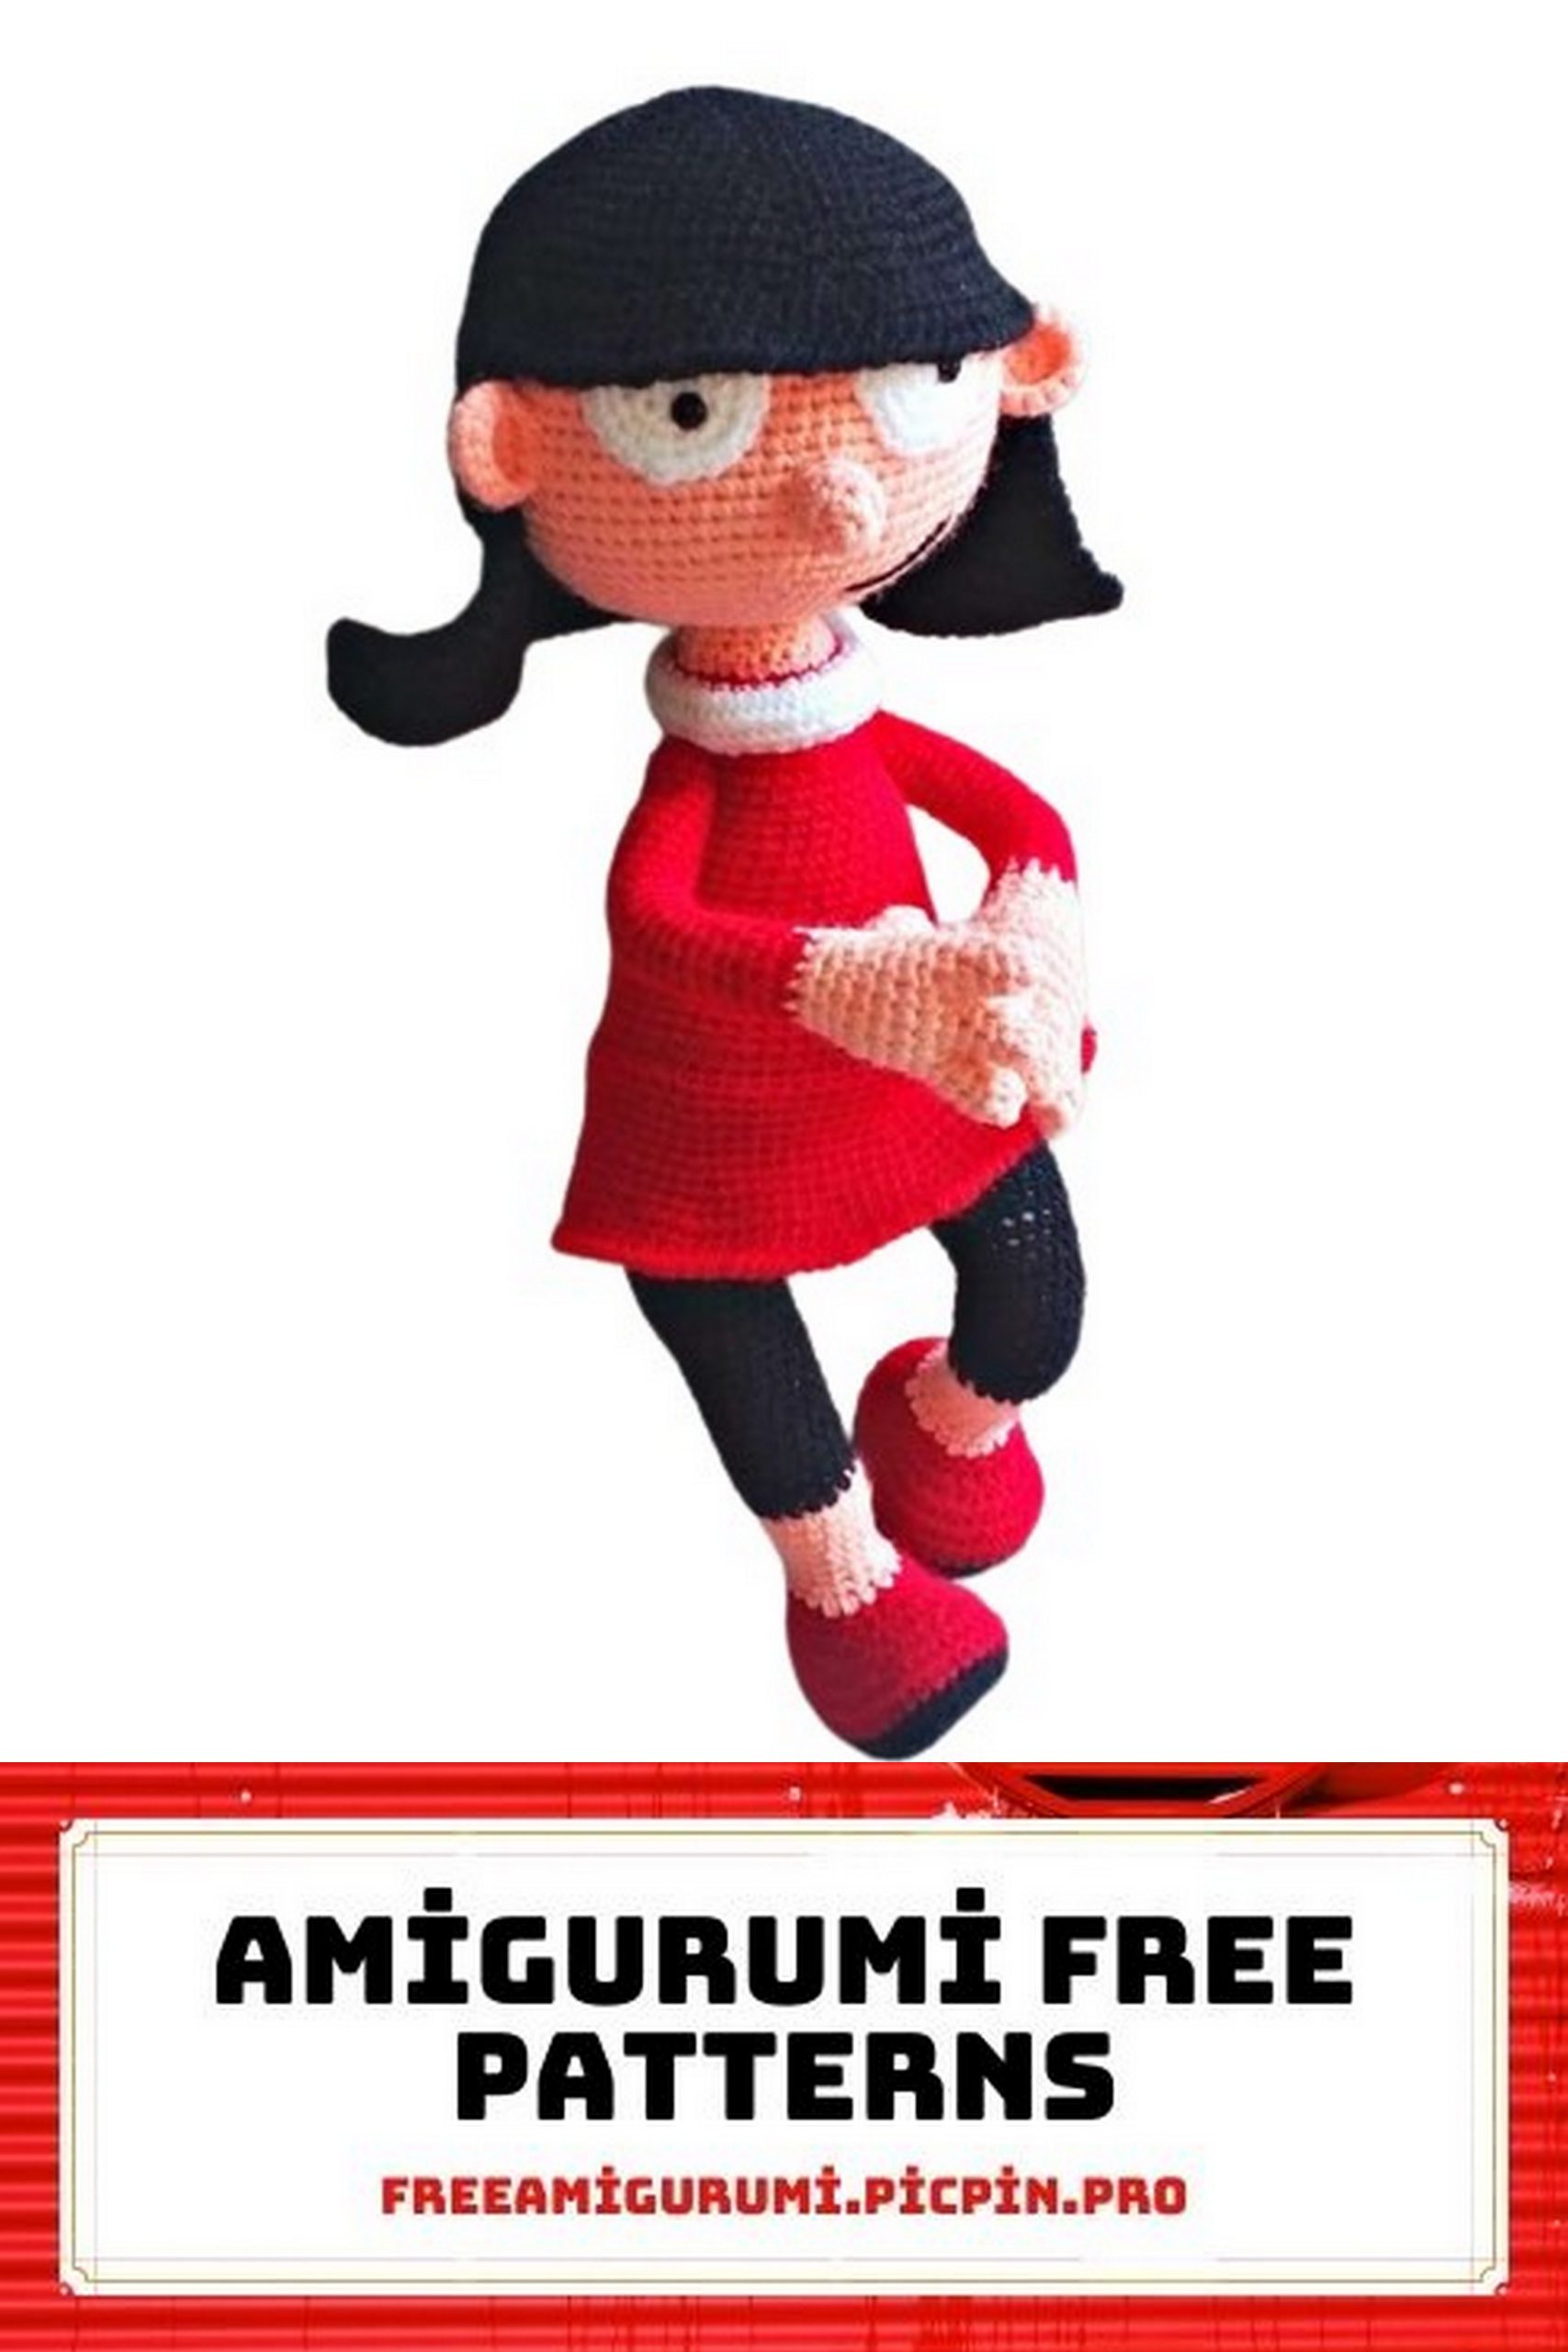
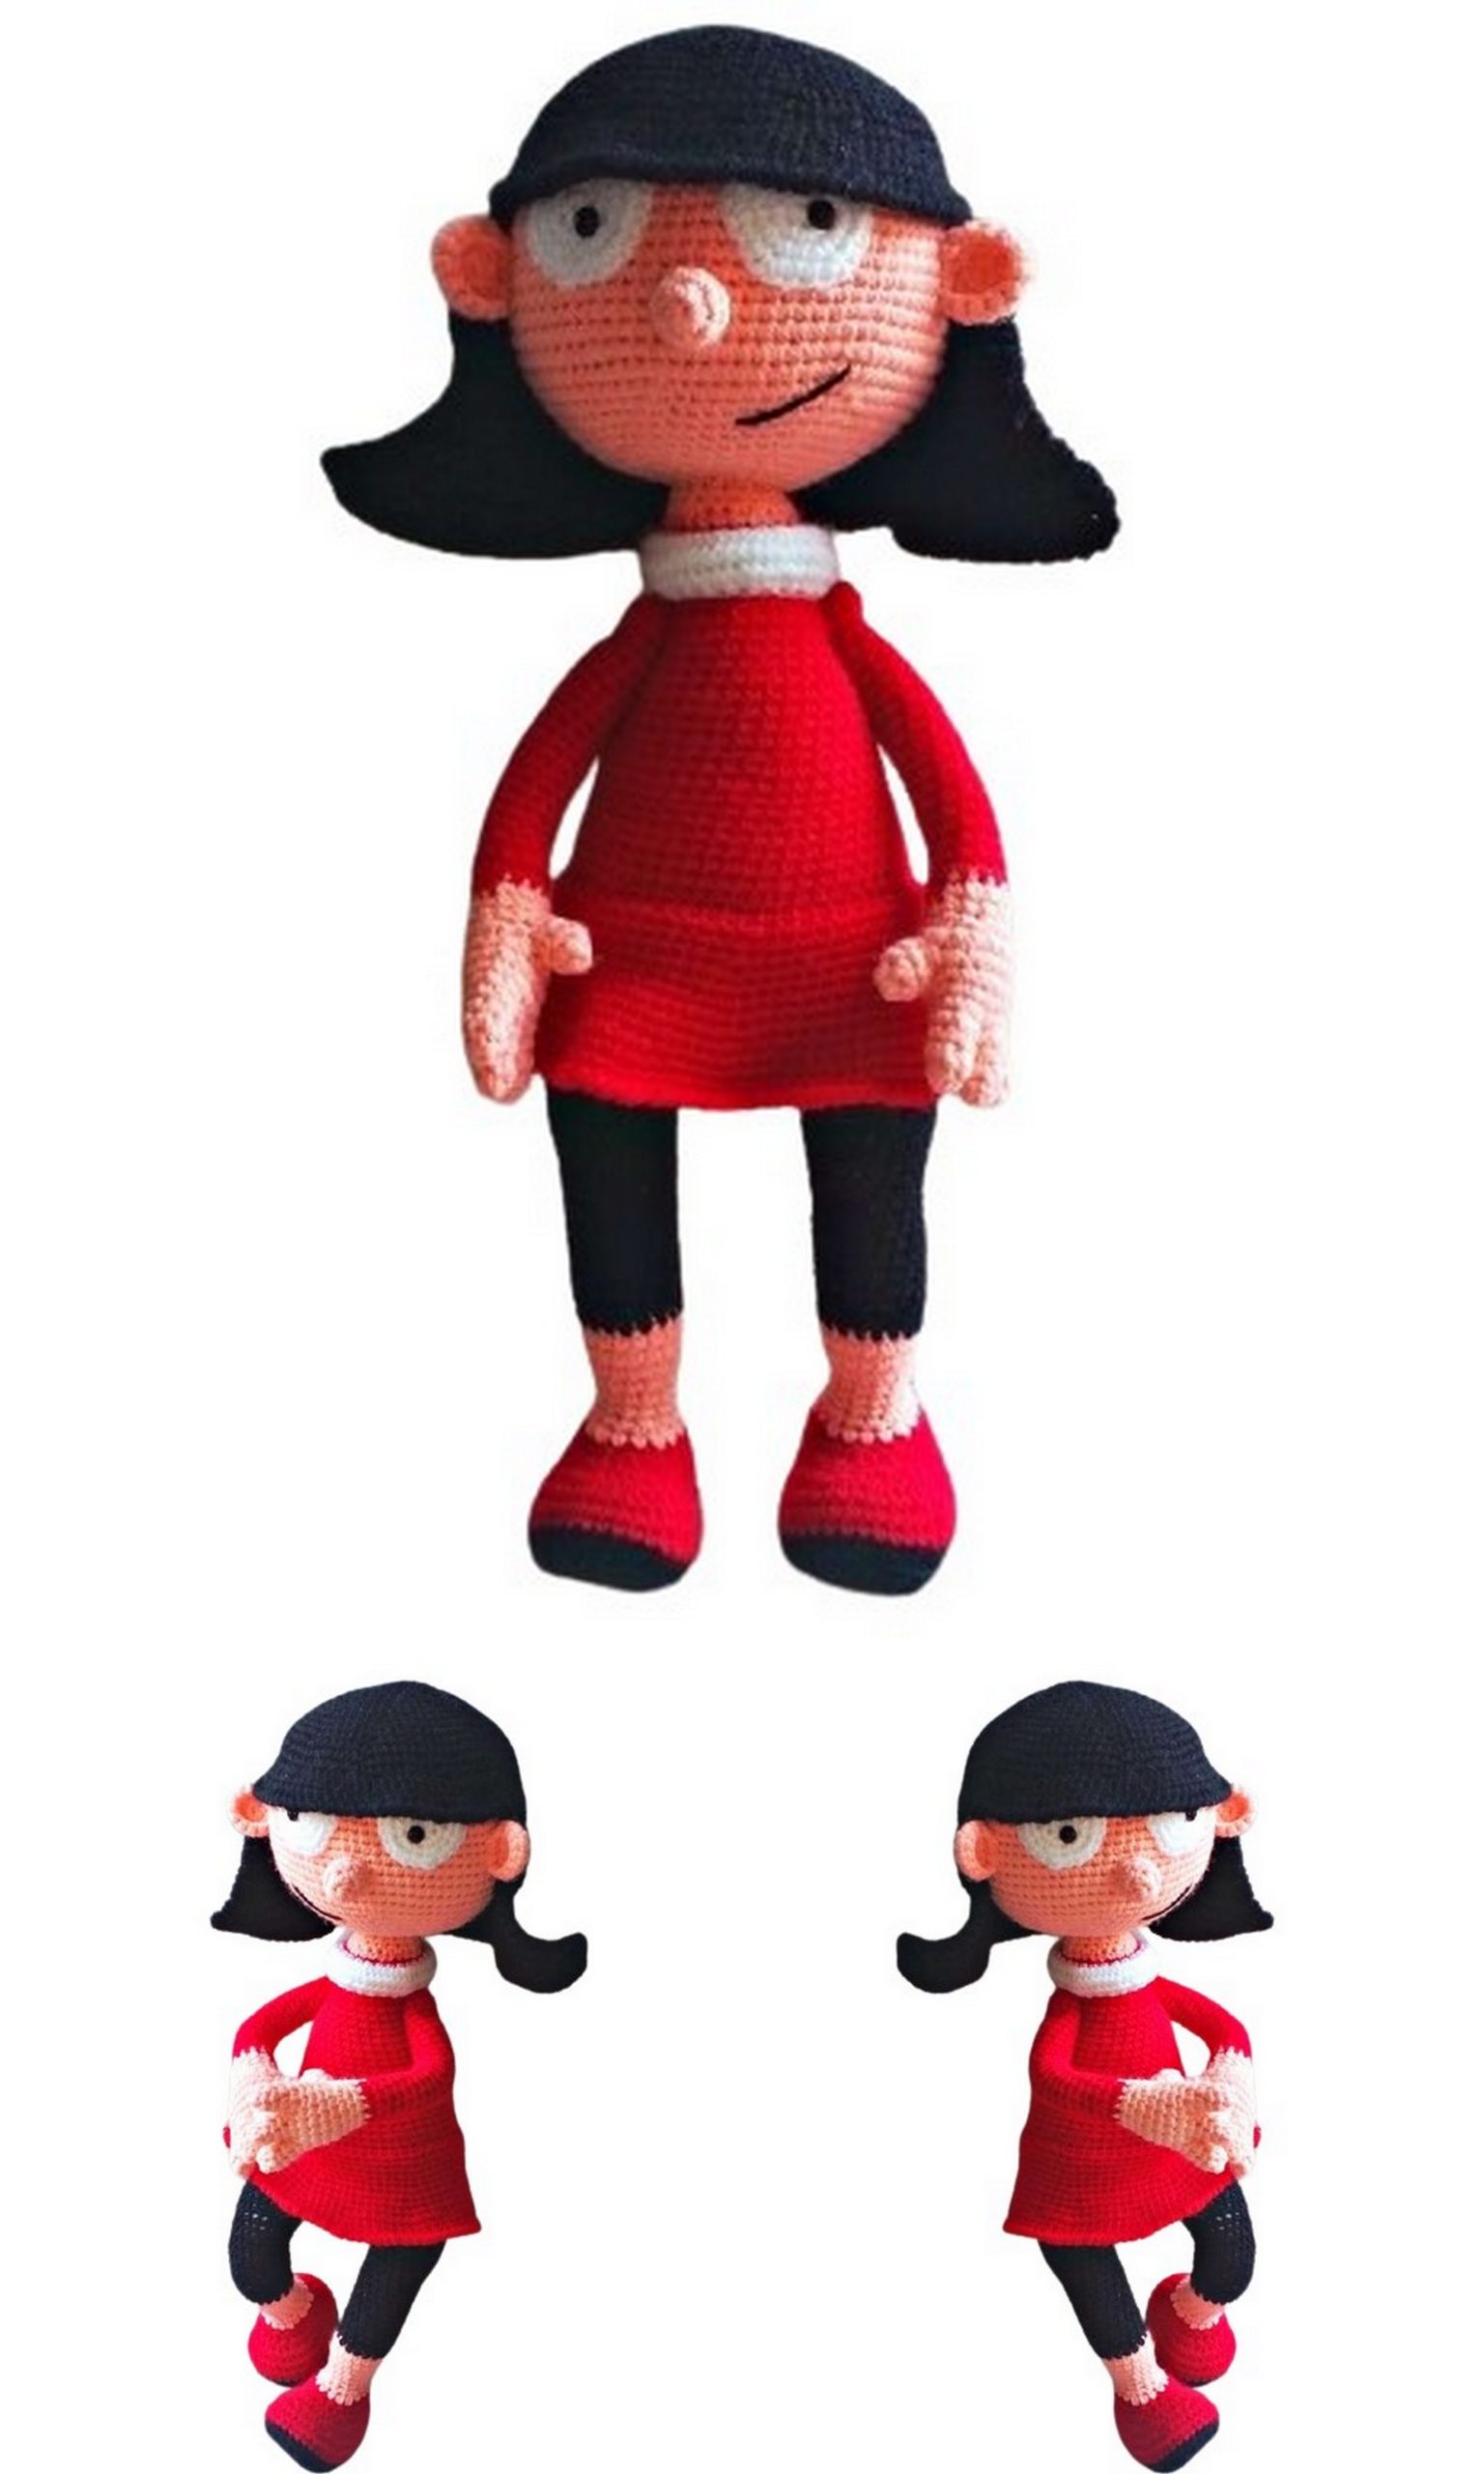
When using these materials, the doll Ronda measures approximately 30-32 cm.
Abbreviations:
Ch – chain
Sc – single crochet
Hdc – half double crochet
Inc – increase (two single crochets in one)
Dec – decrease (two single crochets together)
Sl st – slip stitch
(…) *X – repeat what’s in the parentheses X times
(Number) – total number of stitches/loops in a row
PATTERN
Head
Crochet in a spiral using flesh color yarn.
1 Row: 6 sc in amigurumi ring.
2 Row: Inc*6 (12).
3 Row: (1 sc, inc)*6 (18).
4 Row: (2 sc, inc)*6 (24).
5 Row: (3 sc, inc)*6 (30).
6 Row: (4 sc, inc)*6 (36).
7 Row: (5 sc, inc)*6 (42).
8 Row: (6 sc, inc)*6 (48).
9 Row: (7 sc, inc)*6 (54).
10 Row: (8 sc, inc)*6 (60).
11 Row: (9 sc, inc)*6 (66).
12 Row: (10 sc, inc)*6 (72).
13 Row: (11 sc, inc)*6 (78).
14-26 Row: 78 sc.
27 Row: (11 sc, dec)*6 (72).
28 Row: (10 sc, dec)*6 (66).
29 Row: (9 sc, dec)*6 (60).
30 Row: (8 sc, dec)*6 (54).
31 Row: (7 sc, dec)*6 (48).
32 Row: (6 sc, dec)*6 (42).
33 Row: (5 sc, dec)*6 (36).
34 Row: (4 sc, dec)*6 (30).
35 Row: (3 sc, dec)*6 (24).
36 Row: (2 sc, dec)*6 (18).
Finish off, secure the thread leaving it for sewing.
Wig
Crochet in a spiral using black yarn.
1 Row: 6 sc in amigurumi ring.
2 Row: Inc*6 (12).
3 Row: (1 sc, inc)*6 (18).
4 Row: (2 sc, inc)*6 (24).
5 Row: (3 sc, inc)*6 (30).
6 Row: (4 sc, inc)*6 (36).
7 Row: (5 sc, inc)*6 (42).
8 Row: (6 sc, inc)*6 (48).
9 Row: (7 sc, inc)*6 (54).
10 Row: (8 sc, inc)*6 (60).
11 Row: (9 sc, inc)*6 (66).
12 Row: (10 sc, inc)*6 (72).
13 Row: 3 sc, inc, 7 sc, inc, 6 sc, inc, 7 sc, inc, 16 sc, inc, 14 sc, inc, 13 sc (78).
14 Row: 4 sc, inc, 8 sc, inc, 6 sc, inc, 8 sc, inc, 18 sc, inc, 14 sc, inc, 14 sc (84).
15 Row: 8 sc, inc, 9 sc, inc, 8 sc, 56 sc (87).
16 Row: 87 sc.
17 Row: 40 hdc, 47 sc (87).
18 Row: Dec, 17 sc, Dec, 17 sc, Dec, 47 (84).
19 Row: 37 hdc, 47 sc (84).
Continue working in turning rows:
20-21 Row: 47 sc, turn.
22 Row: Ch 1, hdc in the same stitch as ch 1, 45 hdc, hdc in the last stitch (49), turn.
23 Row: Ch 1, hdc in the same stitch as ch 1, 47 hdc, hdc in the last stitch (51), turn.
24 Row: Ch 1, 51 hdc, turn.
25 Row: Ch 1, hdc in the same stitch as ch 1, 49 hdc, hdc in the last stitch (53), turn.
26 Row: Ch 1, 53 hdc, turn.
27 Row: Ch 1, 53 hdc, turn.
28 Row: Ch 1, hdc in the same stitch as ch 1, 51 hdc, hdc in the last stitch (55), turn.
29-30 Row: Ch 1, 55 hdc, turn.
31 Row: Ch 1, hdc in the same stitch as ch 1, 53 hdc, hdc in the last stitch (57), turn.
32 Row: Ch 1, 57 hdc, turn.
33 Row: Ch 1, hdc in the same stitch as ch 1, 55 hdc, hdc in the last stitch (59), turn.
34 Row: Ch 1, 59 hdc, turn.
35 Row: Ch 1, hdc in the same stitch as ch 1, 57 hdc, hdc in the last stitch (61), turn.
36 Row: Ch 1, 61 hdc, turn.
37 Row: Ch 1, hdc in the same stitch as ch 1, 59 hdc, hdc in the last stitch (63), turn.
38 Row: Ch 1, hdc in the same stitch as ch 1, 61 hdc, hdc in the last stitch (65), turn.
39-41 Row: Ch 1, 65 hdc, turn.
Crochet around the wig with single crochets. Secure the thread, cut, and hide.
Ears (2 pieces)
Crochet in a spiral using flesh color yarn.
1 Row: 6 sc in amigurumi ring.
2 Row: Inc*6 (12).
3 Row: 12 sc.
Finish off, secure the thread, leaving the end for sewing.
Nose
Crochet in a spiral using flesh color yarn. Slightly stuff while sewing.
1 Row: 6 sc in amigurumi ring.
2 Row: (1 sc, inc)*3 (9).
3-4 Row: 9 sc.
Finish off, secure the thread, leaving the end for sewing.
Eyes (2 pieces)
Crochet in a spiral using white yarn.
1 Row: 6 sc in amigurumi ring.
2 Row: Inc*6 (12).
3 Row: (1 sc, inc)*6 (18).
4 Row: (2 sc, inc)*6 (24).
Finish off, secure the thread, leaving the end for sewing.
Fingers
Crochet in a spiral using flesh color yarn.
Large Fingers (2 pieces):
1 Row: 5 sc in amigurumi ring.
2-3 Row: 5 sc.
Small Fingers (6 pieces):
1 Row: 5 sc in amigurumi ring.
2-4 Row: 5 sc.
Finish off, secure the thread, leaving the end for sewing.
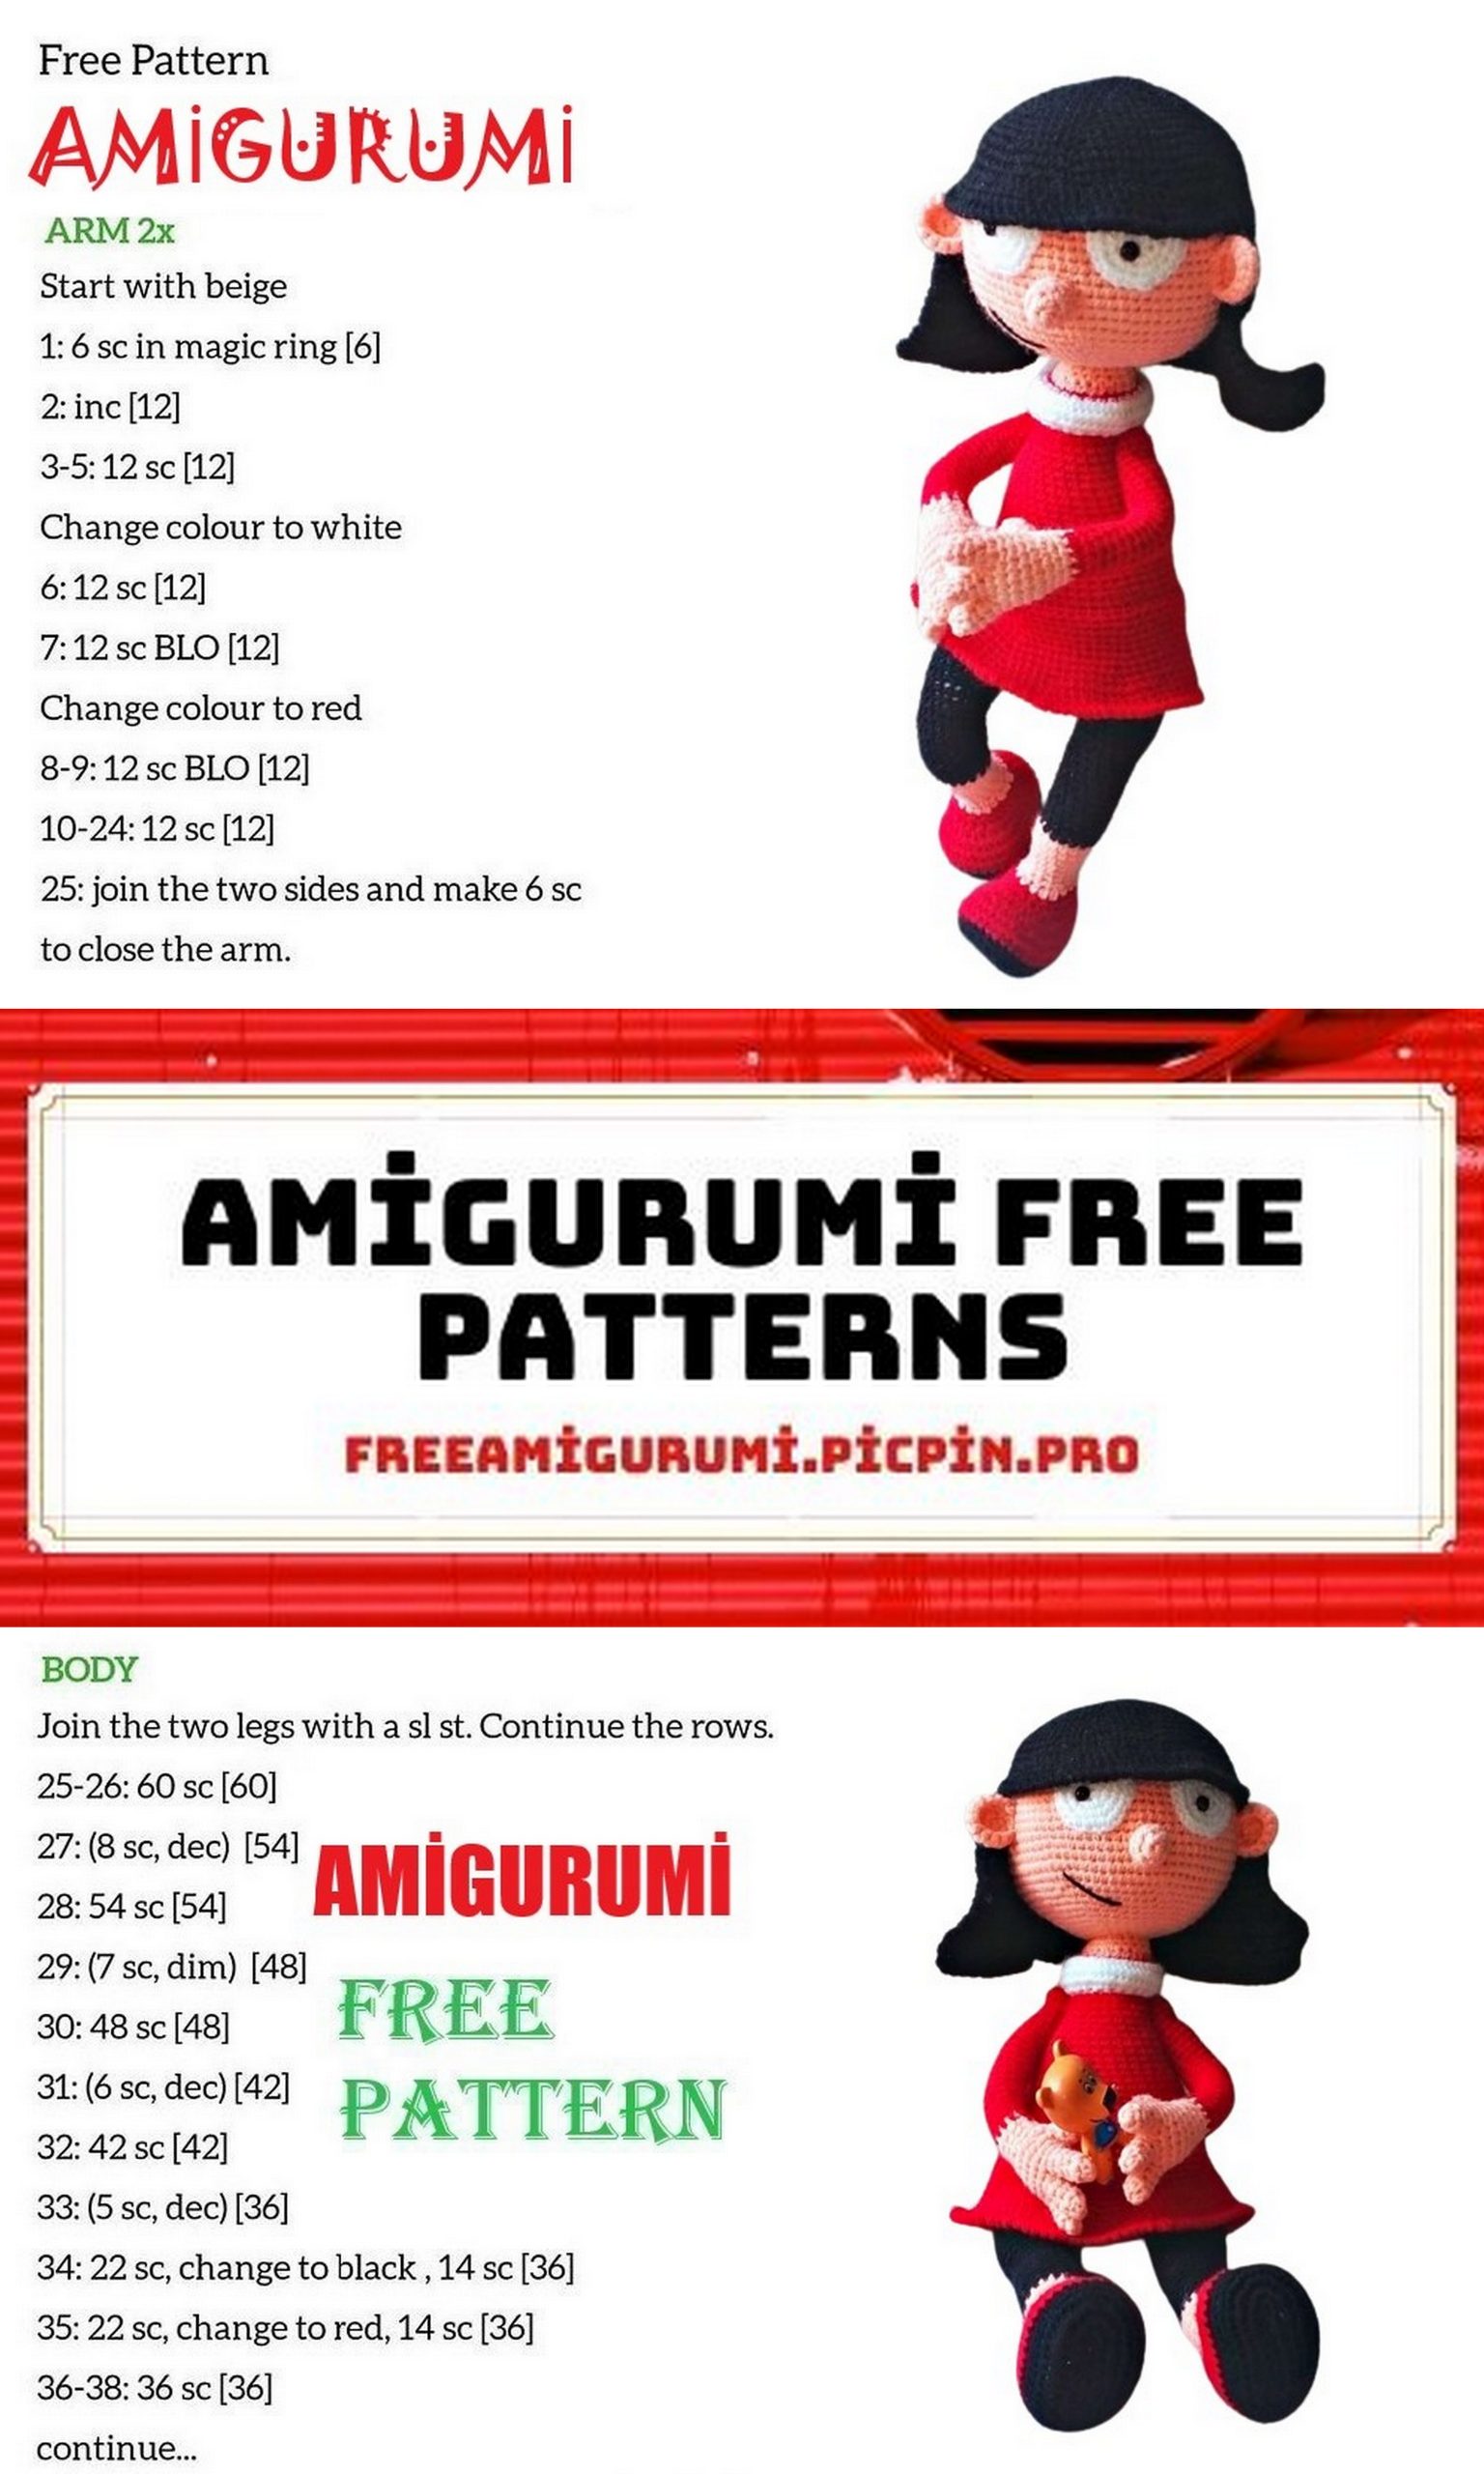
Left Arm
In flesh color yarn, crochet in a spiral.
1 Row: Connect the fingers: 2 sc on the third finger, 2 sc on the second finger, 5 sc on the first finger, 3 sc on the second finger, 3 sc on the third finger (15).
2-3 Row: 15 sc.
4 Row: Incorporate the large finger: 1 sc, 2 sc on the large finger and through the palm together, 12 sc (15).
5 Row: 1 sc, 3 sc on the finger, 12 sc (16).
6 Row: 7 sc, dec, 5 sc, dec (14).
7 Row: Dec, 5 sc, dec, 5 sc (12).
8 Row: 12 sc.
Switch to red color.
9-10 Row: 12 sc.
Stuff the palm. Continue stuffing as you go.
11 Row: Dec, 3 sc, dec, 5 sc (10).
12-30 Row: 10 sc.
31 Row: Dec*5 (5).
Drawstring the opening, secure the thread, and hide it.
These instructions should help you create an amigurumi doll following the given pattern.
Right Leg
Begin with black yarn and crochet in a spiral. Stuff as you go.
1 Row: Chain 9 and work from the 2nd chain from the hook: sc, 6 sc, 4 sc in 1 loop, 7 sc (19).
2 Row: 2 inc, 5 sc, 6 inc, 5 sc, inc (28).
3 Row: (1 sc, inc)*2 times, 5 sc, (1 sc, inc)*6 times, 5 sc, inc, 1 sc (37).
4 Row: 3 inc, 34 sc (40).
Create a sole using cardboard or thin plastic. You can use mayonnaise bucket lids for this purpose.
Switch to red yarn.
5 Row: Crochet 40 sc in the back loops of the stitches.
6-8 Row: 40 sc.
9 Row: 8 sc, (1 sc, dec)*8 times, 8 sc (32).
10 Row: 8 sc, 8 dec, 8 sc (24).
11 Row: 8 sc, 4 dec, 8 sc (20).
Switch to flesh color yarn.
12 Row: (3 sc, dec)*4 times (16).
13 Row: (2 sc, dec)*4 times (12).
14-16 Row: 12 sc.
17 Row: (2 sc, inc)*4 times (16).
18-19 Row: 16 sc.
Switch to black yarn.
20-31 Row: 16 sc.
32 Row: (3 sc, inc)*4 times (20).
33-40 Row: 20 sc.
Finish off, secure the thread, and cut.
Make the second leg following the same pattern, but don’t cut the yarn. Continue crocheting the body of the doll. The second leg will be the left leg, and the first one is the right leg.
Body
Align the marker on the side of the left leg and join the legs.
41 Row: 10 sc on the left leg, 8 chains, 20 sc on the right leg, 8 slip stitches in the chain from the chains, 10 sc on the left leg (56).
Incomplete row: 34 sc.
Set a marker. Make sure it goes through the middle of the back.
42-45 Row: 56 sc.
46 Row: 13 sc, dec, 26 sc, dec, 13 sc (54).
47-48 Row: 54 sc.
You can stop following the marker after this point.
Switch to red yarn.
49 Row: 54 sc.
50 Row: 54 sc crocheted in the back loops of the stitches.
51 Row: (7 sc, dec)*6 times (48).
52-54 Row: 48 sc.
55 Row: (6 sc, dec)*6 times (42).
56-59 Row: 42 sc.
60 Row: (5 sc, dec)*6 times (36).
61-64 Row: 36 sc.
65 Row: (4 sc, dec)*6 times (30).
66-69 Row: 30 sc.
70 Row: (3 sc, dec)*6 times (24).
71-73 Row: 24 sc.
Switch to flesh color yarn.
74 Row: 24 sc crocheted in the back loops of the stitches.
75 Row: (2 sc, dec)*6 times (18).
76 Row: 18 sc.
Finish off, secure the thread, and cut.
Collar
Crochet in red yarn in a spiral.
Attach the thread to the front loops of the 50th row of the body.
1 Row: 54 sc.
2 Row: (8 sc, inc)*6 times (60).
3 Row: 60 sc.
4 Row: (9 sc, inc)*6 times (66).
5-6 Row: 66 sc.
7 Row: (10 sc, inc)*6 times (72).
8 Row: 72 sc.
9 Row: (11 sc, inc)*6 times (78).
10 Row: 78 sc.
11 Row: (12 sc, inc)*6 times (84).
12 Row: (13 sc, inc)*6 times (90).
13 Row: 90 sc.
Finish off the collar and sew it to the 1st row of the body. Stuff the collar as you sew it.
Skirt
1 Row: Sew the eyes to the head, approximately between rows 14 and 22. Leave 4-5 stitches between the eyes.
2 Row: Glue the half-beads to the eyes. Adjust the direction of the gaze as you like.
3 Row: Sew the nose between rows 21 and 23 of the head, slightly stuffing it.
4 Row: Embroider the mouth with black thread.
5 Row: Sew the wig to the head, aligning its center with the center of the head.
6 Row: Sew the ears to the head, approximately between rows 18 and 23 of the head.
The rows are approximate, so adjust them according to your doll’s appearance. Do it as you like.
Assembly and Finishing
7 Row: Attach the head to the body. (I inserted a pencil into the neck for stability and stuffed it as I sewed).
8 Row: Attach the arms using thread joints.
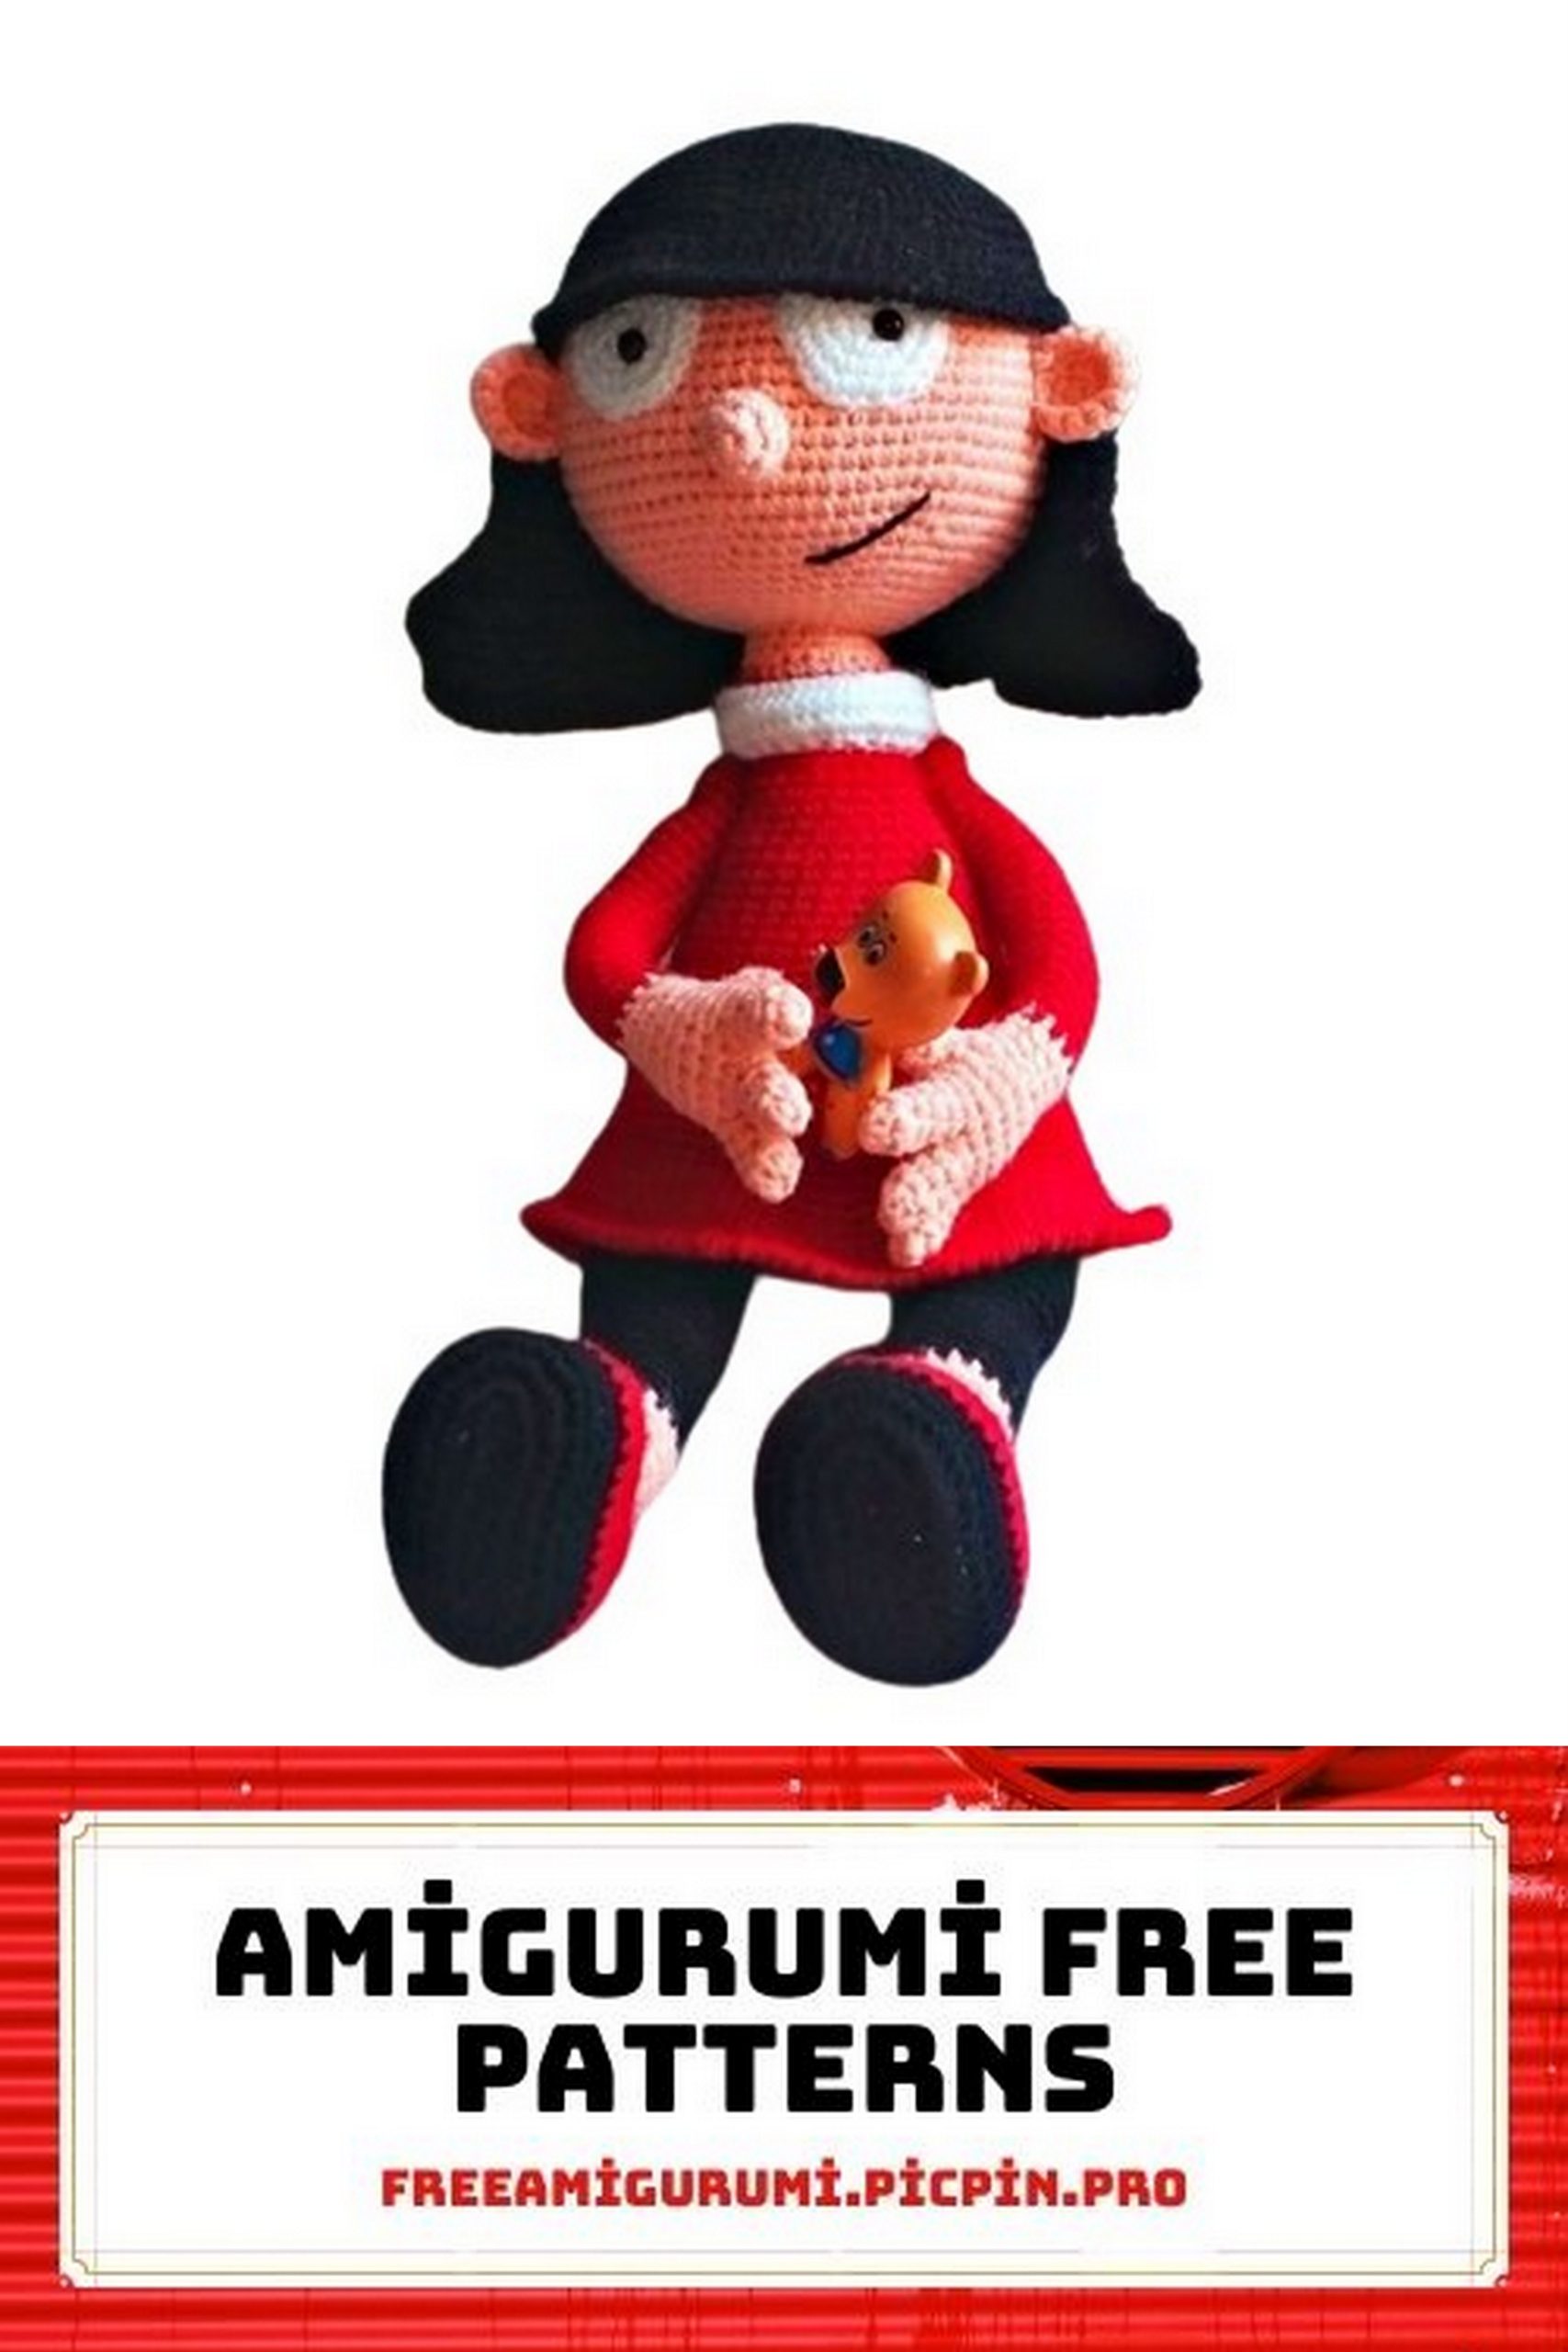
Your Ronda doll is ready! Thank you for choosing my master class. Good luck with your crochet! If you have any questions or need further clarification, feel free to ask.