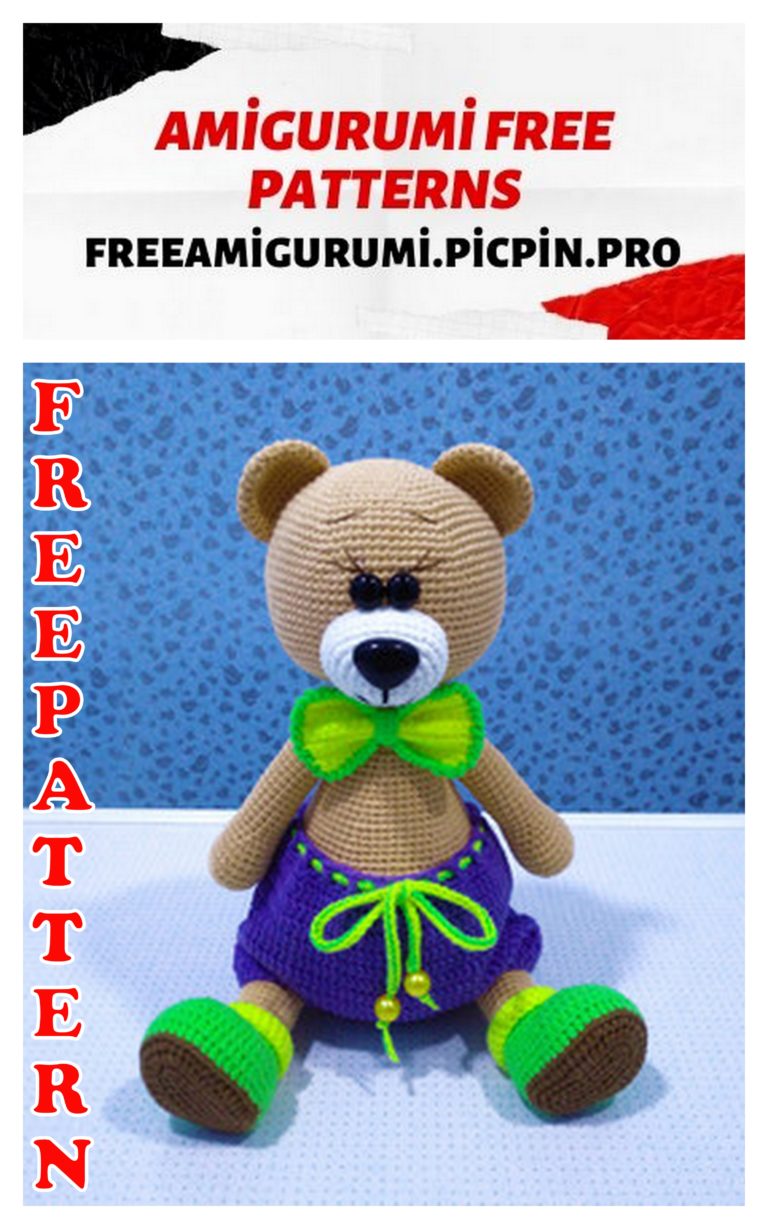
Velvet Teddy Bear Amigurumi Free Crochet Pattern
Best quality and free amigurumi animal patterns on this site. In this article, we shared with you amigurumi cute bear pattern.
Facebook Group: Amigurumi Free Patterns
Pinterest Officall Page: Free Amigurumi Picpin
Necessary materials:
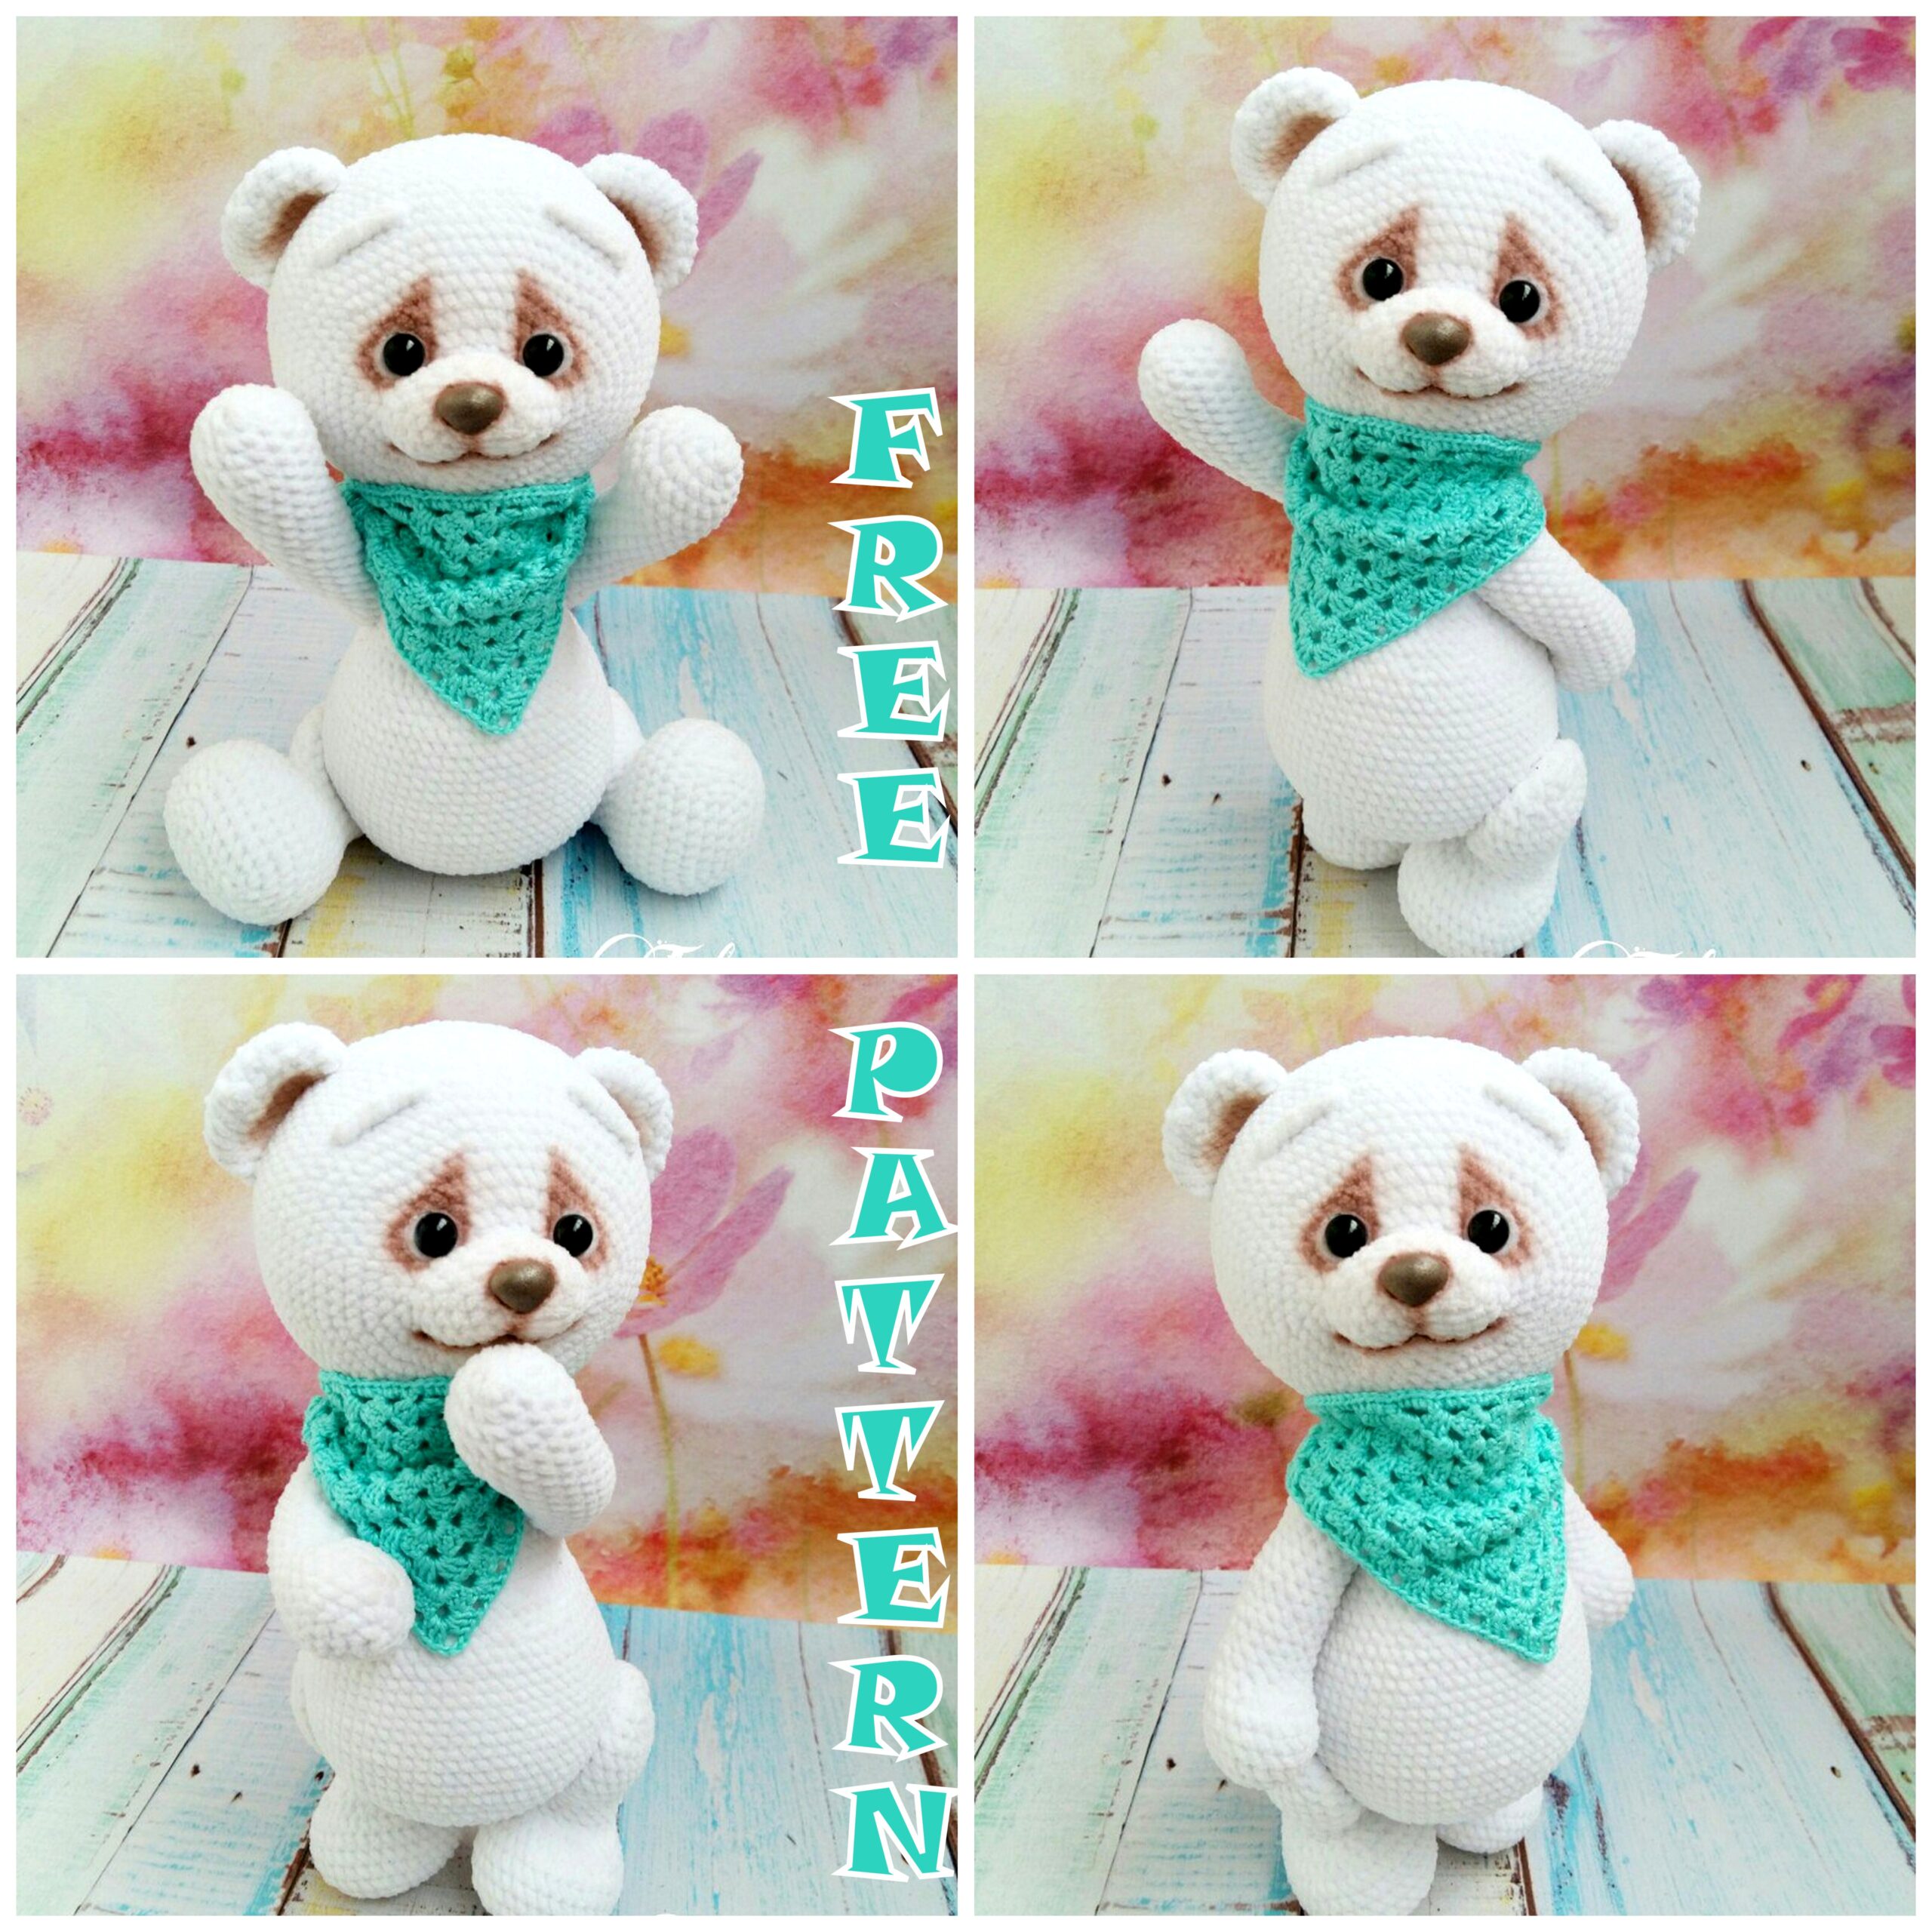
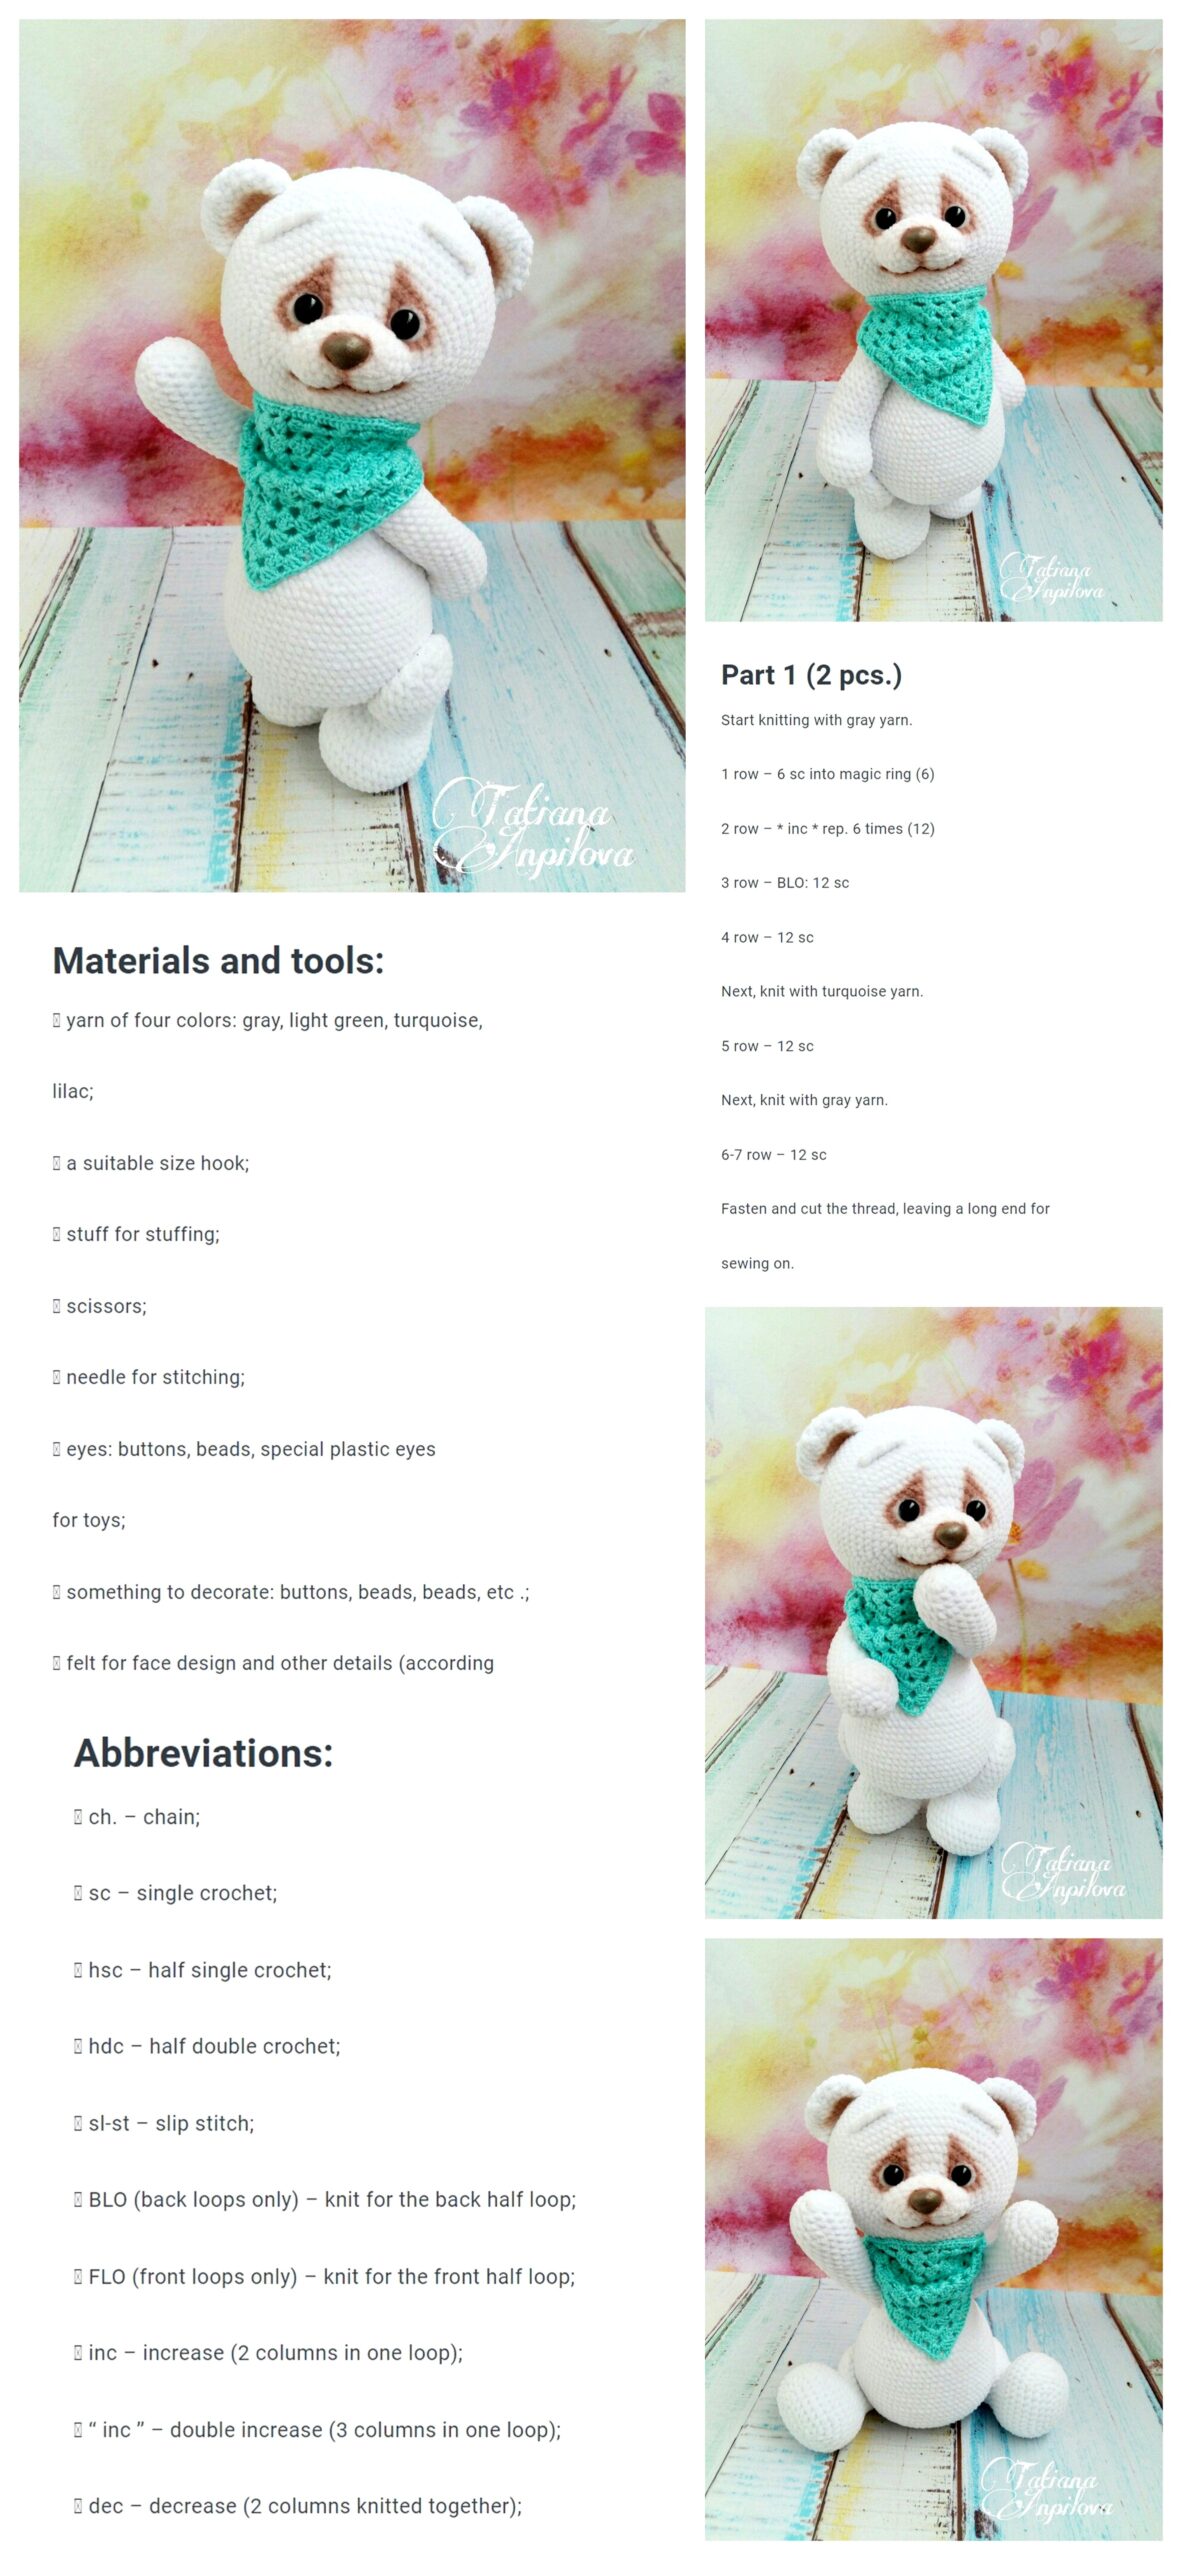
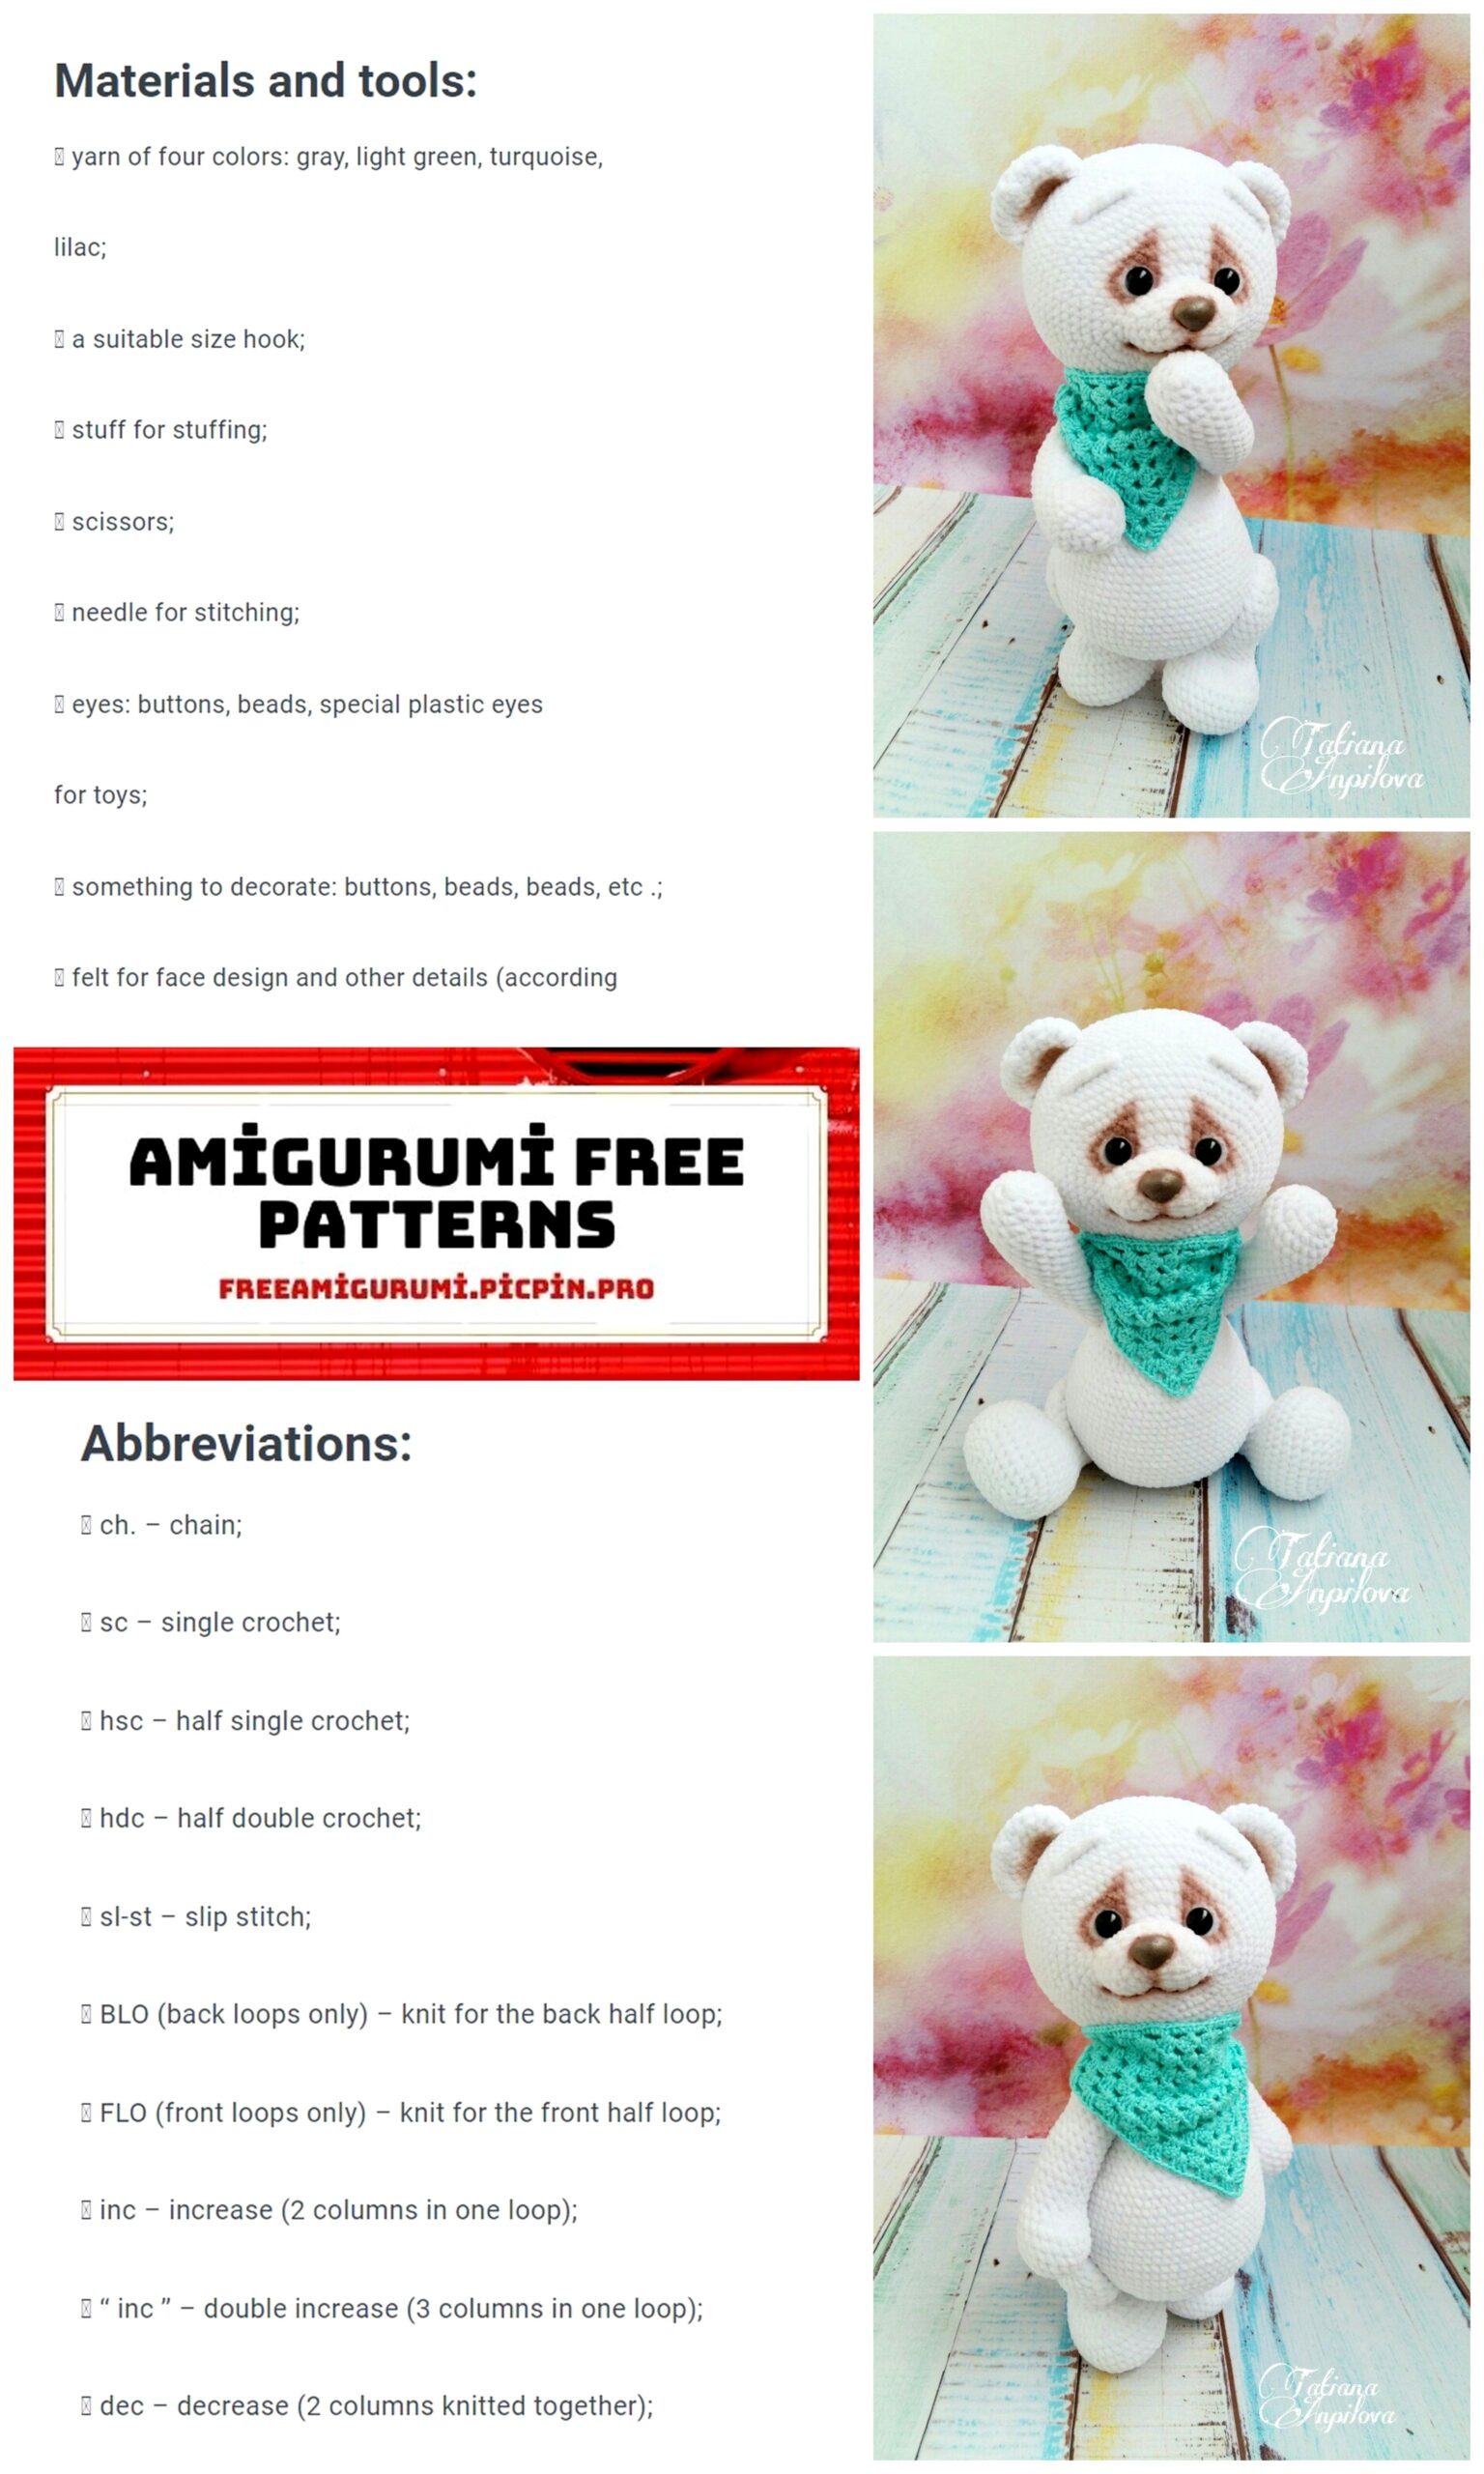
– YarnArt Suede (100% polyamide, 50 g-135 m) I have white color No. 330, 1.5 hanks. Hook Clover # 2.25
– “Coco” Vita cotton (100% mercerized cotton, 50 g-240 m) for the headscarf color No. 3867 turquoise. Hook Clover No. 1.5
– Plastic joints. I have fasteners with a diameter of 20mm for the upper legs (2 pieces), 30mm for the lower legs (2 pieces) and 30mm for the head (1 piece)
– Half beads with a diameter of 8mm, nose 15mm, button 6mm
– Filler
– Needle for sewing on and tightening
When using these materials, the bear is 21cm tall.
Attention! The toy is knitted in a spiral, without lifting loops and connecting posts. In the process of knitting, you need to monitor the symmetry of the part and, if necessary, knit an additional offset column every 4-5 rows so that the marker for the beginning of the row is again in the place we need. The additional column of displacement is not indicated in the description.
Abbreviations:
Ch-chain
Sc – single crochet
Inc- incraise (2 sc in one loop)
Dec- decrease (knit 2 sc together)
Dc double crochet
Sl-st- slip stitch
Upper legs
The row start marker runs along the back of the foot.
1 row: 2 ch, in 1 loop 6 sc (6)
2nd row: Inc * 6 (12)
3rd row: (inc, sc) * 6 (18)
4th row: (5 sc, inc) * 3 (21)
5-7 row: (3 rows) 21 sc (21)
8 row: 8 sc, dec * 3, 7 sc (18)
9th row: 7 sc, dec * 2, 7 sc (16)
10-21 rows: (12 rows) 16 sc (16)
Note: If you use cotter pins and discs instead of plastic joints, then you do not need to knit holes
For the right foot:
22 row: 3 sc, 3 ch, skip 3 loops (form a hole for the joint), 10 sc (16)
23 row: 3 sc, 3 sc in chains, 10sc (16)
We fill the foot with filler and insert the joint.
For the left foot:
22 row: 10 sc, 3 ch, skip 3 loops (form a hole for the joint), 3 sc (16)
23 row: 10 sc, 3 sc in chains, 3 sc (16)
We fill the foot with filler and insert the joint.
24 row: (2 sc, dec) * 4 (12)
25 row: dec * 6 (6)
Fasten and cut the thread, pull off the remaining hole, hide the end of the thread inside the part.
Lower legs
The row start marker runs along the back of the foot.
Row 1: 6 ch + 1 lift, from 2 from hook: 5 sc, 3sc to last st, on other side of chain 4 sc, inc (14)
2nd row: inc, 4 sc, inc * 3, 4 sc, inc * 2 (20)
3rd row: 1 sc, inc, 4 sc, (1 sc, inc) * 3, 4sc, (1 sc, inc) * 2 (26)
4th row: 1 sc, inc, 6 sc, (inc, 2 sc) * 2, inc, 6 sc, inc, 2 sc, inc, 1 sc (32)
5th row: 3 sc, inc, 4 sc, (3 sc, inc) * 3, 4 sc, (3 sc, inc) * 2 (38)
6-8 row: (3 rows) 38 sc (38)
9 row: 36 sc, move the marker of the beginning of the row, it should go in the middle of the heel (36)
10 row: 8 sc, (dec, 2sc) * 5, dec, 8sc (32)
11 row: 8 sc, (dec, 1 sc) * 5, dec, 7 sc (26)
12 row: dec, 5 sc, dec * 6, 5 sc, dec (18)
13-15 rows: (3 rows) 18 sc (18)
16 row: inc, 8 sc, inc, 8 sc (20)
17th row: 9 sc, inc * 2, 9 sc (22)
18 row: 8 sc, inc, 4 sc, inc, 8 sc (24)
19 row: 24 sc (24)
For right foot
20 row: 4 sc, 3 ch, skip 3 loops (form a hole for the joint), 17 sc (24)
Row 21: 4 sc, 3 sc in puffs, 17 sc (24)
22 row: 24 sc (24)
We fill the foot with filler and insert the joint.
For the left foot
20 row: 17 sc, 3 ch, skip 3 loops (form a hole for the joint), 4 sc (24)
Row 21: 17 sc, 3 sc in sts, 4 sc (24)
22 row: 24 sc (24)
We fill the foot with filler and insert the joint.
23 row: 1 sc, (dec, 2 sc) * 5, dec, 1 sc (18)
24 row: (1 sc, dec) * 6 (12)
25 row: dec * 6 (6)
Fasten the thread, cut it, pull off the remaining hole, hide the end of the thread inside the part.
Torso
The row start marker runs down the middle of the back.
1 row: 2 ch, in 1 first loop 6 sc (6)
2nd row: inc * 6 (12)
3rd row: (1 sc, inc) * 6 (18)
4th row: 1 sc, inc, (2 sc, inc) * 5, 1 sc (24)
5 row: (3 sc, inc) * 6 (30)
6 row: 2 sc, inc, (4 sc, inc) * 5, 2 sc (36)
7 row: (5 sc, inc) * 6 (42)
8 row: 3 sc, inc, (6 sc, inc) * 5, 3 sc (48)
9th row: (7 sc, inc) * 6 (54)
10 row: 4 sc, inc, (8 sc, inc) * 5, 4 sc (60)
11 row: (9 sc, inc) * 6 (66)
12 row: 5 sc, inc, 6 sc, 3 ch, skip 3 loops (form a hole for the joint), 1 sc, inc, (10 sc, inc) * 3, 1 sc, 3 ch, skip 3 loops (form a hole for joint), 6 sc, inc, 5 sc (72)
Row 13: 13 sc, 3 sc over sts, 40 sc, 3 sc over sts, 13 sc (72)
Rows 14-21: (8 rows) 72 sc (72)
22 row: 3 sc, dec, 6 sc, dec, 46 sc, dec, 6 sc, dec, 3 sc (68)
23 row: 68 sc (68)
24 row: 2 sc, dec, 4 sc, dec, 48 sc, dec, 4 sc, dec, 2 sc (64)
We insert the joints of the legs into the holes formed and fasten.
25 row: 16 sc, (dec, 4 sc) * 5, dec, 16 sc (58)
26 row: 1 sc, dec, 2 sc, dec, 44 sc, dec, 2 sc, dec, 1 sc (54)
27 row: 54 sc (54)
28 row: 14 sc, (dec, 3 sc) * 5, dec, 13 sc (48)
Rows 29-30: (2 rows) 48 sc (48)
31 row: 3 sc, dec, (6 sc, dec) * 5, 3 sc (42)
Rows 32-33: (2 rows) 42 sc (42)
We fill the body with filler.
34 row: 9 sc, 3 ch, skip 3 loops (form a hole for the joint), 18 sc, 3 ch, skip 3 loops (form a hole for the joint), 9 sc (42)
35 row: 9 sc, 3 sc over sts, 18 sc, 3 sc over sts, 9 sc (42)
Rows 36-38: (3 rows) 42 sc (42)
Insert the joints of the upper legs and fix. We fill the body with filler.
39 row: (5 sc, dec) * 6 (36)
40 row: 36 sc (36)
We measure the diameter of the head mount.
41 row: 2 sc, dec, (4 sc, dec) * 5, 2 sc (30)
We fill the body to the end and insert the joint.
42 row: (3 sc, dec) * 6 (24)
43 row: 1 sc, dec, (2 sc, dec) * 5, 1 sc (18)
44 row: (1 sc, dec) * 6 (12)
We fix the thread, cut it and hide the tip.
Head
The row start marker runs down the middle of the chin.
1 row: 2 ch, in the first loop 6 sc (6)
2nd row: inc * 6 (12)
3rd row: (1 sc, inc) * 6 (18)
4th row: 18 sc (18)
5 row: 1 sc, inc, (2 sc, inc) * 5, 1 sc (24)
6-7 rows: (2 rows) 24 sc (24)
8 row: 4 sc, inc * 3, 4 sc, inc * 2, 4sc, inc * 3, 4 sc (32)
9th row: 4 sc, (inc, 1 sc) * 3, inc, 3 sc, inc, 2 sc, inc, 3 sc, inc, (1 sc, inc) * 3, 4 sc (42)
10 row: 5 sc, (inc, 2 sc) * 3, inc, 5 sc, inc * 2, 5 sc, inc, (2 sc, inc) * 3, 5sc (52)
11th row: 6 sc, (inc, 3 sc) * 3, inc, 3 sc, inc, 6 sc, inc, 3 sc, inc, (3 sc, inc) * 3, 6 sc (62)
12 row: 62 sc (62)
Row 13: 7 sc, (inc, 4 sc) * 3, inc, 5 sc, inc, 4 sc, inc, 5 sc, inc, (4 sc, inc) * 3, 7sc (72)
Row 14: 72 sc (72)
15 row: 13 sc, (inc, 8 sc) * 5, inc, 13 sc (78)
16 row: 78 sc (78)
17 row: 21 sc, (inc, 6 sc) * 5, inc, 21 sc (84)
18 row: 83 sc, 1 ch, skip 1 loop (form a hole for the joint) (84)
19 row: (form a hole for the joint) 2 ch, skip 2 loops, 81 sc, 1 sc along a chain of air loops (84)
Row 20: 2 sc in chain, 82 sc (84)
Rows 21-28: (8 rows) 84 sc (84)
29 row: 6 sc, dec, (12 sc, dec) * 5, 6 sc (78)
30 row: 78 sc (78)
31 row: (11 sc, dec) * 6 (72)
32 row: 72 sc (72)
33 row: 5 sc, dec, (10 sc, dec) * 5, 5 sc (66)
34 row: (9 sc, dec) * 6 (60)
35 row: 4 sc, dec, (8 sc, dec) * 5, 4 sc (54)
We insert the joint of the body into the knitted hole and fix the head.
36 row: (7 sc, dec) * 6 (48)
37 row: 3 sc, dec, (6 sc, dec) * 5, 3 sc (42)
38 row: (5 sc, dec) * 6 (36)
39 row: 2 sc, dec, (4 sc, dec) * 5, 2 sc (30)
We stuff our head.
40 row: (3 sc, dec) * 6 (24)
41 row: 1 sc, dec, (2 sc, dec) * 5, 1 sc (18)
We fill our head to the end.
42 row: (1 sc, dec) * 6 (12)
43 row: dec * 6 (6)
Fasten the thread, cut, pull the remaining hole, hide the end of the thread inside the part.
Ears (2 parts)
1 row: 2 ch, in 1 loop 6 sc (6)
2nd row: inc * 6 (12)
3rd row: (inc, 1 sc) * 6 (18)
4th row: 1 sc, inc, (2 sc, inc) * 5, 1 sc (24)
Rows 5-7: (3 rows) 24 sc (24)
Fasten the thread, cut, leaving a small end for sewing.
Tail
1 row: 2 ch, in the first loop 6 sc (6)
2nd row: inc * 6 (12)
3-4 rows: (2 rows) 12 sc (12)
Fold the piece in half and knit by 5 sc. Leave a small end for sewing.
Registration
With pins we mark as shown in the photo the places of future tightenings.
Points 2 and 3 are located in the 8th row, departing from double increments of one column to the sides, points 1 and 4 are in the same row as the points of the eyes, point 5 is located between 5 and 6 rows, point 6 is one row below the beginning of knitting.
We tighten the right eye. We introduce the needle at point 1, retreat one column, insert the needle and output it at point 2. Retreat one column and output at point 1. Repeat the tightening several times, constantly tightening the thread. We tighten the left eye in the same way.
Mouth tightening. The thread goes from above. We do not tighten the thread strongly, we follow the tightening of the mouth. From point 4 we introduce the needle to point 5, and output at point 2. Retreat the column, output at point 1, insert the needle into point 5 and output at point 3. If necessary, repeat it.
We tighten the nose. We do not tighten the thread strongly. From point 5, we insert the needle into point 6 and output it at point 2, return to point 5, insert the needle into point 6 and output it at point 3. Fix the thread, cut and hide.
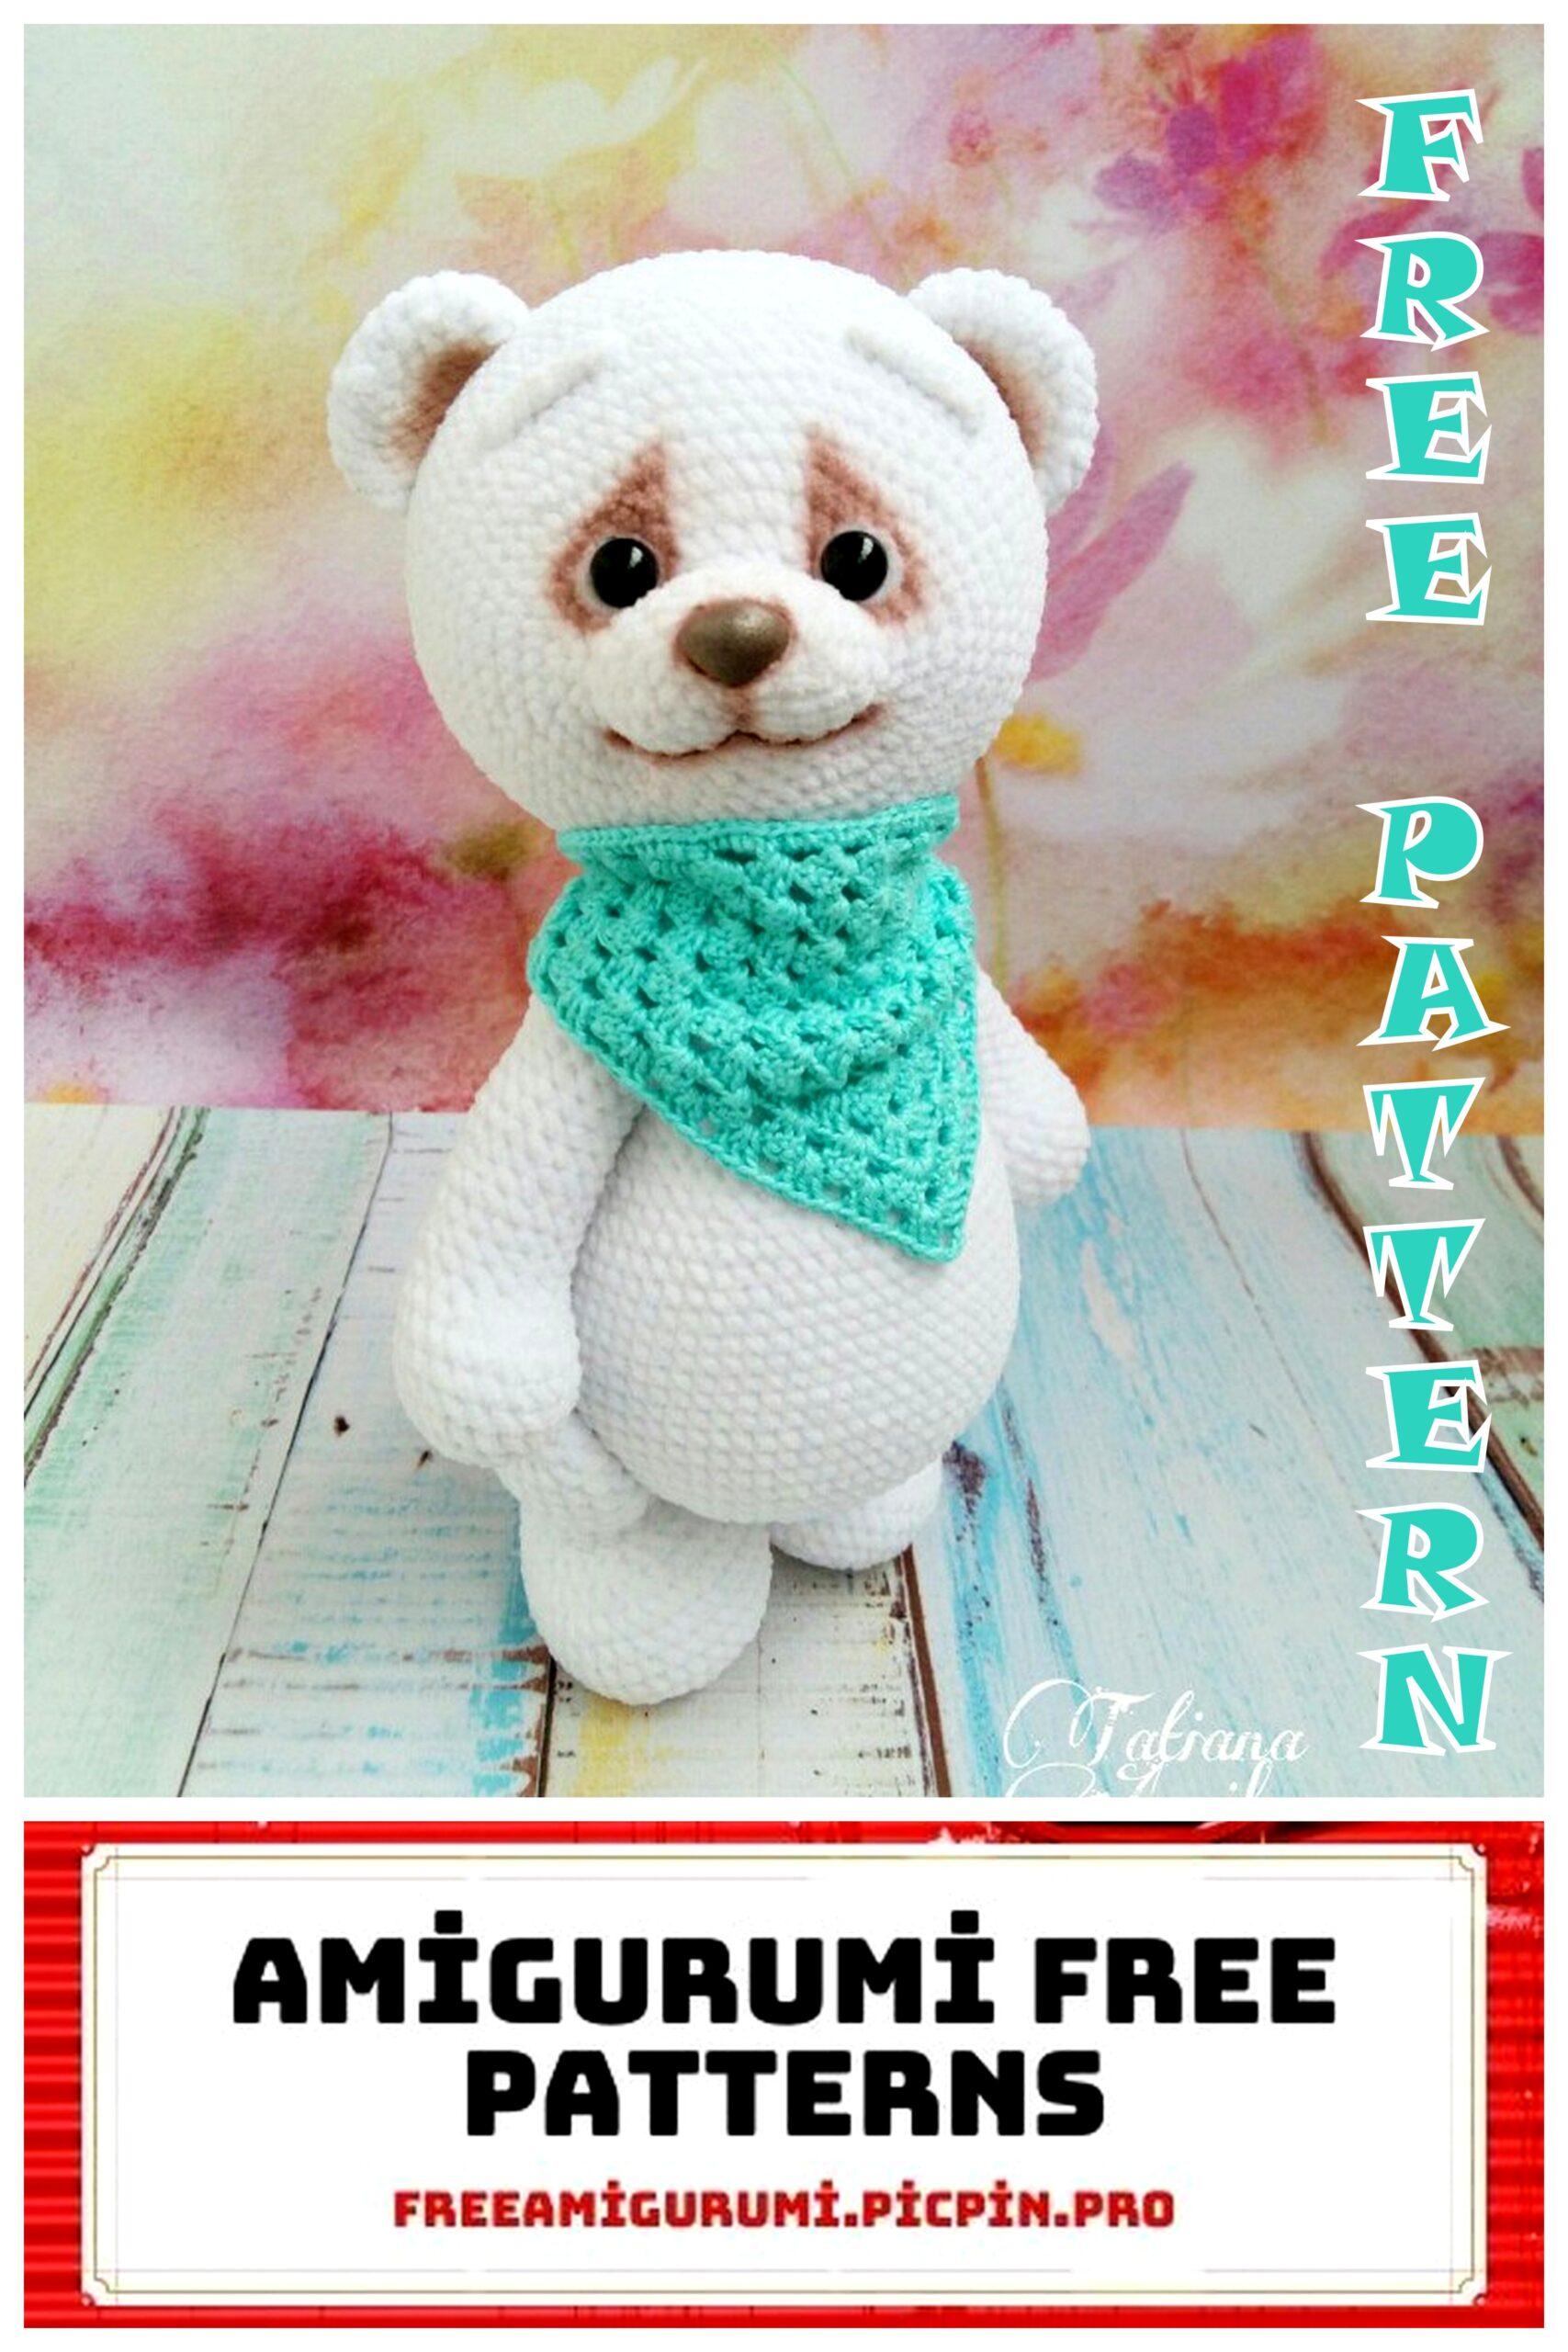
We glue the eyes, nose. With a thread of a contrasting color, select the contour of the mouth. We outline the approximate location of the eyebrows and knit 5 sc, you can embroider with a thread. We sew the ears in any place you like. Sew on the tail. We fix the thread, cut it and hide the tip inside the part.
If desired, we tint our baby.
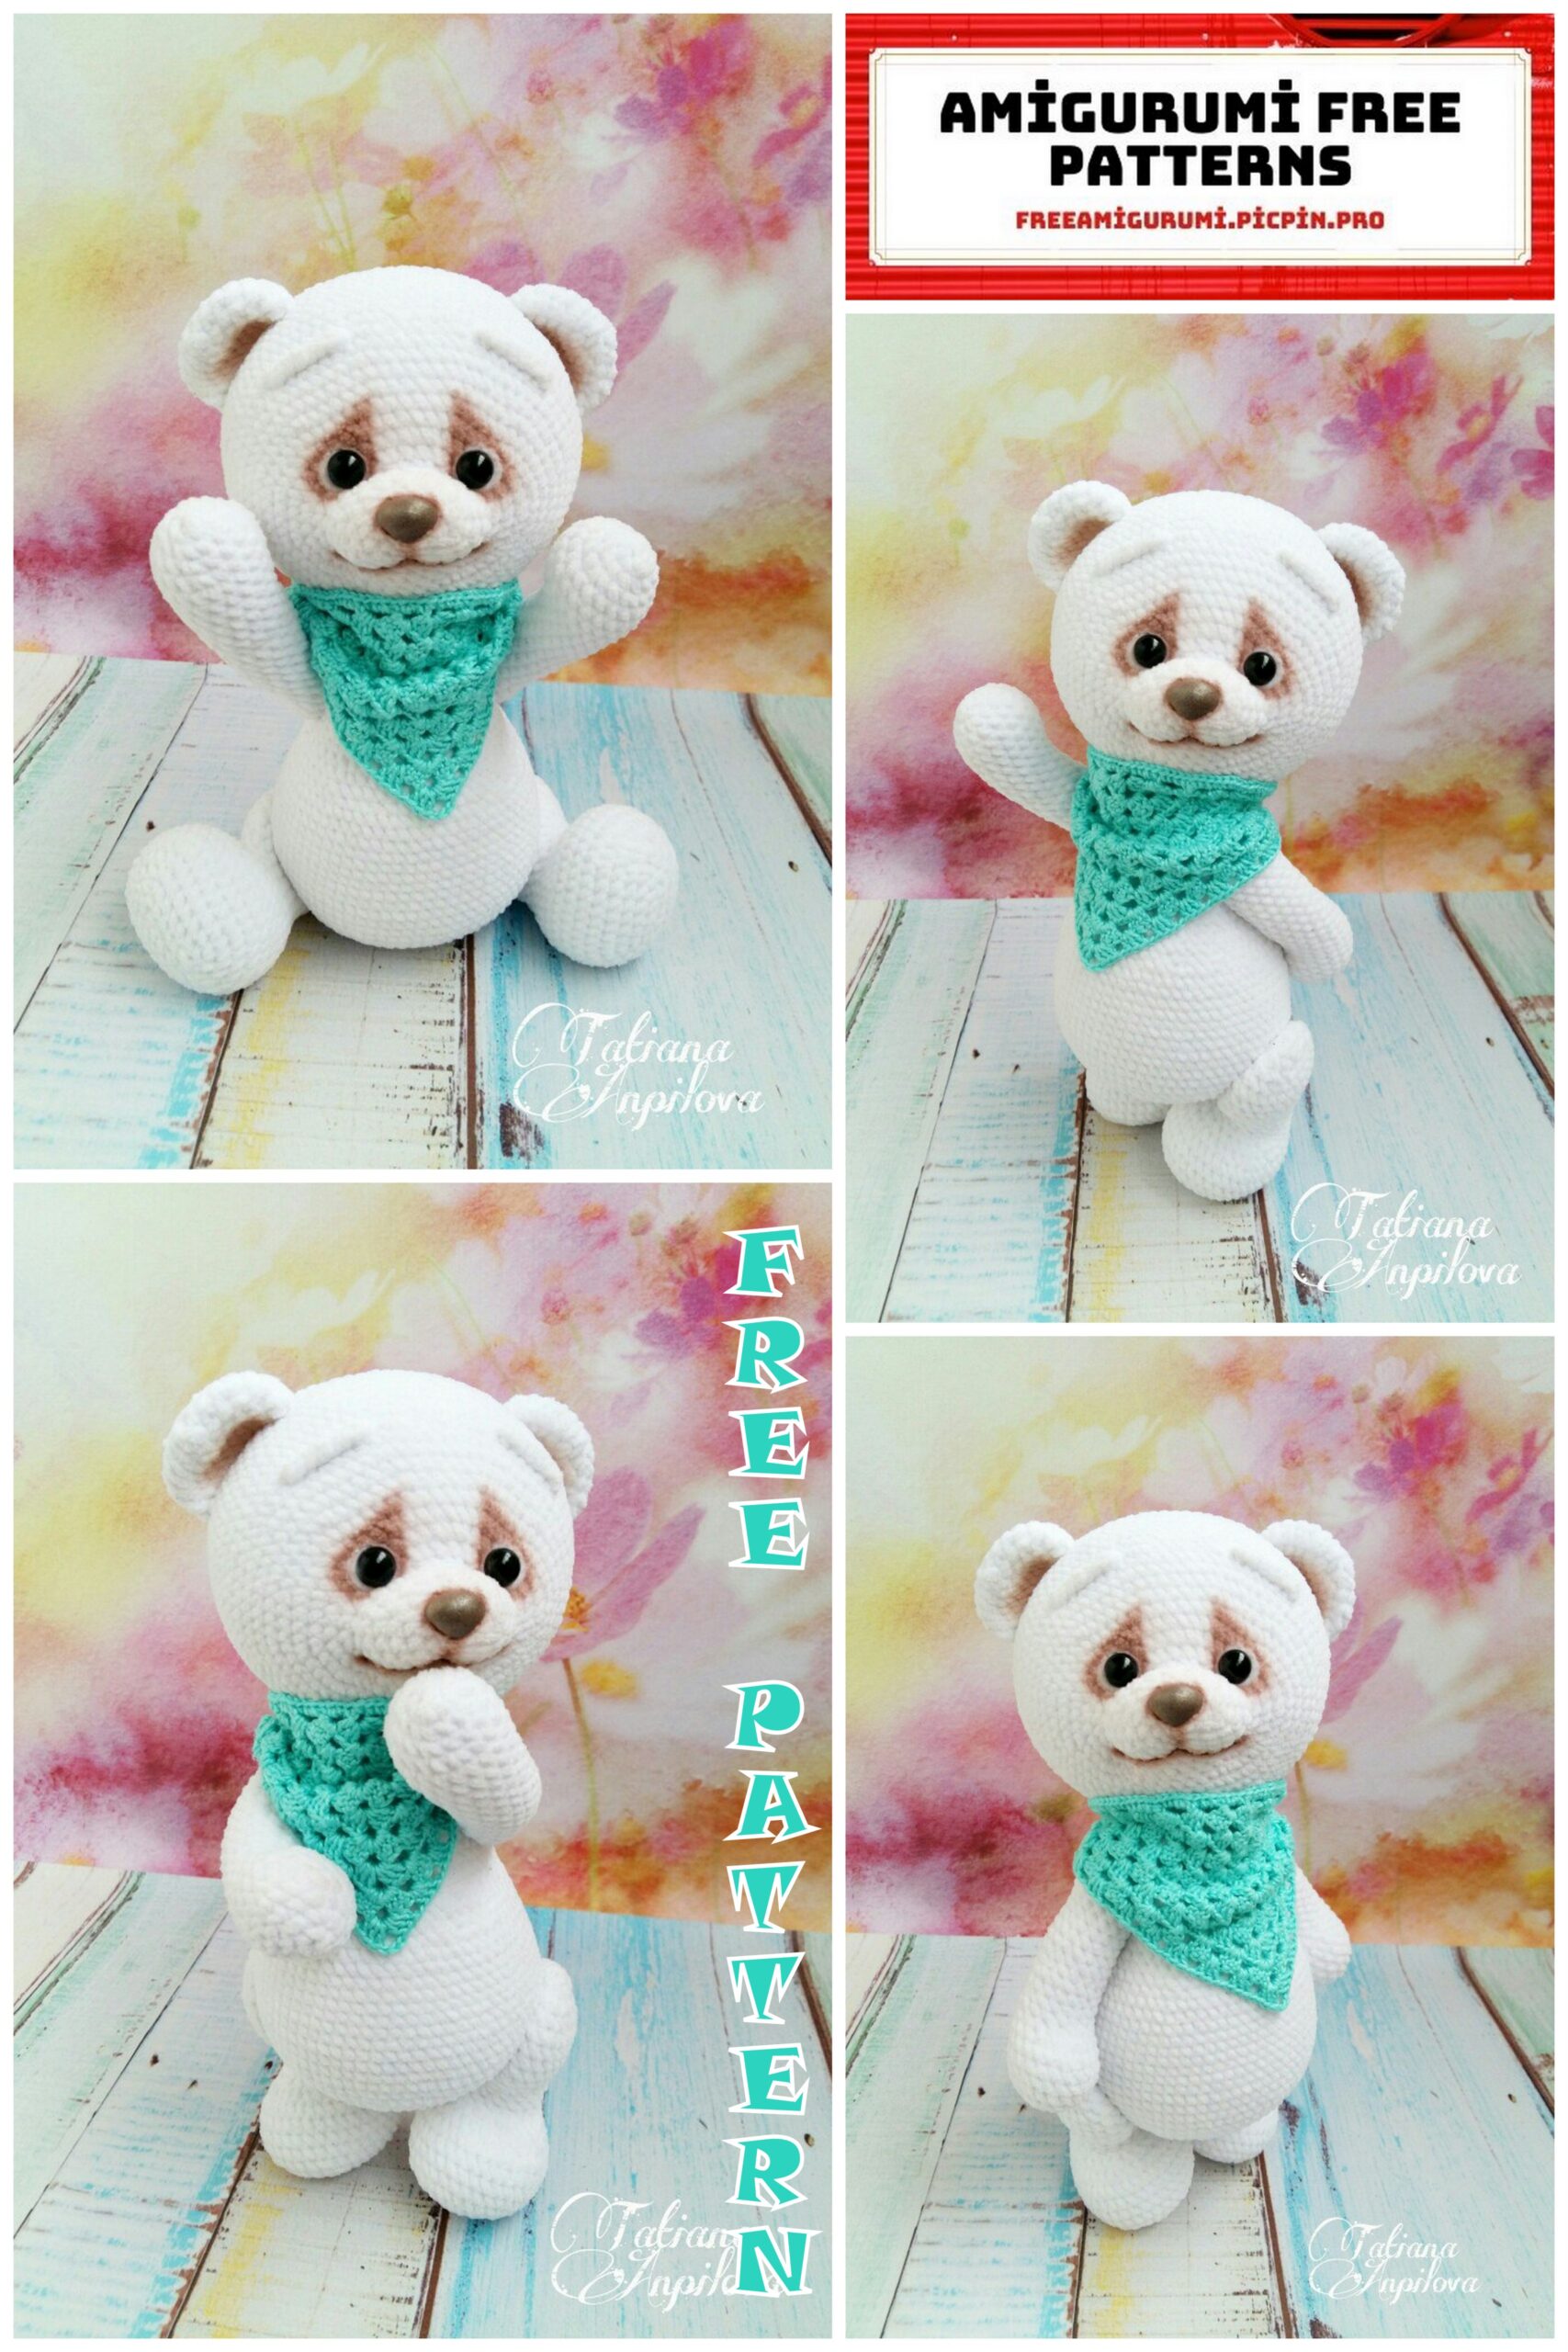
Scarf
We knit in rotary rows.
1st row: 6 ch, in the first loop 3 dc, 3 ch, 3 dc, ch, dc (13)
2 row: 5 ch, turn, 3 dc under the chain loop, ch, (3 dc, 3 ch, 3 dc) under the chain of 3 ch, ch, 3 dc under the chain loop, ch, dc in the 4 chain of the previous row ( 21)
3rd row: 5 ch, turn, 3 dc under ch, ch, 3 dc, ch, (3 dc, 3 ch, 3 dc) under a chain of 3 ch, ch, 3 dc under ch, ch, 3 dc under ch, ch, dc in 4 chain loop of the previous row (29)
Thus, we knit to the length we need along the circumference of the neck. We do not cut the thread, do not turn the knitting, we tie the top of the scarf sc. Optionally, you can tie it completely in a circle. Fasten, cut and hide the thread.
On the one hand, we sew on a button of the size you need, and on the other hand, we already have a ready-made loop.
That’s all our teddy bear is ready, small and charming.