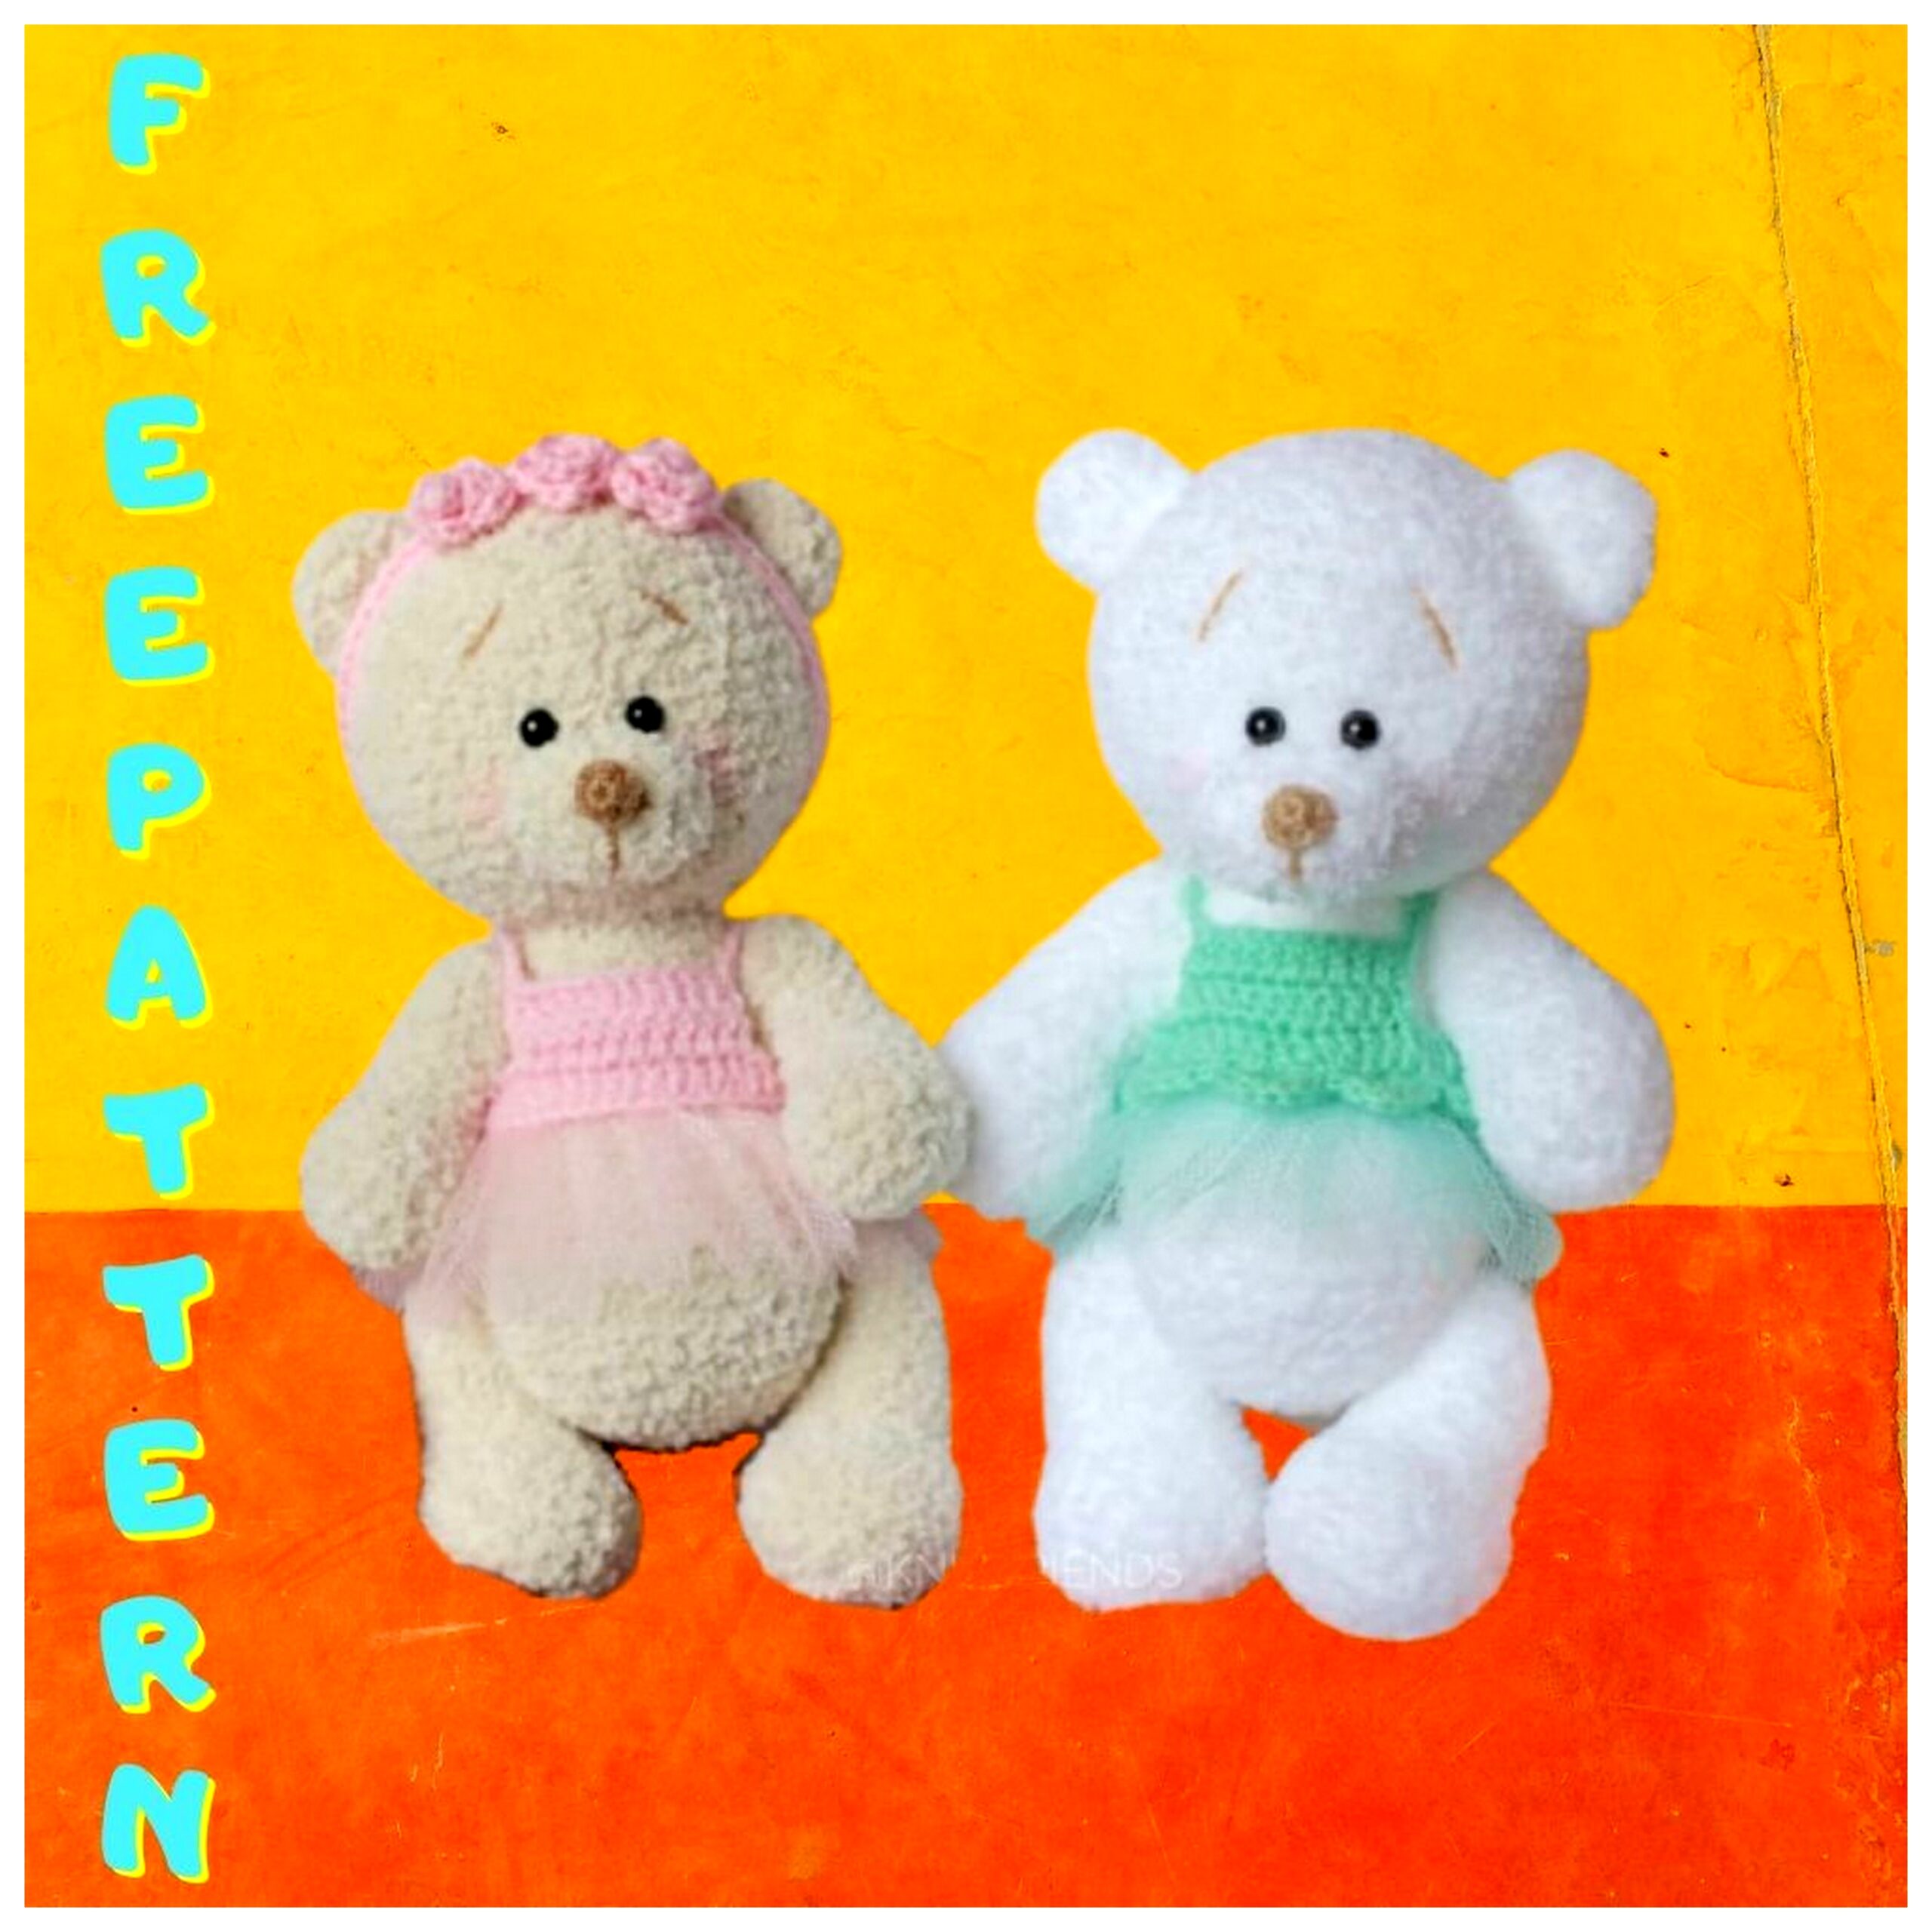
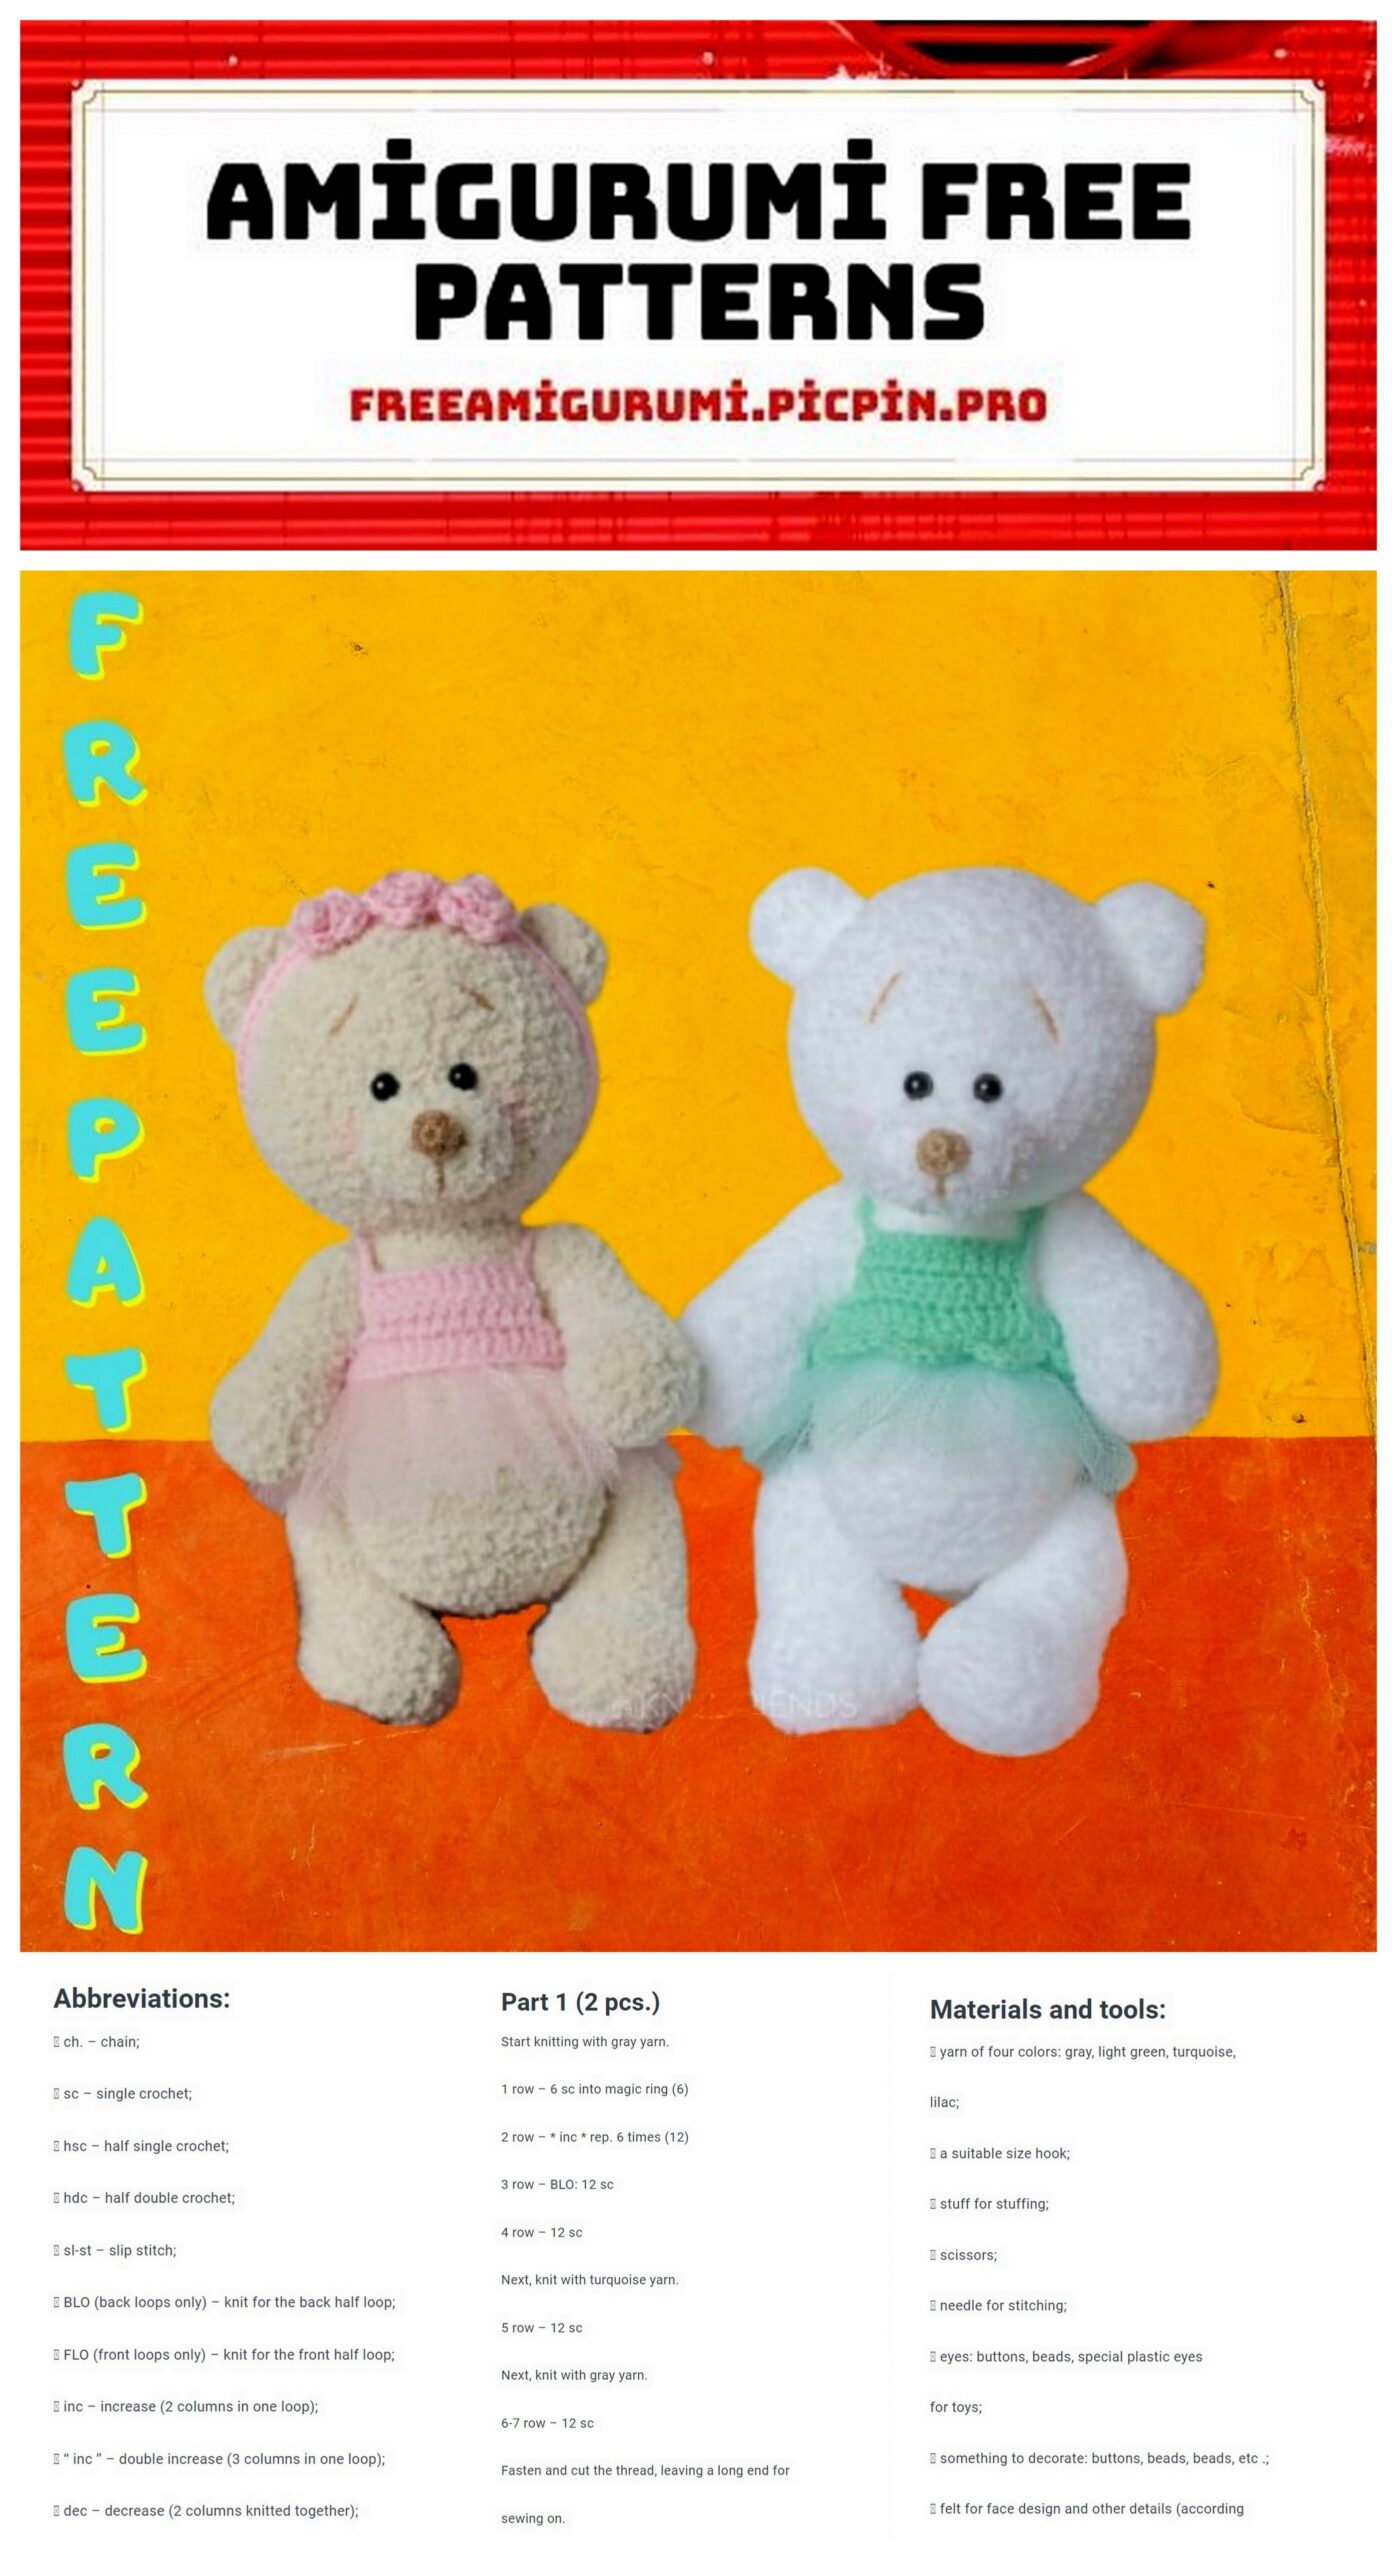
Teddy Bear Amigurumi Free Crochet Pattern
Amigurumi teddy bear patterns are available for free on this site. this cute teddy bear pattern is with you in this article.
Teddy bear 🐻
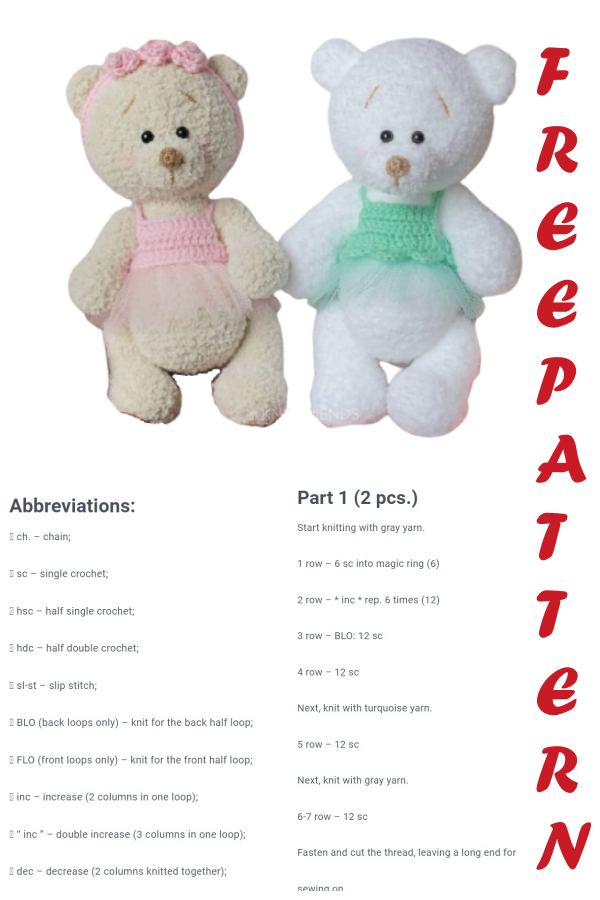
Abbrevations:
🐻SC – single crochet
🐻DEC – decrease (knit two stitches together)
🐻İNC – increase (knit two from one column)
🐻CH – air loop
🐻DC – Column with 1 crochet
✔ The toy is knitted in a spiral without lifting loops
Upper legs – handles (from Softy) 🐻
1st row: 6 SC İNTO MAGİC RİNG
2nd row: İNC * 6 (12)
3rd row: (2 SC, İNC) * 4 (16)
4-6 rows (3 rows): 16 SC (16)
7 row: 4 SC, 4 DEC, 4 SC (12 SC)
8 row: 4 SC, 2 DEC, 4 SC (10)
9-16 rows (8 rows): 10 SC (10)
17: Decreases before closing loops
✔ Tip for stuffing: we only stuff the cam tightly, stuff the upper part of the handle loosely
Lower legs – legs (from Softy) 🐻
1st row: 6 SC İNTO MAGİC RİNG (6)
2nd row: İNC * 6 (12)
3rd row: (1 SC, İNC) * 6 (18)
4th row: (5 SC, İNC) * 3 (21)
5-7 row (3 rows): 21 SC (21)
8 row: 3 SC, (1SC, DEC) * 5, 3 SC (16)
9th row: 6 SC, DEC, 1 SC, DEC, 5 SC (14)
10-13 rows (4 rows): 14 SC (14)
14 row: (5 SC, DEC) * 2 (12)
15-18 rows (4 rows): 12 SC (12)
19 row: DEC * 6 (6)
Ears (from Softy) 🐻
✔ Tip: leave the long end of the thread on one eye in order to sew them in the future.
1st row: 6 SC İNTO MAGİC RİNG (6)
2nd row: İNC * 6 (12)
3-4 rows (2 rows): 12 SC
Muzzle (from Softy) 🐻
Tip: if you have never crocheted an oval, then try to knit first from an ordinary non-fluffy thread (for example, acrylic) the first 2 rows from this description
We collect a chain of 5 CH
1 row: from the second from the hook of the loop 3 SC, 3 SC in one loop, then on the other side of the chain 2 SC, İNC (10)
2nd row: İNC, 2 SC, İNC * 3, 2 SC, 2 İNC (16)
3-4 rows: 16 SC (16)
Spout (made of acrylic, hook 2mm) 🐻
1st row: 6 SC İNTO MAGİC RİNG
2nd row: 6 SC (6)
A spout for those who knit from soft +, plush and other threads that are thicker than ordinary soft (add to the post)
1st row: 6 SC İNTO MAGİC RİNG
2nd row: İNC * 6 (12)
3-4 rows: 12 SC
Body
1st row: 6 SC İNTO MAGİC RİNG (6)
2nd row: İNC * 6 (12)
3rd row: (1SC, İNC) * 6 (18)
4th row: (2SC, İNC) * 6 (24)
5 row: (3SC, İNC) * 6 (30)
6 row: (4SC, İNC) * 6 (36)
7 row: (5SC, İNC) * 6 (42)
8-14 rows (7 rows): 42 SC (42)
15 row: 12 SC, (1 SC, DEC) * 6, 12 SC (36)
16 row: (4 SC, DEC) * 6 (30)
17-20 rows (4 rows): 30 SC (30)
21 row: (3 SC, DEC) * 6 (24)
22-24 rows (3 rows): 24 SC (24)
25 row: (2 SC, DEC) * 6 (18)
Fasten and cut the thread
⠀
Stuffing tip: we stuff the belly area well so that our bear turns out to be pot-bellied.
Head (from Softy) 🐻
1st row: 6 SC İNTO MAGİC RİNG (6)
2nd row: İNC * 6 (12)
3rd row: (1SC, İNC) * 6 (18)
4th row: (2SC, İNC) * 6 (24)
5 row: (3SC, İNC) * 6 (30)
6 row: (4SC, İNC) * 6 (36)
7 row: (5SC, İNC) * 6 (42)
8 row: (6SC, İNC) * 6 (48)
9-17 rows (9 rows): 48 SC (48)
18 row: (6 SC, DEC) * 6 (42)
19 row: (5 SC, DEC) * 6 (36)
20 row: (4 SC, DEC) * 6 (30)
21 row: (3 SC, DEC) * 6 (24)
22 row: (2 SC, DEC) * 6 (18)
23 row: (1 SC, DEC) * 6 (12)
24 row: DEC * 6 (6)
⠀
We stuff the head evenly. This is very important, we should get a perfect ball. And to make it perfect, advice to you: before putting the filler into the toy, you need to fluff it up a little so that it does not look like a lump, but is airy. Then it spreads better inside the toy✔
⠀
🐻 COMPLETE POST: for those with safety eyes, you can place them on the 12th row. Between the eyes 2-2.5 SC
WE DECORATE THE BEAR
1. Sew the head to the calf.
⠀
2. Now you need to sew on the muzzle. We find the optimal position on the face, pin it with pins. Do not forget to fill in the process of sewing. I do not stuff very tightly, but not too weakly, so that the pug turns out to be a real bear, plump and at the same time not stone.
⠀
3. Sew on the ears. We try on the desired position and fix it with pins. The ears need to be sewn on, grabbing both sides of it. That is, folded in half. First, we sew on the eyelet, on which we have a long thread. Then from the first ear, go to the second (the distance between the ears is about 10 SC) and sew it on. Let’s look at the bear from above, so that the ears are in line with the muzzle.
⠀
4. We attach the eyes in the place you like. I have half-bead eyes and I glue them. If your toy is intended for a child, then it is better to use beads and sew them on with strong thread.
⠀
5. Now the most important thing is to sew on the nose, also securing it with a pin on the face. We do not cut the thread. We bring the needle out about 3-4 rows below the nose, grabbing more filler inside (you can move it with your hands). We introduce the needle under the nose – we get a strip under the nose, and we withdraw it already at the lower edge of the first brow. Now we only have to embroider them. We have embroidered the first edge and move on to the second without cutting the thread.
⠀
6. Cheeks can be tinted a little with your usual means. I tint with oil pastels and just a little.
⠀
7. Sew on the legs – leg handles. I sewn n and a thread mount so that they spin. The arms touch the body from rows 18 to 23 of the body, the legs touch the body from about 8 to 12 rows.
BAND AND DRESS🐻
⠀
Bandage
1st row: 65 CH close in the ring
2nd row: 65 SC
Fasten and cut the thread
⠀
Roses 3 pcs
Cast on 18 CH, from the third from the hook of the loop: 2 DC in one loop, 1SC, (3DC in one loop, 1 SC) repeat to the end of the row and leave the long end of the thread. We gradually fold and sew each one. Then sew to the bandage one by one
⠀
Dress
Since we all have bears of different sizes, each will have to knit an individual dress. It is very easy to do this, rely on my description 👇
Cast on a chain of 49 CH (it should be equal to the bear’s waist + 3 loops). From the third loop from the hook, we knit the entire DC chain
Next, we will need to connect the shape, as in the photo in the carousel.
⠀
1) We knit half of the back. To do this, you need to attach the resulting strip to the bear, it should close in the middle of the back. Calculate approximately how many loops you need to knit to the handles. I got 9 DC.
Pay attention: 2 CH lifting loops play the role of the first column!
Then we knit as follows: 2 CH, turn (turned over our strip), we knit 8 DC, 2 CH, turn, another row of 8 DC. We do not cut the thread, we tie the edge of the SC blouse, while making a loop for the future button
⠀
2) Now we knit in front of the dress. To do this, we again apply the resulting detail to the bear, the incision is in the middle of the back. Now we calculate how many loops for the handle and the width of the front to skip.
Here’s how: under the handles we skip 9 stitches of the first row (or the calculated number of stitches), insert the hook into the 10th loop and knit 2 CH, 11 DC. 2 CH, turn, 11 DC. We don’t cut the thread, we just knit a chain from CH for it – this will be the strap of our dress. I have 10 CH, leaving the long end of the thread. Now we need to knit the same strap for the other edge of the dress – attach a thread and knit a chain of 10 CH. Leave the long end of the thread
⠀
3) the second half of the back. We retreat from the front of 9 loops of the first row, insert a hook into the 10th, 2 CH lifts, 8 DC. 2 CH lift, turn, 8 DC.
And we sew the straps to the back.
Sew a button to the resulting dress detail платья
Now you need to measure a piece of tulle, its length approximately corresponds to three girths of the bear’s waist, and the width is at your discretion, this will be the length of the skirt. We will double the length you have chosen, since we will sew in two additions
⠀
We cut off a piece of tulle, fastened the thread at the very corner of the dress and begin to sew it on the seamy side of the dress: first we grab the edge so that it holds well with a few stitches. WE SEW ON IN SMALL CAREFUL STITCHES! So that they are not visible on the front side of the product ✔
Now we form waves with our fingers, and grab them with stitches
⠀
After the skirt was completely sewn, we tried it on. If it turns out to be very long, then it can be shortened with scissors.
⠀
You can tie the edge of the dress with ruffles. The front walls of the SC are visible on the pink dress. So we will knit these little things for them. We knit like this: in the very first front wall sl-st, skip 1 loop, in the next 5 DC, skip one loop, sl-st, skip one loop, 5 DC, and so on until the end of the row.