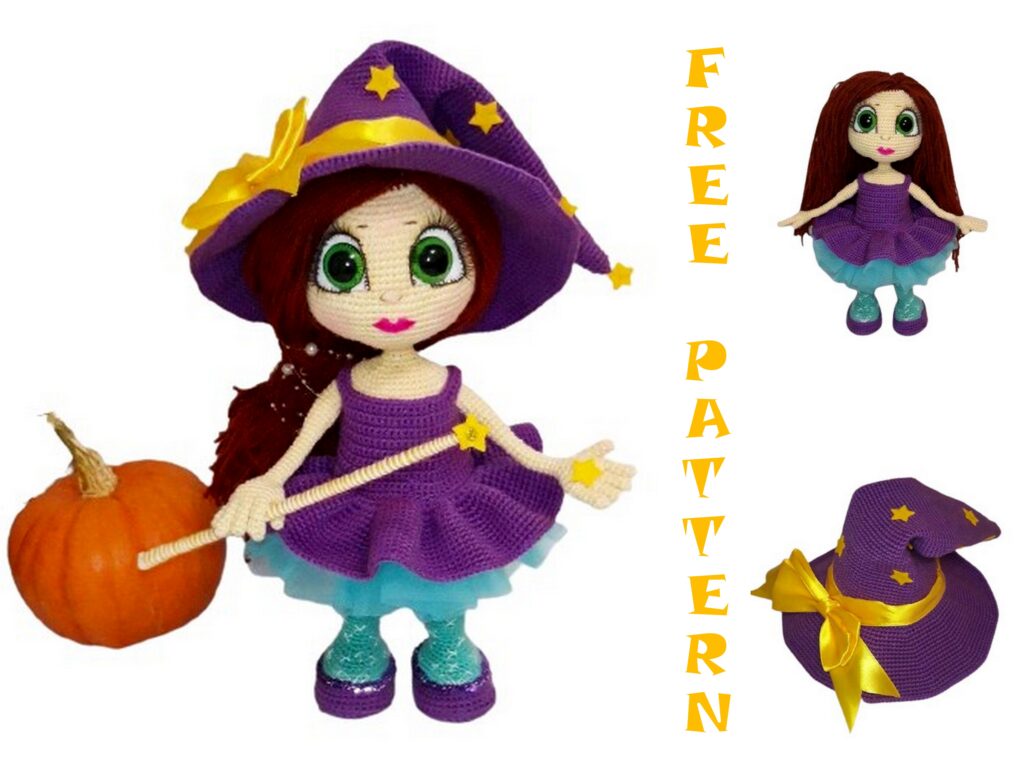
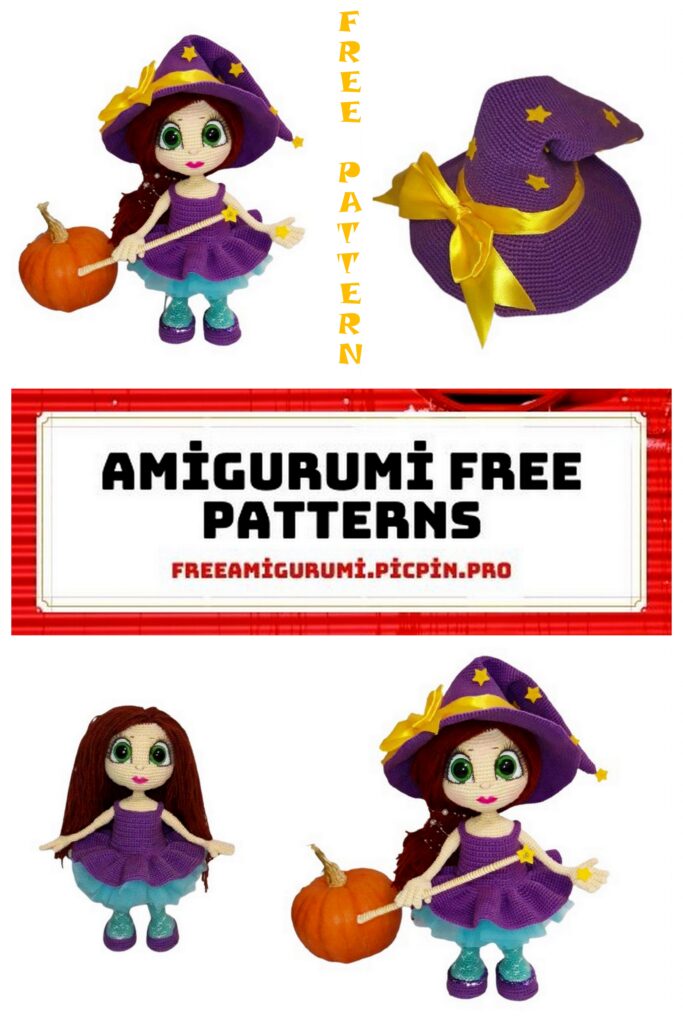
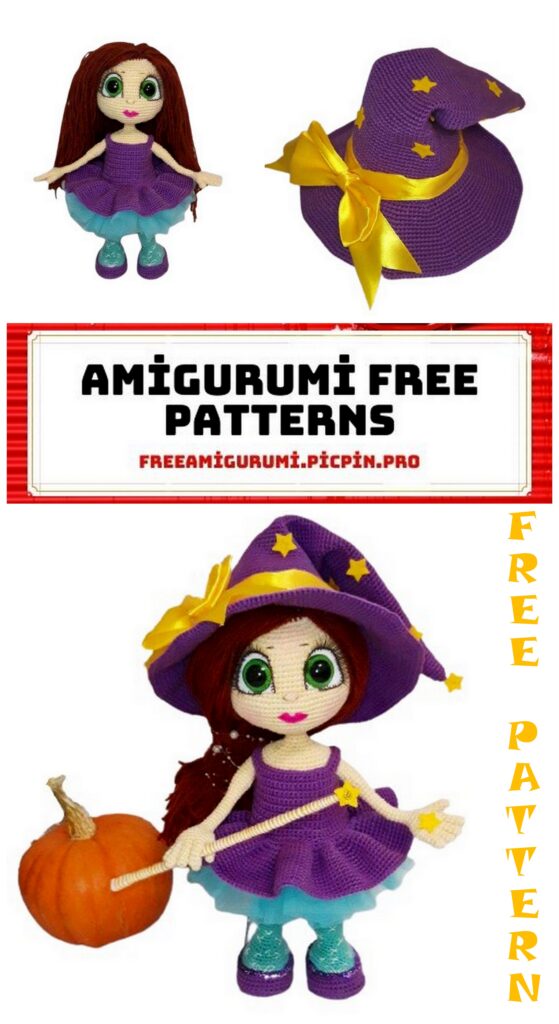
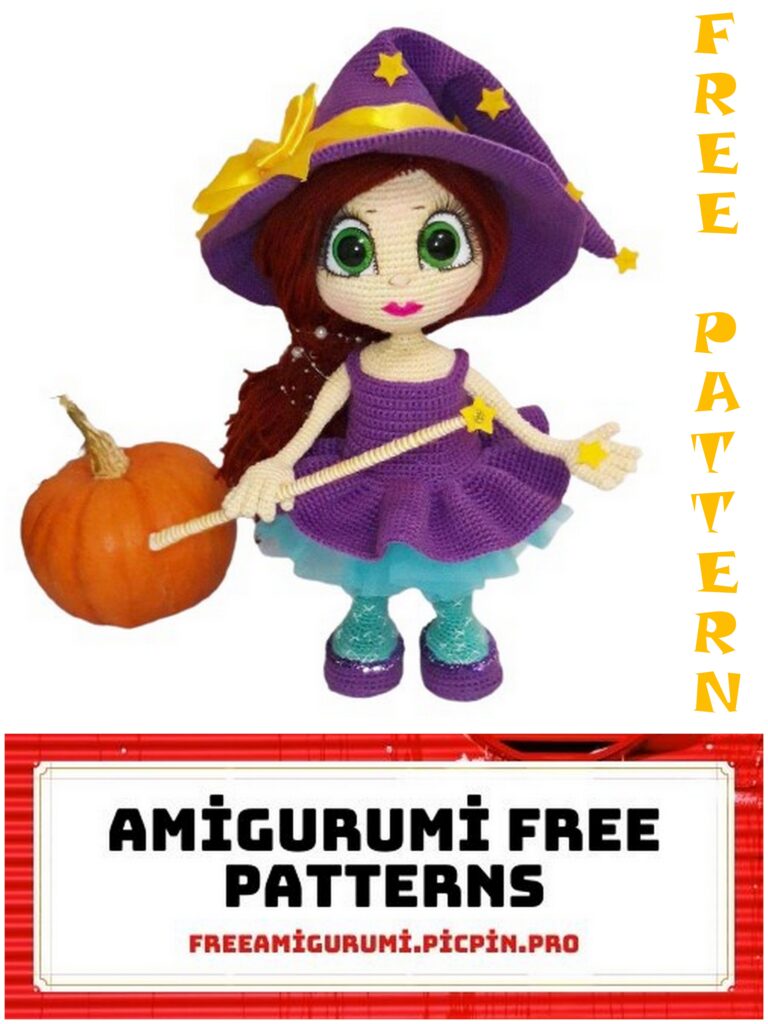
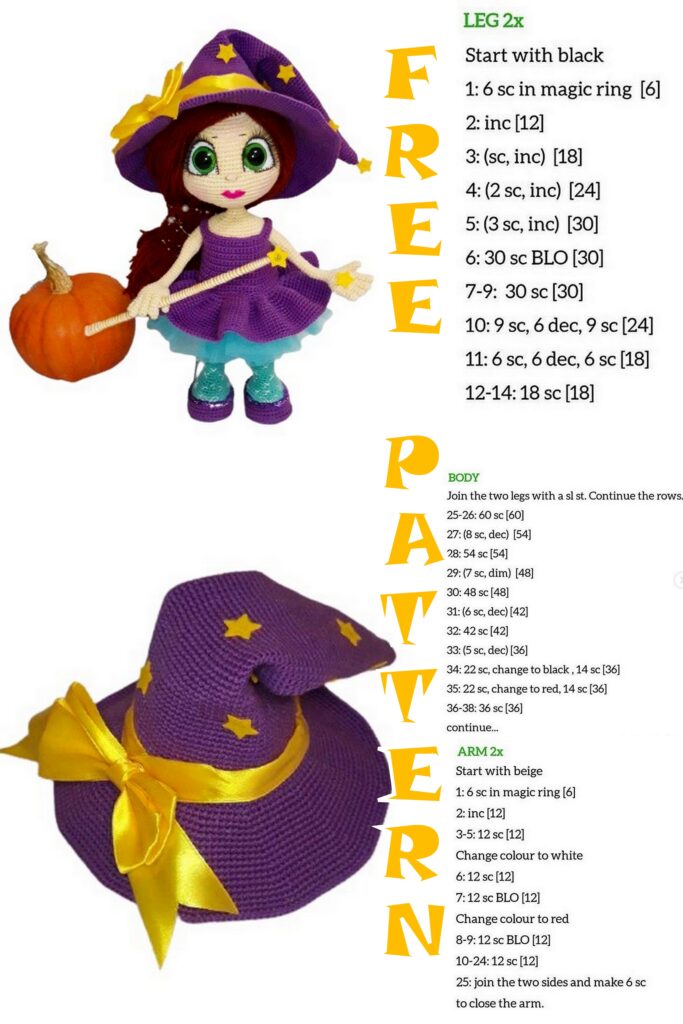
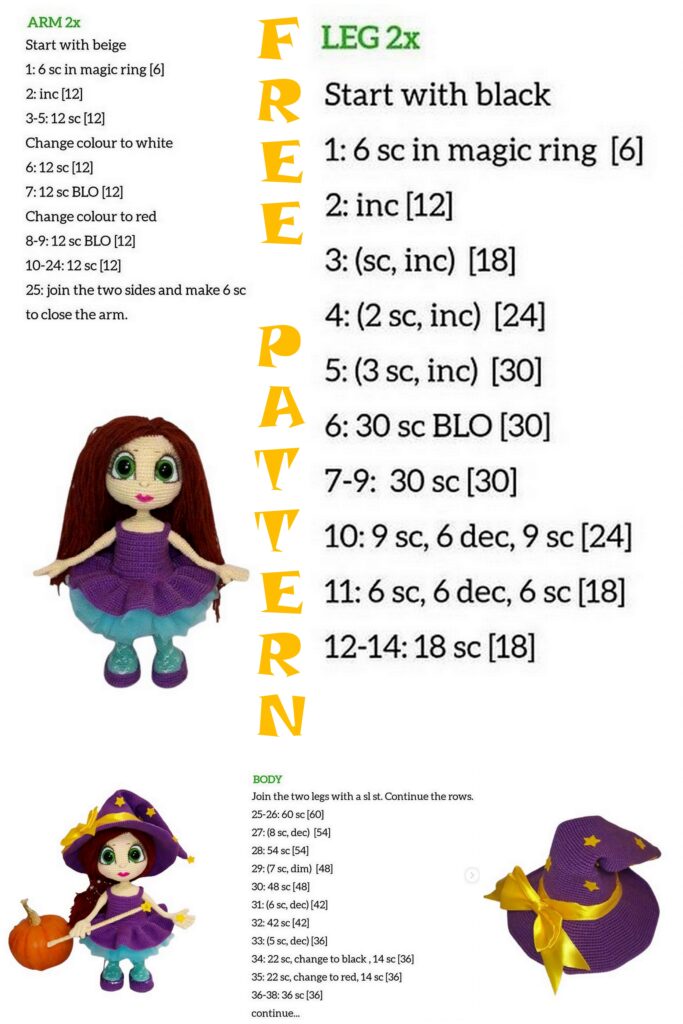
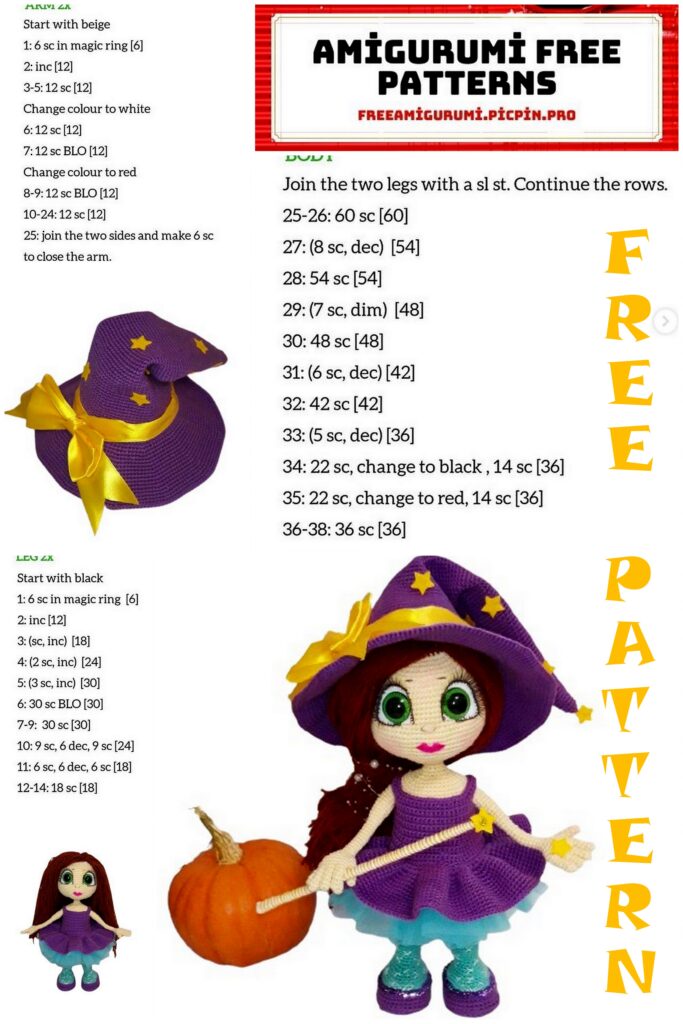
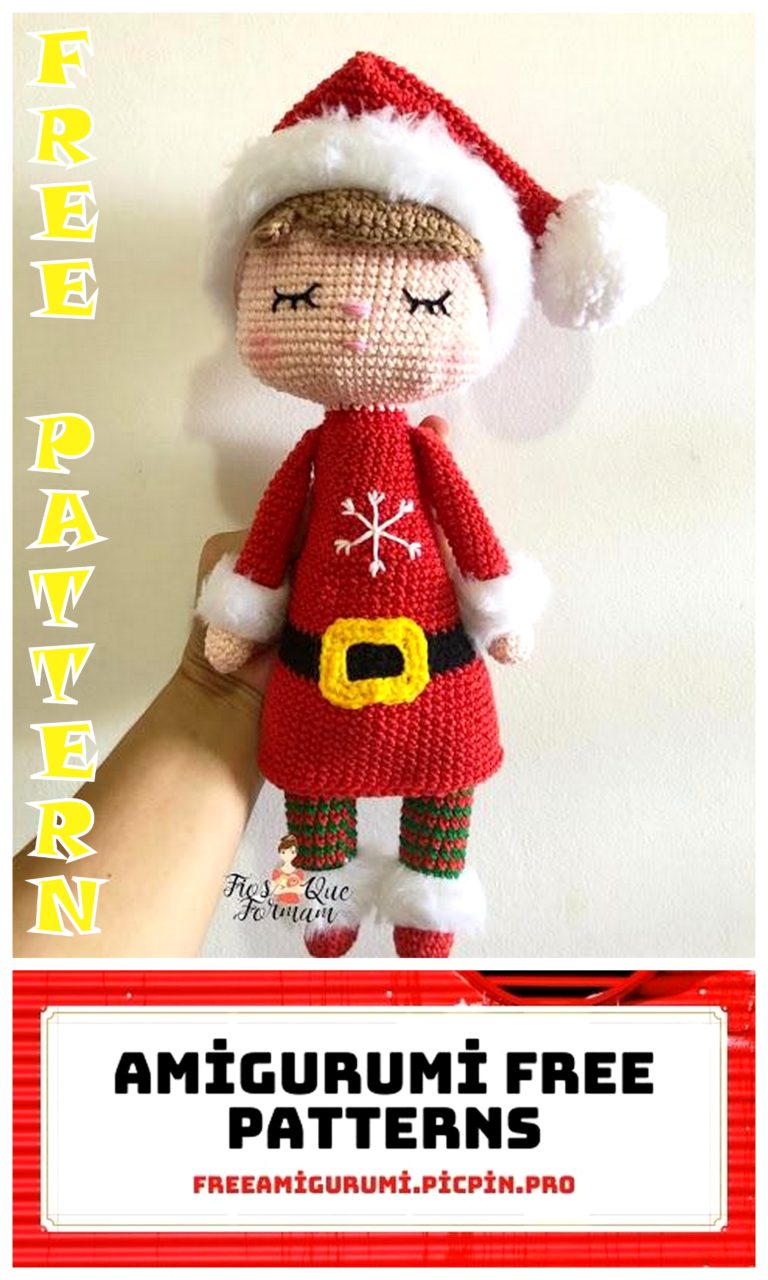
Sweet Witch Doll Amigurumi Free Crochet Pattern
Beautiful amigurumi doll patterns are available on this site for free. In this article, I shared with you the amigurumi sweet witch doll pattern.
To create such a doll, we need the following materials and tools.
1) for the body the yarn “Podmoskovnaya” from Troitsk (50% wool, 50% acrylic, 250m / 100g) in the color “champagne” – 1 piece;
2) for hair, yarn “Podmoskovnaya” from Troitsk (50% wool, 50% acrylic, 250m / 100g) in “cognac” color – 1 pc .;
3) for dresses, hats and shoes, Kamteks “Bambino” yarn (25% wool, 75% acrylic, 150m / 50g) lilac – 2-3 pcs.;
4) for tights yarn “Bambino” Kamtex (25% wool, 75% acrylic, 150m / 50g) green turquoise – a little;
5) nylon thread or line for tightening the face – a little;
6) filler (holofiber, or synthetic winterizer, or synthetic fluff) – about 200-250 gr.
7) aluminum (or copper) wire for weaving with a diameter of 2 mm for the frame – about 2 – 2.5 m;
8) white felt for the eyes – a little;
9) eyes for dolls with a ray of green or blue with a diameter of 25 mm – 1 pair;
10) thread “Iris” or “Mouline” brown for the eyes – a little;
11) false eyelashes;
12) transparent super-glue for attaching eyes and eyelashes – a little;
13) hook number 3 for basic knitting;
14) hook number 2 for knitting handles;
15) a needle with a large eye;
16) scissors;
17) colored pins for marking;
18) white plastic or thick white cardboard for insoles – a little;
19) white cloth adhesive plaster or electrical tape for wrapping the ends of the wire;
20) lilac buttons with a diameter of 10 – 12 mm for a dress – 2 pcs.
21) stars-buttons, or sequins, or rhinestones, or stars made of fabric or foamiran to decorate the cap (optional);
22) turquoise tulle for petticoat (optional);
23) a satin ribbon of golden or yellow color about 4 -5 cm wide for decorating a hat – 1 m;
24) an elastic band for hair of a lilac color of medium size – 1 piece;
25) dry pastel pink or regular dry blush for toning (optional).
You have the right to choose the yarn and decorative elements to your taste and color, choosing the hooks of the required size for your yarn!
I will use the following conventions:
CH – chain;
CHH – chain lifting loop;
SC – single crochet;
INC – single crochet increase;
DEC – single crochet decrease;
DC – double crochet;
INCDC – increase in a column with a crochet;
HDC – half double crochet;
SL-ST – slip stitch;
BLO – back half loop;
FLO – front half loop.
Stage 1. Head.
We knit with flesh-colored threads in a spiral, crochet number 3 (or whatever you chose for the main knitting).
1st row: 6 SC into magic ring (6)
2nd row: 6 INC (12)
3 row: (SC, INC) * 6 (18)
4th row: SC, INC, (2 SC, INC) * 5, SC (24)
5 row: (3 SC, INC) * 6 (30)
6 row: 2 SC, INC, (4 SC, INC) * 5, 2 SC (36)
7 row: (5 SC, INC) * 6 (42)
8 row: 3 SC, INC, (6 SC, INC) * 5, 3 SC (48)
9 row: (7 SC, INC) * 6 (54)
10 row: 4 SC, INC, (8 SC, INC) * 5, 4 SC (60)
11 row: (9 SC, INC) * 6 (66)
12th row: 5 SC, INC, (10 SC, INC) * 5, 5 SC (72)
13 – 17 row (5 rows): 72 SC (72)
18 row: 36 SC, (INC, 6 SC) * 5, INC (78)
19 – 23 row (5 rows): 78 SC (78)
24 row: 36 SC, DEC, (6 SC, DEC) * 5 (72)
25 row: 5 SC, DEC, (10 SC, DEC) * 5, 5 SC (66)
26 row: (9 SC, DEC) * 6 (60)
27 row: 4 SC, DEC, (8 SC, DEC) * 5, 4 SC (54)
28 row: (7 SC, DEC) * 6 (48)
29 row: 3 SC, DEC, (6 SC, DEC) * 5, 3 SC (42)
30 row: (5 SC, DEC) * 6 (36)
31 row: 2 SC, DEC, (4 SC, DEC) * 5, 2 SC (30)
32 row: (3 SC, DEC) * 6 (24)
33 row: SC, DEC, (2 SC, DEC) * 5, SC (18)
34 row: (SC, DEC) * 6 (12)
We fix the thread, cut it off. We fill our head with filler (see photo).
Stage 2. Handles.
We knit the handles with flesh-colored threads, crochet number 2 (or smaller than you chose for the main knitting).
First we knit the fingers. For the left and right hands, they fit the same way.
Middle, index and ring fingers.
1st row: 5 SC into magic ring (5)
2-5 row (4 rows): 5 SC (5)
We fix the thread, cut it off.
Thumb and pinky.
1st row: 5 SC into magic ring (5)
2-4 row (3 rows): 5 SC (5)
We do not cut the thread on the little finger, we continue to knit, connecting the fingers into the palm.
Right hand.
Row 1: 2 SC on the little finger, 2 SC on the ring finger, 2 SC on the middle finger, 5 SC on the index finger, 3 SC on the middle finger, 3 SC on the ring finger, 3 SC on the little finger (20)
2nd row: 20 SC (20)
Note! The marker for the beginning of the row should be located in the middle of the edge of the palm underneath. If necessary, knit offset loops. In the next row, we tie a thumb.
3rd row: 7 SC in the palm, 1 SC together with the thumb (grab SC of the palm and SC of the thumb at the same time), 12 SC in the palm (20)
4th row: 7 SC in the palm, 3 SC in the thumb, grab the SC of the thumb and SC of the palm and knit them together UB, 11 SC in the palm (22)
5 row: 8 SC, DEC, 10 SC, DEC (20)
6 row: (3 SC, DEC) * 4 (16)
7 row: (2 SC, DEC) * 4 (12)
We fill the palm lightly with filler.
8 row: (SC, DEC) * 4 (8)
Cut off about 35 cm of wire. We make a small loop at one end so that you can insert it into your palm. We twist the ends of the wire together, insulate with tissue adhesive plaster or electrical tape. We make 2 such blanks.
We insert the wire blank into the handle.
9-19 row (11 rows): 8 SC (8)
20 row: (3 SC, INC) * 2 (10)
21 – 23 rows (3 rows): 10 SC (10)
24 row: (4 SC, INC) * 2 (12)
25 – 30 row (6 rows): 12 SC (12)
We fix the thread, cut it off. We fill the handle with filler.
Left hand.
Row 1: 3 SC on the little finger, 3 SC on the ring finger, 3 SC on the middle finger, 5 SC on the index finger, 2 SC on the middle finger, 2 SC on the ring finger, 2 SC on the little finger (20)
2nd row: 20 SC (20)
Note! The marker for the beginning of the row should be located in the middle of the edge of the palm underneath. When
if necessary, we knit offset loops. In the next row we tie a thumb.
3rd row: 12 SC in the palm, 1 SC together with the thumb (grab SC of the palm and SC of the thumb at the same time), 7 SC in the palm (20)
4th row: 11 SC in the palm, grab SC of the thumb and SC of the palm and knit them together UB, 3 SC in the thumb, 7 SC in the palm (22)
5 row: DEC, 10 SC, DEC, 8 SC (20)
6 row: (3 SC, DEC) * 4 (16)
7 row: (2 SC, DEC) * 4 (12)
We fill the palm lightly with filler.
8 row: (SC, DEC) * 4 (8)
We insert the wire blank into the handle.
9-19 row (11 rows): 8 SC (8)
20 row: (INC, 3 SC) * 2 (10)
21 – 23 rows (3 rows): 10 SC (10)
24 row: (INC, 4 SC) * 2 (12)
25 – 30 row (6 rows): 12 SC (12)
We fix the thread, cut it off. We fill the handle with filler.
Stage 3. Legs.
We begin to knit from the sole of the shoes with lilac threads, crochet number 3 (or the crochet that you chose for the main knitting).
1 row: we cast on 10 CH + 2 CHH, in the third loop from the hook we knit 4 DC, then 8 DC along the chain from CH, 5 DC into the last loop, 8 DC on the other side of the chain from CH, SL-ST (26)
2nd row: 2 CHH, DC in the same loop, 4 INCDC, 2 DC, 2 HDC, 4 SC, 5 INC, 4 SC, 2 HDC, 2 DC, SL-ST (36)
3rd row: 2 CHH, DC in the same loop, DC, (INCDC, DC) * 4, 2 DC, 2 HDC, 4 SC, (INC, SC) * 5, 4 SC, 2 HDC, 2 DC, SL- ST (46)
According to the resulting trail, we cut out the insoles from plastic (2 pcs.)
4th row: 46 SC for BLO (46)
5 – 6 row: 46 SC (46)
Change the thread to turquoise.
7 row: 46 SC for BLO (46)
8 row: 46 SC (46)
9 row: 8 DEC, 11 SC, 2 DEC, 15 SC (36)
Note! 8 DEC are located in the center of the toe, 2 DEC are in the center of the heel, if necessary, knit offset loops. Insert the plastic insole into the shoe.
10 row: DEC, 3 SC, DEC, 4 SC, DEC, 6 SC, 2 DEC, 6 SC, DEC, 5 SC (30)
Cut off about 80 cm of wire. Fold the wire in half, make a small loop at the end a little smaller than the knitted foot. We twist the ends of the wire together. We make 2 such blanks (see photo).
We insert the wire blank into the leg. We fill the leg with filler.
11 row: (3 SC, DEC) * 6 (24)
12 row: 3 DEC, 18 SC (21)
13 row: 2 DEC, 8 SC, DEC, 7 SC (18)
14th row: DEC, 3 SC, DEC, 6 SC, DEC, 3 SC (15)
15-16 row: 15 SC (15)
17th row: 2 SC, INC, 3 SC, INC, 6 SC, INC, SC (18)
18 -39 (22 rows): 18 SC (18)
We tie the last 39th row to the middle of the inner side of the leg, fasten the thread, cut it off.
We fill the leg with filler.
Keeping the leg in the direction of the foot away from you, attach the lilac thread to the first half-loop of the 7th row of knitting of the leg, where you knit for BLO, and tie the shoe along the top SL-ST: 46 SL-ST. We fix the lilac thread, cut it off, hide the ends. We embroider crosses on the leg with white “Iris” or “Mouline” threads (optional, see photo).
We knit the second leg in the same way, but we do not cut the turquoise thread in the last 39th row of knitting, then we will connect the legs in the body.
Stage 4. Body.
On the leg, where the loop was left untight in the last row of knitting (I have it the left leg), we dial 3 CH and connect with the second leg:
1st row: 18 SC on the leg, 3 SC on the CH chain, 18 SC on the second leg, 3 SC on the other side of the CH chain (42)
Note! The body fits symmetrically, so it doesn’t matter which leg you start with.
2nd row: 42 SC (42)
We twist the wire going from the legs to each other, isolate it with fabric adhesive plaster or electrical tape.
3 row: (6 SC, INC) * 6 (48)
4 – 6 rows (3 rows): 48 SC (48)
7 row: (7 SC, INC) * 6 (54)
8-10 row (3 rows): 54 SC (54)
11 row: (7 SC, DEC) * 6 (48)
12 row: (6 SC, DEC) * 6 (42)
We tie it up to the middle of the side, transfer the marker here.
We change the thread to bodily.
13-25 row (13 rows): 42 SC (42)
We do not tie the 25th row to the middle of the side (the beginning of the row) 2 SC, then we will tie the handles.
We fill the body with filler.
26 row: 4 SC together with the handle (simultaneously grab the SC bodies and SC handles), 17 SC on the body, 4 SC together with the second handle, 17 SC on the body (42)
27 row: 8 SC on the handle, 17 SC on the body, 8 SC on the second handle, 17 SC on the body (50) We fasten the wire from the handles to the general winding coming from the legs, well insulate with fabric adhesive tape or electrical tape.
28 row: (6 SC, DEC, 15 SC, DEC) * 2 (46)
29 row: (6 SC, DEC, 13 SC, DEC) * 2 (42)
30 row: (6 SC, DEC, 11 SC, DEC) * 2 (38)
31 row: (6 SC, DEC, 9 SC, DEC) * 2 (34)
32 row: (6 SC, DEC, 7 SC, DEC) * 2 (30)
33 row: (3 SC, DEC) * 6 (24)
We fill the body and shoulders with filler.
34 row: SC, DEC, (2 SC, DEC) * 5, SC (18)
35 row: (SC, DEC) * 6 (12)
36-40 row (5 rows): 12 SC (12)
We fix the thread, leave the long end for sewing on the head, cut it off.
Stage 5. Face shaping.
Part 1. Eye shaping.
First, using colored pins, we make markings for eye tightening.
1) We count 17 rows of SC down from the crown and put a blue pin in the center of the protruding part of the head (see photo).
2) We count from the blue pin 5 SC to the left and 2 SC up, put a green pin (point).
3) We count from the green pin (point) 1 SC up and put the purple pin (point).
4) We count from the blue pin (point) 5 SC to the right and 2 SC up, put a red pin (point).
5) We count from the red pin (point) 1 SC up and put the pink pin (point).
6) In the last row of knitting the head, perpendicular to the blue pin, put a yellow pin (point) (see photo).
We make an eye tightening using a long needle and a nylon thread (or fishing line) as follows: we insert the needle at the yellow point, withdraw it at the green point, again insert the needle at the purple point and withdraw it at the pink point, then insert the needle at the red point and bring it out to the open head hole. Tighten the thread slightly, tie the ends into several knots and hide them in the open hole of the head.
Part 2. Chin tightening.
First, we make the markings for tightening the chin using colored pins.
1) The yellow pin (dot) remains in the last row of knitting in the same place where we put it when marking to tighten the eyes.
2) We count from the yellow pin (point) 3 rows SC up and 3 SC to the left, put a blue pin (point).
3) We count from the blue pin (point) 1 SC to the left and 2 SC up, put a pink pin (point).
4) We count from the yellow pin (point) 3 rows SC up and 3 SC to the right, put a green pin (point).
5) We count from the green pin (point) 1 SC to the right and 2 SC up, put a purple pin (point) (see photo).
With the help of a long needle and a nylon thread (or fishing line) we tighten the chin as follows: insert the needle at the yellow point, bring it out to the blue one, re-insert the needle at the pink point and draw it out in the purple one, then insert the needle at the green point and bring it out into the open hole of the head. We tighten the thread, tie the ends into several knots, hide them in the open hole of the head.
Stage 5. Face shaping.
Part 3. Design of eyes, nose, brows, mouth and ears.
We make out the eyes.
Cut out two blanks for the eyes from white felt, look at the shape in the photo. Note! For those who crocheted No. 3 from threads similar in density to those indicated by me, the size of the felt details is approximately 28 * 30 mm. The rest adjust the size of the eyes visually to the size of the resulting head.
We make small cuts in the center of the resulting blanks. We insert green eyes-pupils with a diameter of 25 mm into the incisions.
Trying on the resulting eyes on the head. Sew on the felt details of the eyes with brown “Iris” or “Mouline” threads with small stitches with an overcast seam. We smear the pupils of the eyes on the back with transparent super-glue and glue.
Note! If you have eyes with a foot or a screw in the back, you don’t need to file them! Stretch the loop on the head where the pupils should be, and insert the leg or screw into the head, then glue the pupil. So the eye will hold more securely! Glue false eyelashes around the edge of the eye with transparent super-glue (see photo). We decorate the nose.
We retreat from the inner corners of the eyes 2 rows of SC down and three to fourstitches with flesh-colored thread to embroider a nose 2 SC wide. Then we embroider the contour of the nose with brown “Iris” or “Mouline” threads (see photo).
Go up 2 rows SC up above the eyes and embroider small eyebrows with brown “Iris” or “Mouline” threads (see photo). We decorate the sponges.
We retreat from the spout 2 rows of SC down and embroider the sponges with dense crimson (either pink or red) threads. First we embroider the contour of the lips (see photo), then fill the space inside the embroidered contour with horizontal stitches. We decorate the ears.
We count from the crown of the 14 rows of SC down and in the middle of the head on the sides with a chain stitch we embroider the contour of the ear (see photo). We do not cut the thread, but for the resulting loops we knit SC, thus we get ears (see photo)
Stage 6. Hair.
Part 1. Marking and preparation of hair.
For convenience, we first make markings on the head, designate the future “hairline”. To do this, take brown threads “Iris” or “Mouline thread” and embroider “hair growth lines” with large stitches (see photo).
We make the preparation of the hair itself from brown yarn. We take any book 30 cm high, wrap it in height with threads, then cut the threads from one edge with scissors (see photo). The resulting hairs are approximately 60 cm long.
Note! We harvest the hair as needed so as not to spoil the whole skein.
Part 2. Hair attachment.
We attach the hair to the head like a fringe: holding the hook in the direction “from the crown of the head”, insert it under the SC, grab the hair folded in half, pull out the loop, thread the ends of the hair into the pulled loop, tighten. Thus, we first fix the hair along the contour of the “hairline”, then fill in all the space inside these lines (see photo). Fix hair
follows under each SC, but through the SC row. Sew the finished head to the body.
Stage 7. Sundress.
First, we knit a skirt at the sundress with lilac threads.
1st row: dial 66 CH, close into the SL-ST ring. You should get a ring of such a size that the legs of the pupa can freely pass through it, i.e. the sundress will not be worn over the head, but over the legs.
2nd row: take spandex (elastic thread), work it along the chain of CH and knit into the SC of this row: 66 SC (66)
Do not tighten the ends of the spandex yet.
Note! An elastic thread is needed so that the skirt of a sundress is ultimately kept at the waist. If you don’t have such a thread right away, then it can be inserted with a needle when the sundress is ready.
3 row: (INC) * 66 (132)
4th row: (5 SC, INC) * 22 (154)
5 row: (6 SC, INC) * 22 (176)
6 row: (7 SC, INC) * 22 (198)
7-15 row (9 rows): 198 SC (198)
We fix the lilac thread, cut it off.
If you will not make a tulle petticoat, then attach a turquoise thread and tie along the bottom of the sundress:
16 row: (3 DC) * 198 (594)
We fix the thread, cut it off.
We knit the top of a sundress with lilac threads in swivel rows.
1 row: attach the thread to the 2nd half loop of the first row of the skirt and knit 64 SC, do not tie the last SC, CH, turn (64)
2nd row: 64 SC, CH, turn (64)
3 row: (11 SC, DEC) * 2, 12 SC, (DEC, 11 SC) * 2, CH, turn (60)
4th row: 60 SC, CH, turn (60)
5 row: (10 SC, DEC) * 2, 12 SC, (DEC, 10 SC) * 2, CH, turn (56)
6 row: (9 SC, DEC) * 2, 12 SC, (DEC, 9 SC) * 2, CH, turn (52)
7-14 row (8 rows): 52 SC, CH, turn (52)
15 row: 8 SC, 10 CH, 8 SC skip, 20 SC, 10 CH, 8 SC skip, 8 SC, CH, turn (56)
16 row: 17 SC, DEC, 18 SC, DEC, 17 SC, CH, turn (54)
17 row: 16 SC, DEC, 18 SC, DEC, 16 SC, CH, turn (52)
We do not cut the thread, we make the binding of the V-shaped armhole: 5 CH (or enough to make a buttonhole under the buttonhole of your size), 6 SL-ST along the armhole, 5 CH (this is again a buttonhole under the button), SL-ST to the end of the armhole. We fix the thread, cut it off.
Sew 2 buttons on the back of the top of the sundress (see photo)
We tighten the spandex thread to fit the waist of the pupa, tie the ends of the thread into several knots, hide it.
We make a tulle petticoat from tulle 2 m long and 30 cm wide in 4 folds (in width), that is, the length of the petticoat is about 7.5 cm.We string tulle folded in 4 layers onto a spandex thread (thread length about 25 cm) at a distance of 0, 5 cm from the top of tulle. We tie the ends of the spandex to the size of the doll’s waist. The petticoat can be sewn to the sundress from the wrong side, or it can be left separate and removable. We put on a sundress on a doll.
Stage 8. Hat-cap.
First, we knit the brim of the hat-cap with lilac threads.
1st row: we collect a chain of 90 CH and close it in a ring (90)
2nd row: (14 SC, INC) * 6 (96)
3 row: (15 SC, INC) * 6 (102)
4th row: 8 SC, INC, (16 SC, INC) * 5, 8 SC (108)
5 row: (17 SC, INC) * 6 (114)
6 row: 9 SC, INC, (18 SC, INC) * 5, 9 SC (120)
7 row: (19 SC, INC) * 6 (126)
8 row: 10 SC, INC, (20 SC, INC) * 5, 10 SC (132)
9 row: (21 SC, INC) * 6 (138)
10 row: 11 SC, INC, (22 SC, INC) * 5, 11 SC (144)
11 row: (23 SC, INC) * 6 (150)
12 row: 12 SC, INC, (24 SC, INC) * 5, 12 SC (156)
13 row: (25 SC, INC) * 6 (162)
14 row: 13 SC, INC, (26 SC, INC) * 5, 13 SC (168)
15 row: (27 SC, INC) * 6 (174)
16 row: 14 SC, INC, (28 SC, INC) * 5, 14 SC (180)
17 row: (29 SC, INC) * 6 (186)
18 row: 15 SC, INC, (30 SC, INC) * 5, 15 SC (192)
We fix the thread, cut it off.
We attach the lilac thread to the 1st left half loop of the 1st row and knit the cap. 1-5 rows (5 rows): 90 SC (90)
6 row: (13 SC, DEC) * 6 (84)
7-9 row (3 rows): 84 SC (84)
10 row: 6 SC, DEC, (12 SC, DEC) * 5, 6 SC (78)
11 – 13 row (3 rows): 78 SC (78)
14 row: (11 SC, DEC) * 6 (72)
15-18 row (4 rows): 72 SC (72)
19 row: 5 SC, DEC, (10 SC, DEC) * 5, 5 SC (66)
20-24 row (5 rows): 66 SC (66)
25 row: (9 SC, DEC) * 6 (60)
26-30 row (5 rows): 60 SC (60)
31 row: 4 SC, DEC, (8 SC, DEC) * 5, 4 SC (54)
32 -36 row (5 rows): 54 SC (54)
37 row: (7 SC, DEC) * 6 (48)
38 -47 row (10 rows): 48 SC (48)
48 row: 3 SC, DEC, (6 SC, DEC) * 5, 3 SC (42)
49 – 56 row (8 rows): 42 SC (42)
57 row: (5 SC, DEC) * 6 (36)
58 – 65 row (8 rows): 36 SC (36)
66 row: 2 SC, DEC, (4 SC, DEC) * 5, 2 SC (30)
67 -71 row (5 rows): 30 SC (30)
72 row: (3 SC, DEC) * 6 (24)
73 -77 row (5 rows): 24 SC (24)
78 row: SC, DEC, (2 SC, DEC) * 5, SC (18)
79 -83 row (5 rows): 18 SC (18)
84 row: (SC, DEC) * 6 (12)
85 -87 row (3 rows): 12 SC (12)
Row 88: 6 DEC (6)
We tighten the remaining hole, fasten the thread, cut it off.
If desired, we sew (glue) stars onto the hat-cap, decorate the hat with a satin ribbon bow.
We put on a hat-cap on the doll.
We correct the hairstyle by blushing the doll’s cheeks with dry pastel.
