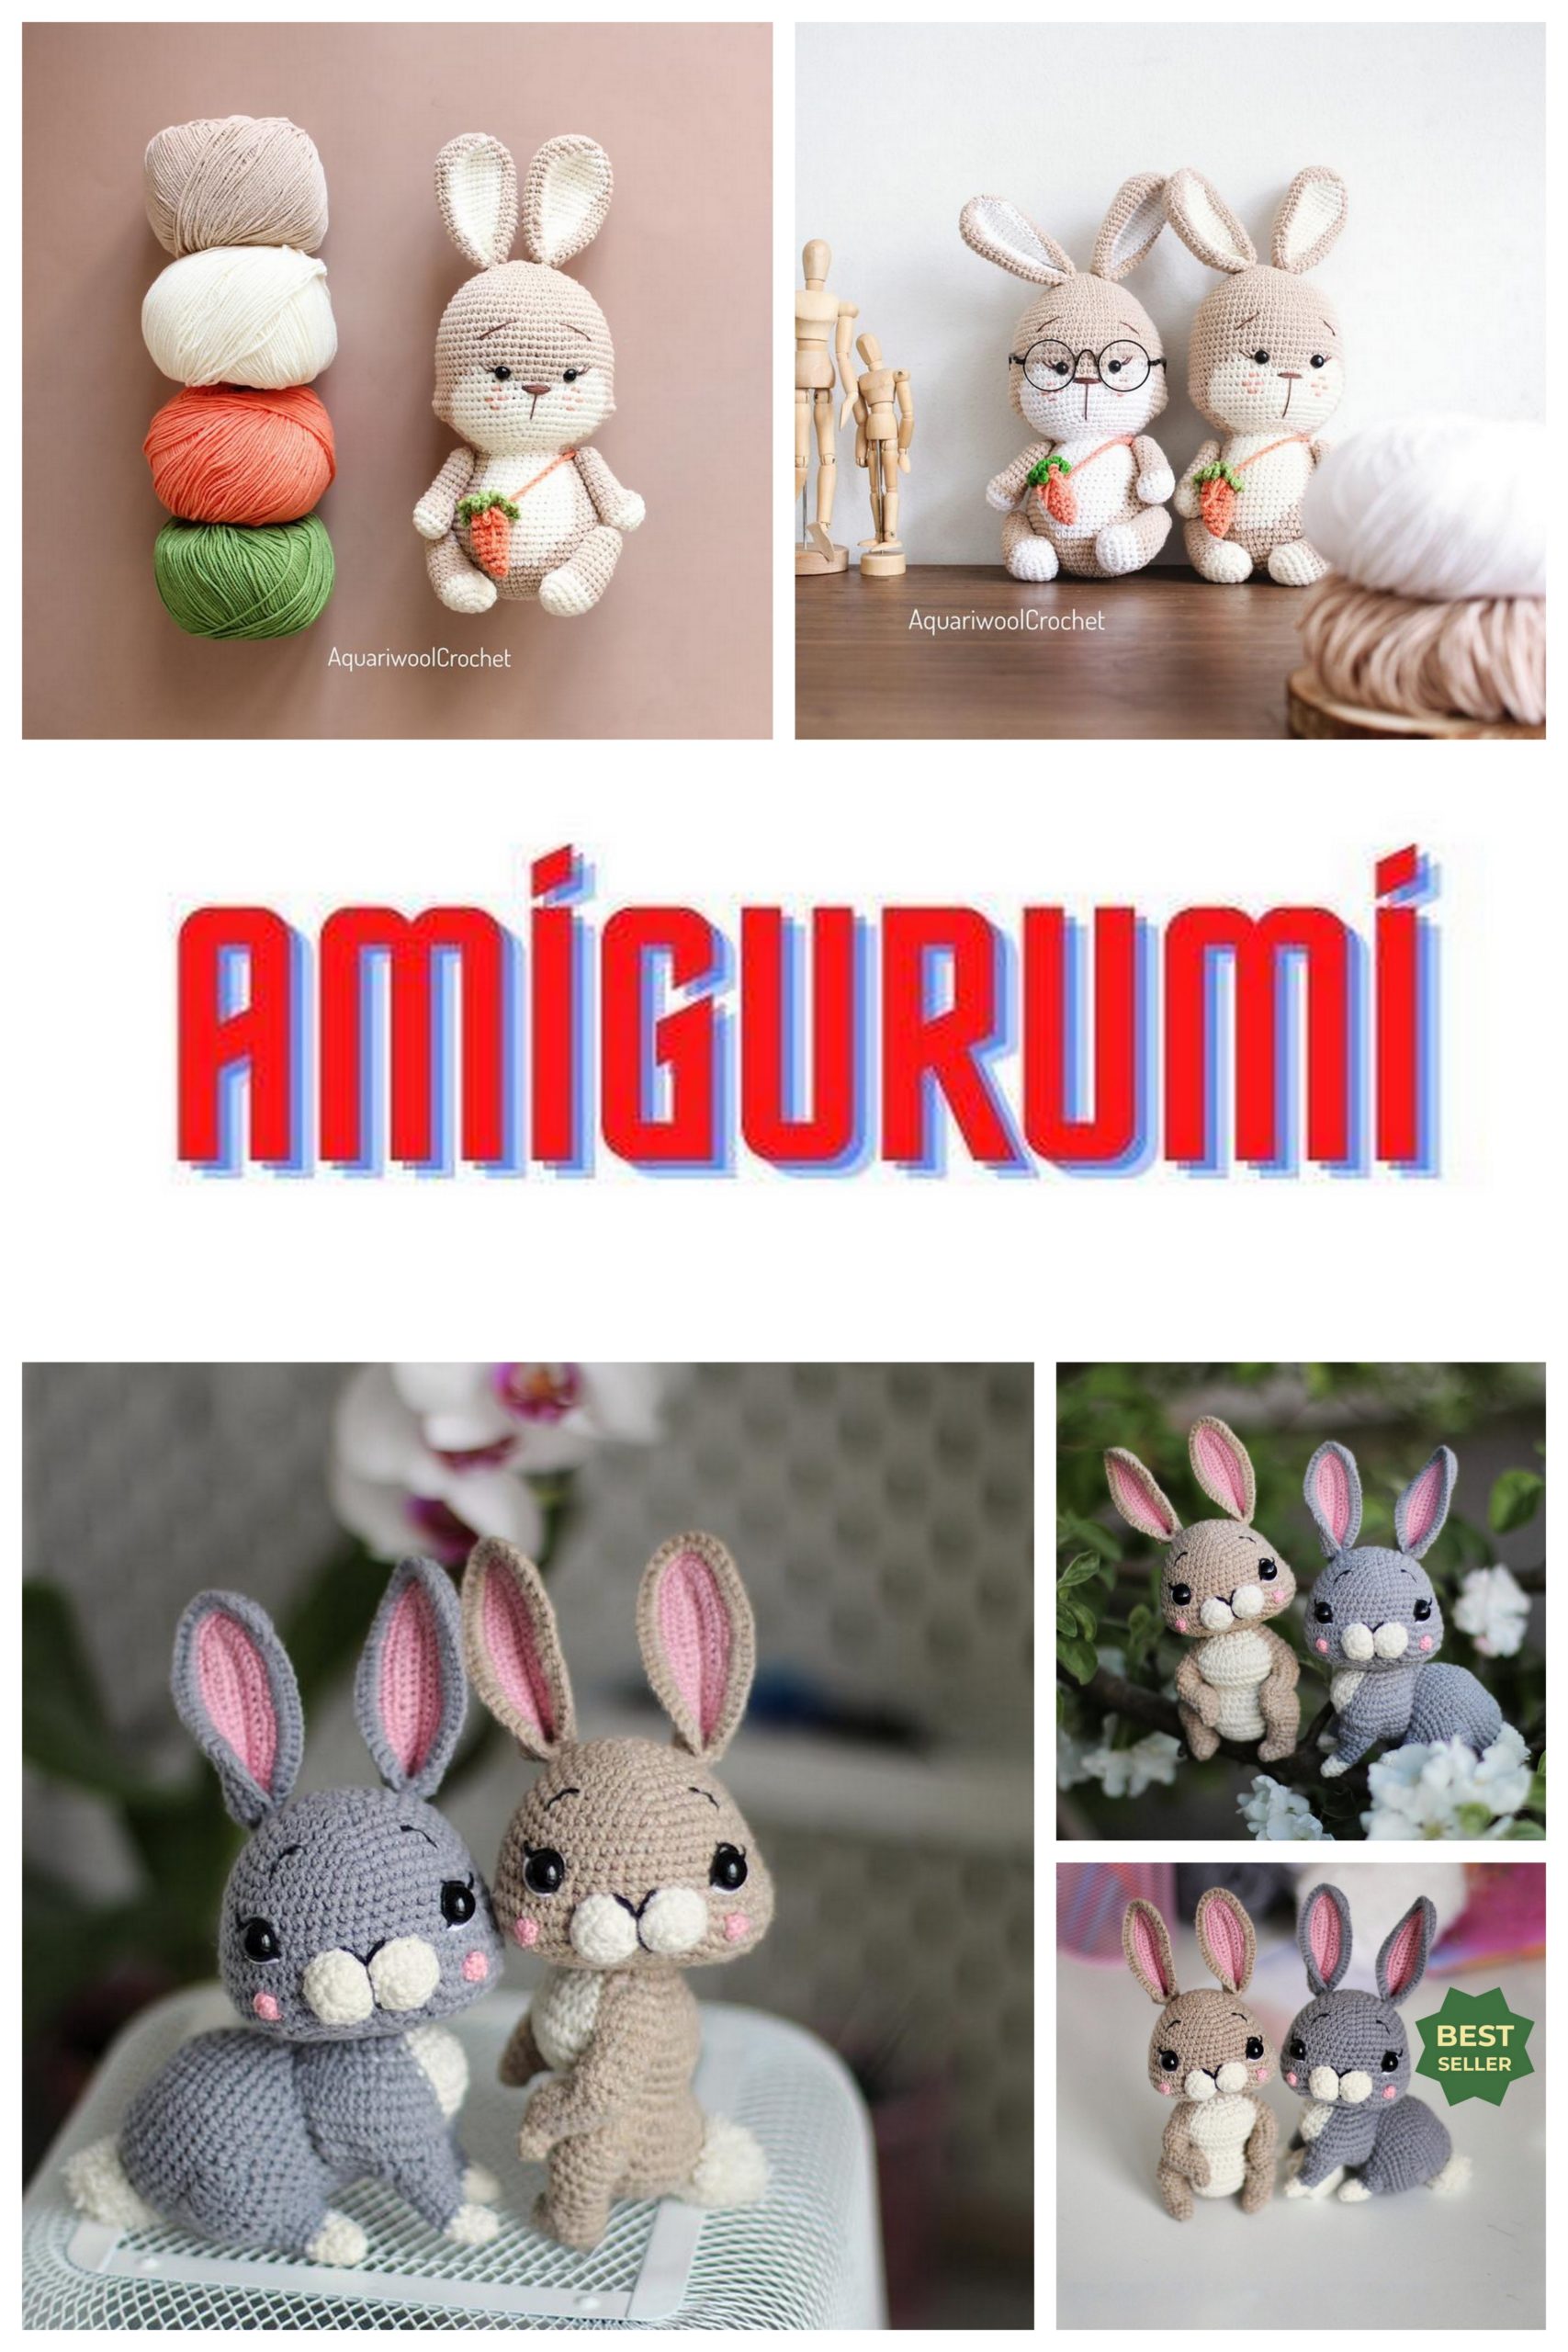
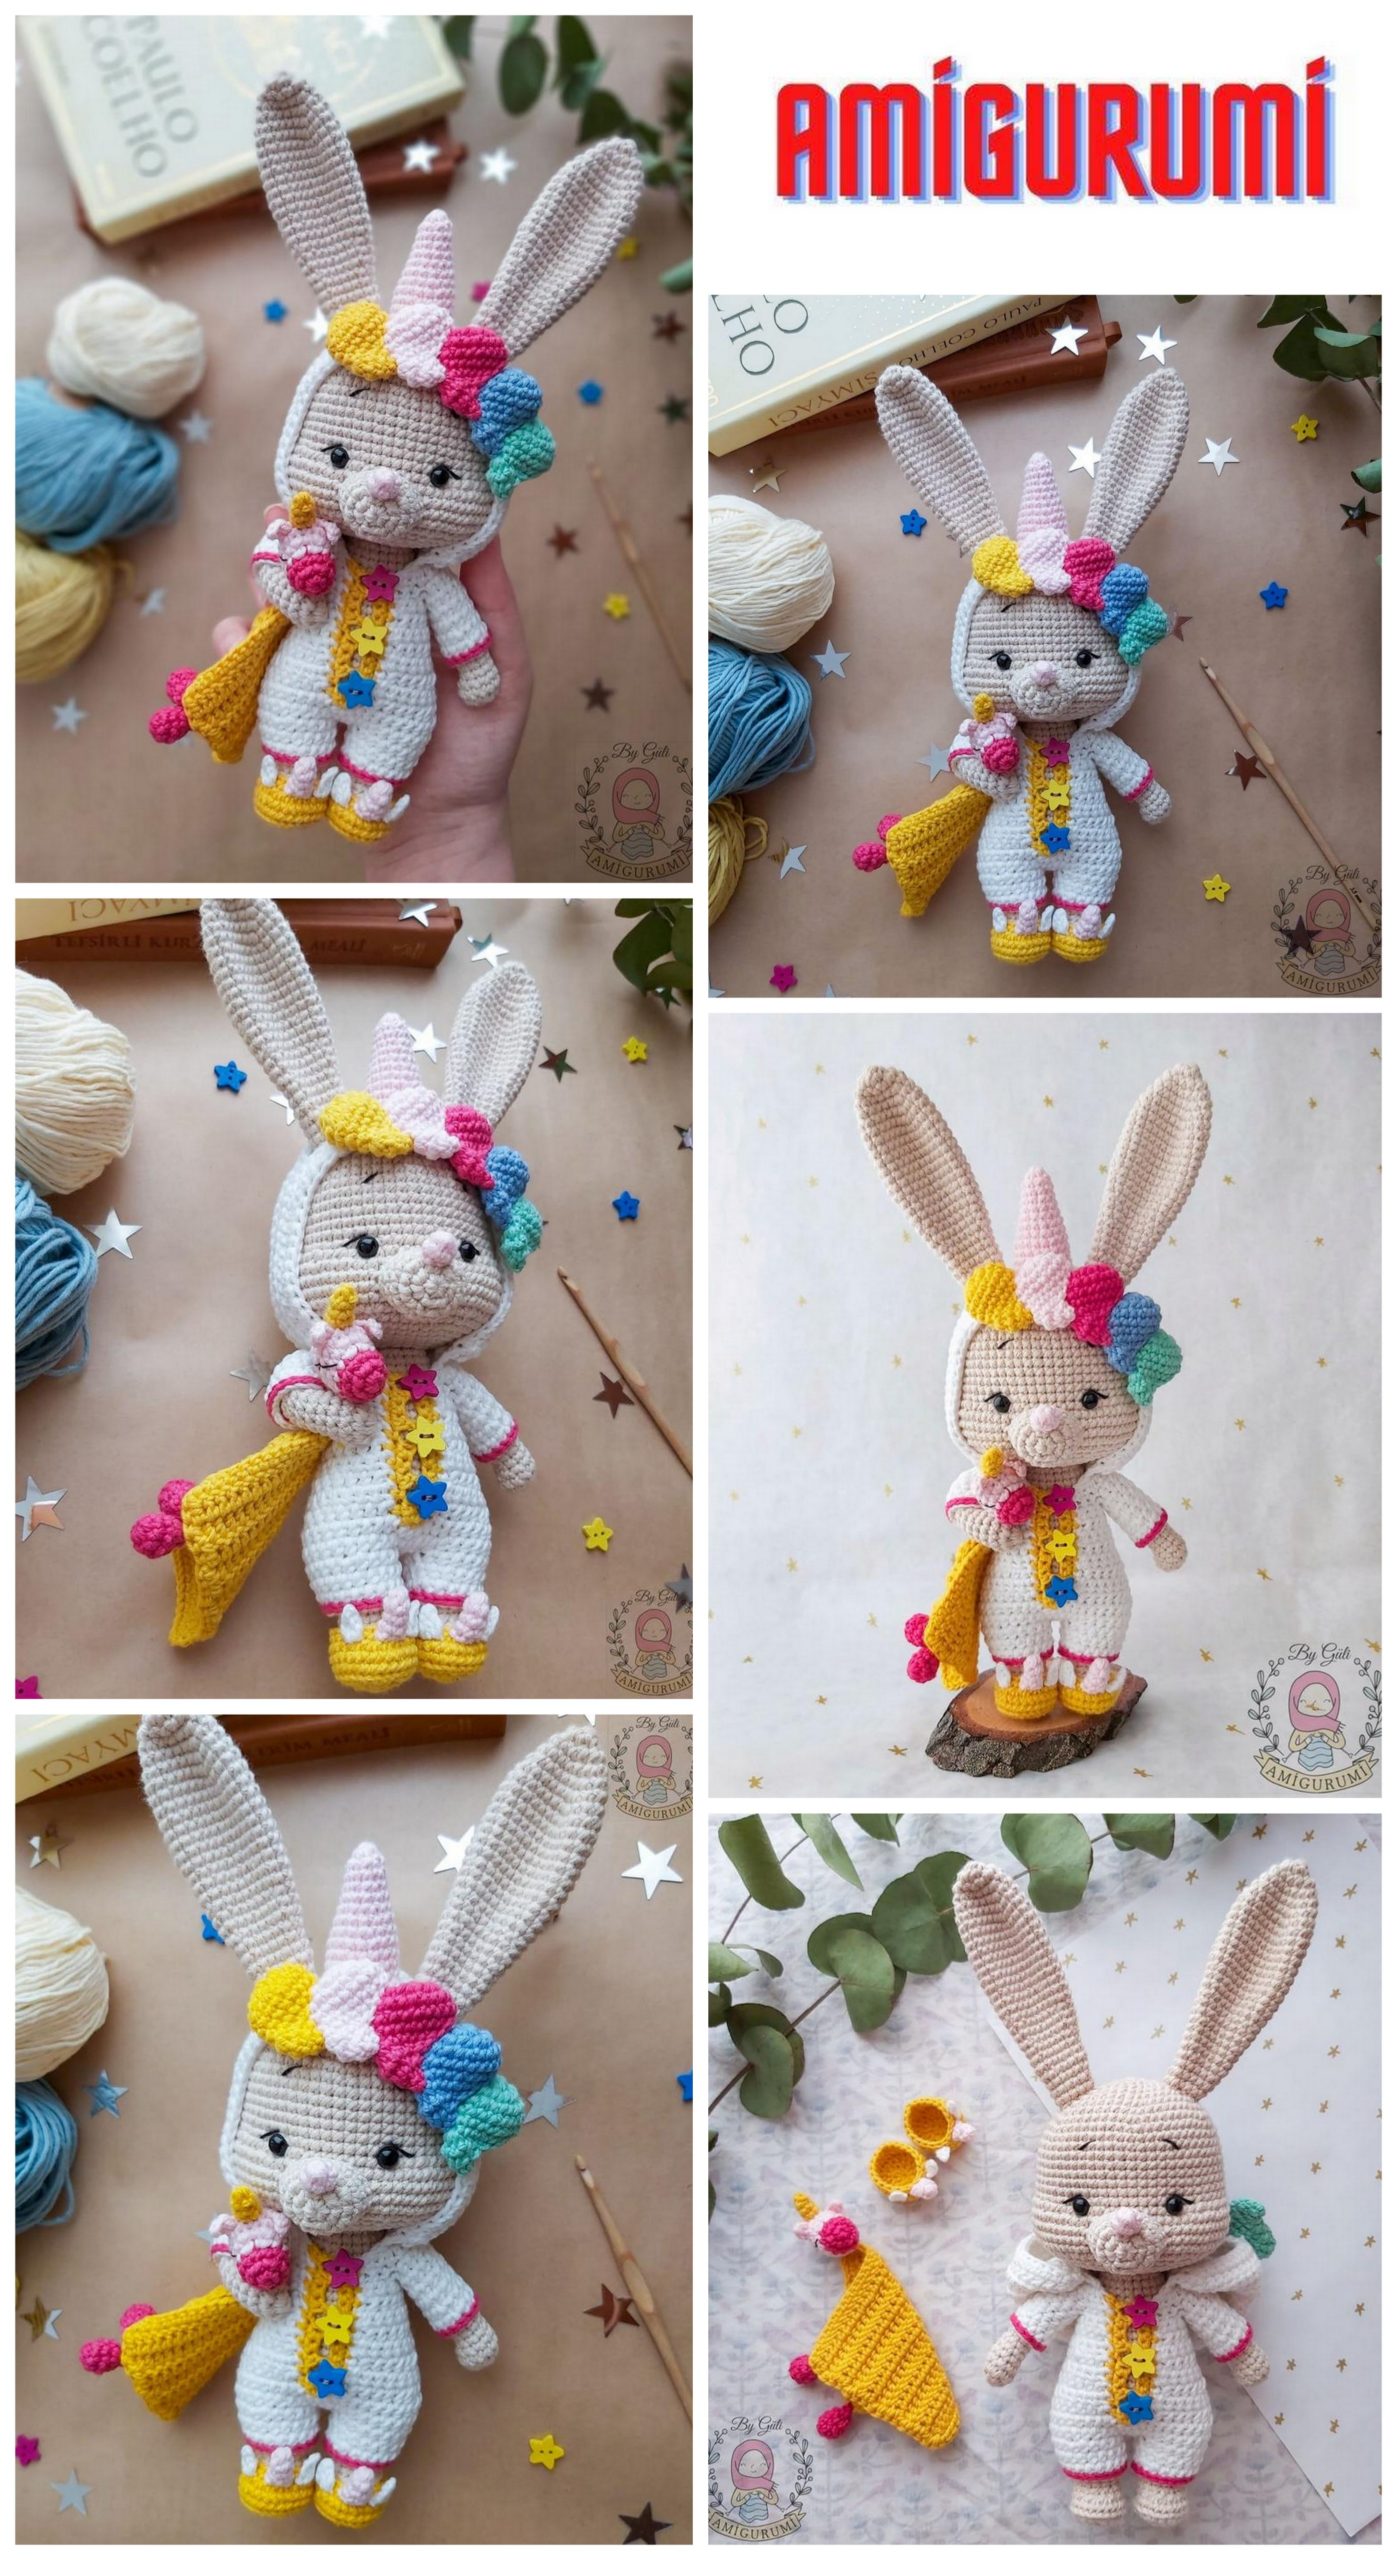
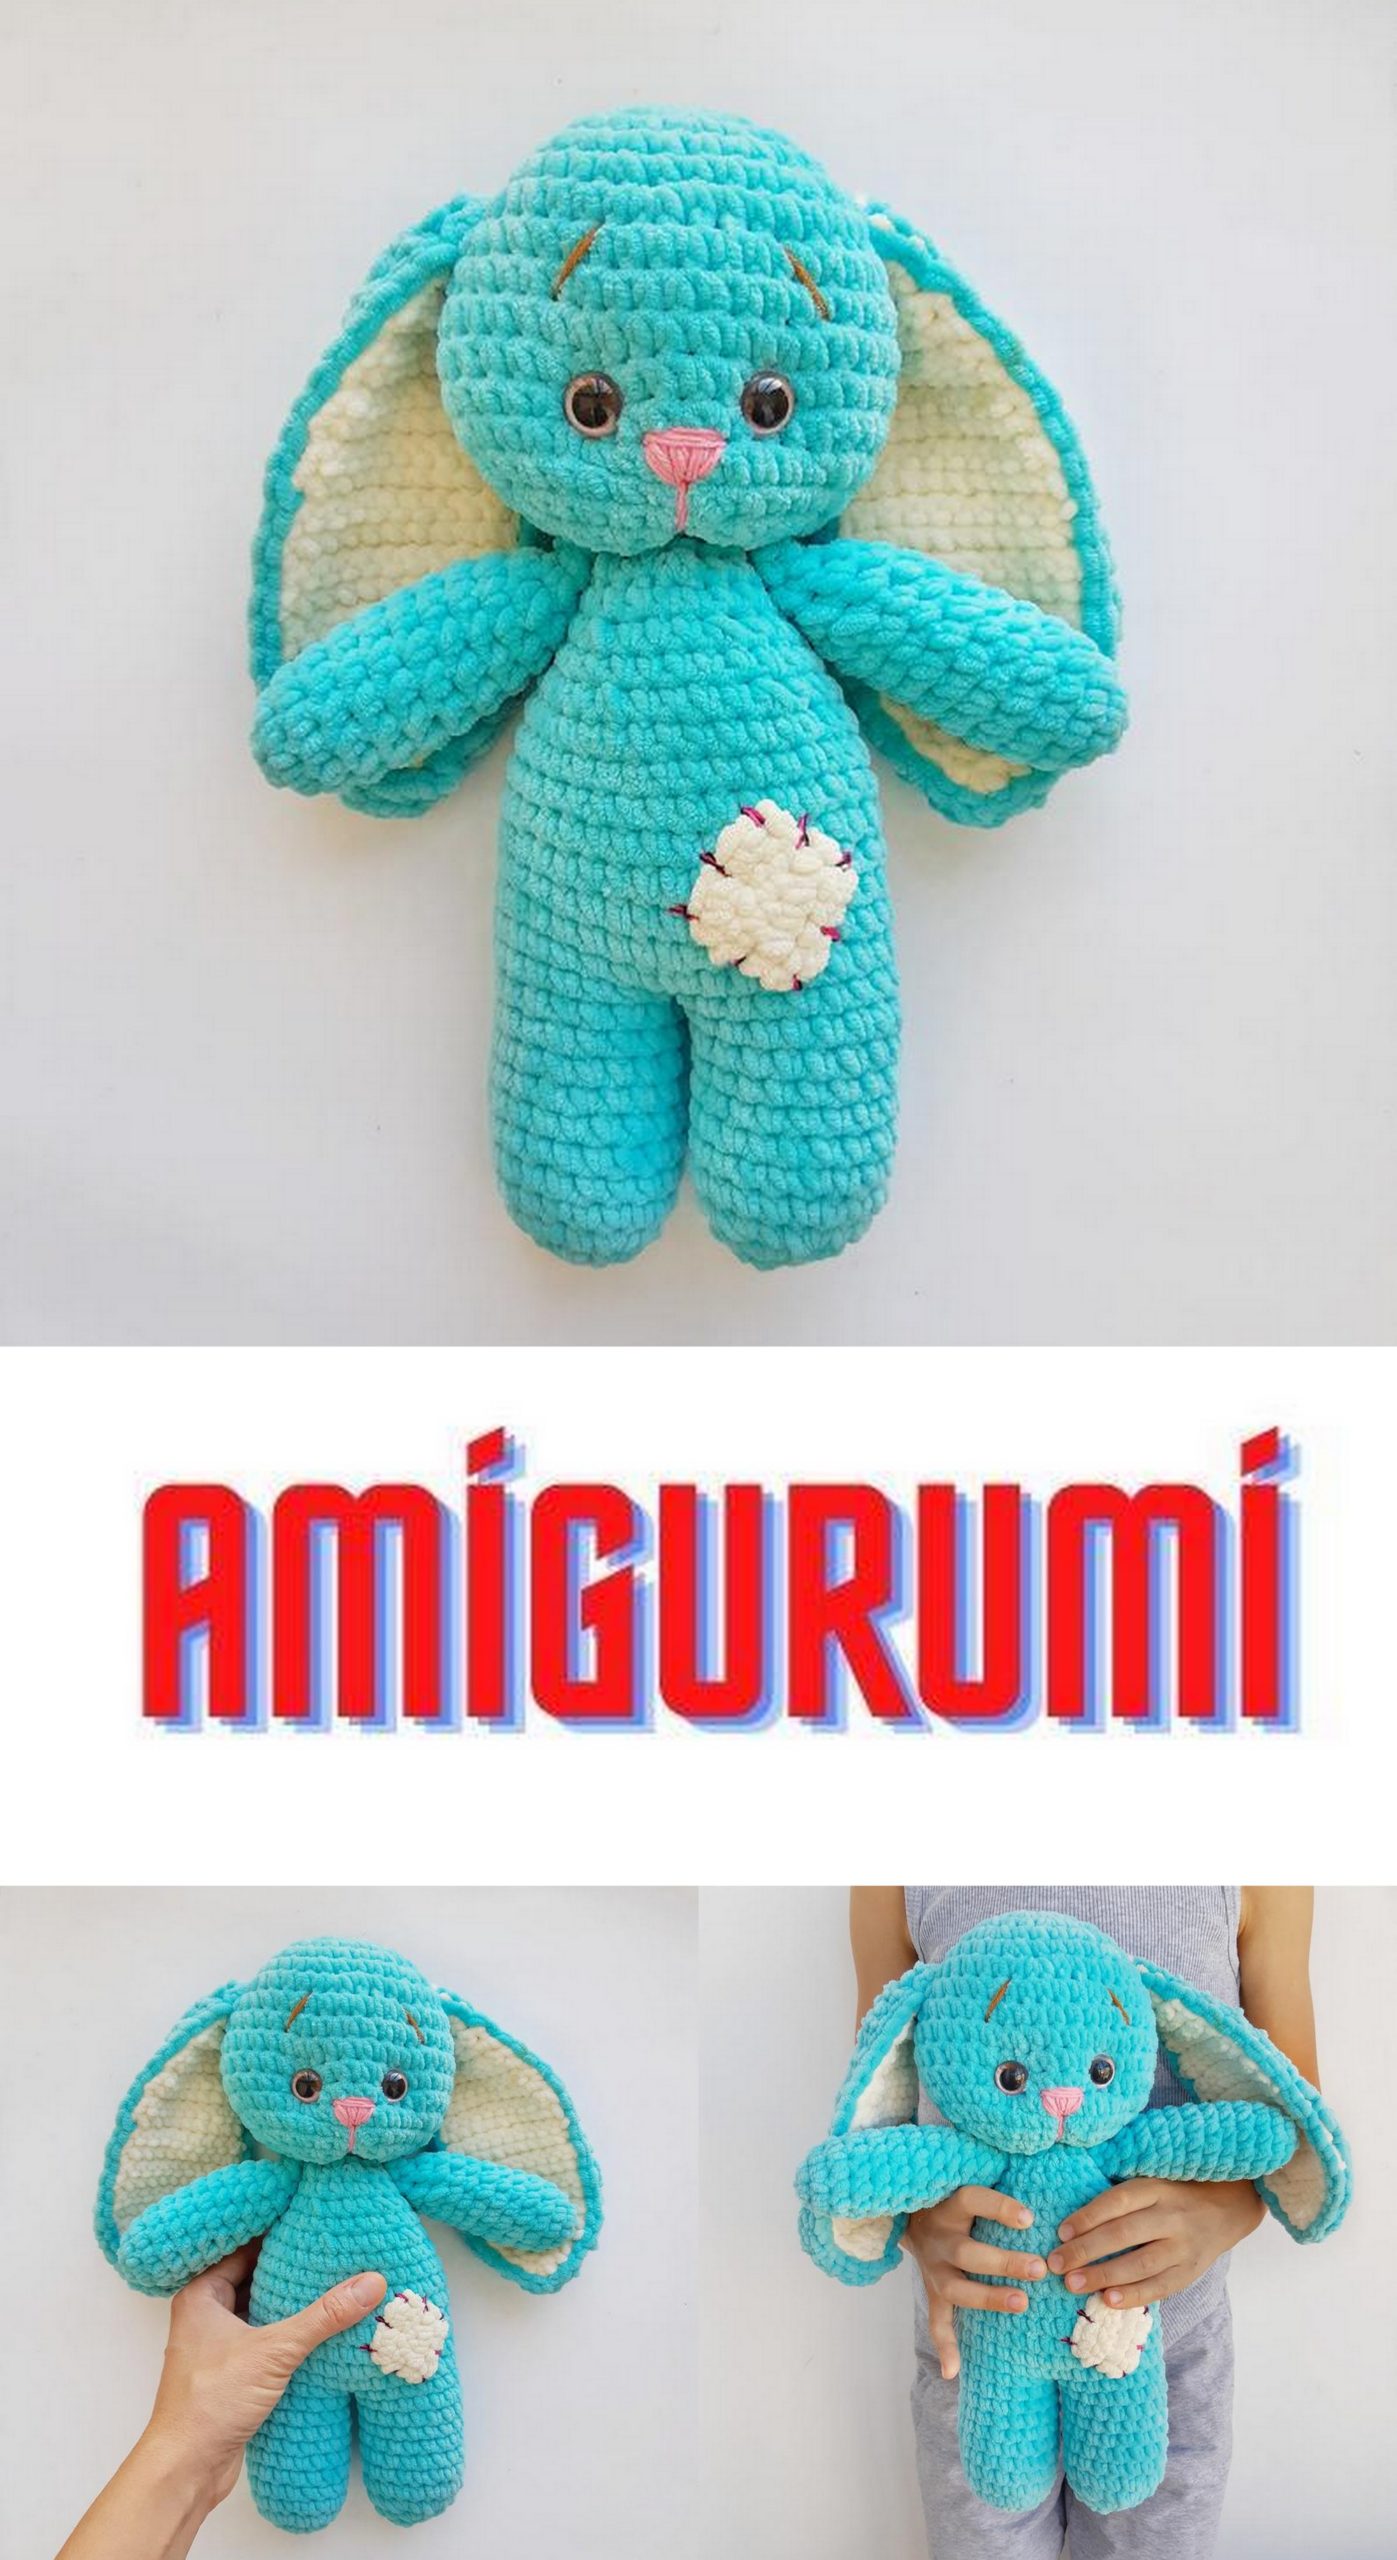
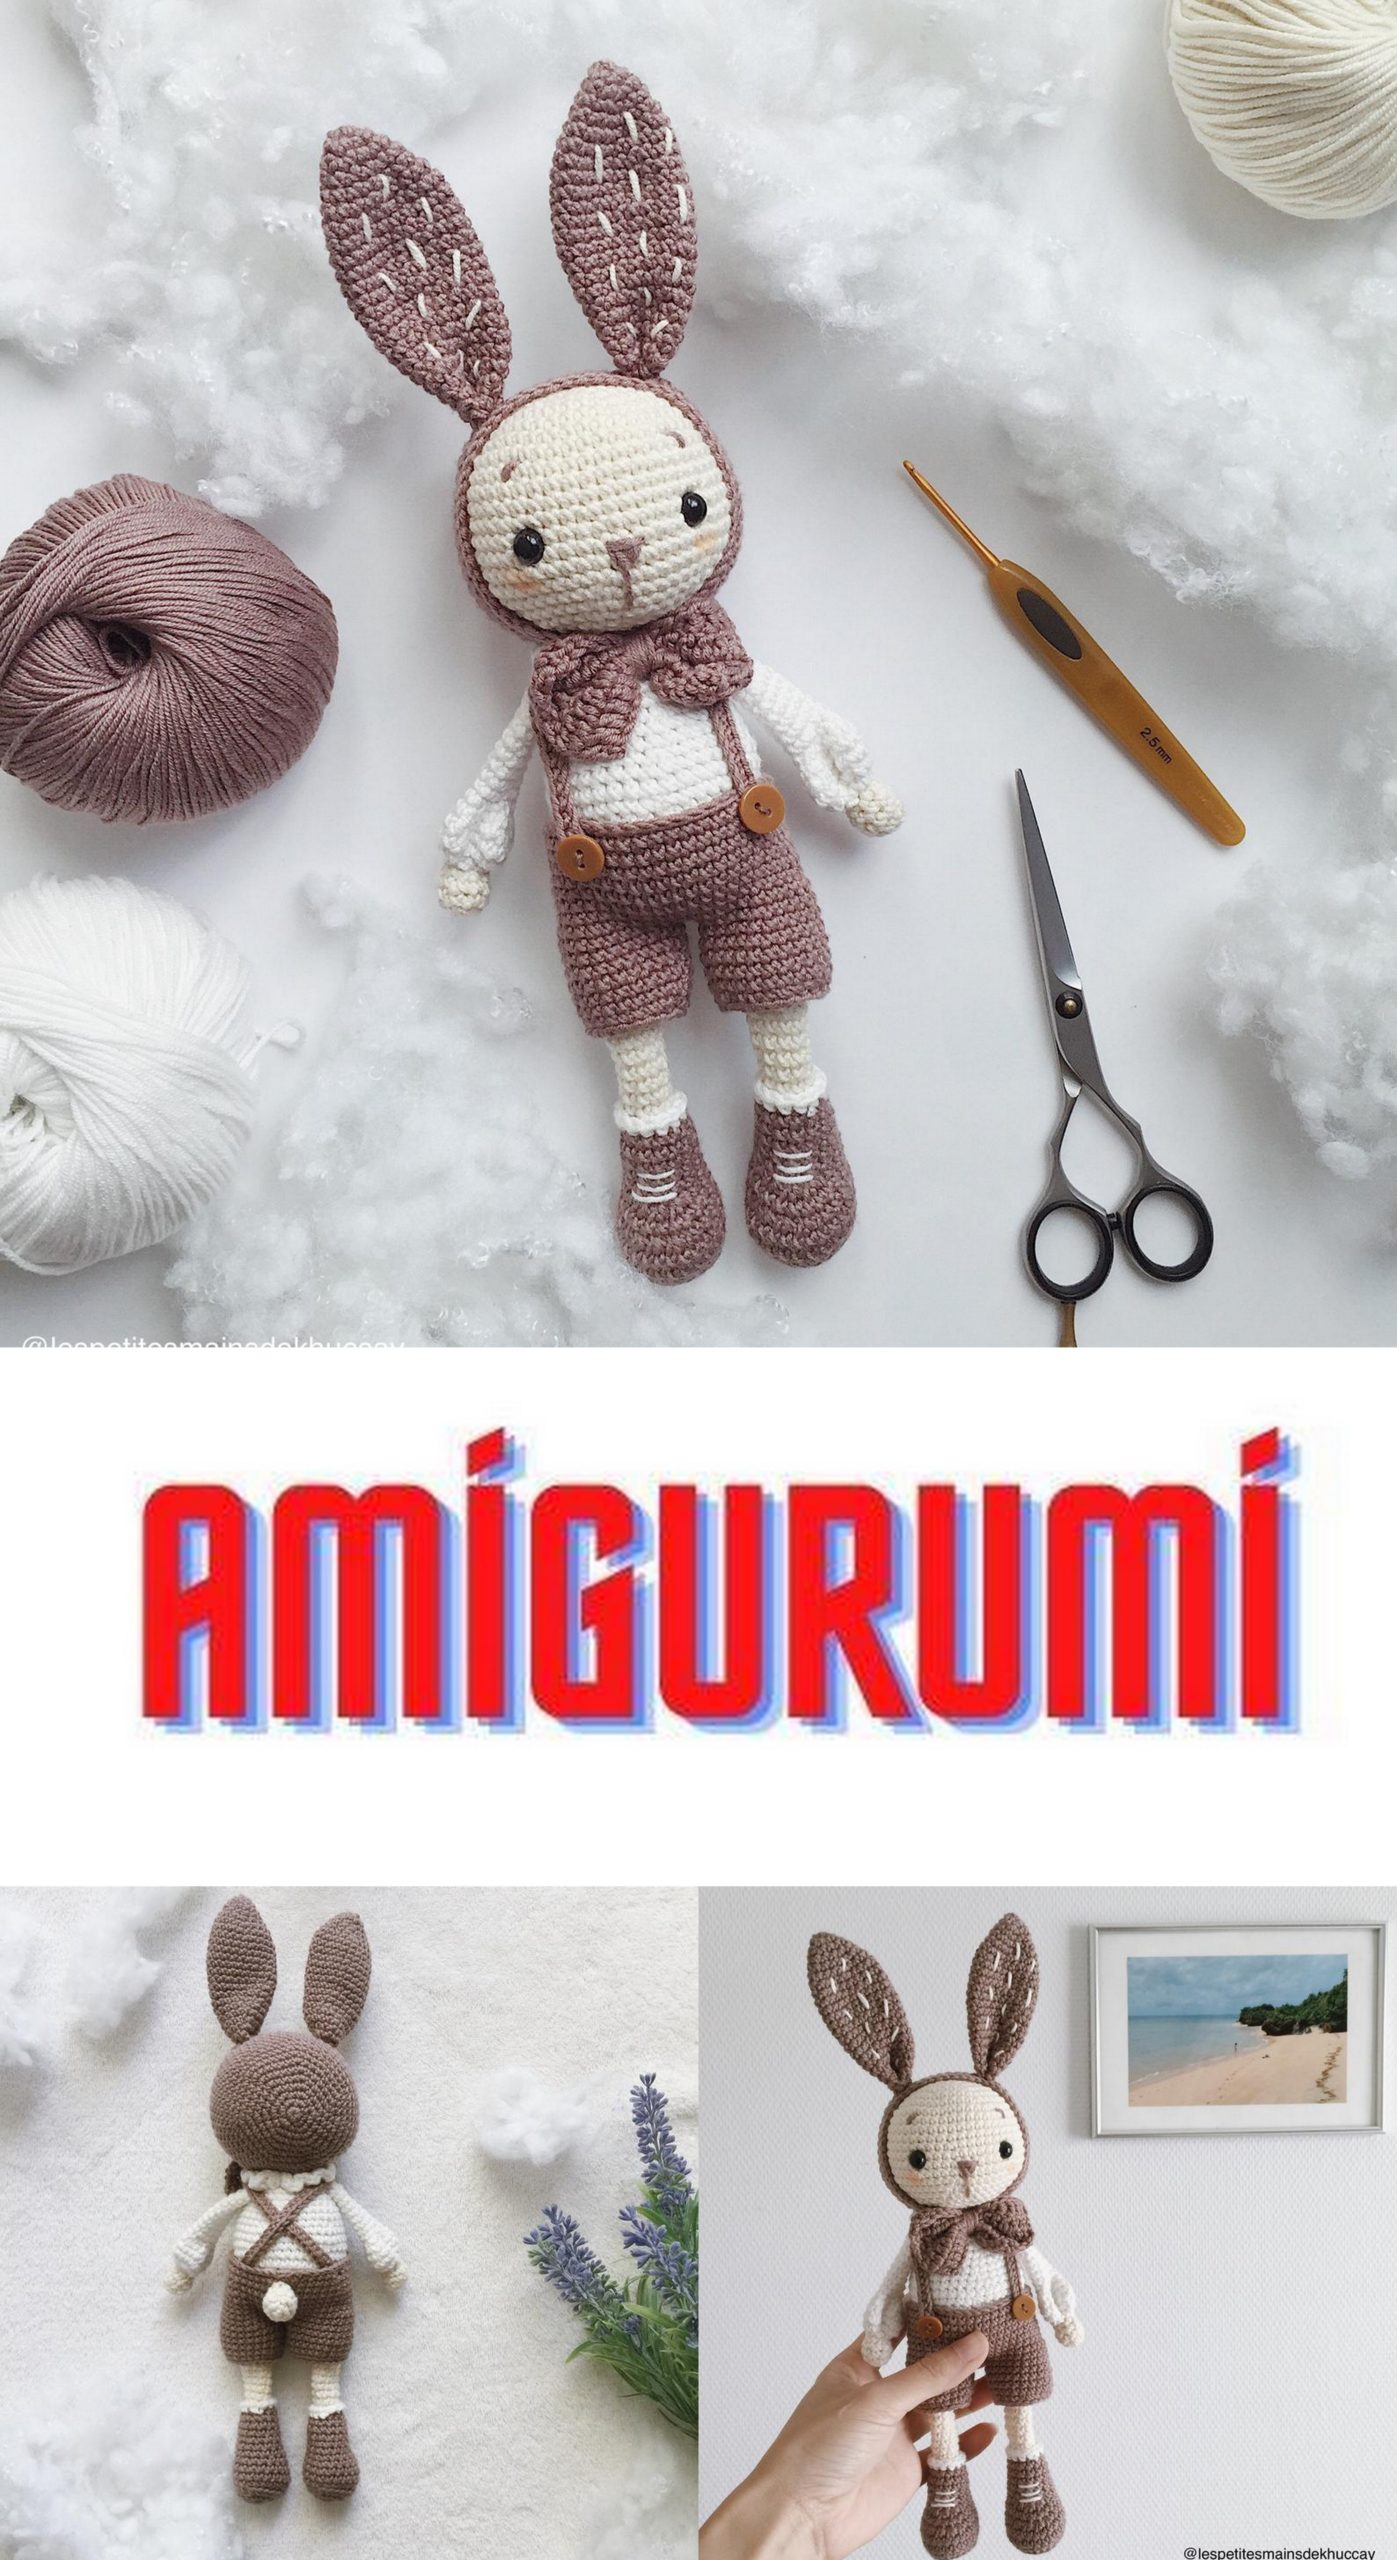
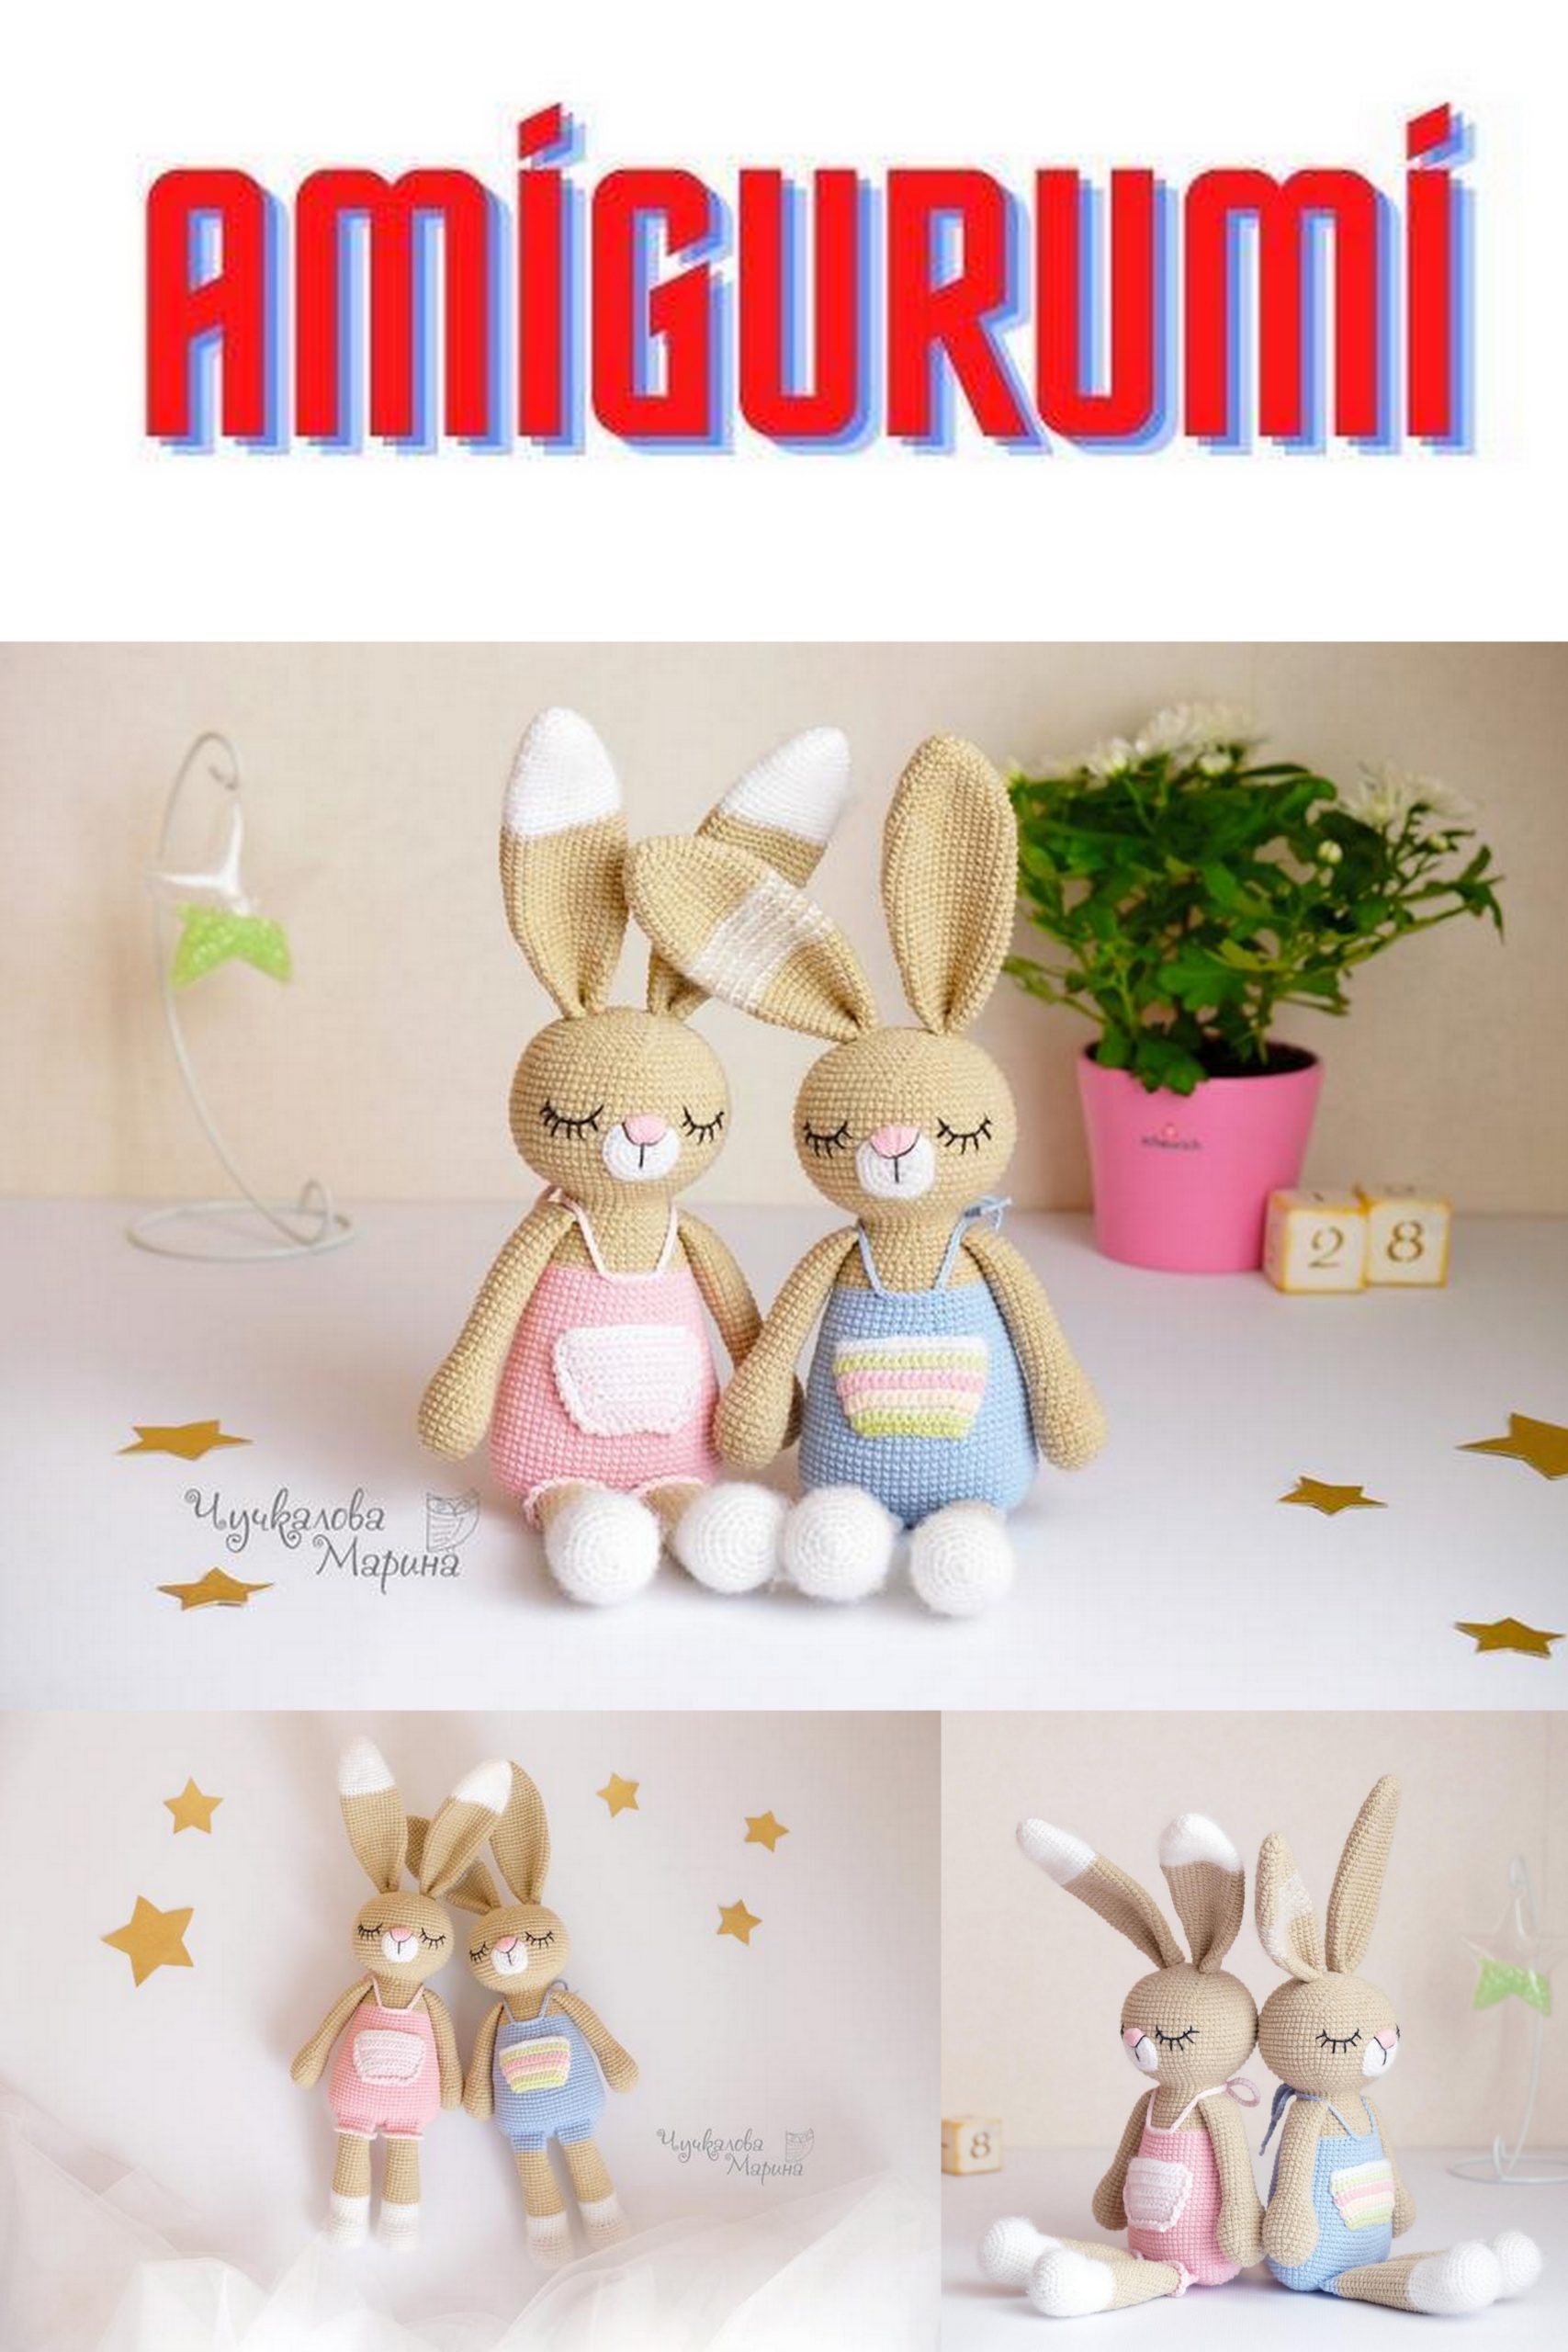
Sweet Bunny Amigurumi Free Crochet Pattern
The best amigurumi animal free patterns on this site. In this article, we shared with you the amigurumi bunny pattern.
Materials and tools for work:
1. Yarn for knitting the rabbit itself, containing wool or mohair (I have Color Citi Angora rabbit 60% acrylic, 40% rabbit 100g / 500m, color light gray)
2. Yarn for knitting clothes for Zakhar – thinner than the main yarn (I have “Alize Classic Lanagold 800” 49% wool, 51% acrylic 100g / 800m azure and pink powdery)
3. Hook corresponding to the thickness of the yarn chosen for knitting (I have a Clover 1.25 mm)
4. Filler for stuffing (sintepon, synthetic fluff or holofiber) (I have holofiber)
5. Wire for the frame: copper, cross-section 2.5 mm2 (ie, diameter about 1.78 mm)
(if the yarn is thicker, then the frame can be made thicker)
6. Adhesive plaster on a fabric base (for fixing the frame).
7. Black half-beads (or ready-made eyes) (I have plastic black eyes 7mm in diameter) – 2 pcs.
8. Small buttons for a shirt.
9. Strong threads for tightening
10. Long needle for tightening.
11. Tailor’s pins with colored heads for marking bindings.
12. Glue super-Moment gel, scissors, nippers. small pliers, eyeshadow or paint and a tinting brush, tweezers, and stuffing sticks.
The height of the finished toy from the materials specified in the MK is about 19 cm to the crown / 23 cm to the tips of the ears.
Abbreviations used:
sc. – single crochet
dc. – double crochet
sl-st – slip stitch
inc – increase (knit 2sc from 1sc)
dec – decrease (from 2sc. knit 1sc.)
ch – chain
3sc. From 1 – knit 3 sc. from 1sc. (double increase)
1sc. From 3 – knit 3sc. Together (double decrease)
Additional marker – an additional marker used to mark special places, for example, places where parts are inserted.
Upper legs (arms, 2 pieces. Knit the same)
row1: 6sc. into magic ring
row2: (inc) * 6 times = (12)
row3: 12sc.
row 4: 12sc.
row5: 12sc.
row 6: 12sc.
row7: 12sc.
row8: 12sc.
row 9: 12sc.
row 10: 12sc.
row 11: 12sc.
row12: 12sc.
row13: 12sc.
row 14: 3sc., 6sc. behind the back p / p, 3sc. = (12)
row 15: 3sc., 6sc. for the front p / p, which remained in the 14th row, 2sc., inc = (13)
row 16: 3sc., 6sc. behind the back p / p, 4sc. = (13)
row 17: inc, 2sc., 6sc. for the front p / p, which remained in the 16th row, 3sc. = (14)
row 18: 14sc.
Let’s make a frame for the pens: take two pieces of wire, the length of each is equal to the length of the arm plus the length of the shoulder, plus the height of the neck and head, plus a little on a ring for the palm.
Roll up a palm ring on one side of each segment and wrap it with a plaster.
We insert the frame into the handles so that the flat loop-palm runs with an edge in relation to the bend of the arm, which was formed by alternating when knitting front and back stitches in 14-17 rows.
Fill the foot with filler. We fill the brush of the paws only from the back side, leave the palm flat.
On the second leg, we make the flat side of the palm in a mirror image relative to the first leg.
row 19: 14sc.
row 20: 14sc.
row21: 14sc.
row 22: 14sc.
row 23: 14sc.
row 24: 14sc.
row 25: 14sc.
row 26: 14sc.
row 27: 14sc.
row 28: 14sc.
row 29: 14sc.
row 30: 14sc.
Let’s knit a few more sc. to the middle of the back of the hand (I got 2sc. extra)
In the direction of the palms and folds of the handles, we determine the right and left hand.
Let’s mark with additional markers on the right hand: 2nd and 6th sc. in the direction of knitting, starting with the first untied;
on the left hand: 2nd and 6th sc. against the direction of knitting, starting with the last knit.
You should get 5sc. between the marked, including marked, from the side of the palms are the places where the handles are tied into the body.
Lower legs (legs, 2 pieces. Knit the same)
row1: 5ch
row 2: From the second loop around the chain: 3sc., 3sc. from 1, 2sc., inc = (10)
row3: inc, 2sc., (inc) * 3 times, 2sc., (inc) * 2 times = (16)
row4: 1sc., inc, 2sc., (1sc., inc) * 3 times, 2sc., (1sc., inc) * 2 times = (22)
row5: (10sc., inc) * 2 times = (24)
row 6: 24sc.
row7: 24sc.
row8: 24sc.
row 9: 24sc.
Fold the part along the initial chain of the first row and check the location of the marker – the marker for the beginning of the row should be in the center of the side of the foot.
1sc. offsets (slightly shifted from the center towards the sole)
In 10-11 rows, the decrease goes along the top of the foot.
row10: 10sc., (dec, 2sc.) * 3 times, dec = (20)
row11: 12sc., (dec, 2sc.) * 2 times = (18)
row 12: 18sc.
row 13: 18sc.
row 14: 18sc.
2sc. Offsets to the middle of the side part Next, we knit the heel. We knit the heel in rotary rows. New marker in the center of the heel
row 15: 5sc., new marker (now it is the main one), 3sc., 1ch, turn
row 16: 3sc., marker, 3sc., 1ch, turn
row 17: 3sc., marker, 3sc., 1ch, turn
row 18: 3sc., marker, 3sc., 1ch, turn
row 19: 3sc., marker, 3sc., 1ch, turn
row 20: 3sc., marker, 3sc., 1ch, turn
row 21: 3sc., marker, 3sc. – along the top of the heel 5sc. – on the side of the heel down 2sc., 8sc. behind the back p / p, 2sc. – on the foot 5sc. – on the side of the heel up 3sc. – along the top of the heel to the marker
row 22: 7sc., dec, 1sc., 8sc. for the front p / p, which remained in 21 rows, 1sc., dec, 7sc. = (26)
row 23: 6sc., dec, 1sc., 8sc. behind the back p / p, 1sc., dec, 6sc. = (24)
row 24: 5sc., dec., 1sc., 8sc. for the front p / p, which remained in the 23rd row, 1sc., dec, 5sc. = (22)
We make the frame of the legs. Take two pieces of wire, each length = (foot length x2) + leg length + distance from leg to spine + torso height + neck height + head height + a little more
We roll each segment on one side into a loop, equal to the length of the foot, wrap the foot with a plaster and bend the frame in the shape of a leg.
Insert the frame into the leg, fill the leg (flat sole).
row 25: dec, 5sc., 8sc. behind the back p / p, 5sc., dec = (20)
row 26: dec, 4sc., 8sc. for the front p / p, which remained in the 25th row, 4sc., dec = (18)
row 27: 18sc.
row 28: 18sc.
row 29: 18sc.
row 30: 18sc.
row31: (5sc., inc) * 3 times = (21)
row 32: 21sc.
row33: 3sc., inc, (6sc., inc) * 2 times, 3sc. = (24)
row 34: 24sc.
row35: (7sc., inc) * 3 times = (27)
row36: 4sc., inc, (8sc., inc) * 2 times, 4sc. = (30)
2sc. Offsets to the center of the back of the leg.
Cut the thread on one leg, fix it (left leg).
We leave the thread on the second leg in work (right leg).
You can bend your feet slightly inward.
Mark the 7th sc with an additional marker on the left leg. against the direction of knitting, starting with the last knit.
The torso.
We take a leg with a working thread (right) and continue knitting.
row 1: 7sc.- on the right leg, 2ch,
(7sc., Inc, 7sc.) * 2 times – on the left leg, starting from the column with an additional marker, 2sc. – along the chain, 7sc., Inc, 14sc., Inc – along the right leg.
Let’s knit 7sc. on the right leg and 1sc. along the chain to the center of the back and place a new marker.
Hereinafter, the marker of the beginning of the row should pass along the center of the back, neck, nape.
If this is not the case, then we knit the required number of offset columns, each time returning the marker of the beginning of the row to its place.
row2: 68sc.
row3: 68sc.
row4: 68sc.
row5: 68sc.
row6: 68sc.
1sc. offsets to the center of the back.
row7: 68sc.
Connect the leg frame into one main frame using a plaster.
row8: 68sc.
row 9: 68sc.
row 10: 68sc.
row11: 68sc.
row12: 68sc.
row13: 68sc.
row14: 68sc.
1sc. Offsets to the center of the back.
row 15: 68sc.
row 16: 68sc.
row 17: 68sc.
row 18: 68sc.
Stuff legs and ass.
row19: (16sc., dec, 16sc.) * 2 times = (66)
row 20: 6sc., dec, 50sc., dec, 6sc. = (64)
row21: (15sc., dec, 15sc.) * 2 times = (62)
row22: 5sc., dec, 48sc., dec, 5sc. = (60)
row23: (14sc., dec, 14sc.) * 2 times = (58)
row 24: 5sc., dec, 44sc., dec, 5sc. = (56)
Fill the carcass with filler.
row25: (13sc., dec, 13sc.) * 2 times = (54)
1sc. Offsets to the center of the back.
row26: 5sc., dec, 40sc., dec, 5sc. = (52)
row 27: (12sc., dec, 12sc.) * 2 times = (50)
row 28: 18sc., dec, 10sc., dec, 18sc. = (48)
row29: (11sc., dec, 11sc.) * 2 times = (46)
row 30: 16sc., dec, 10sc., dec, 16sc. = (44)
1sc. Offsets to the center of the back.
row31: (10sc., dec, 10sc.) * 2 times = (42)
row 32: 14sc., dec, 10sc., dec, 14sc. = (40)
row 33: 40sc.
Fill the carcass with filler
Let’s mark on the body the 8th, 12th (between them together with the marked 5sc.), 29th, 33rd (between them together with the marked 5sc.) Columns.
The marked five of the columns should be clearly on the sides – these are the places where the hands are tied.
If they turned out not on the sides, then adjust the position of the beginning of the row as described (to the center of the back)
row 34: 7sc. – per carcass, 5sc. – carcass + left arm together, 1sc, dec, 10sc., dec, 1sc. – per carcass 5sc. – carcass + right hand together, 7sc. – per carcass = (38)
row 35: 7sc. – per carcass 9sc. – on untied loops of the left hand 14sc. – per carcass 9sc. – on the untied loops of the right hand 7sc. – per carcass = (46)
Attach the arm frame to the main frame.
row 36: 6sc., dec, 30sc .. dec, 6sc. = (44)
row 37: 14sc., dec, 12sc., dec, 14sc. = (42)
row 38: 5sc., dec, 28sc., dec, 5sc. = (40)
1sc. Offsets to center back
row39: 13sc., dec, 10sc., dec, 13sc. = (38)
Fill the carcass with filler
row 40: 4sc., dec, 26sc., dec, 4sc. = (36)
row41: 12sc., dec, 8sc., dec, 12sc. = (34)
row 42: 7sc., dec, 16sc., dec, 7sc. = (32)
row43: 7sc., dec, 14sc., dec, 7sc. = (30)
row44: 6sc., dec, 14sc., dec, 6sc. = (28)
row 45: 6sc., dec, 12sc., dec, 6sc. = (26)
row 46: 26sc.
row 47: 26sc.
Fill the carcass with filler
row48: inc, 5sc., inc, 6sc., inc, 6sc., inc, 5sc. = (30)
1sc. Offset to the center of the back of the neck. Correct positioning of the beginning of the row is very important. Otherwise, the position of the nose will be misaligned.
row49: 2sc., inc, (4sc., inc) * 5 times, 2sc. = (36)
row50: 9sc., inc, 5sc., inc, 4sc., inc, 5sc., inc, 9sc. = (40)
row51: 2sc., inc, 6sc., inc, 7sc., inc, 4sc., inc, 7sc., inc, 6sc., inc, 2sc. = (46)
1sc. Displacement to the center of the occiput
row52: 11sc., inc, 8sc., inc, 4sc., inc, 8sc., inc, 11sc. = (50)
row53: (2sc., inc, 9sc., inc, 9sc., inc, 2sc.) * 2 times = (56)
row54: 13sc., inc, 11sc., inc, 4sc., inc, 11sc., inc, 13sc. = (60)
1sc. Displacement to the center of the occiput
series 55: 14sc., inc, 12sc., inc, 4sc., inc, 12sc., inc, 14sc. = (64)
row 56: 64sc.
row 57: 64sc.
row58: 64sc.
row 59: 64sc.
row60: 64sc.
1sc. Displacement to the center of the occiput
row61: 64sc.
row 62: 15sc., dec, 11sc., dec, 4sc., dec, 11sc., dec, 15sc. = (60)
row 63: (2sc., dec, 10sc., dec, 10sc., dec, 2sc.) * 2 times = (54)
row 64: 12sc., dec, 9sc., dec, 4sc., dec, 9sc., dec, 12sc. = (50)
row65: 2sc., dec, 7sc., dec, 8sc., dec, 4sc., dec, 8sc., dec, 7sc., dec, 2sc. = (44)
Fill shoulders, neck and head with filler.
row66: (10sc., dec, 10sc.) * 2 times = (42)
row67: (2sc., dec, 13sc., dec, 2sc.) * 2 times = (38)
row68: 8sc., dec, 18sc., dec, 8sc. = (36)
1sc. Displacement to the center of the occiput
row69: (2sc., dec, 10sc., dec, 2sc.) * 2 times = (32)
row70: 7sc., dec, 14sc., dec, 7sc. = (30)
Stuff your head with filler.
row71: (3sc., dec) * 6 times = (24)
row72: 1sc., dec, (2sc., dec) * 5 times, 1sc. = (18)
row73: (1sc., dec) * 6 times = (12)
row74: (dec) * 6 times = (6)
Add filler to your head. Cut the thread, pull the remaining loops, hide the thread inside the toy.
Ears. (2pcs knit the same)
row1: 6sc. into magic ring
row2: (1sc., inc) * 3 times = (9)
row3: (2sc., inc) * 3 times = (12)
row4: (3sc., inc) * 3 times = (15)
row5: (4sc., inc) * 3 times = (18)
row6: (5sc., inc) * 3 times = (21)
row 7: 21sc.
row8: 21sc.
row 9: 21sc.
row 10: 21sc.
row11: dec, 19sc. = (20)
row12: 20sc.
row13: 20sc.
row14: dec, 18sc. = (19)
row 15: 19sc.
row 16: 19sc.
row17: dec, 17sc. = (18)
row 18: 18sc.
row 19: 18sc.
row 20: 14sc., 1sl-st (stopped knitting on the side of the ear, the marker should be in the center of the front side of the ear)
Do not fill the ears with filler!
Cut the thread, leaving a long tail for sewing, fasten.
Tail.
row1: 6sc. into magic ring
row2: (inc) * 6 times = (12)
row3: (1sc., inc) * 6 times = (18)
row 4: 18sc.
row 5: 18sc.
row6: (1sc., dec) * 6 times = (12)
1sl-st, cut the thread, leaving a long tail for sewing, fasten.
Assembly and design.
We outline the places for the eyes and pin the ears, trying to find the optimal position for them, corresponding to our mood
We will make a stitch from eye to eye and vice versa – we will tighten the bridge of the nose.
We will tint the eye sockets and glue the eyes.
We will embroider a nose in the shape of the letter Y (in my photo on the right, the nose is embroidered, but the threads are not yet thoroughly hidden – and rightly so, because a little later I decided that it should be made smaller and remade)
Therefore, at the stage of fitting and trying on, do not rush to immediately overhaul and hide the tails of the threads, you may want to correct something in the process of forming the muzzle.
Embroider the whites of the eyes by placing a stitch of white thread under the eye. The position of this stitch determines the direction and expression of the gaze, so take your time to secure the ponytails, try different positions of this white stitch.
Sew on the ears and tail. Place a small piece of filler underneath when sewing on the tail.
Here in the photo on the right is a redesigned nose.
Maybe the difference is not big, but it seemed to me more organic for this mordaha.
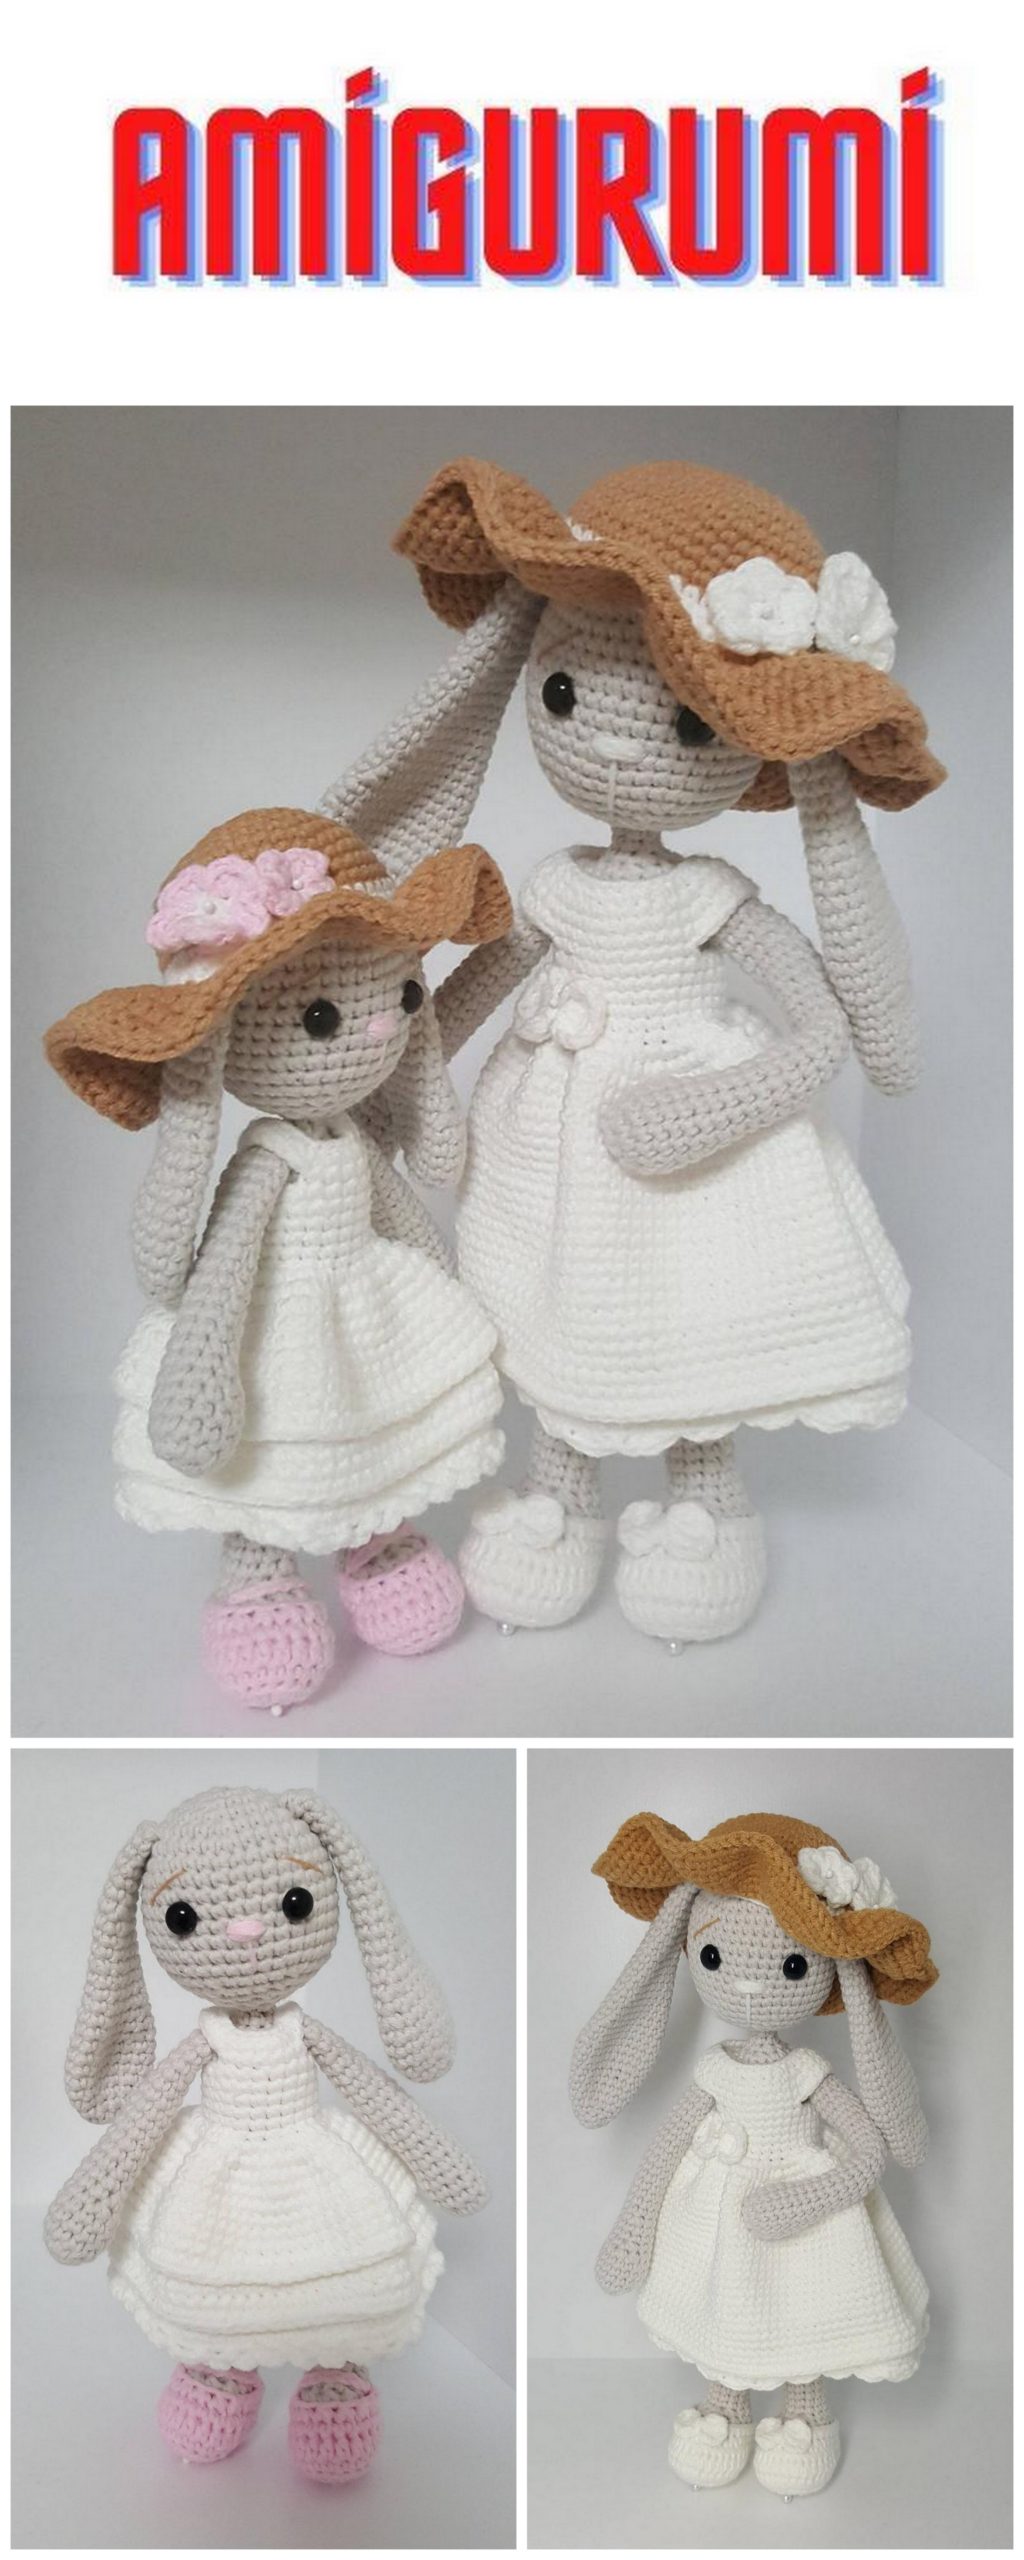
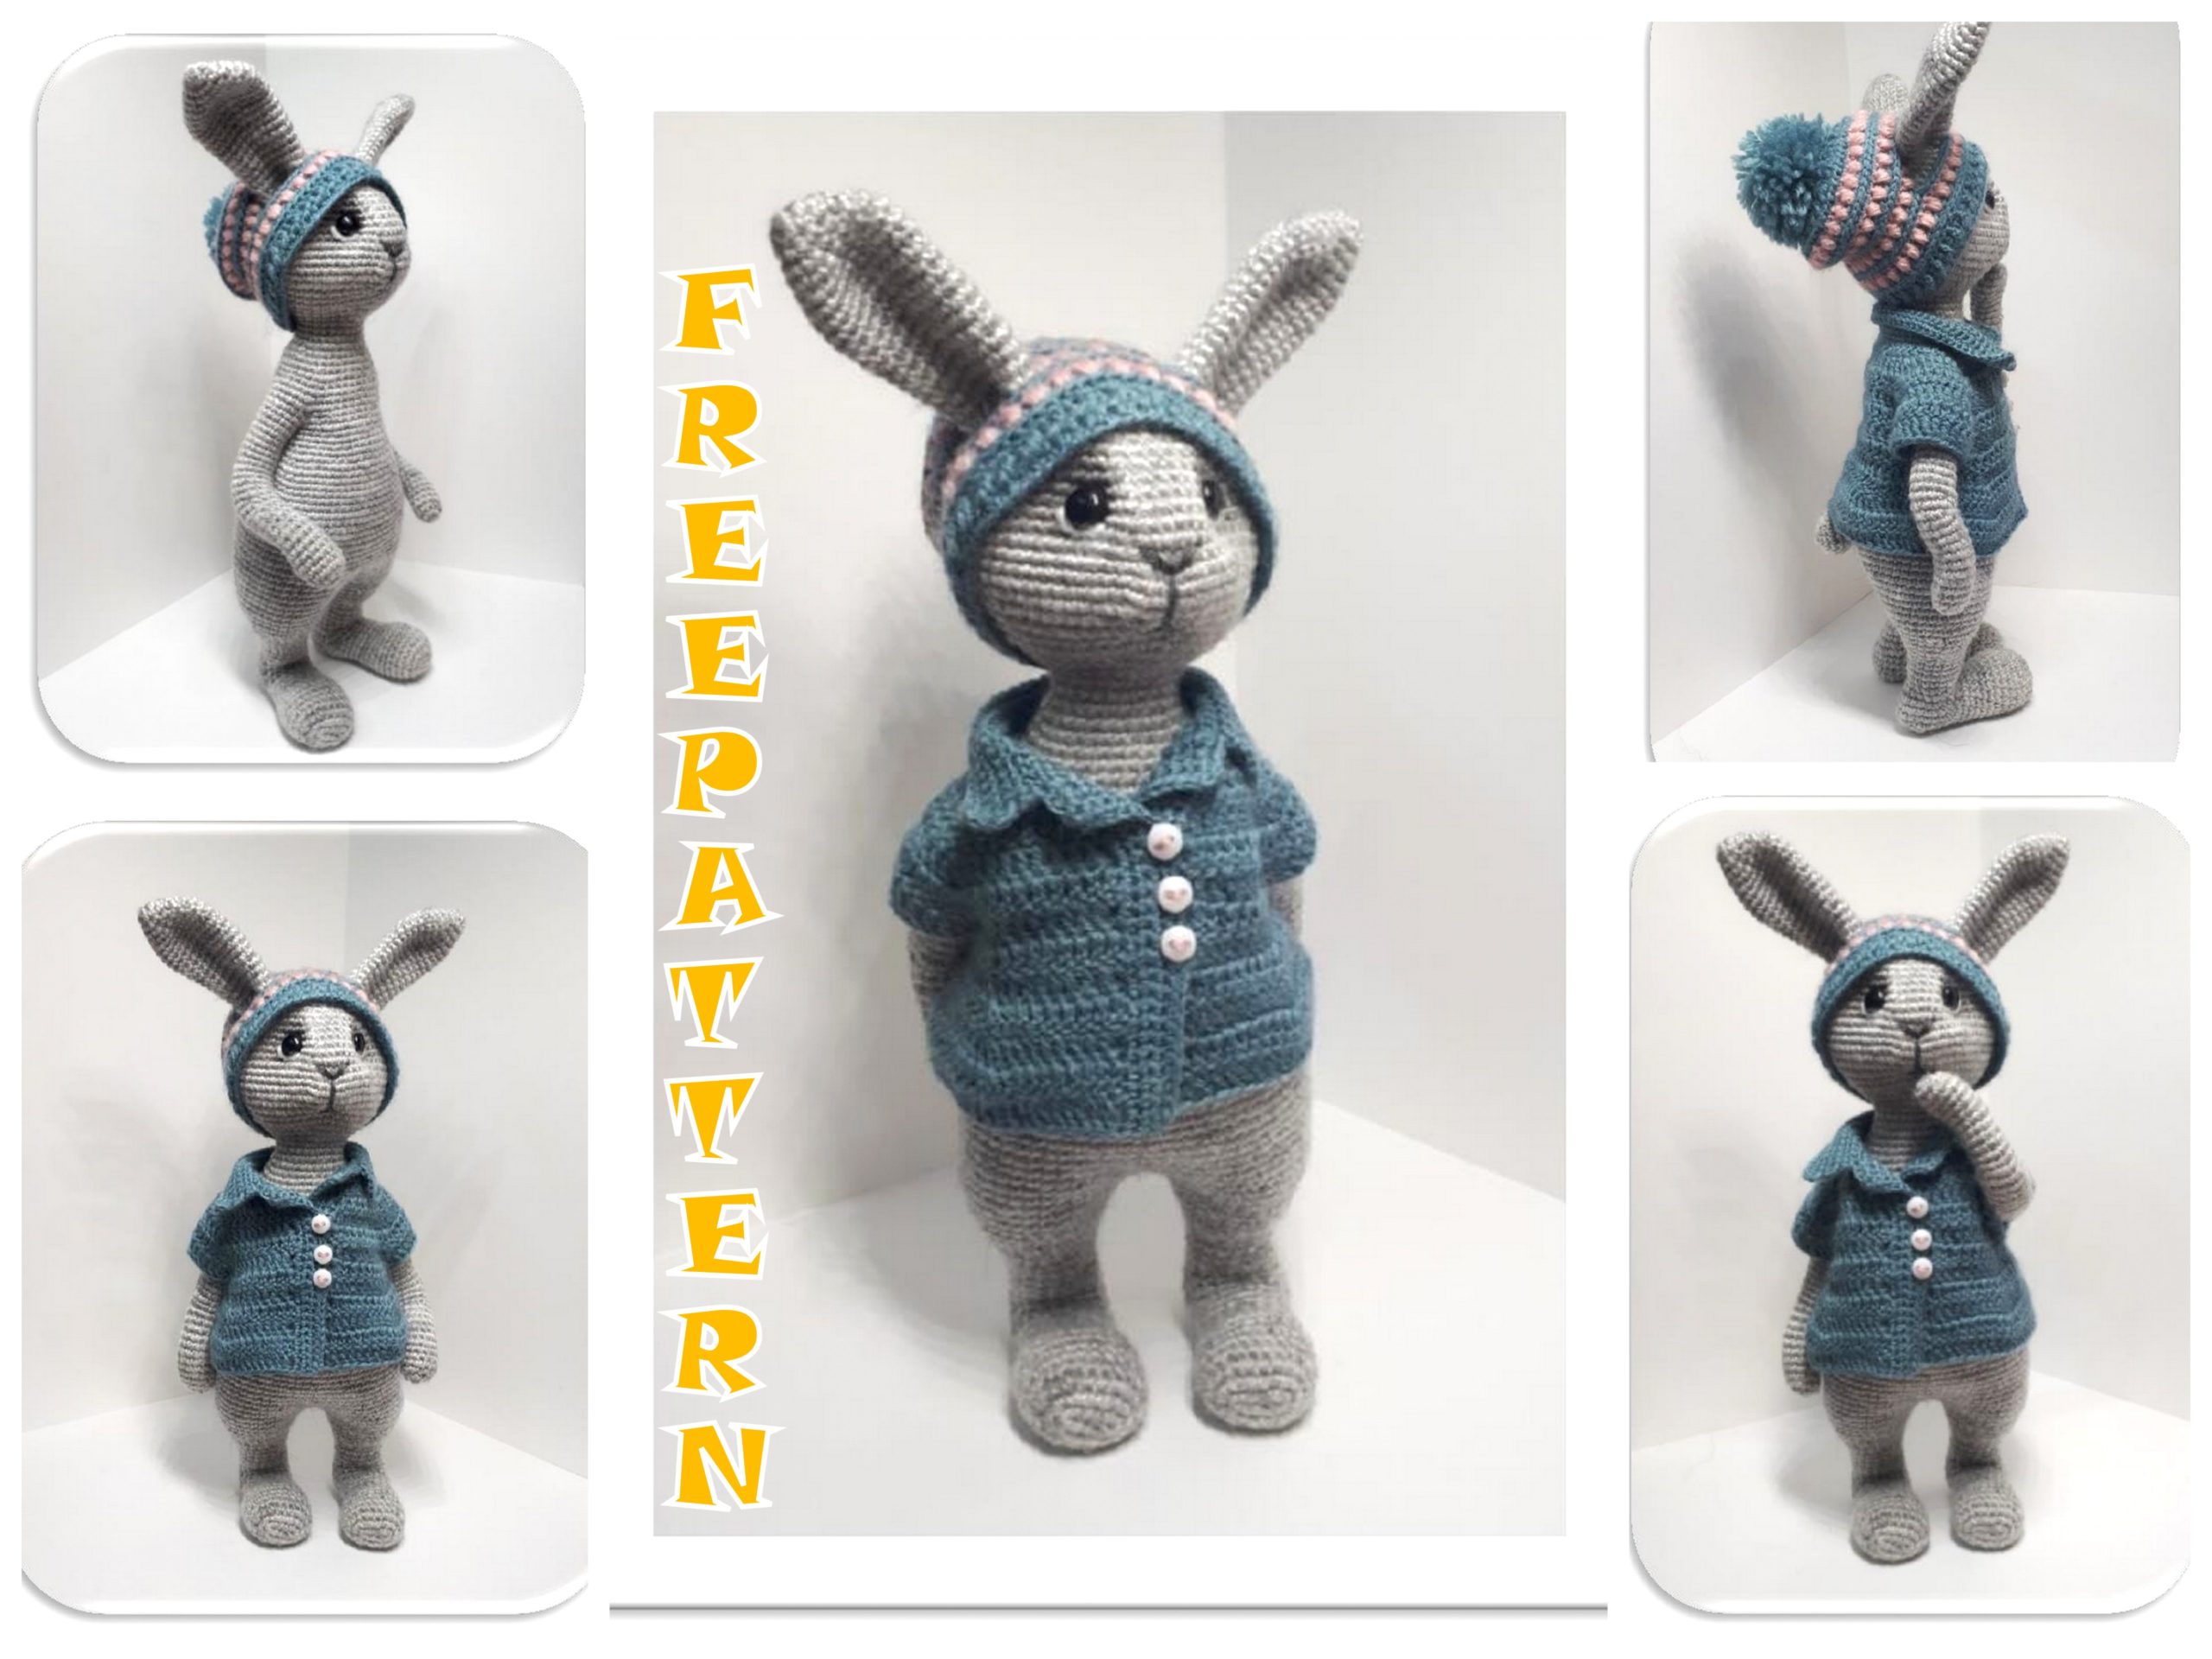
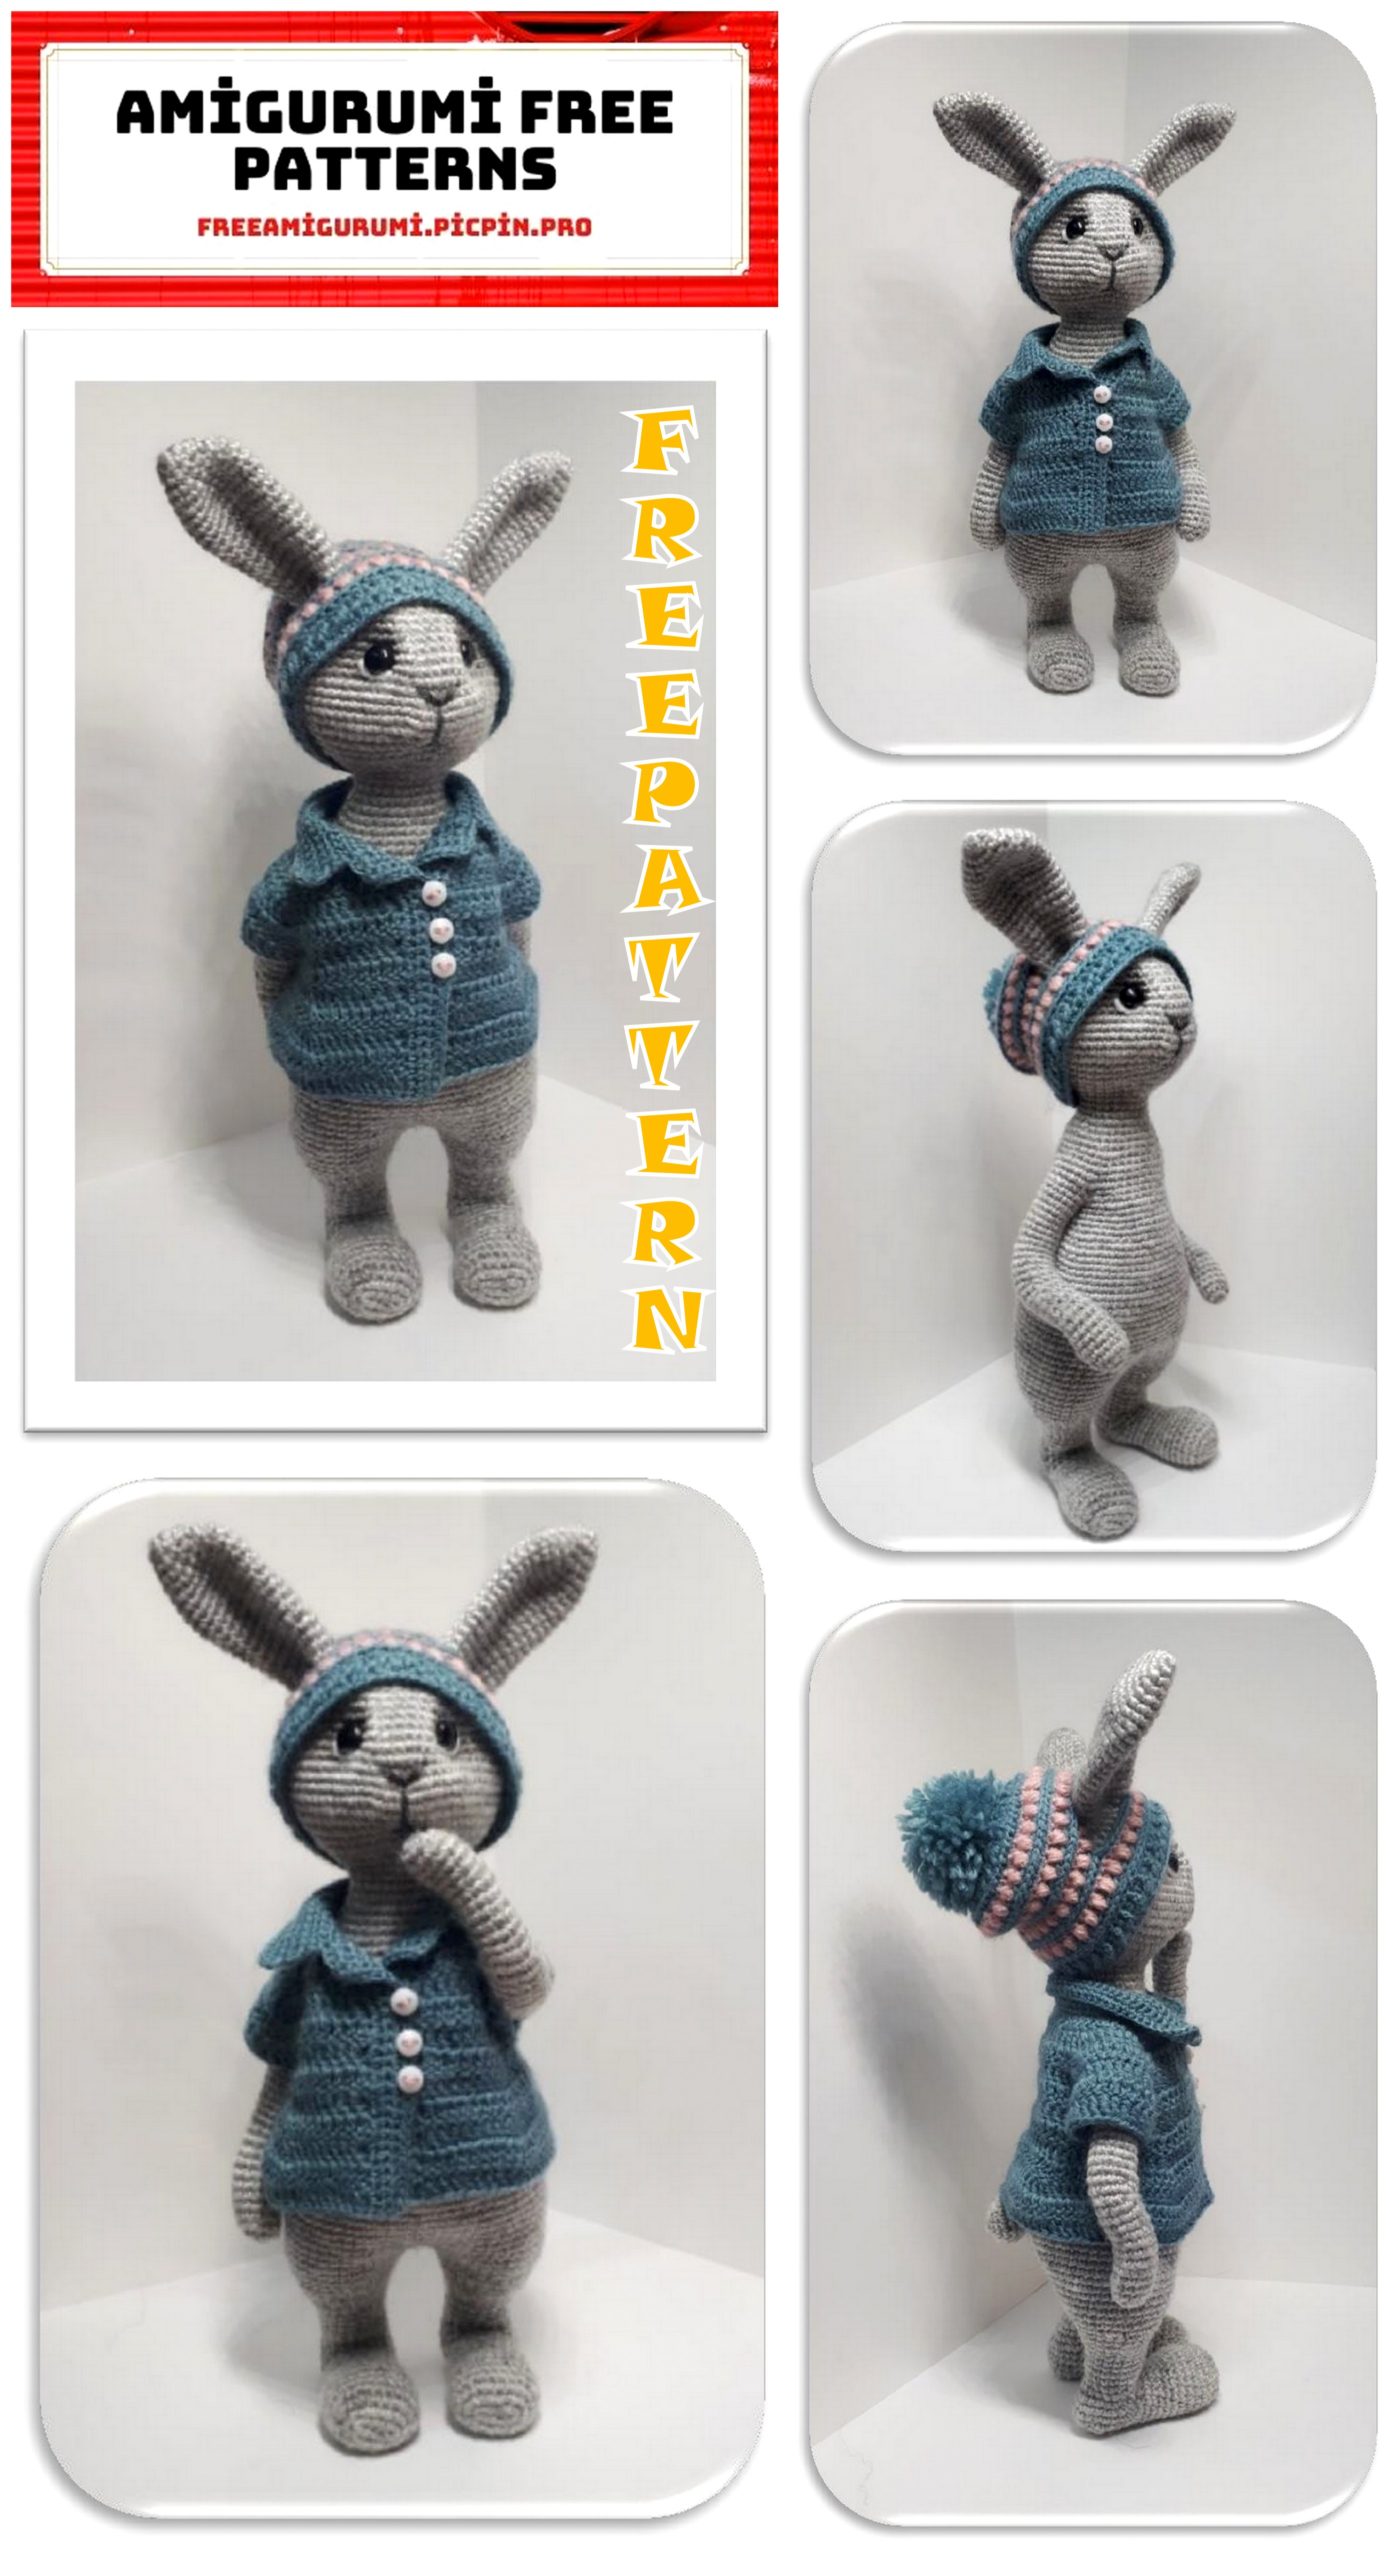
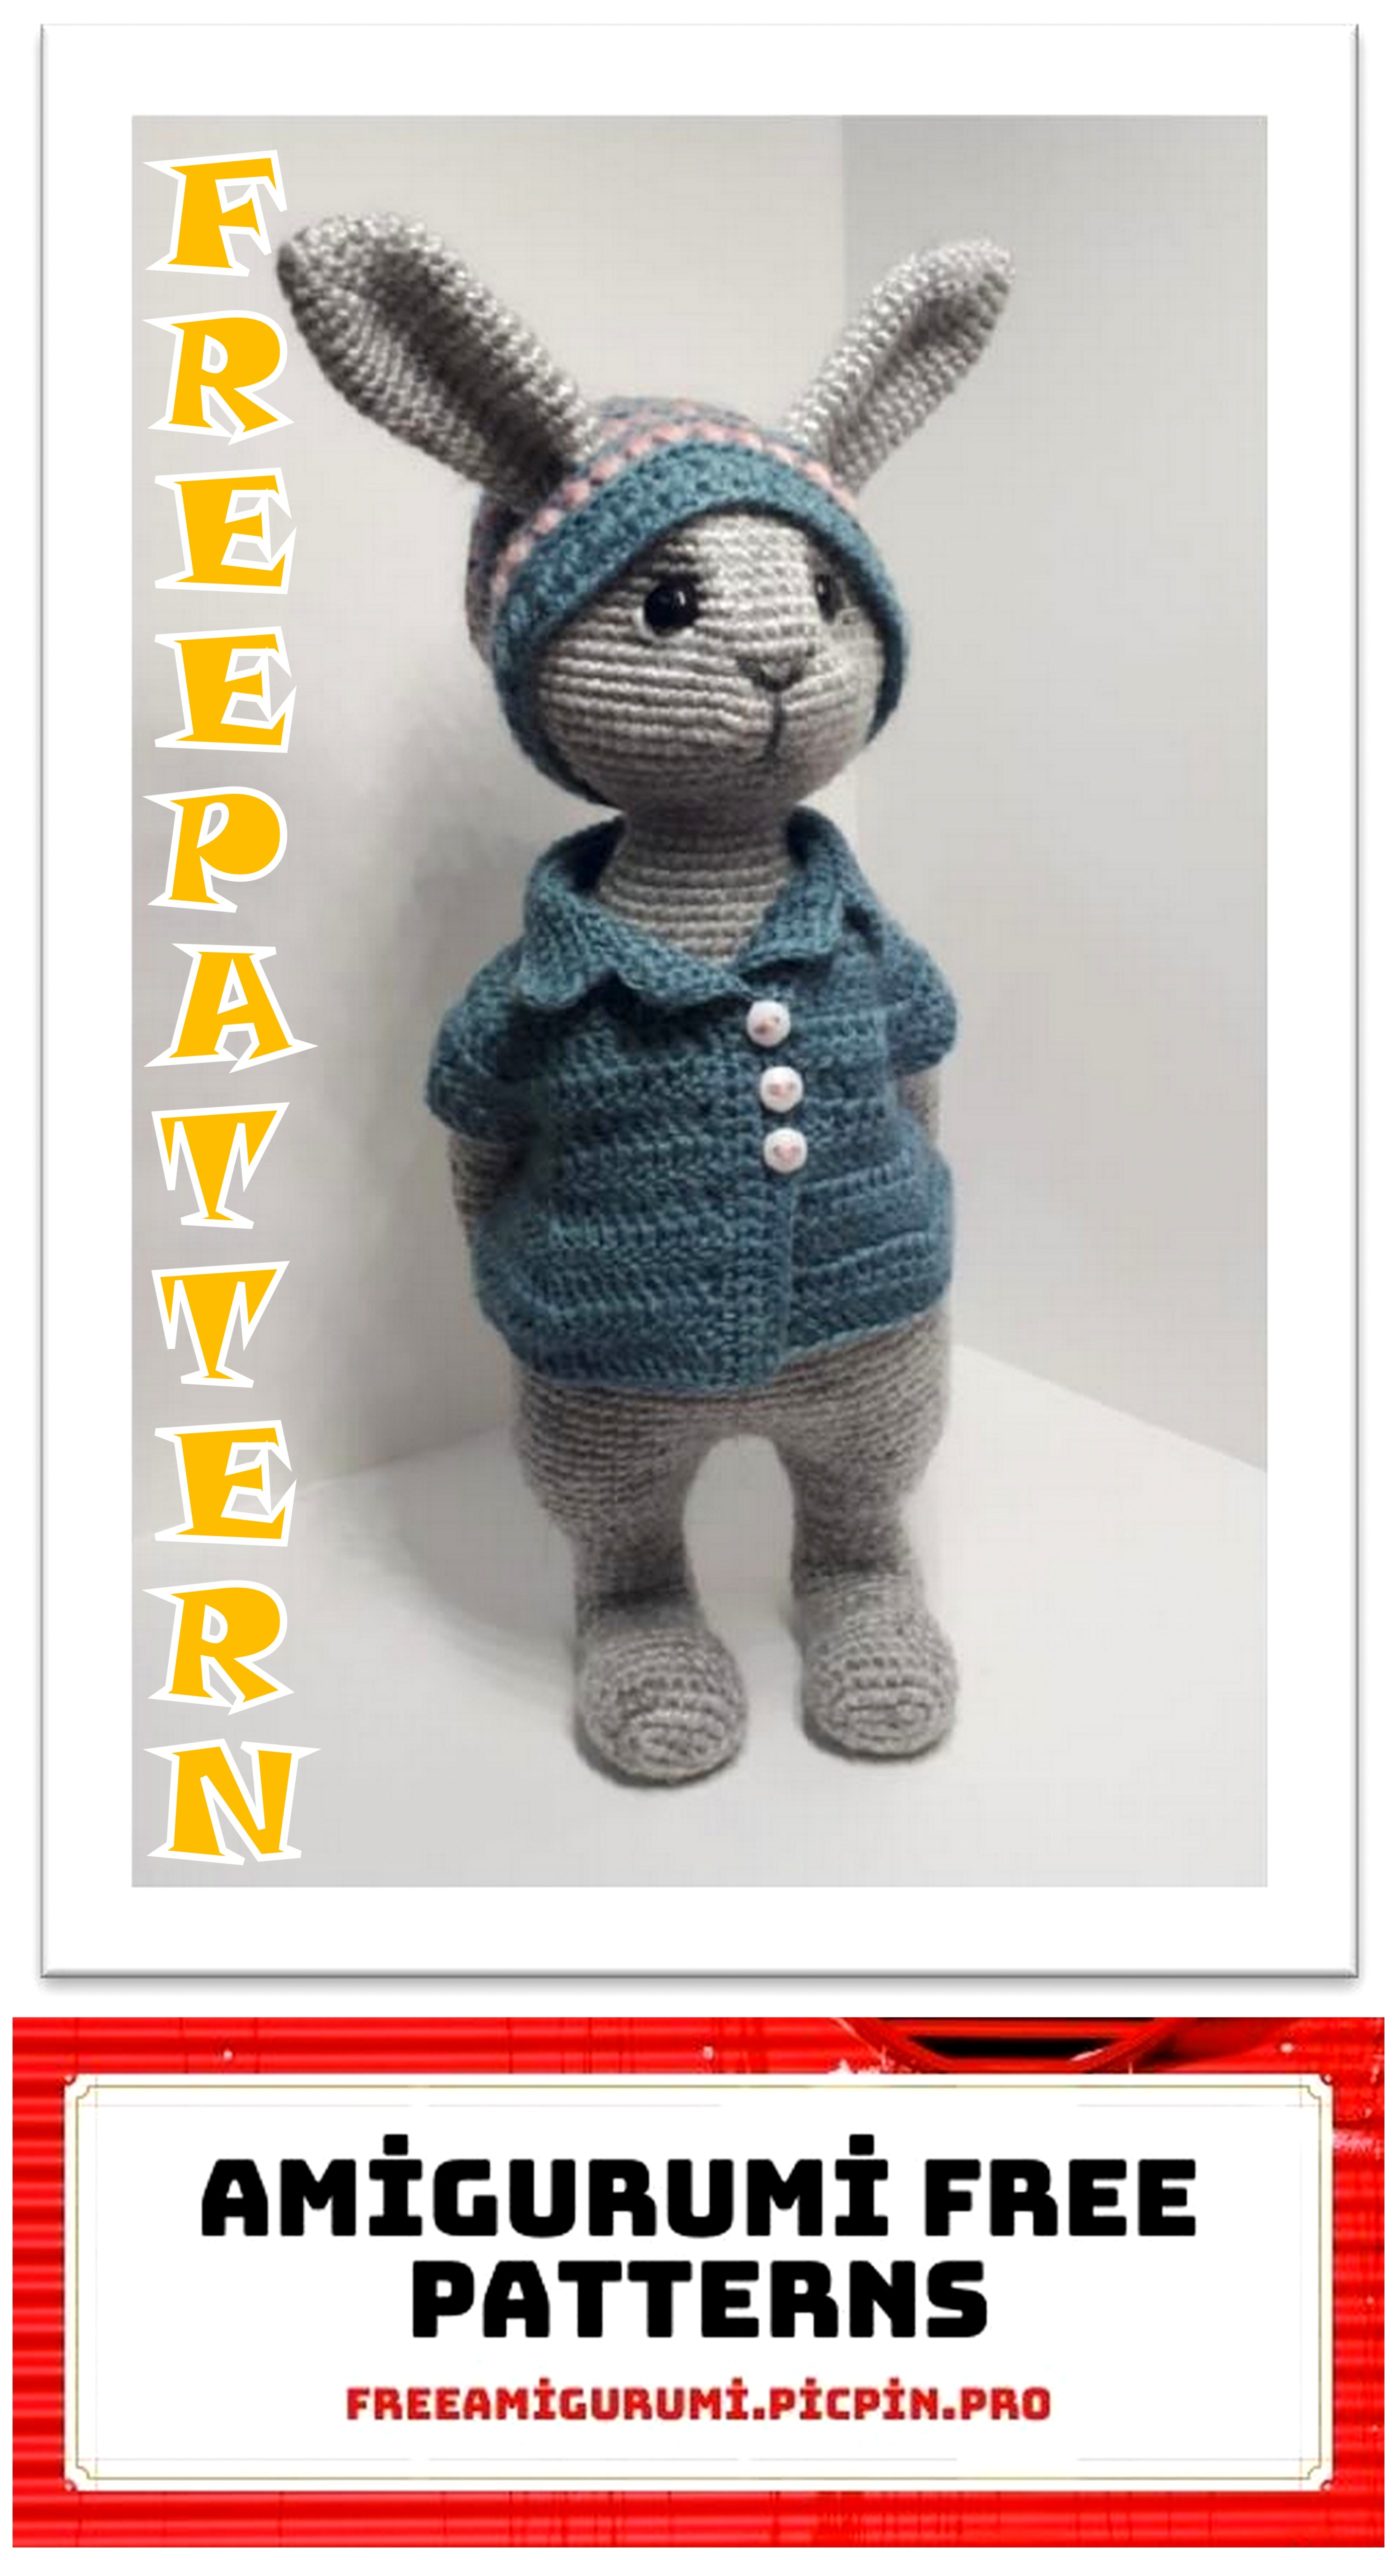
The rabbit itself is ready!
Then you can comb it or leave it smooth
Dress him up to your liking or hand him trendy and interesting accessories.
I suggest you knit a hat and a blouse-shirt for him.
A hat for Zakhar.
We end each row with ss – connecting the beginning and end of the row and start a new row with 1ch.
Azure color
row1: 64ch join in a ring (must be equal to the head circumference)
row2: 64sc.
row3: (1dc. embossed front, 1dc. embossed purl) * 32 times = (64)
row4: 64sc.
row5: 64sc. embossed purl
Pink color
row 6: (lush column, 1ch) * 32 times (each repeat we knit through 1sc.)
Azure color
row7: 64sc.
row8: Knit sc. purl embossed: 18sc., 10ch, 10sc. skip, 8sc., 10ch, 10sc. skipping, 18sc. (tied the holes for the ears.)
Pink color
row 9: (lush column, 1ch) * 32 times (each rep we knit through 1sc.)
Azure color
row 10: 64sc.
row11: 64sc. embossed purl
Pink color
row12: (lush column, 1ch) * 32 times (each repetition we knit through 1sc.)
Azure color
row13: 64sc.
row14: 64sc. embossed purl
Pink color
row 15: (lush column, 1ch) * 32 times (each repetition we knit through 1sc.)
Azure color
row 16: 64sc.
row 17: 64sc. embossed purl
row18: (1dc. embossed purl, 1dc. embossed front) * 32 times = (64)
row 19: (1dc. embossed purl, decrease dc. embossed
front) * 16 times = (32) (we make a decrease by crocheting two adjacent front ones, leaving behind the purl not knitted, standing between them. It turns out that with such a decrease we make 1 from 3)
row20: (1dc. embossed purl, decrease dc. embossed front) * 8 times = (16)
(we make a decrease by crocheting two adjacent front ones, leaving behind the purl not knitted, standing between them. It turns out that with such a decrease we make 1 from 3)
row21: (1dc. embossed purl, decrease dc. embossed front) * 4 times = (8)
(we make a decrease by crocheting two adjacent front ones, leaving behind the purl not knitted, standing between them. It turns out that with such a decrease we make 1 from 3)
Pull off the remaining loops. Hide the tail inside.
Make a pom-pom and sew to the hat.
Blouse shirt.
Azure color.
We knit in rotary rows, at the end of each row we do 2ch and a turn.
row1: 40ch
row2: 7dc, 3dc from1, 4dc. 3dc.from1, 14dc., 3dc.from1, 4dc., 3dc.from1, 7dc. = (48)
row3: 8dc, 3dc from1, 6dc., 3dc.from1, 16dc., 3dc.from1, 6dc., 3dc.from1, 8dc. = (56)
row4: 9dc, 3dc from1, 8dc., 3dc.from1, 18dc., 3dc.from1, 8dc., 3dc.from1, 9dc. = (64)
row5: 10dc, 3dc from1, 10dc., 3dc.from1, 20dc., 3dc.from1, 10dc., 3dc.from1, 10dc. = (72)
row6: 11dc, 3dc of1, 12dc, 3dc.from1, 22dc., 3dc.from1, 12dc., 3dc.from1, 11dc. = (72)
row 7: Separate the sleeves: 13dc., skip 15dc, 24dc., skip 15dc., 13dc. = (50)
row8: (8dc., inc, 7dc, inc, 8dc.) * 2 times = (54)
row 9: 8dc., 3dc. from 1, 4dc., inc, 4dc., 3dc. from 1, 16dc., 3dc. from 1, 4dc., inc, 4dc., 3dc. from 1, 8dc. = (64)
row 10: 9dc., 3dc. from 1, 6dc., inc, 6dc., 3dc. from 1, 16dc., 3dc. from 1, 6dc., inc, 6dc., 3dc. from 1, 9dc. = (74)
row11: 9dc., inc, 18dc., inc, 16dc., inc, 18dc., inc, 9dc. = (78)
row12: 78dc.
We stopped at the bottom of the right shelf, turn to the shelf:
row1: 24sc. up the ledge, 1ch, turn
row2: 24sc. down the shelf, 1ch, turn
row 3: 12sc., (3ch, skip 1sc., 2sc.) * 3 times, 3sc. (knitted loops)
Turn to neck:
2sc. by strapping, 40sc. along the neck, turn to the left shelf:
row1: 24sc. down the shelf, 1ch, turn
row2: 24sc. up the ledge, 1ch, turn
row 3: 24sc. down the shelf, 1ch, turn
row 4: 24sc. up the ledge, 1ch, turn
In the last one we will knit another 2sc., Turn to the neck:
3sc. on the strapping of the shelf and start knitting the collar:
row 1: 40sc., 1ch, turn
row 2: 40sc., 1ch, turn
row3: inc, 38sc., inc, 1ch, turn
row 4: 42sc., 1ch, turn
row5: inc, 40sc., inc, 1ch, turn
row6: 44sc.
Fasten the thread, carefully hide it in the posts.
Sew on buttons.
We dress our rabbit, kiss on the nose and take pictures