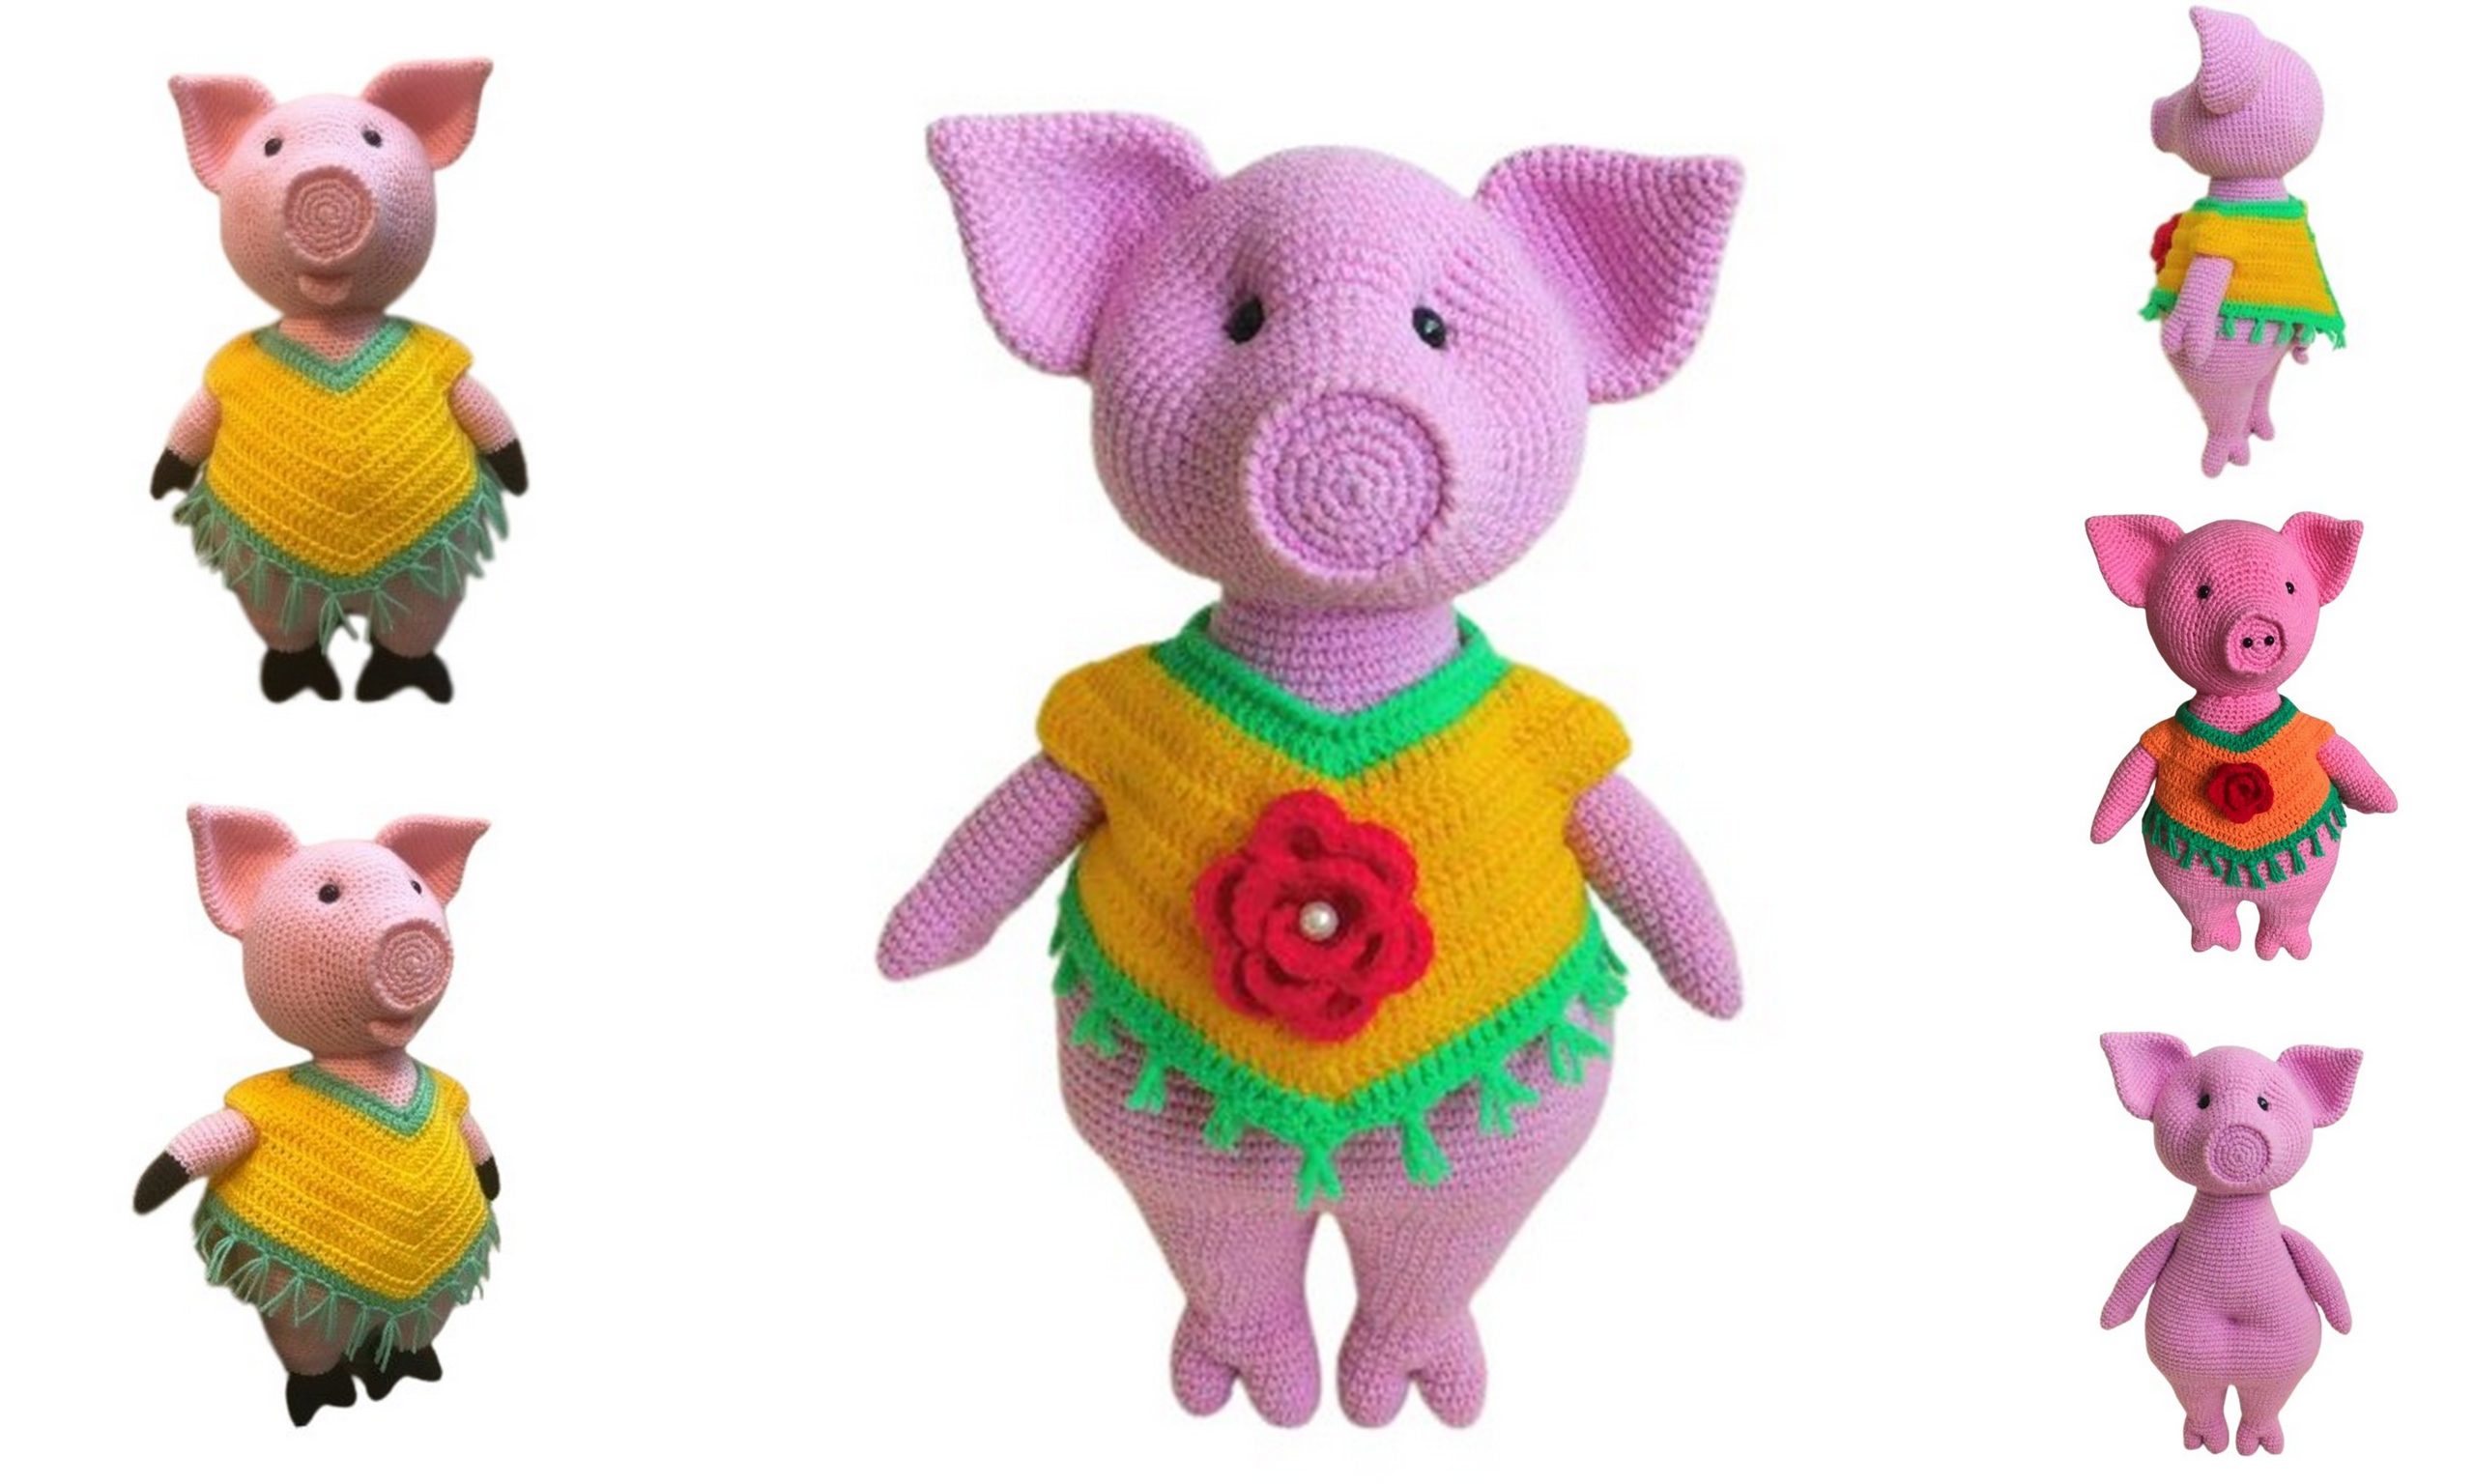
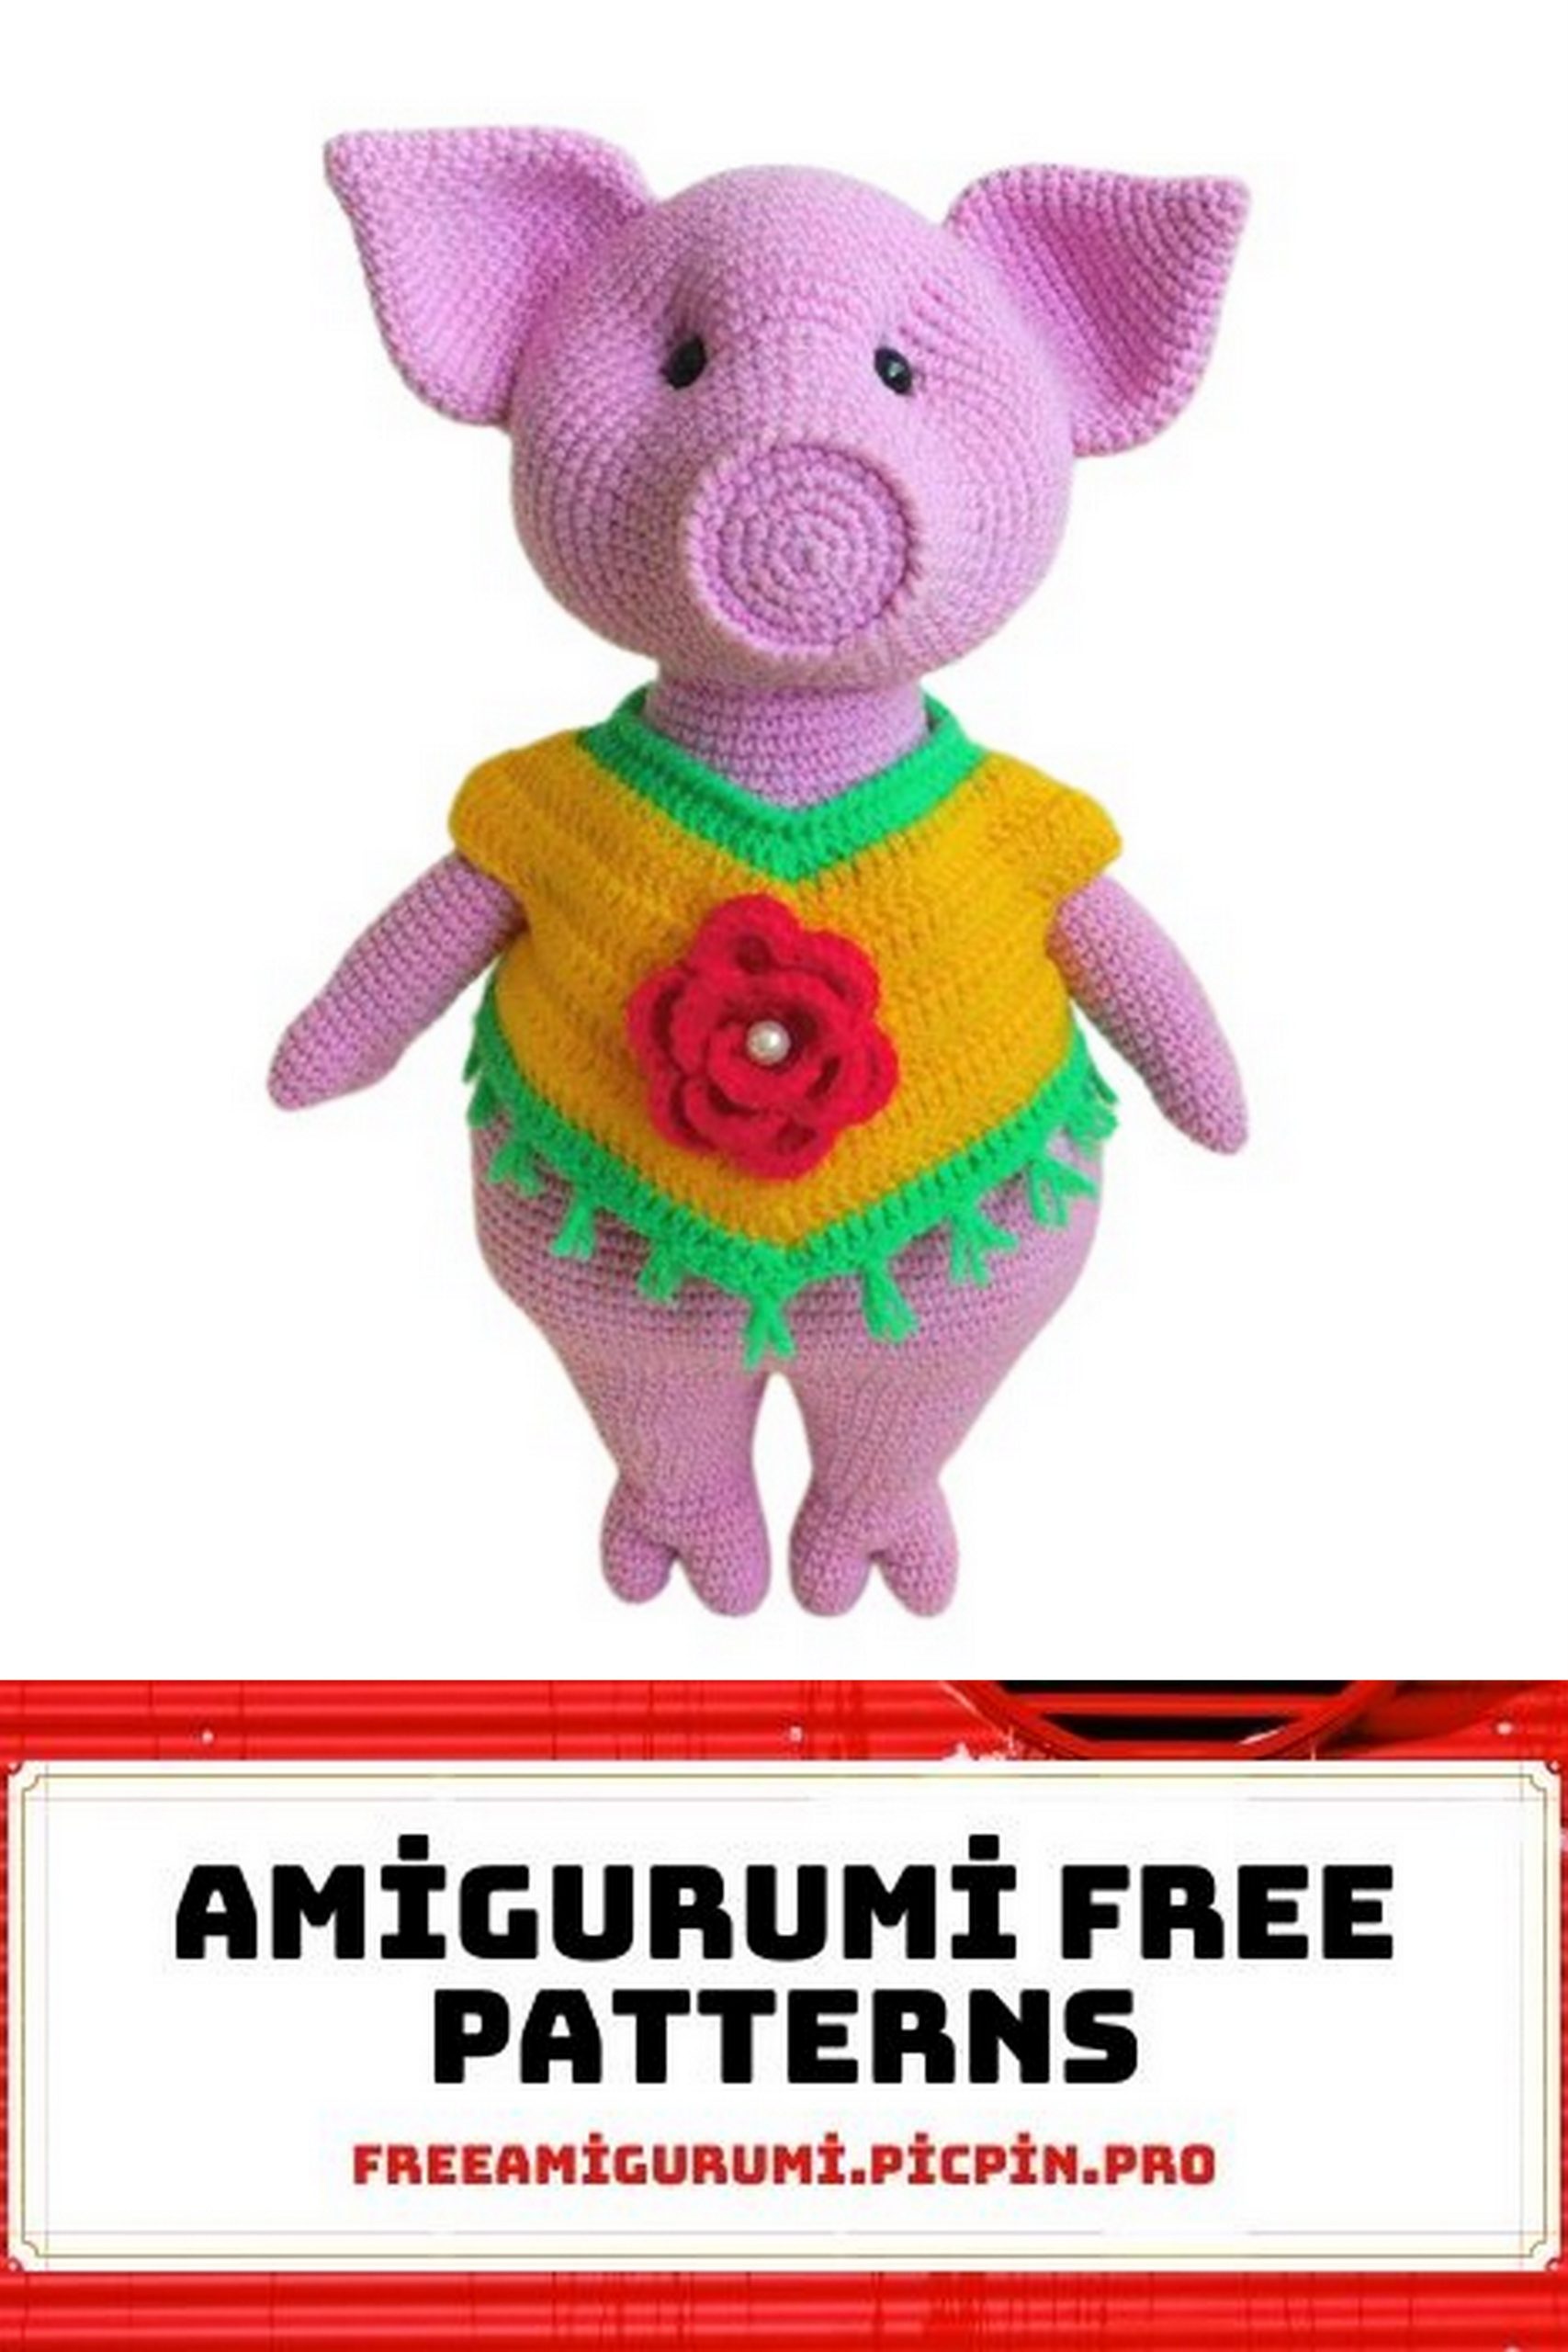
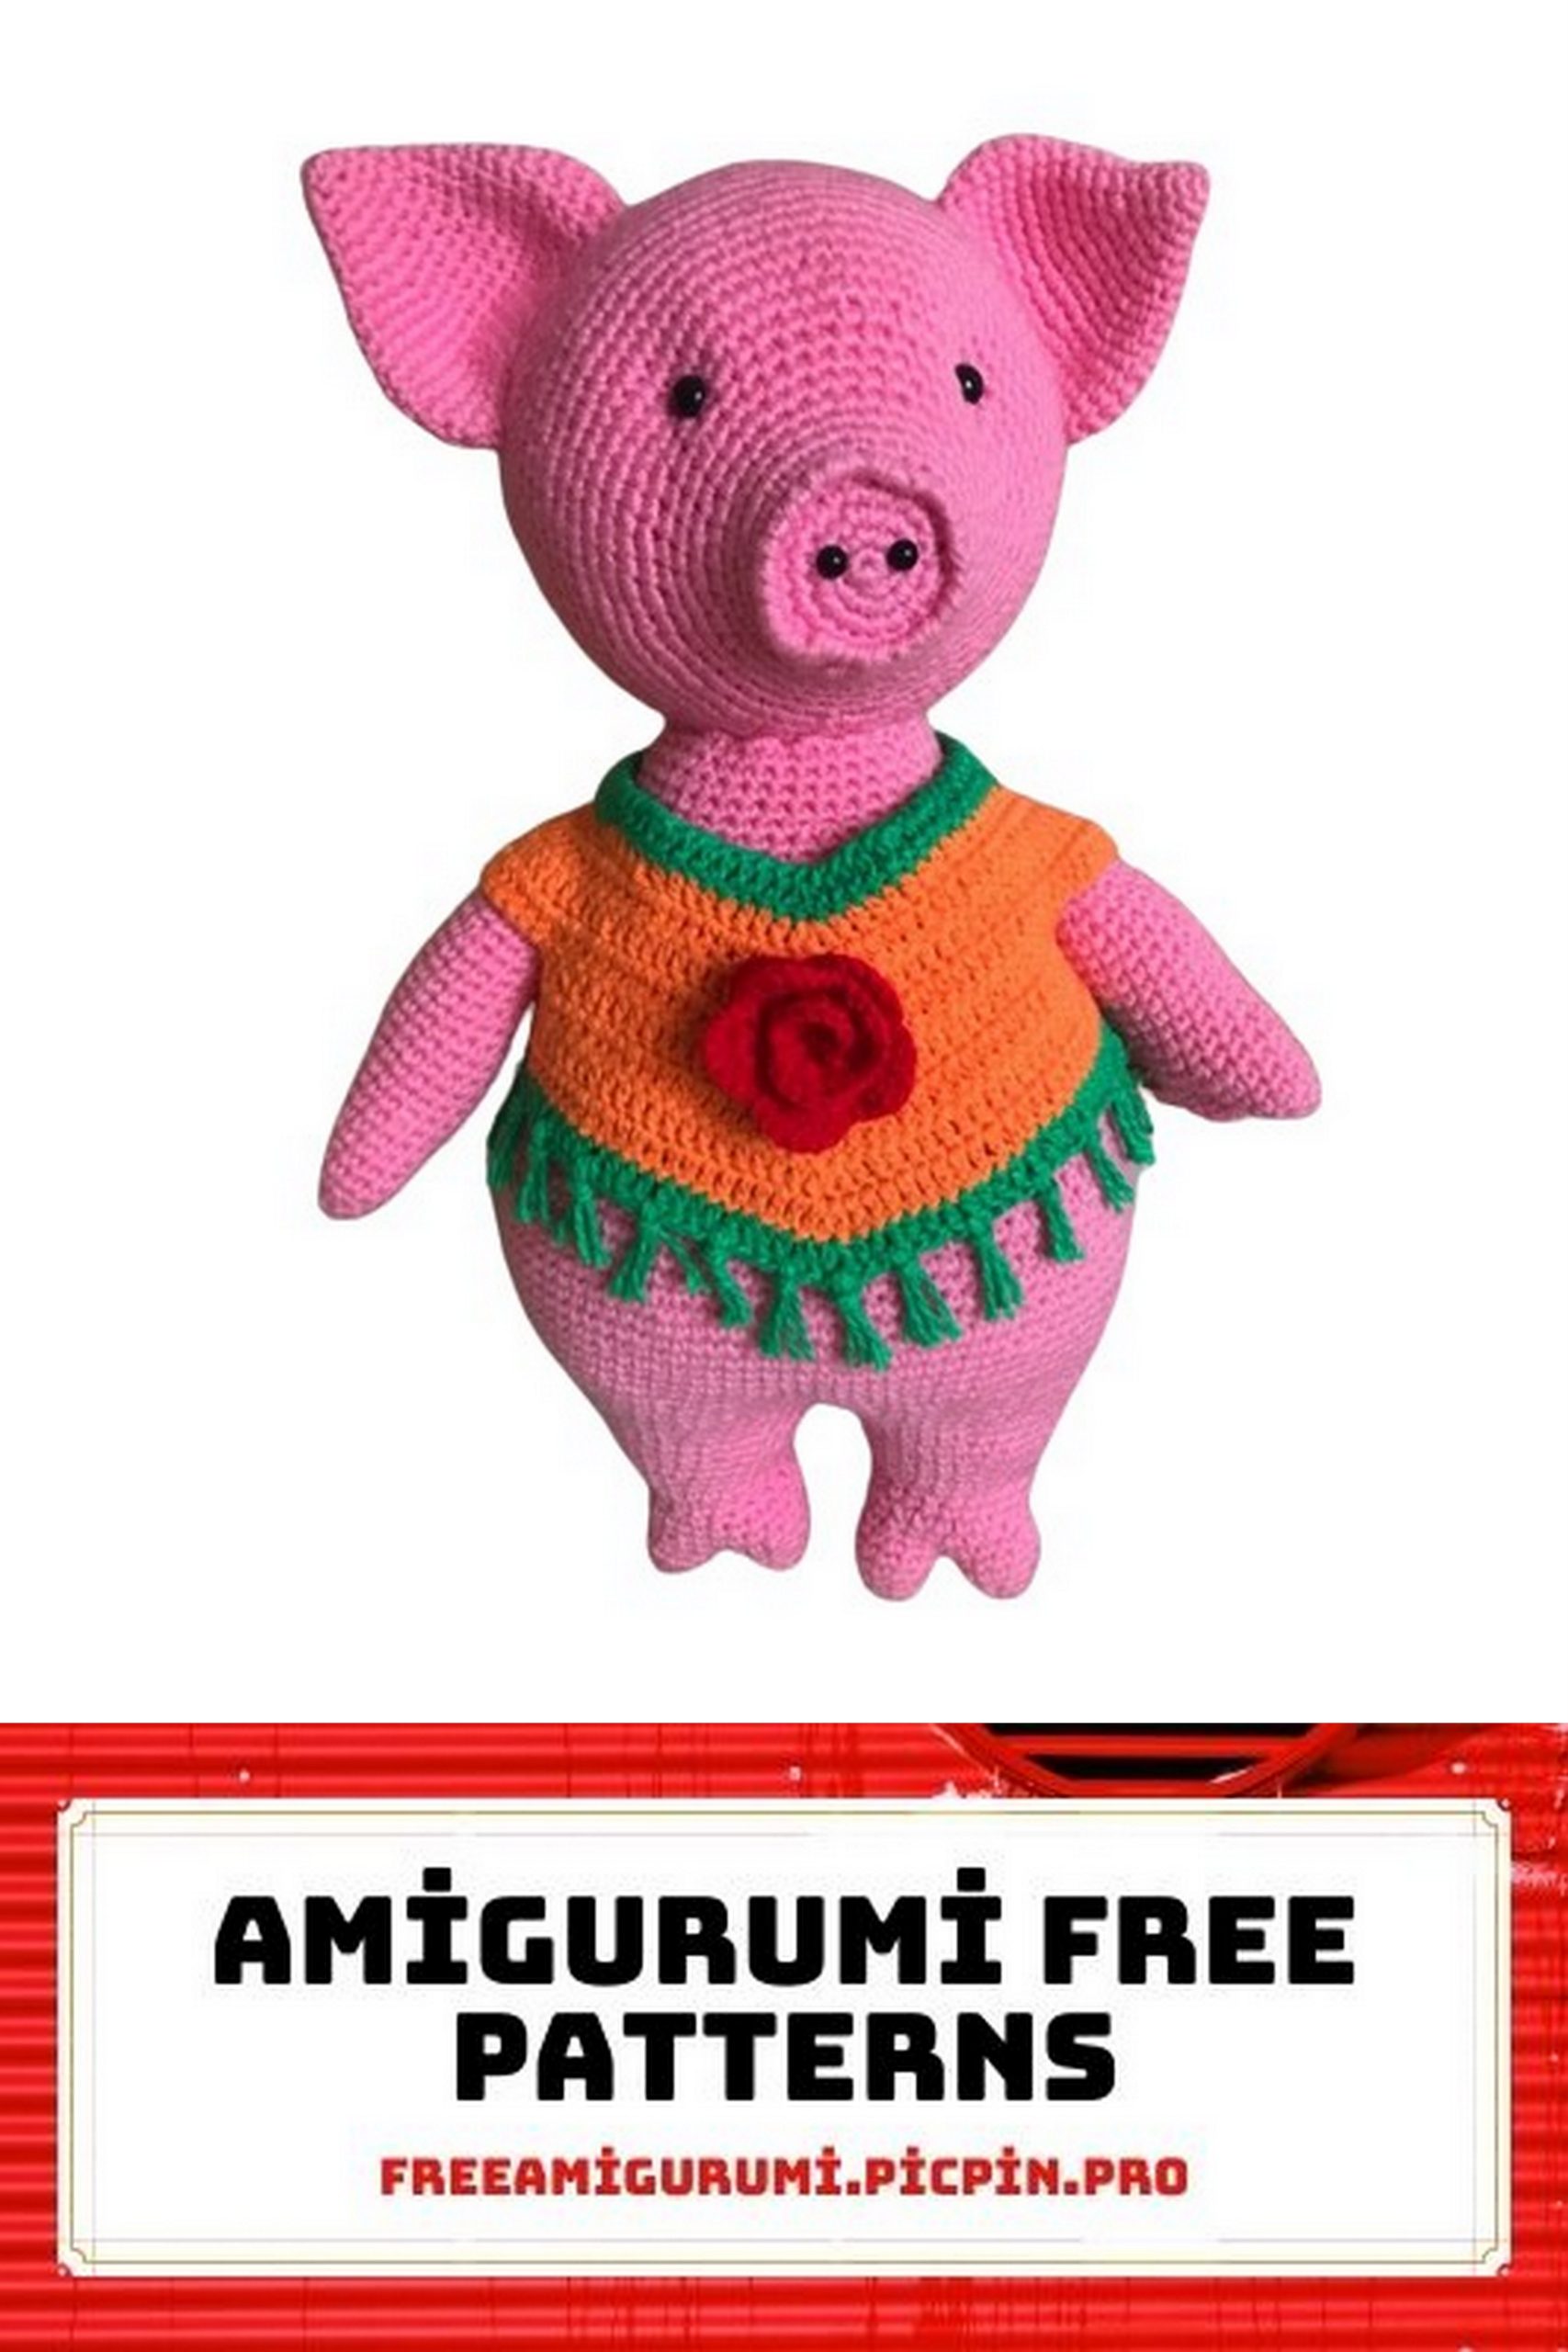
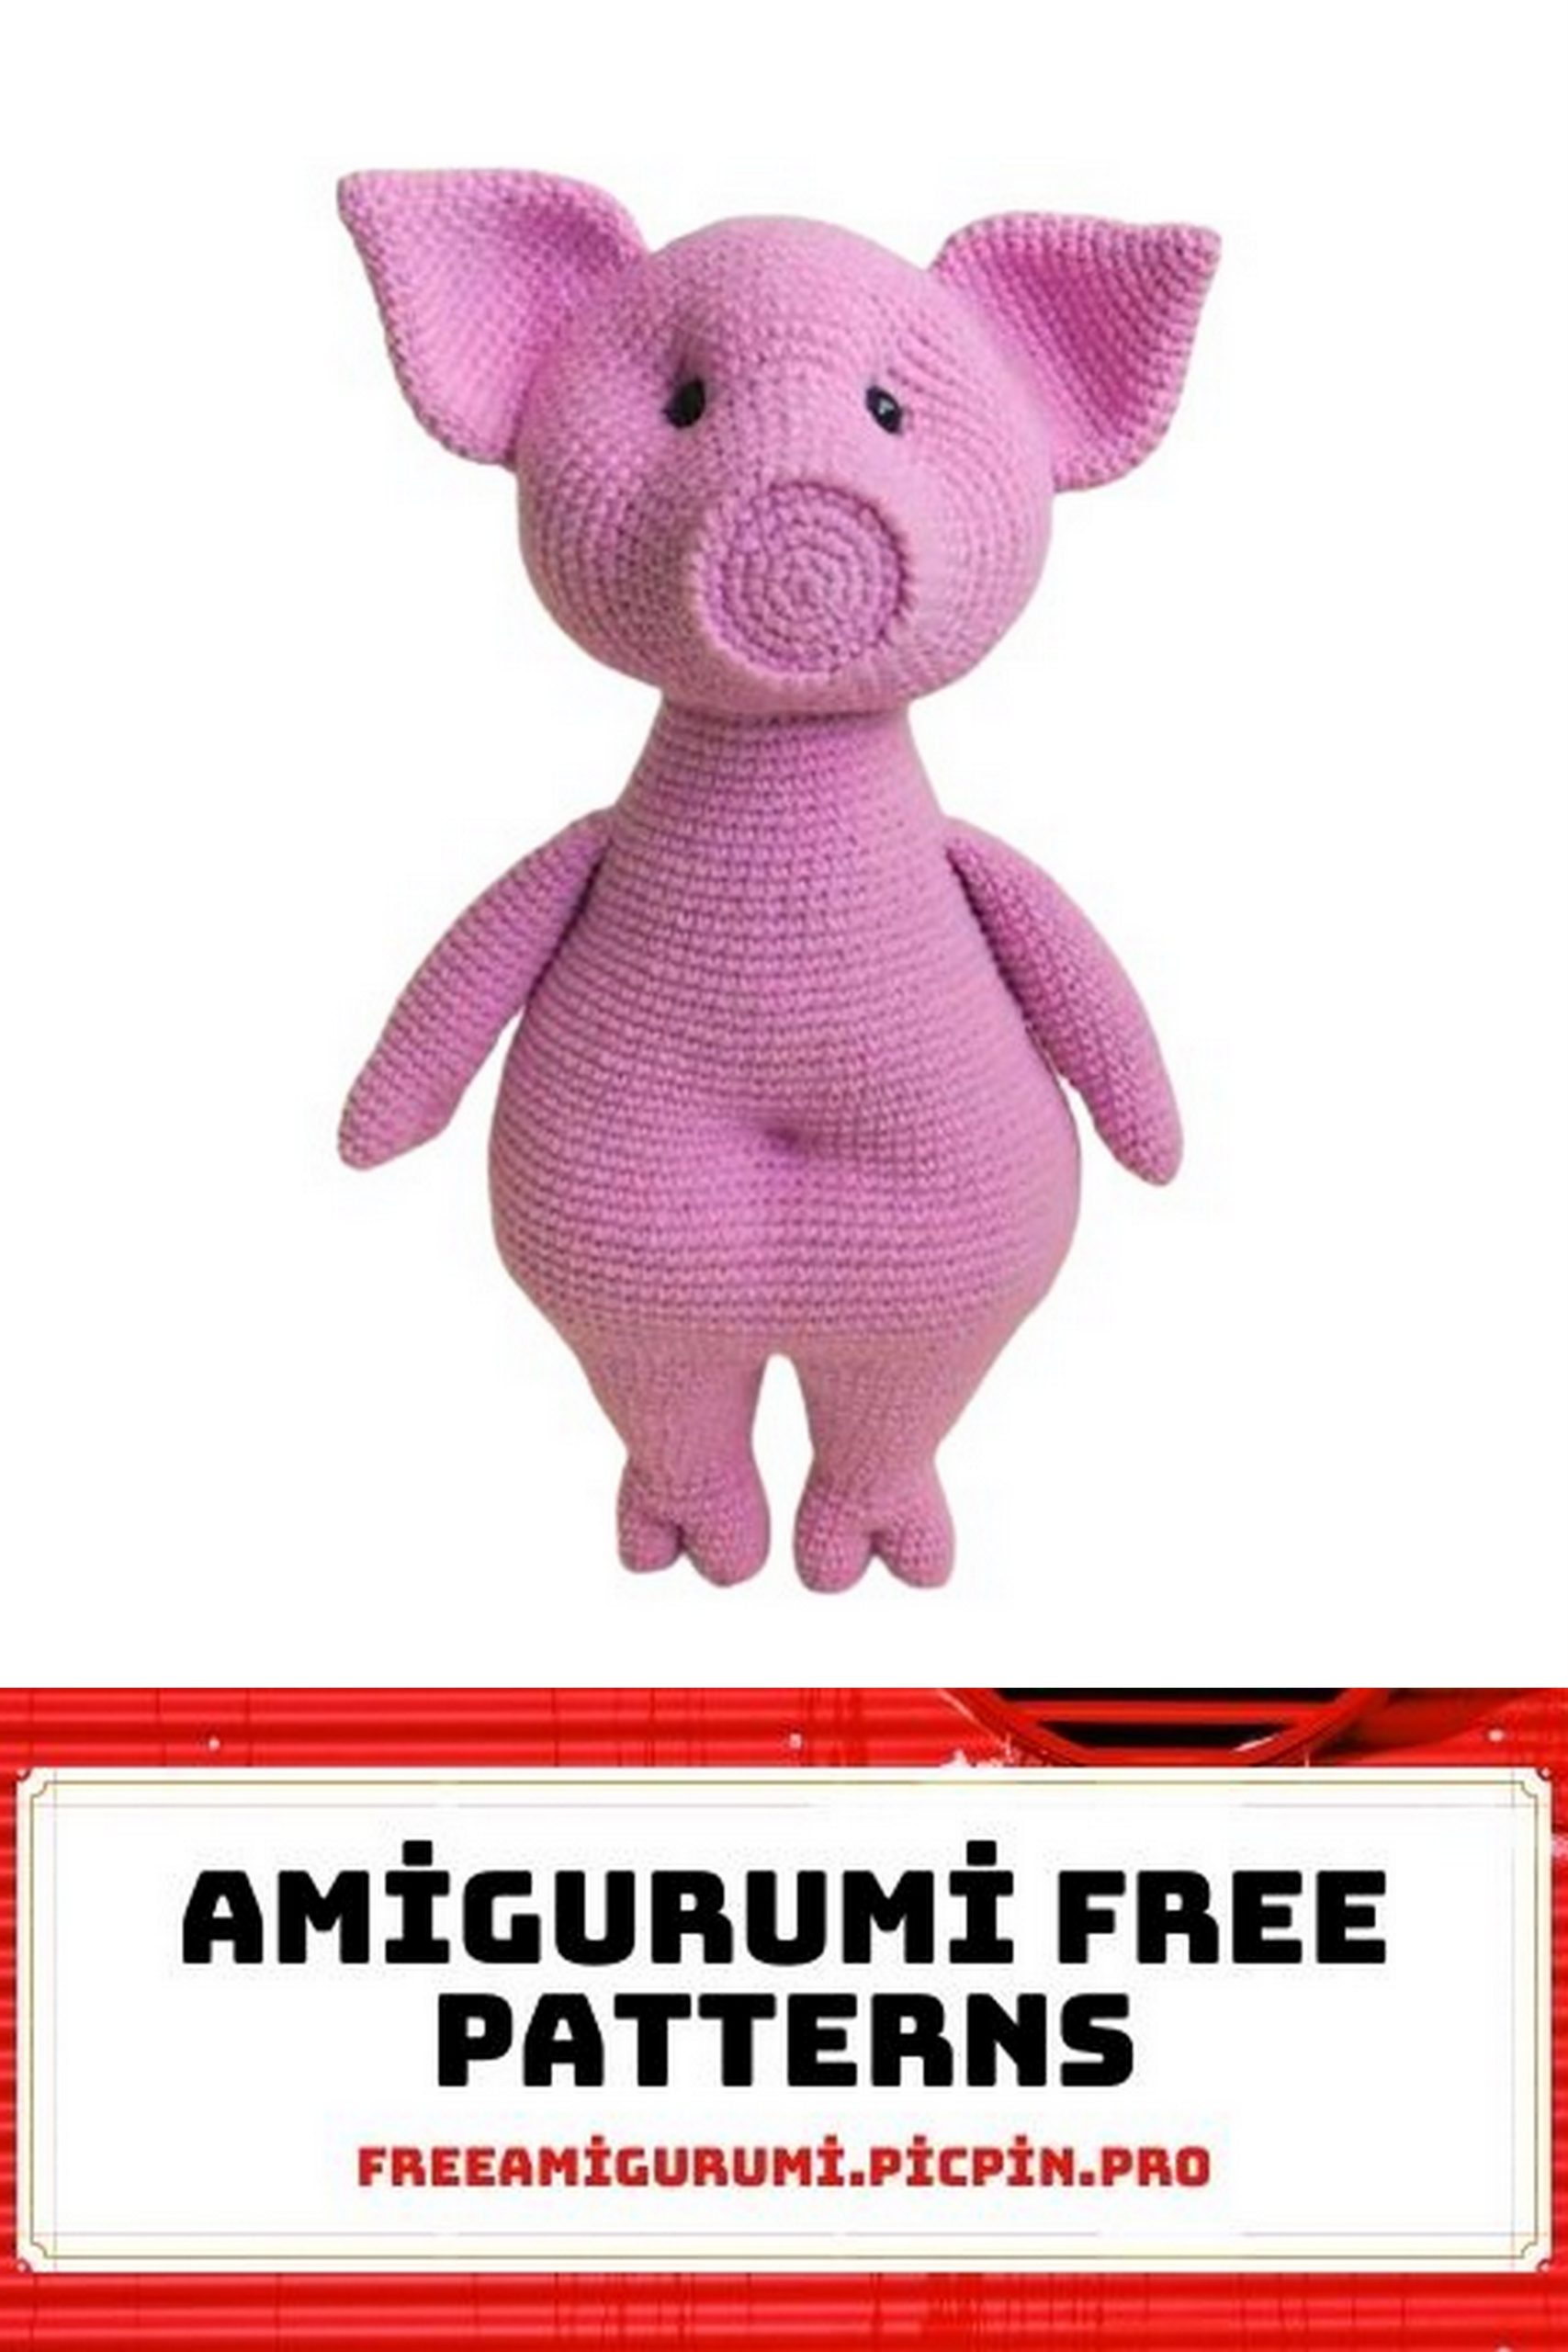
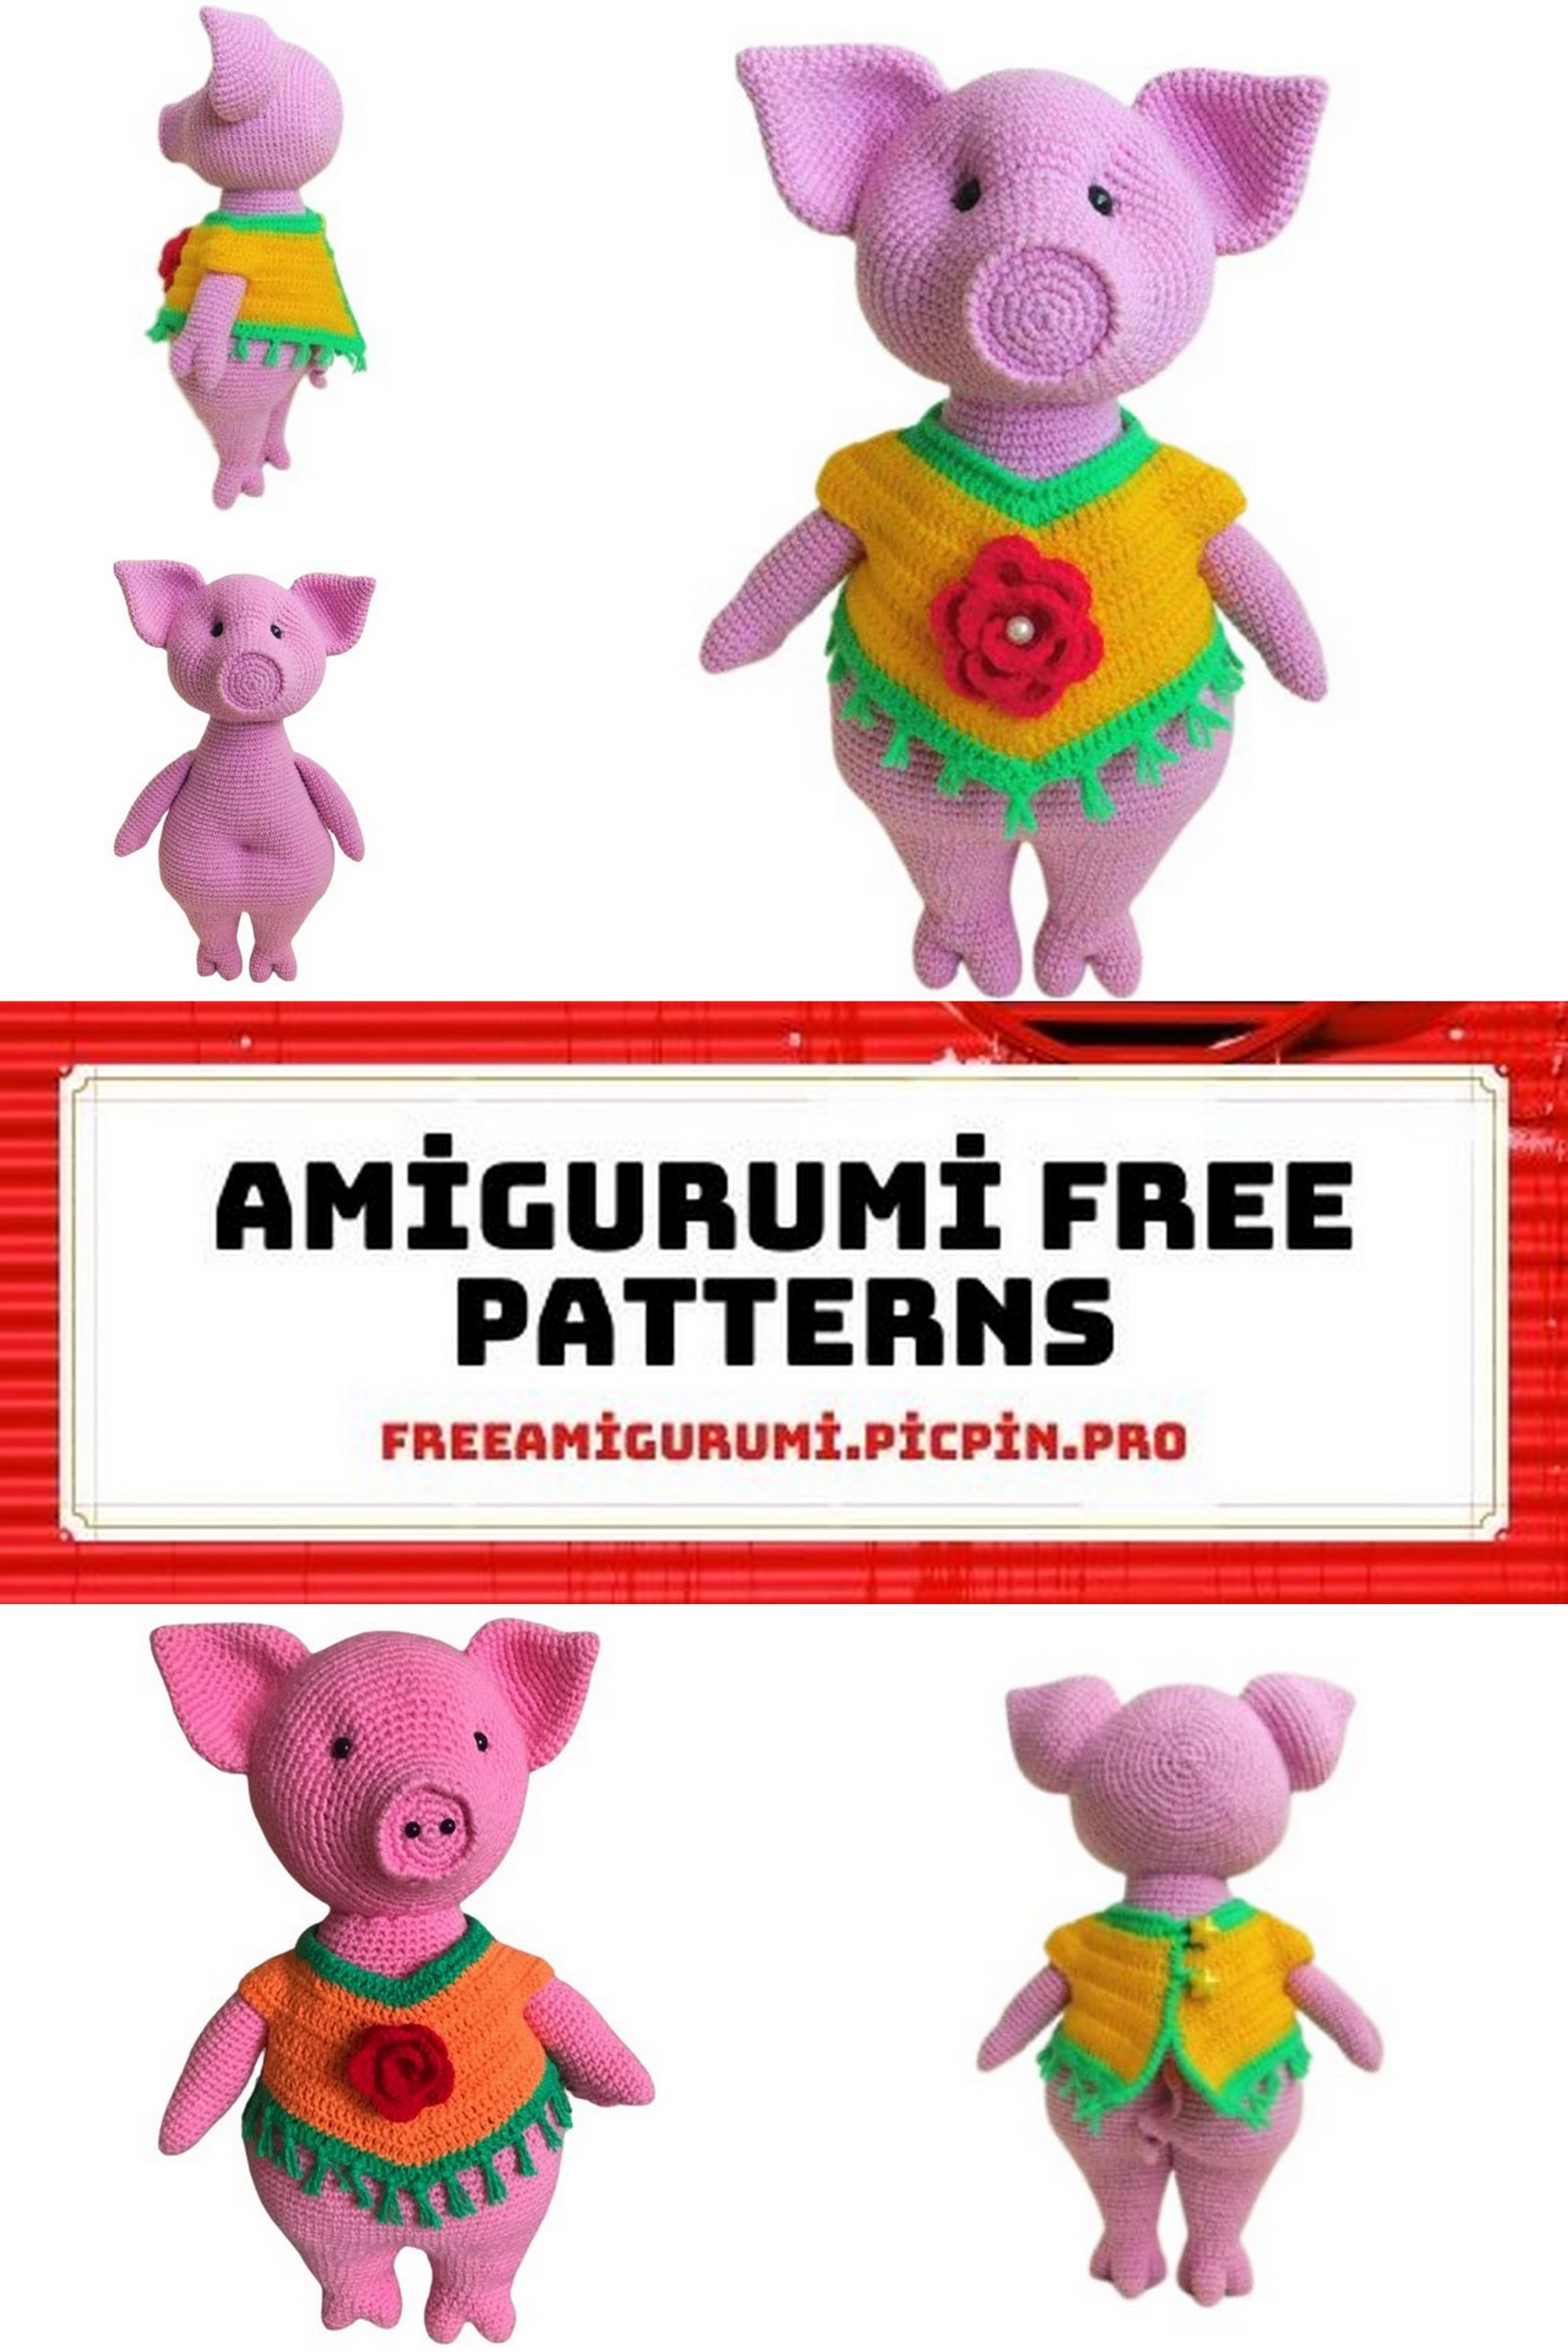
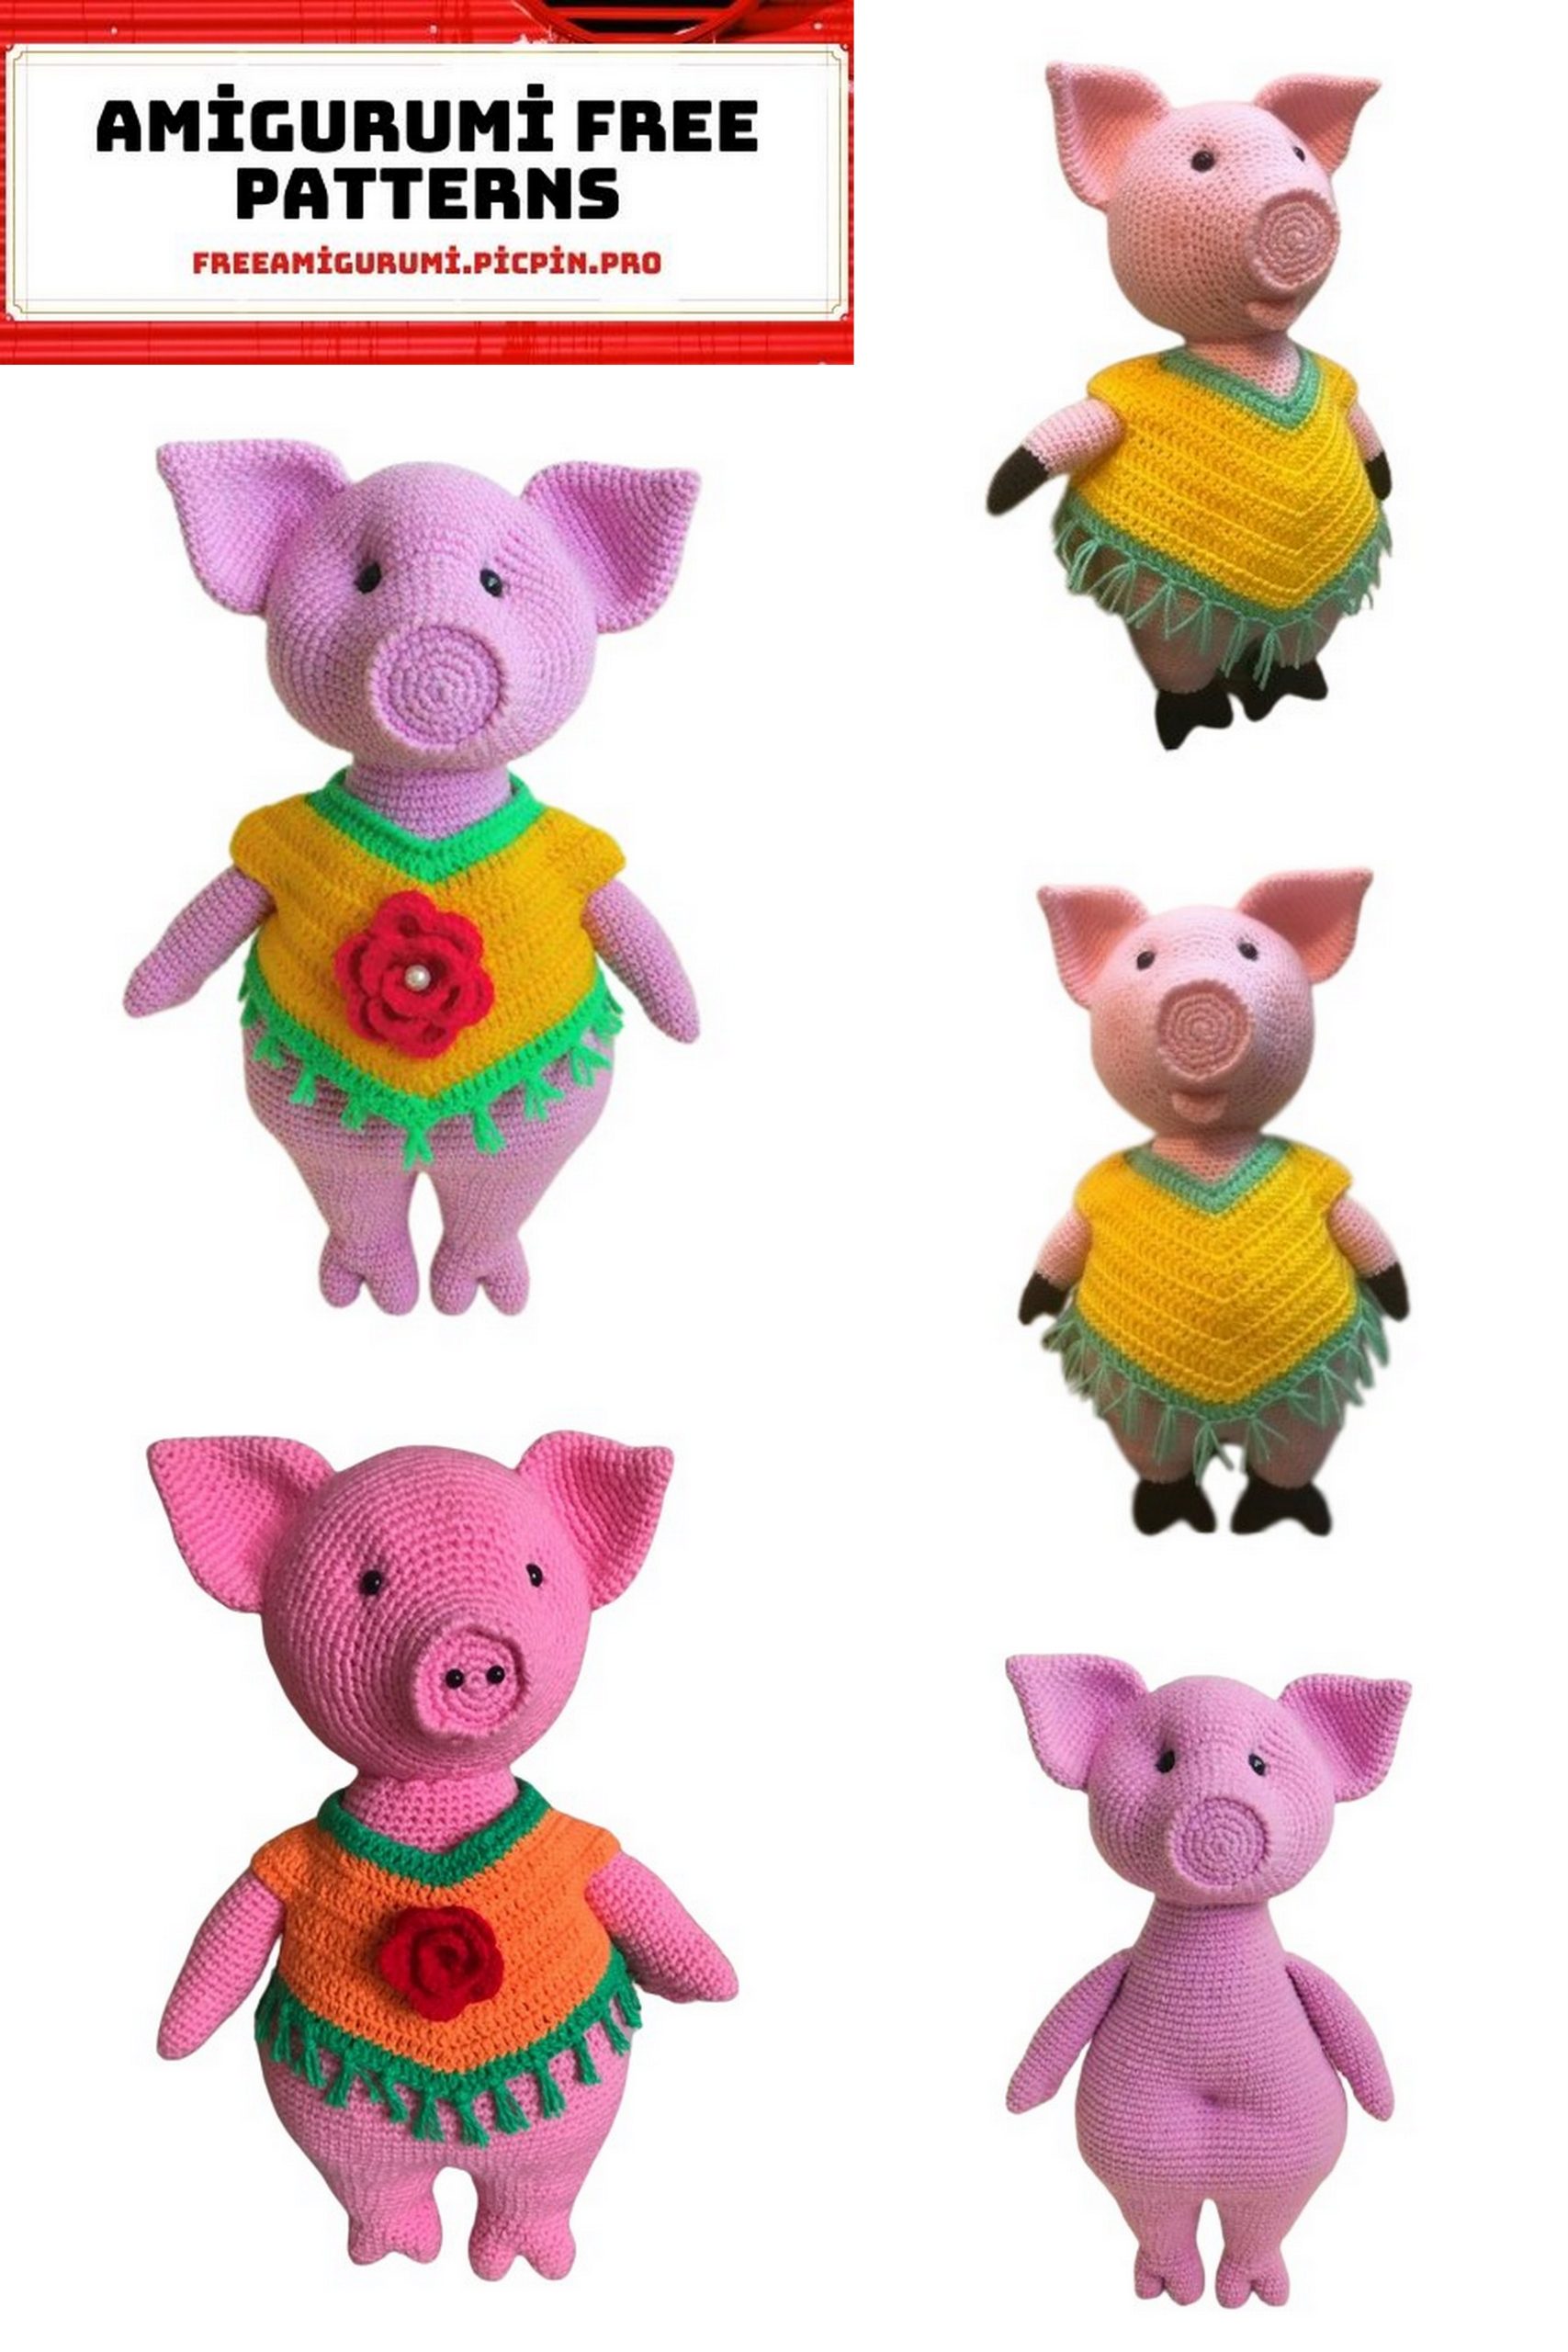
Free Amigurumi Cute Pig Pattern – Crochet Your Adorable Piggy
Amigurumi is a wonderful art form that has gained immense popularity in the world of handcrafting. If you have a passion for creating adorable handmade toys, then the “Amigurumi Cute Pig” pattern could be the perfect choice for you. This free pattern will help you create a charming little piglet.
Handmade toys make for fantastic gifts, whether for your loved ones or yourself. This amigurumi pig pattern is an excellent choice, especially for kids who will absolutely adore these handmade toys.
In this article, you’ll learn how to make the Amigurumi Cute Pig pattern step by step. By following our instructions, you can enjoy the process of crafting your very own huggable pig. Here’s what you need to get started and our comprehensive guide!
Materials for work:
● Yarn
YarnArt “Jeans” (55% cotton, 45% acrylic) 160m/50g
Color 36 (pink) – for the toy’s body (2 skeins)
Pexorka “Children’s Novelty” (100% acrylic) 200m/50g
For the poncho:
12 (yellow)
065 (exotic)
06 (red) – for the rose
● Crochet hook size 2
● Stuffing – synthetic stuffing or polyester fiberfill
● Safety eyes/buttons with a diameter of 0.8 mm
● Bead of any size for decorating the rose
● Needle for sewing and a large needle for tightening
● Marker or contrasting thread
● Sturdy material for reinforcing the soles
Using the specified materials, the height of the toy is approximately 32 cm. You can use different yarn and an appropriate hook size, but this may result in a different toy height.
Abbreviations:
ch – chain stitch
sc – single crochet
inc – increase
dec – decrease
hdc – half-double crochet
sl st – slip stitch
Notes:
All parts of the toy (except the soles) are crocheted in a spiral. Rows are not joined with a slip stitch, and you do not need to make chain stitches at the beginning of a new row.
The marker or contrasting thread is used only to mark the beginning of the row and will shift slightly during work, but there’s no need to adjust it; crochet as per the instructions.
Unless otherwise specified, all stitches are worked through both loops of the previous row’s stitches.
To avoid unsightly gaps in your fabric, it is recommended to follow the decrease pattern provided below.
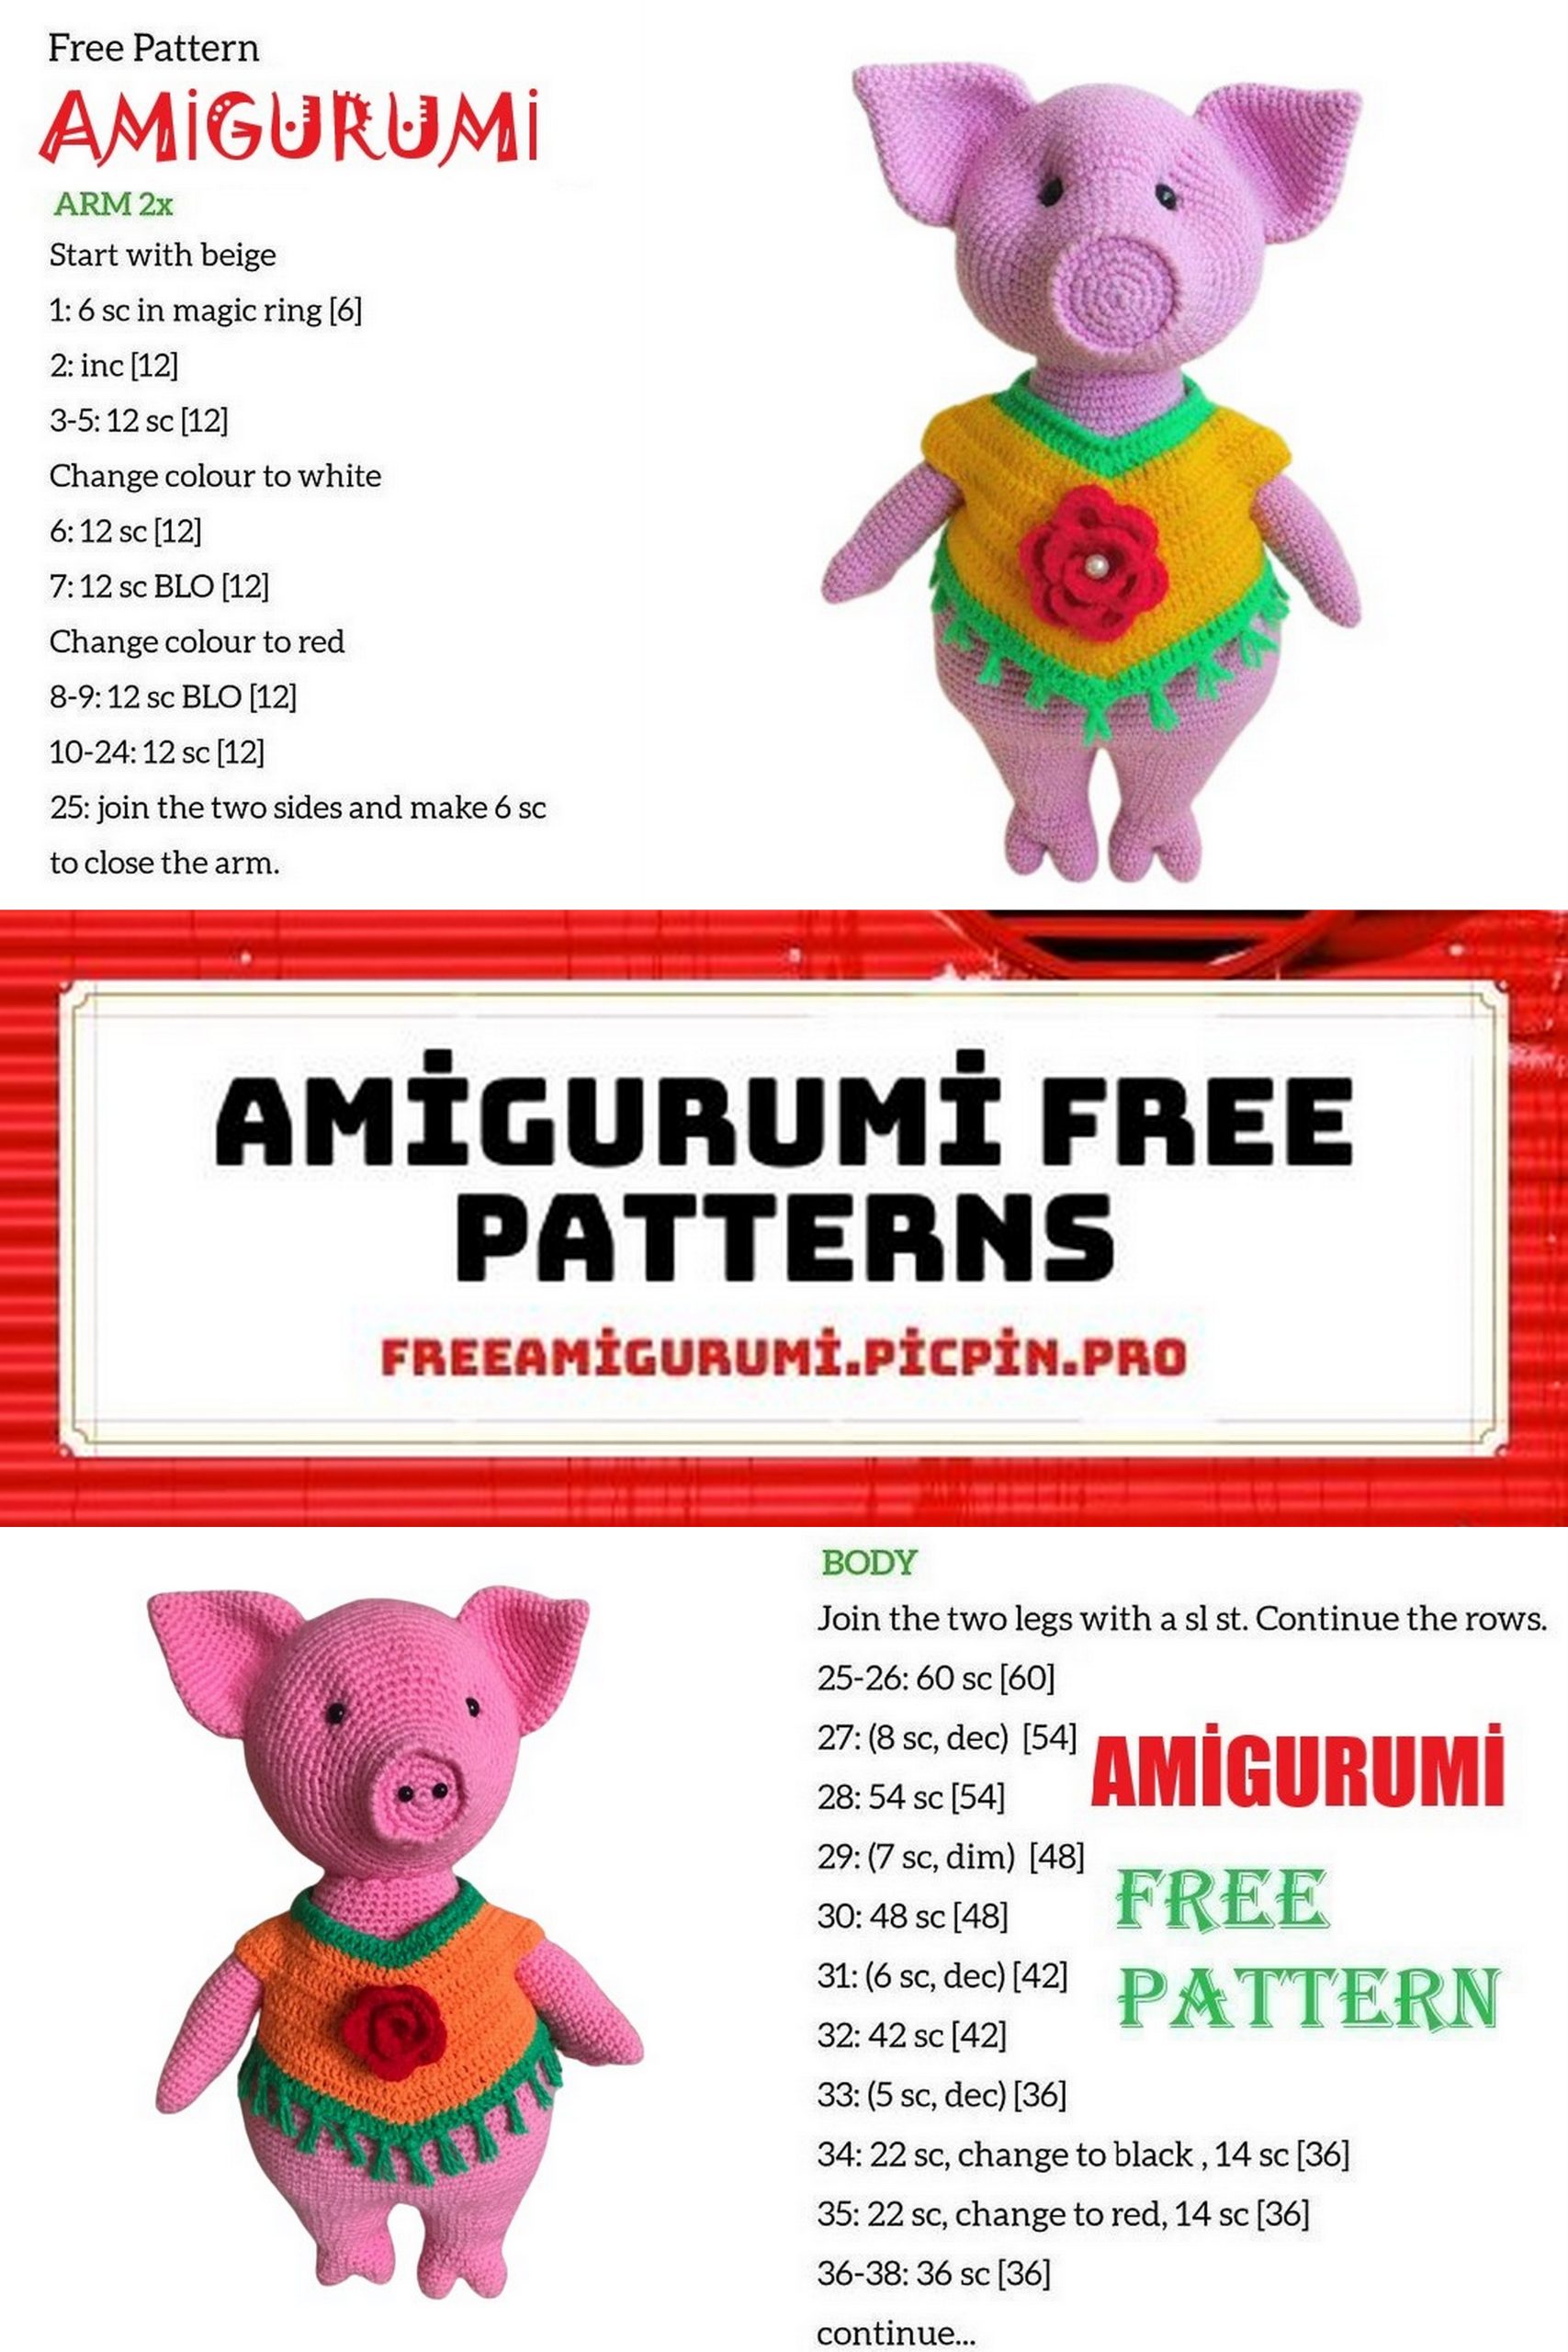
Legs (2 pieces):
Start with crocheting the fingers.
Row 1: 4 sc in the amigurumi ring.
Row 2: 4 inc (8 sc).
Row 3: 8 sc.
Row 4: (1 sc, inc) x 4 (12 sc).
Rows 5-6: 12 sc.
Fasten off and cut the yarn. Make a second finger in the same way but do not cut the yarn – continue to crochet the leg.
Place the fingers together with their right sides facing each other and join by crocheting 3 sc.
Row 7: 9 sc around one finger, 9 sc around the other finger (18 sc). Place a marker at this point.
Stuff each finger individually, but don’t overstuff the top part. This area should fold in half to attach to the body.
Rows 8-19: 18 sc.
Row 20: (7 sc, dec) x 2 (16 sc).
Rows 21-22: 16 sc.
Row 23: 3 sc, dec, 6 sc, dec, 3 sc (14 sc).
Rows 24-25: 14 sc.
Row 26: (5 sc, dec) x 2 (12 sc).
Fasten off and cut the yarn, hiding the end inside the piece.
Legs (2 pieces):
Start with crocheting the fingers (refer to the “Legs” section on page 4, rows 1 to 6). For each leg, you need to crochet 3 such fingers. Do not cut the yarn on the third finger; continue to crochet the leg.
Row 7: 6 sc around the third finger (the one crocheted last, with the working yarn), 12 sc around the other finger (you can choose any, they’re all the same), 6 sc around the third finger again (24 sc). Place a marker at this point.
Row 8: 3 sc, place the last finger with the right side facing and join by crocheting 6 sc. Continue to crochet 15 sc to the marker (24 sc).
So, the third finger (let’s call it “rudimentary”) is shorter than the others. It will be located on the back of the hoof like a spur.
Rows 9-10: 3 sc, 6 sc around the remaining stitches of the last attached finger, 15 sc (24 sc).
Stuff each finger individually, without overpacking the joint area, and continue stuffing as you work.
Row 11: (2 sc, dec) x 6 (18 sc).
Row 12: 18 sc.
Row 13: 1 sc, inc, (2 sc, inc) x 5, 1 sc (24 sc).
Rows 14-15: 24 sc.
Row 16: (3 sc, inc) x 6 (30 sc).
Rows 17-18: 30 sc.
Row 19: 2 sc, inc, (4 sc, inc) x 5, 2 sc (36 sc).
Rows 20-21: 36 sc.
Row 22: (5 sc, inc) x 6 (42 sc).
Rows 23-24: 42 sc.
Row 25: 3 sc, inc, (6 sc, inc) x 5, 3 sc (48 sc).
Fasten off and cut the yarn, hiding the end inside the piece.
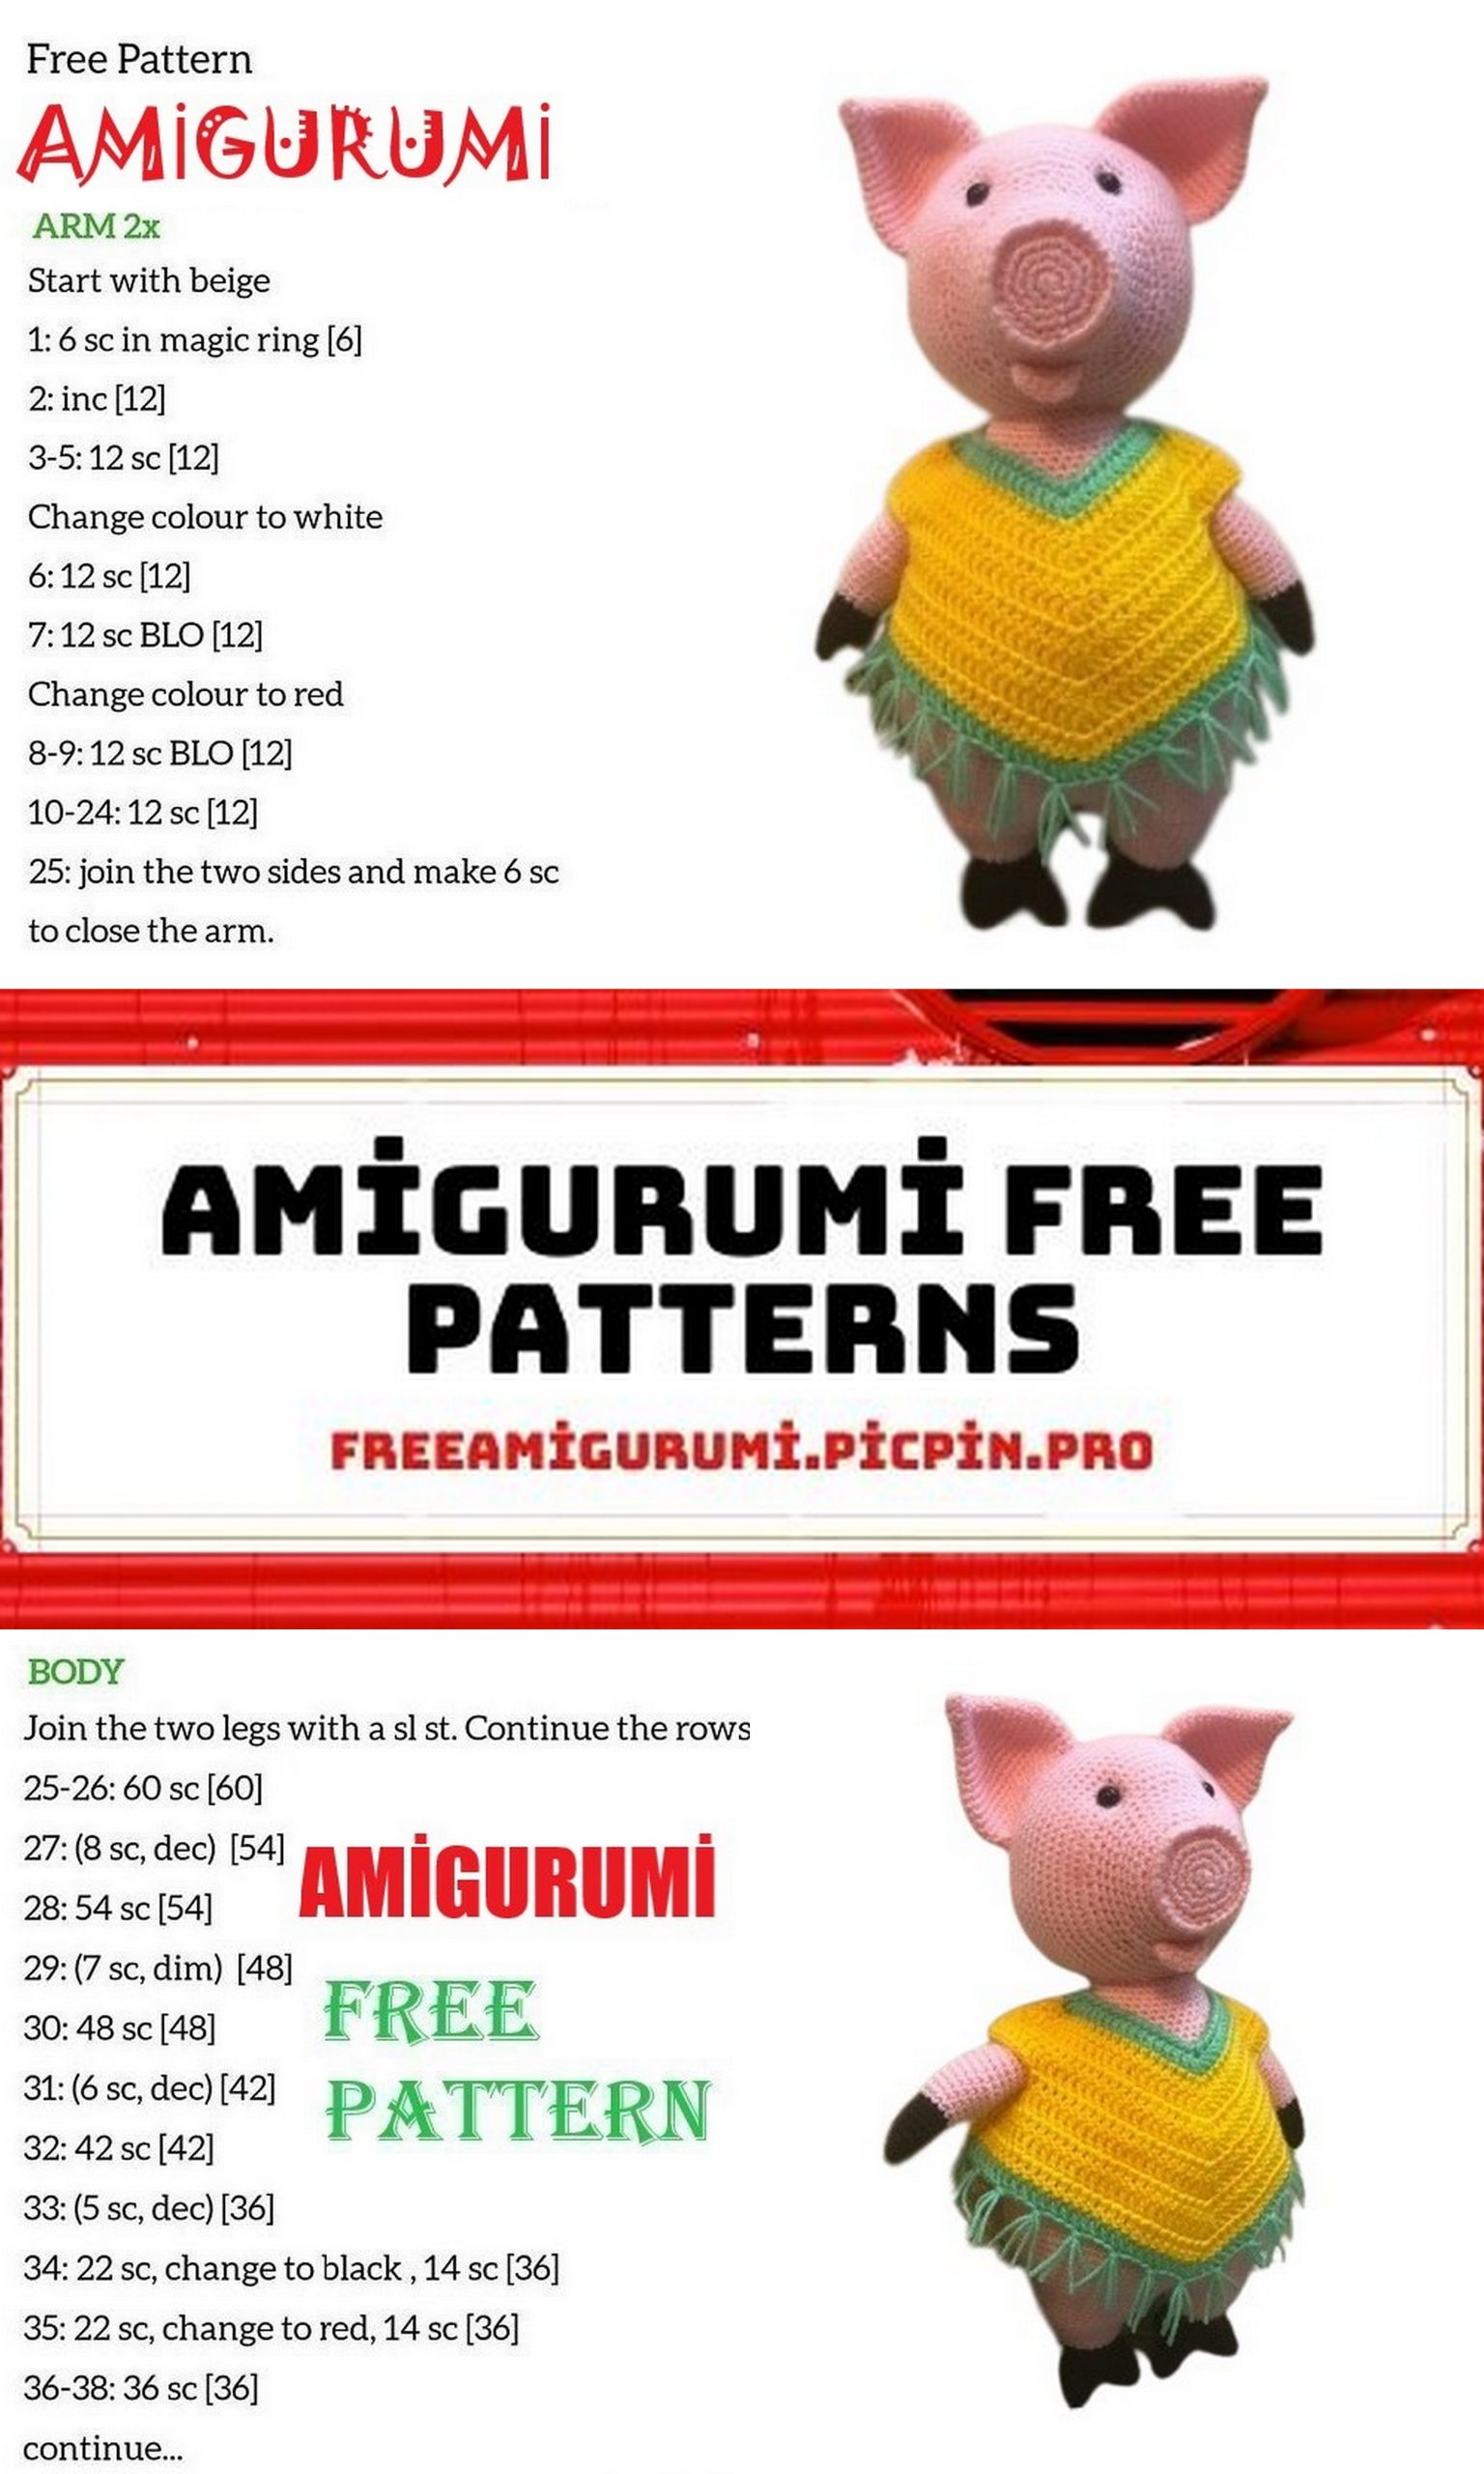
Secure the yarn end on the second leg, and continue to crochet the body.
Body:
Align the legs with their right sides facing each other so that the “rudimentary” fingers are in the center of the back of the legs. You may need to crochet a few extra stitches to make them align properly. Connect the legs by crocheting 12 sc.
Continue crocheting. Work 36 sc on one leg and 36 sc on the other leg, for a total of 72 sc. This was the first row of the toy’s body. Place a marker at this point; it will be on the back.
Row 2: (2 sc, inc) x 24 (96 sc).
Stuff each leg individually without overstuffing the joint area, and continue stuffing as you crochet.
Rows 3-12: 96 sc.
Row 13: 7 sc, dec, (14 sc, dec) x 5, 7 sc (90 sc).
Rows 14-15: 90 sc.
Row 16: (13 sc, dec) x 6 (84 sc).
Row 17: In this row, create a tail. It should be positioned at the center of the back directly above the point where the legs are joined. For example, you can do the following: 2 sc, then make 33 ch, start crocheting the tail in the second ch from the hook with 32 sc, and then continue crocheting around the body with 82 sc to the marker (84 sc).
Row 18: 84 sc.
Be careful in this row: do not crochet extra stitches above the tail!
Row 19: 6 sc, dec, (12 sc, dec) x 5, 6 sc (78 sc).
Rows 20-21: 78 sc.
Row 22: (11 sc, dec) x 6 (72 sc).
Rows 23-24: 72 sc.
Row 25: 5 sc, dec, (10 sc, dec) x 5, 5 sc (66 sc).
Rows 26-27: 66 sc.
Row 28: (9 sc, dec) x 6 (60 sc).
Rows 29-30: 60 sc.
Row 31: 4 sc, dec, (8 sc, dec) x 5, 4 sc (54 sc).
Row 32: In this row, attach the folded arms behind the body with 6 stitches. They should be positioned evenly on each side of the toy. For example, 14 sc, crochet 6 sc around the arm loops, 21 sc, 6 sc around the other arm loops, and 7 sc (54 sc).
Row 33: 54 sc.
Row 34: (7 sc, dec) x 6 (48 sc).
Rows 35-36: 48 sc.
Row 37: 3 sc, dec, (6 sc, dec) x 5, 3 sc (42 sc).
Rows 38-42: 42 sc.
Fasten off and leave a long end for sewing.
Head:
Begin with the sole. You will crochet in closed rounds to create an even circle without a step. At the end of each round, make a slip stitch into the first sc of that round, chain 1, and work the first sc of the next round in the same stitch as the slip stitch (this slip stitch does not count as a stitch and is not worked in the next round).
Row 1: 6 sc in the amigurumi ring.
Row 2: 6 inc (12 sc).
Row 3: (1 sc, inc) x 6 (18 sc).
Row 4: 1 sc, inc, (2 sc, inc) x 5, 1 sc (24 sc).
Row 5: (3 sc, inc) x 6 (30 sc).
Cut a piece of sturdy material according to the size of the resulting circle, and insert it to reinforce the sole.
Row 6: Work the edging in crab stitch (reverse single crochet) around the front loop of the stitches. After completing the last stitch, cut the yarn, pull it through the loop, and tighten. Insert the yarn end into a needle, bring it under the back loops of the opposite side of the circle, and pull it through. This will create the closure.
Row 7: Attach the yarn to the back loops of the 5th round of stitches, and crochet 30 sc.
Row 8: 2 sc, inc, (4 sc, inc) x 5, 2 sc (36 sc).
9-10. Rows 9-10: 36 sc.
Row 11: (5 sc, inc) x 6 (42 sc).
12-13. Rows 12-13: 42 sc.
Row 14: (1 sc, inc) x 21 (63 sc).
Row 15: 1 sc, inc, (2 sc, inc) x 20, 1 sc (84 sc).
16-27. Rows 16-27: 84 sc.
Row 28: 6 sc, dec, (12 sc, dec) x 5, 6 sc (78 sc).
Row 29: 78 sc.
Row 30: (11 sc, dec) x 6 (72 sc).
Row 31: 72 sc.
Row 32: 5 sc, dec, (10 sc, dec) x 5, 5 sc (66 sc).
Row 33: 66 sc.
Row 34: (9 sc, dec) x 6 (60 sc).
Row 35: 60 sc.
Row 36: 4 sc, dec, (8 sc, dec) x 5, 4 sc (54 sc).
Row 37: 54 sc.
Row 38: (7 sc, dec) x 6 (48 sc).
Row 39: 3 sc, dec, (6 sc, dec) x 5, 3 sc (42 sc).
Row 40: (5 sc, dec) x 6 (36 sc).
Row 41: 2 sc, dec, (4 sc, dec) x 5, 2 sc (30 sc).
Row 42: (3 sc, dec) x 6 (24 sc).
Row 43: (2 sc, dec) x 6 (18 sc).
Row 44: (1 sc, dec) x 6 (12 sc).
Row 45: 6 dec.
Close the opening, secure the yarn, and cut, leaving a long end for sewing.
Ears:
Row 1: 4 sc in the amigurumi ring.
Row 2: 4 inc (8 sc).
Row 3: 8 sc.
Row 4: (1 sc, inc) x 4 (12 sc).
Row 5: 12 sc.
Row 6: (1 sc, inc) x 6 (18 sc).
Row 7: 18 sc.
Row 8: (2 sc, inc) x 6 (24 sc).
Row 9: 24 sc.
Row 10: (3 sc, inc) x 6 (30 sc).
Row 11: (4 sc, inc) x 6 (36 sc).
12-16. Rows 12-16: 36 sc.
Row 17: (5 sc, dec) x 6 (30 sc).
Row 18: (4 sc, dec) x 6 (24 sc).
Fasten off and leave a long end for sewing.
Assembly and Decoration:
Use pins to mark the areas for the safety eyes. Place points 1 and 6 at the center of the bottom part of the head, 6 stitches apart.
Points 2, 3, 4, and 5 should be placed between rows 16 and 17 of the head. The distance between points 3 and 4 should be 16 stitches, and the distance between points 2 and 3, 4 and 5 should be 1 stitch.
Thread a needle and insert it into point 1, coming out at point 2. Thread the first safety eye and insert the needle back into point 3, coming out at point 4. Thread the second safety eye and insert the needle into point 5, coming out at point 6. Pull the thread tight, controlling the depth of the eye attachment.
Secure the ears to the head with pins in the desired position and sew them in place.
Attach the head to the body, covering the indentation created by the waist.
Create a belly button indentation. Insert the needle where you want the belly button to be and pull it out under the tail. Insert the needle between the legs, coming out 1-2 stitches away from the initial entry point. Tie a knot, and hide the thread ends inside the toy.
Poncho:
Crochet 2 double crochets with a chain in between into both loops of each stitch. At the end of each row, chain 3 as a turning chain and turn your work.
Using green yarn, make a foundation chain of 59 chains + 3 turning chains.
Row 1: Inc, 13 dc, 3 dc in one chain, 14 dc, 3 dc in one chain, 14 dc, 3 dc in one chain, 13 dc, inc.
Row 2: Change the yarn color to yellow, and work the ends of the yarn into the stitches as you go.
Row 2: Inc, 15 dc, 3 dc in one chain, 16 dc, 3 dc in one chain, 16 dc, 3 dc in one chain, 15 dc, inc.
Row 3: Inc, 17 dc, 3 dc in one chain, 18 dc, 3 dc in one chain, 18 dc, 3 dc in one chain, 17 dc, inc.
Row 4: Inc, 19 dc, 3 dc in one chain, 20 dc, 3 dc in one chain, 20 dc, 3 dc in one chain, 19 dc, inc.
Row 5: Inc, 21 dc, 3 dc in one chain, 22 dc, 3 dc in one chain, 22 dc, 3 dc in one chain, 21 dc, inc.
Row 6: Inc, 17 dc, 6 ch, skip 13 stitches from the previous row, 18 dc, 3 dc in one chain, 18 dc, 6 ch, skip 13 stitches, 17 dc, inc.
Row 7: Inc, 18 dc, 6 sc in the chain, 19 dc, 3 dc in one chain, 19 dc, 6 sc in the chain, 18 dc, inc.
Row 8: Inc, 45 dc, 3 dc in one chain, 45 dc, inc.
Row 9: Inc, 47 dc, 3 dc in one chain, 47 dc, inc.
Row 10: Change the yarn color to green, and work the ends of the yarn into the stitches as you go.
Row 10: Inc, 49 dc, 3 dc in one chain, 49 dc, inc.
For the side edges and neckline, crochet using the crab stitch, adding loops for buttons on one of the poncho sides. These loops consist of chains (the number of chains depends on the size of your buttons).
To the lower edge of the poncho, attach a fringe. Cut threads twice the desired length of the future fringe. Take several threads (I used 2 threads for each tassel), fold them in half, forming a loop.
Insert the hook under the outer loop from the wrong side, catch the loop from the threads, and pull it through to the wrong side. Thread the ends of the threads through the loop and pull a knot.
I attached tassels every 4 loops, but you can do it more frequently.
Rose:
Using red yarn, make a foundation chain of 33 chains and follow a pattern to create a crocheted rose. Form the strip into a flower, spreading the petals, and secure the edges with a few stitches. You can follow a video tutorial for making a small crochet rose for this step.
You can attach the rose to the poncho with a bead, or you can replace it with another flower, applique, a felt ornament, or a large button.