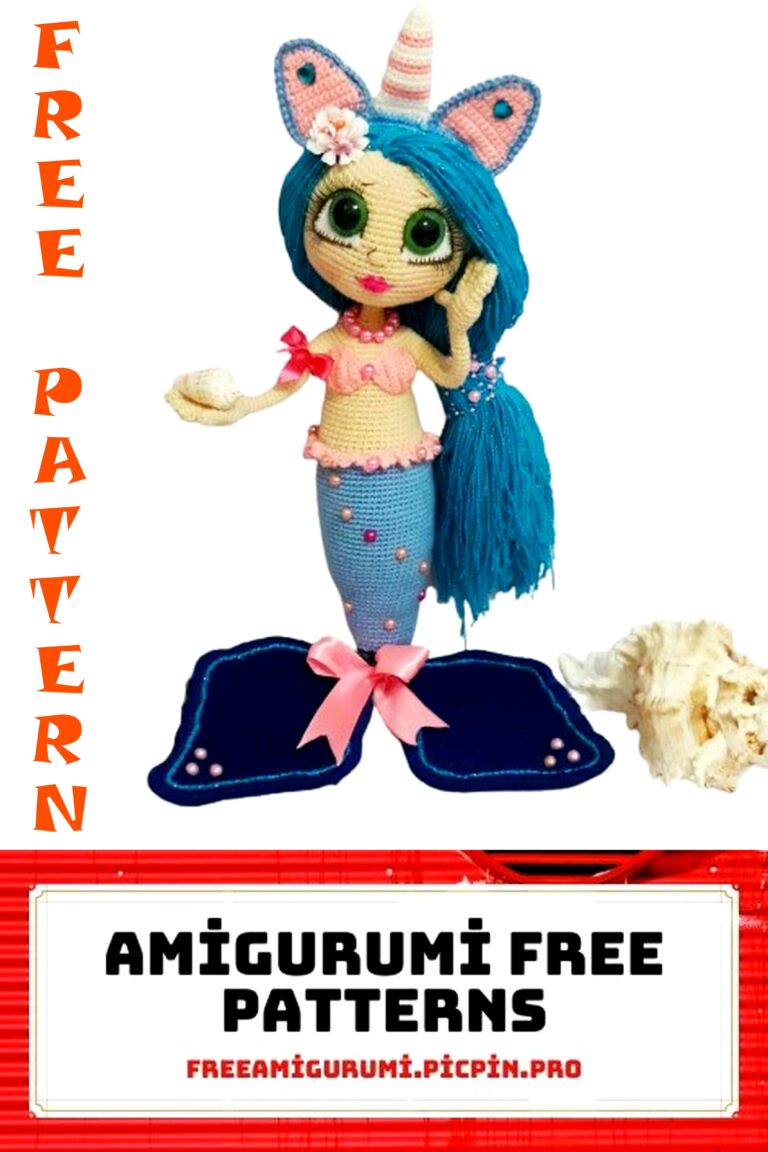
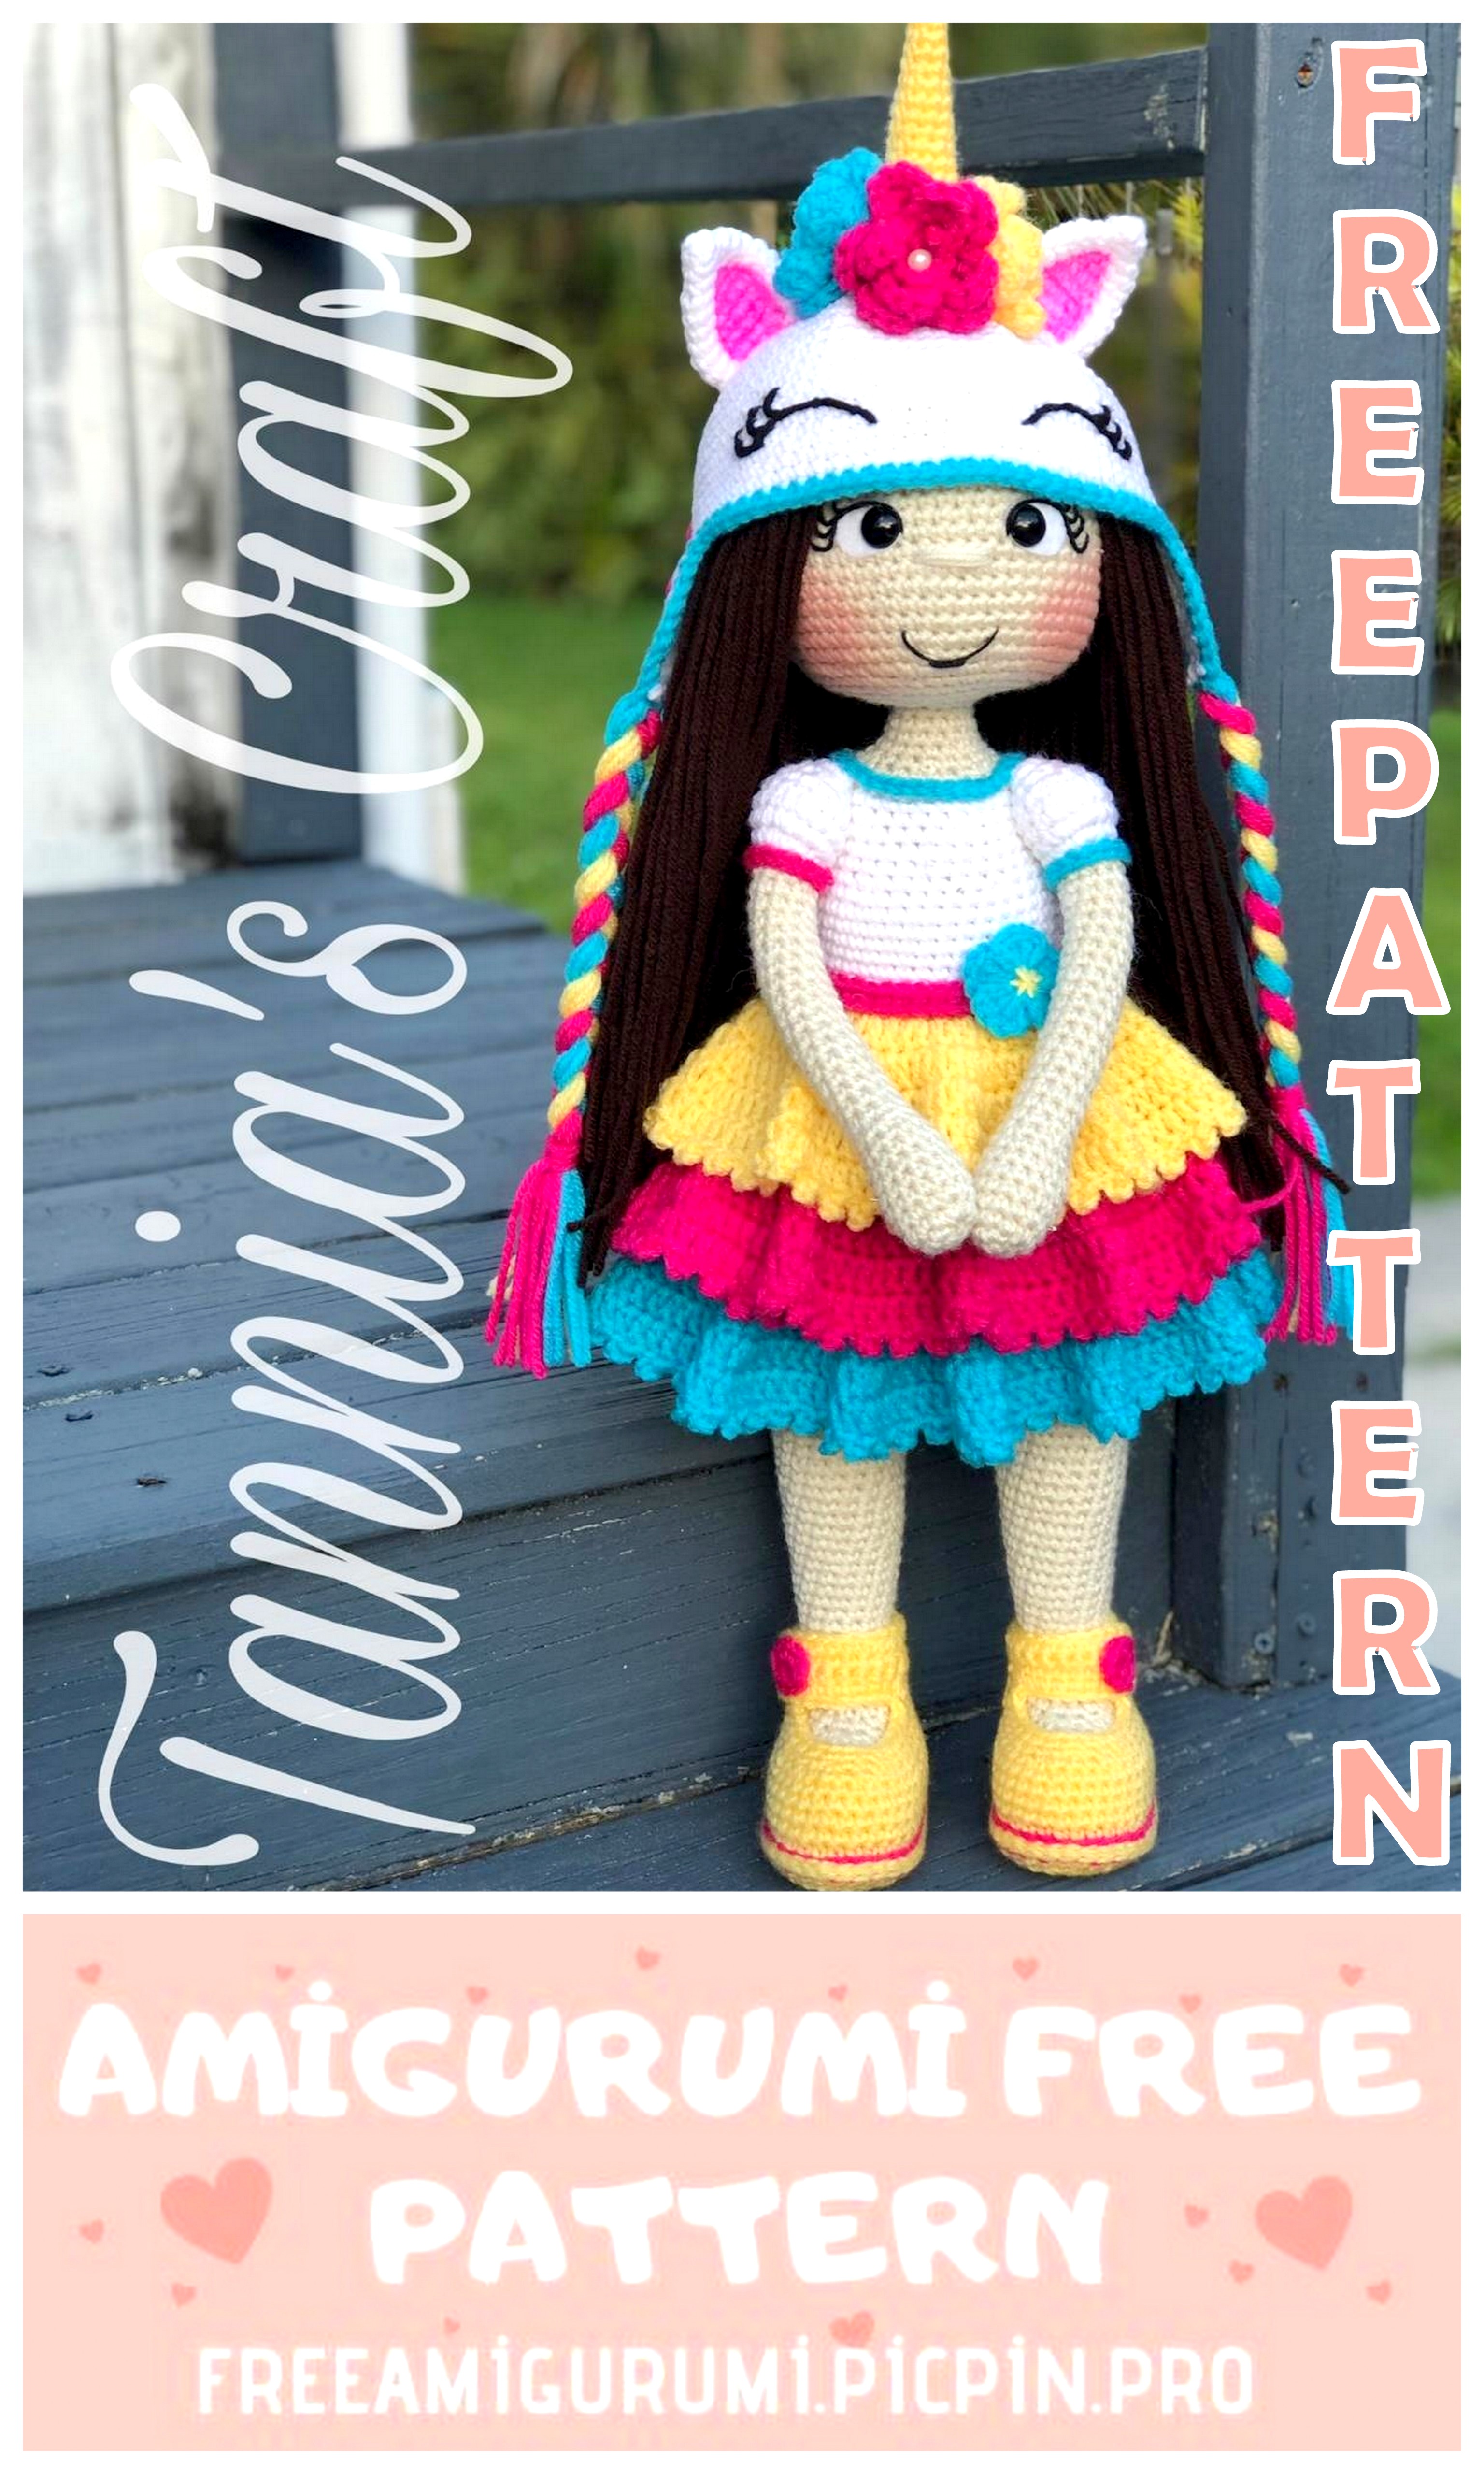
Amigurumi Unicorn Vicky Doll Free Crochet Pattern
Welcome to our website where you can find the most beautiful and highest quality samples of Amigurumi patterns. All the amigurumi patterns you can’t find are available on our website. Every day we continue to share new amigurumi patterns for you. Stay tuned to reach these amigurumi patterns before anyone else
Terms Used:
slst – slip stitch
ch – chain
sc – single crochet
inc – increase
dec – decrease

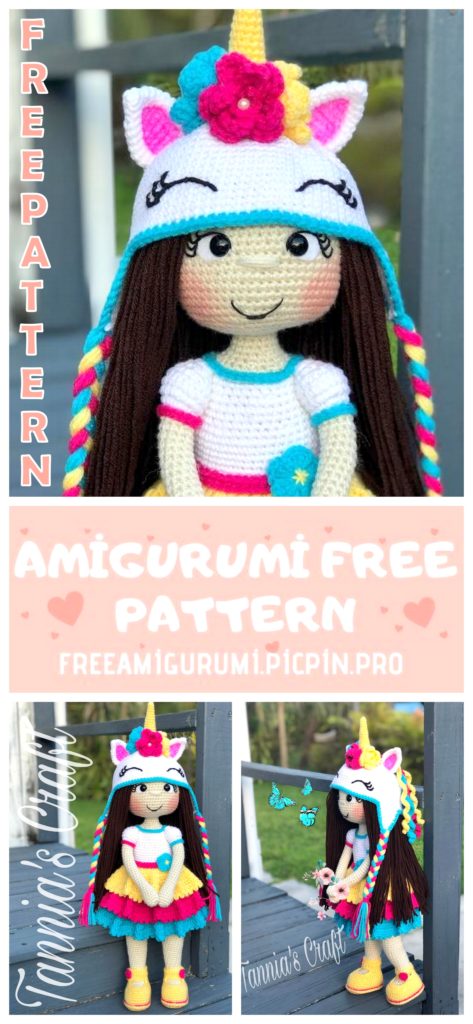
R
– Doll Unicorn Vicky-
➢ IMPORTANT: Before starting please read all instructions, special techniques and points
Basics, you will use all of these techniques in the process of making this doll.
Head
➢ We will work the head in a spiral, use G / 6-4.25MM crochet hook and Coffee / Cafe color wool.
➢ We will use brown color in the first 8 Rds, in them we will place the hair.
Rd: 1 Magic Ring: 6 SC in the magic ring (6 points)
Rd: 2 * 1 Inc * Repeat 6 times (12 points)
Rd: 3 * 1 SC, 1 Inc * Repeat 6 times (18 points)
Rd: 4 * 2 SC, 1 Inc * Repeat 6 times (24 points)
Rd: 5 * 3 SC, 1 Inc * Repeat 6 times (30 points)
Rd: 6 * 2 SC, 1 Inc, 2 SC * Repeat 6 times (36 points)
Rd: 7 * 5 SC, 1 Inc * Repeat 6 times (42 points)
Rd: 8 * 3 SC, 1 Inc, 3 SC * Repeat 6 times (48 points)
Rd: 9 To start Rd: 9 change to Aran color with SC (see special techniques “Change color with a
SC ”page 4) * 7 SC, 1 Inc * Repeat 6 times (54 points)
Rd: 10 * 4 SC, 1 Inc, 4 SC * Repeat 6 times (60 points)
Rd: 11-22 60 SC (60 points)
Rd: 23 * 8 SC, DEC 1 * Repeat 6 times (54 points)
Rd: 24 * 4 SC, 1 DEC, 3 SC * Repeat 6 times (48 points)
➢ Place the eyes between Rds 15 and 16 (see face instructions on page 8, make eyelashes when there are
finished head.
Rd: 25 * 6 SC, 1 Inv-sc2tog * Repeat 6 times (42 points)
Rd: 26 * 3 SC, 1 DEC, 2 SC * Repeat 6 times (36 points)
Rd: 27 * 4 SC, DEC 1 * Repeat 6 times (30 points)
➢ Start filling
Rd: 28 * 1 SC, 1 DEC, 2 SC * Repeat 6 times (24 points)
Rd: 29 * 2 SC, DEC 1 * Repeat 6 times (18 points)
Rd: 30 * 7 SC, DEC 1 * Repeat 6 times (16 stitches) cut the thread and leave one strand to sew
Face
➢ Place the eyes: Cut two circles of white felt, larger than the size of the eyes, place the eye
so that the felt protrudes more than one side like a crescent, (you must open a small hole in the
felt to insert the eye pin) Place the eyes between rounds 15 and 16, 5 separation points. When
you have placed the eyes, put a small amount of hot glue to secure the felt, with the
black color size 3 thread, make 4 eyelashes as seen in the photo, to make the eyelash curves
use the glue gun and this will fix the curve. Don’t forget to put the safety behind the eye.
➢ Make the nose two Rds under the eyes and a smile 3 Rds under the nose.
➢ If you want you can add color to the cheeks with a light pink marker, or you can use makeup.
Hair
➢ Use Coffee / brown wool, cut strands approximately 30 inches long.
➢ With the crochet we will place each strand following the spiral shape of the head, we will start at the
center.
➢ Fold the strand in half, place the hook, photo 5, pull the thread with the hook.
➢ Pull the thread as if you were going to knit through the yarn over, photo 6, pull firmly to secure,
➢ Work until round 8 where the brown color ends.
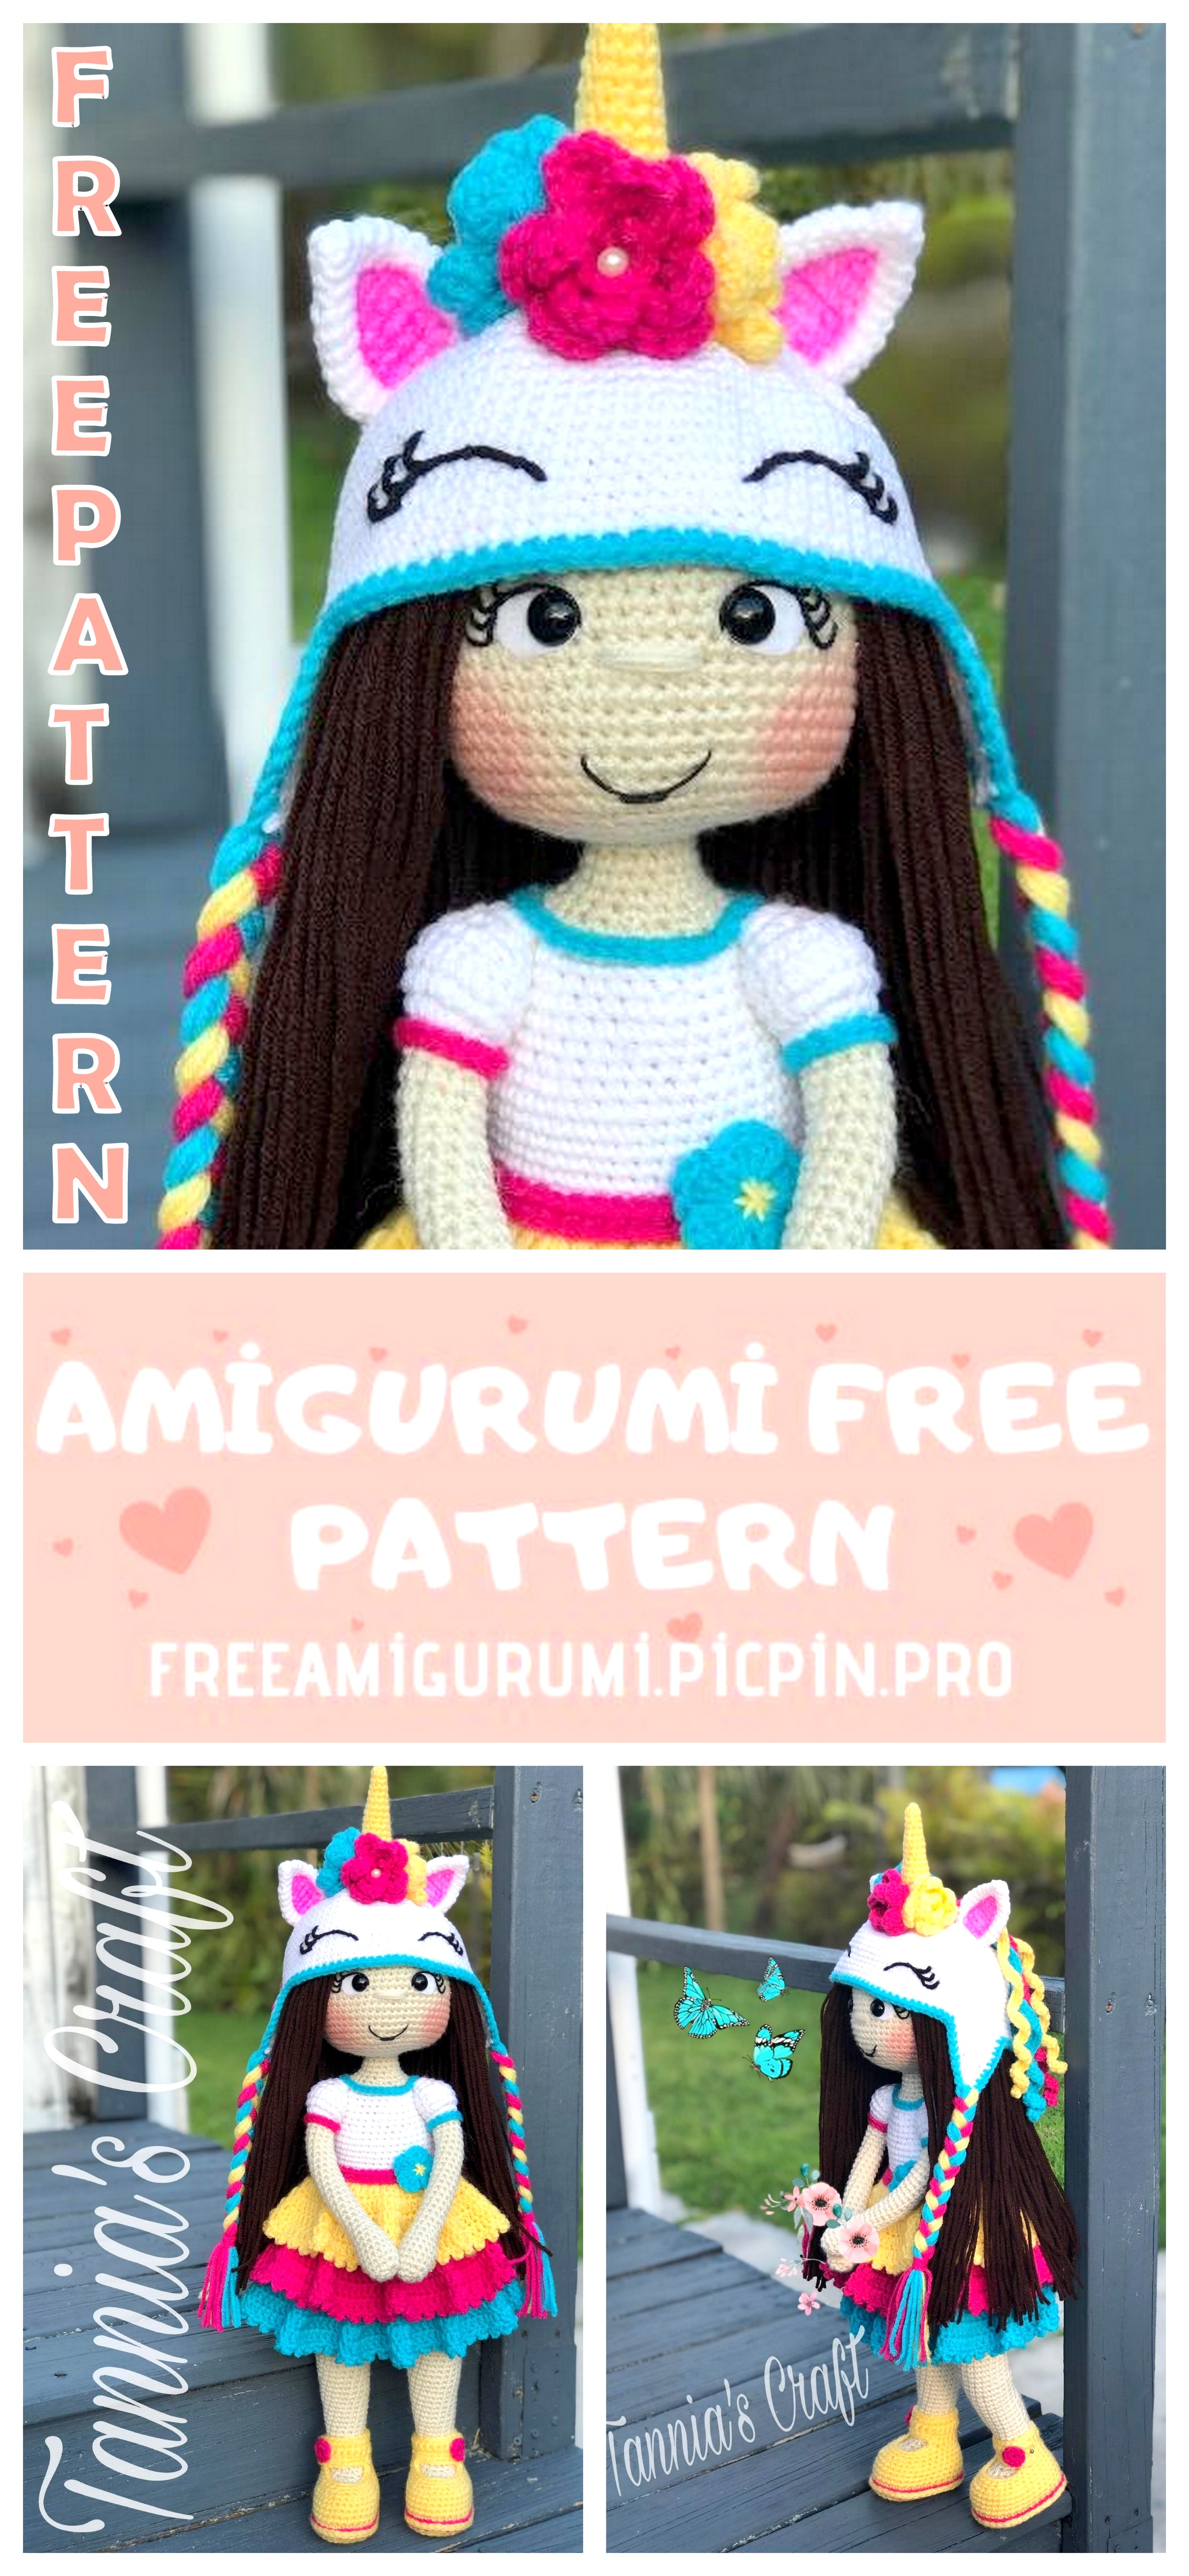
Hat
➢ Use G / 6-4.25MM crochet hook and White / White wool, we will work in a spiral
Rd: 1 Magic Ring: 6 SC in the magic ring (6 points)
Rd: 2 * 1 Inc * Repeat 6 times (12 points)
Rd: 3 * 1 SC, 1 Inc * Repeat 6 times (18 points)
Rd: 4 * 2 SC, 1 Inc * Repeat 6 times (24 points)
Rd: 5 * 3 SC, 1 Inc * Repeat 6 times (30 points)
Rd: 6 * 2 SC, 1 Inc, 2 SC * Repeat 6 times (36 points)
Rd: 7 * 5 SC, 1 Inc * Repeat 6 times (42 points)
Rd: 8 * 3 SC, 1 Inc, 3 SC * Repeat 6 times (48 points)
Rd: 9 * 7 SC, 1 Inc * Repeat 6 times (54 points)
Rd: 10 * 4 SC, 1 Inc, 4 SC * Repeat 6 times (60 points)
Rd: 11 * 9 SC, 1 Inc * Repeat 6 times (66 points)
Rd: 12 * 5 SC, 1 Inc, 5 SC * Repeat 6 times (72 points)
Rd: 13 * 11 SC, 1 Inc * Repeat 6 times (78 points)
Rd: 14-25 78 SC (78 points)
Rd: 26 9 SC, 1 CH, turn (9 points)
Rd: 27-28 9 SC, 1 CH, turn (9 points)
➢ FRONT LOOP or BACK LOOP indicate that the decrease must be made in the front Strand of the chain or in the BACK LOOP,
as indicated.
Rd: 29 3 SC, BACK LOOP 1 DEC, 4 SC 1 CH, turn (8 points)
Rd: 30 2 SC, FRONT LOOP 1 DEC, 4 SC 1 CH, turn (7 points)
Rd: 31 2 SC, BACK LOOP 1 DEC, 3 SC, 1 CH, turn (6 points)
Rd: 32 2 SC, FRONT LOOP 1 DEC, 2 SC, 1 CH, turn (5 points)
Rd: 33 2 SC, BACK LOOP 1 DEC, 1 SC, 1 CH, turn (4 points)
Rd: 34 1 SC, FRONT LOOP 1 DEC, 1 SC, 1 CH, turn cut the thread and lose the excess (3 points)
➢ With the hat in this position, photo 1, count 30 points to the left, to make the other part of the hat.
Rd: 35 Count 30 stitches left and tie yarn: 9 SC, 1 CH, turn (9 stitches)
Rd: 36-37 9 SC, 1 CH, turn (9 points)
Rd: 38 3 SC, BACK LOOP 1 DEC, 4 SC 1 CH, turn (8 points)
Rd: 39 2 SC, FRONT LOOP 1 DEC, 4 SC 1 CH, turn (7 points)
Rd: 40 2 SC, BACK LOOP 1 DEC, 3 SC 1 CH, turn (6 points)
Rd: 41 2 SC, FRONT LOOP 1 DEC, 2 SC 1 CH, turn (5 points)
Rd: 42 2 SC, BACK LOOP 1 DEC, 1 SC, 1 CH, turn (4 points)
Rd: 43 1 SC, FRONT LOOP 1 DEC, 1 SC 1 CH, cut the thread and lose all the excess (3 points)
➢ Use Turquoise / Turquoise wool to finish the edge of the hat, we will work SC the entire edge.
➢ Start in the middle as indicated in photo 2. 30 points
➢ When finished, 1 pe in the 1st double crochet, photo 4, cut the thread and lose the excess.
➢ Cut 26 inch long strands of colors, Turquoise / Turquoise, Pink / Pink, Lemon / Yellow, 4
strands of each color.
➢ Place them as shown in photo 5 and 6, 4 strands at each point, do the same on both sides.
➢ Make a braid on each side.
Unicorn horn
➢ Use G / 6-4.25 MM crochet hook and Lemon / Yellow wool, work in a spiral.
Rd: 1 Magic Ring, 6 SC in the ring (6 points)
Rd: 2 6 SC (6 points)
Rd: 3 * 2 SC, 1 Inc * Repeat 2 times (8 points)
Rd: 4-5 8 SC (8 points)
Rd: 6 * 3 SC, 1 Inc * Repeat 2 times (10 points)
Rd: 7-9 10 SC (10 points)
Rd: 10 * 4 SC, 1 Inc * Repeat 2 times (12 points)
Rd: 11-12 12 SC (12 points)
Rd: 13 * 5 SC, 1 Inc * Repeat 2 times (14 points)
Rd: 14-17 14 SC (14 stitches) cut the thread, leave one strand to sew. Finish the Spiral Lap (see techniques
specials “How to finish the turns in spiral fabric” pag. 3)
➢ Fill
Flowers (make 3, one of each color, photo 9)
➢ Use G / 6-4.25MM crochet hook
➢ We will make 3 flowers, 1 Pink / Pink, 1 Lemon / Yellow and 1 Turquoise / Turquoise.
Rd: 1 15 CH, 1 DC at 5
ta
CH from the hook, * (1 DC, 2 CH, 1 DC) at the same point * Repeat 10 times
Rd: 2 1 CH rotate * (1 SC, 1 HDC, 3 DC, 1 HDC, 1 SC) in the space of 2 CH, 1 eg between 2 DC * Repeat 11 times (11
petals) leave a thread to sew.
➢ Form the flower by placing the petals in a spiral, photo 7, with the strand that I leave and a needle make small
stitches on the bottom to secure the petals, tie a knot and lose all the excess.
➢ If you wish, you can add a small pearl in the center of the flower.
Ears (make two)
➢ Use G / 6-4.25 MM crochet hook and wool color white / White
Rd: 1 Magic Ring, 6 SC in the magic ring (6 points)
Rd: 2 6 SC (6 points)
Rd: 3 1 SC, 1 Inc, 1 SC, 3 Inc, (10 points)
Rd: 4 * 1 SC, 1 Inc * Repeat 5 times (15 points)
Rd: 5-6 15 SC, (15 points)
Rd: 7 * 2 SC, 1 Inc * Repeat 5 times (20 points)
Rd: 8-10 20 SC (20 points)
Rd: 11 * 2 SC, DEC 1 * Repeat 5 times (15 points)
Rd: 12 15 SC (15 stitches) cut the thread, leave one strand to sew. Finish the spiral loop (see techniques
specials “How to finish the turns in spiral fabric” page 3) If you want you can add color to the
ear with a permanent marker light pink as indicated in photo 12.
➢ Sew the Horn in the middle, counting 18 Rds from the bottom, photo 10.
➢ Sew (or use the hot glue gun) the flowers around the horn as seen in photo 11.
➢ Mark the half of the hat to make the eyes, photo 13, count 4 points on each side of the half (the eyes
will have 8 points between them) the eye length is 7 points, and 2 Rds width, photo 12, make 3 tabs, use the glue gun to make the curves of the eyes.
2 Rds
7 points
Unicorn hair
➢ * Work 51 CH, 1 SC in the 2nd CH from the hook, 49 SC * repeat 4 times, cut the thread and leave one thread to sew. Make 3 pieces 1 Pink / Pink, 1 Lemon / Yellow and 1 Turquoise / Turquoise. (3 pieces of 4 strips, pic 14) it is very important that you work the loose SC, in this way it will be possible to form curls, every time you finish a strip, with your finger, twist in the same way as you would for shapes curls with hair.
➢ Sew these pieces on the back of the horn, in the order you want, one behind the other, photo 15, 16.
Hands (make two)
➢ Use Aran wool and G / 6-4.25MM crochet, work in a spiral.
Rd: 1 Magic Ring, 6 SC in the magic ring (6 points)
Rd: 2 * 1 Inc * repeat 6 times (12 points)
Rd: 3 * 3 SC, 1 Inc * repeat 3 times (15 points)
Rd: 4-6 15 SC, (15 points)
Rd: 7 5 SC, 1 DEC, 4 SC, 1 DEC, 2 SC (13 points)
Rd: 8 13 SC (13 points)
Rd: 9 3 SC, 1 DEC, 3 SC, 1 DEC, 3 SC (11 points)
Rd: 10 1 DEC, 9 SC (10 points)
Rd: 11-28 10 SC (10 points)
Rd: 29 Change to white / white wool with SC (see special techniques “Change color with SC” on page
4): 10 SC (10 points)
Rd: 30 3 SC, 4 Inc, 3 SC (14 points)
Rd: 31 3 SC, * 1 Inc, 1 SC * repeat 4 times, 3 SC (18 points)
Rd: 32-33 18 SC (18 points)
Rd: 34 3 SC, * 1 DEC, 1 SC * repeat 4 times, 3 SC (14 points)
Rd: 35 3 SC, * 4 DEC * repeat 4 times, 3 SC (10 points)
Rd: 36 10 SC, cut the thread and finish the spiral loop (see special techniques “How to finish the spiral loops” on page 3)
➢ Finished the sleeve: Work 13 CH, we will cover the entire edge of the sleeve, first make sure that the 13
chains cover everything around the shore, make more or less chains if you need to, use the gun
hot glue, start where you made the color change on Rd: 29. Tie a knot and lose
leftovers.
➢ Use Turquoise / Turquoise wool for one sleeve and Pink / Pink for the other.
Body and legs:
➢ We will start the body from the legs, starting with the soles, use G / 6-4.25 MM crochet hook and wool
Aran / Skin color.
➢ Work 1
ra Rd on the 3rd strand of the chain (see special techniques “How to work on the 3rd strand of the
chain ”page 5) make loose stitches only for the sole.
Rd: 1 Work on 3rd strand of CH: 8 CH, 1 SC on 3rd strand of 1st CH, 7 SC (16 stitches = 8 stitches above and 8
down)
Rd: 2 1 Inc, 6 SC, 3 Inc, 4 SC, 2 Inc (22 points)
Rd: 3 2 Inc, 6 SC, 5 Inc, 7 SC, 2 Inc (31 points) Make the sole with the cardboard.
➢ Use the cardboard to make the sole, cut two pieces. Cut two strips of # 10 wire, 35 inches long.
You will use the wire and the cardboard sole for later. Bend the wire as seen in photos 3, 4, use
masking tape to hold the wire.
Rd: 4-7 31 SC, 1 extra SC, move marker to start Rd: 8 (31 points)
Rd: 8 10 SC, 6 DEC, 9 SC (25 points)
Rd: 9 5 SC, * 1 DEC, 1 SC * repeat 4 times, 1 DEC, 6 SC (20 points)
Rd: 10 6 SC, 4 DEC, 6 SC (16 points)
Rd: 11 16 SC, (16 points) Place the cardboard sole inside the foot.
Rd: 12 5 SC, 3 DEC, 5 SC (13 points) Put the wire inside the foot and start filling, see photos 5, 6.
Rd: 13-15 13 SC, (13 points)
Rd: 16 1 Inc, 12 SC (14 points)
Rd: 17-18 14 SC (14 points)
Rd: 19 2 SC, 1 Inc, 10 SC, 1 Inc (16 points)
Rd: 20-22 16 SC, (16 points)
Rd: 23 3 SC, 1 Inc, 11 SC, 1 Inc (18 points)
Rd: 24-27 18 SC, (18 points)
Rd: 28 4 SC, 1 Inc, 12 SC, 1 Inc (20 points)
Rd: 29-40 20 SC, (20 points)
First Leg: 9 SC extra, cut the thread and finish the Rd in a spiral (see special techniques “How
finish the turns in spiral fabric ”page 3)
Rd: 41 Second Leg: change to wool white / white with SC (see special techniques “Change color with a SC” page 4) 20 SC, 1 extra SC, 5 CH, join SC to the other leg (make sure that legs well aligned) 19 SC, 1 SC at junction, 1 SC at each CH, 1 SC at junction, 20 SC, 1 SC at each CH, 24 SC (52 points) place marker to start next Rd .
Rd: 42-55 52 SC (52 points)
➢ When you are on Rd: 48 bend the wires towards the center and then upwards and twist them, photo 7.
Rd: 56-59 To start Rd: 56 change to Aran / skin color with SC (see special techniques “Change color with SC” on page 4) 52 SC (52 points)
Rd: 60 * 11 SC, DEC 1 * Repeat 4 times (48 points)
Rd: 61-63 48 SC (48 points)
Rd: 64 * 6 SC, DEC 1 * Repeat 6 times (42 points)
Rd: 65-67 42 SC, Do not move the marker we will work the upper part of the dress from this point. Work 11 SC extra and finish the Spiral Row (see special techniques “How to finish the turns in spiral fabric” page 3) (42 points)
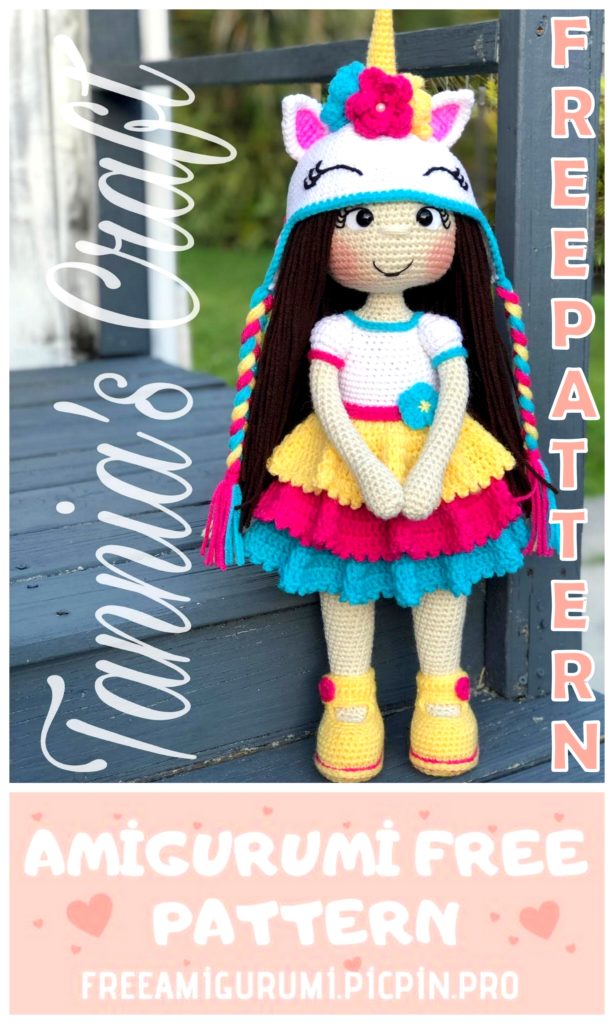
Dress
➢ Use Lemon / Yellow wool and crochet G / 6-4.25MM
➢ We will make the skirt of the dress separately and then we will join it to the body.
First Lemon / Yellow color flight
Rd: 1 Work on 3rd strand of chain (see special techniques “How to work on 3rd strand of chain” page 5): 42 CH, 1 SC on 3rd strand of 1st
ra CH from the hook, 41 SC, forming a circle 1 pe
on the FRONT LOOP of the 1st SC of this Rd (42 points)
Rd: 2 Work on the FRONT LOOP: 3 CH, 1 DC at the same point, 1 DC * Inc_DC, 1 DC * repeat 20 times, 1 pe at the stop of
3 CH (63 points)
Rd: 3 3 CH 1 DC, Inc_DC * 2 DC, Inc_DC * repeat 20 times, 1 pe at the top of the 3 CH (84 points)
Rd: 4 3 CH 2 DC, Inc_DC * 3 DC, Inc_DC * repeat 20 times, 1 pe at the top of the 3 CH (105 points)
Rd: 5 3 CH 3 DC, Inc_DC * 4 DC, Inc_DC * repeat 20 times, 1 pe at the top of the 3 chains (126 points)
Rd: 6 3 CH * 1 DC, 3 CH, 1 pe at the top of the same DC, 1 DC * photo 3, 4, repeat 62 times, 1 pe in
the top of the 3 chains. Cut the thread and lose all the leftovers. (126 points)
Second flight Pink / Pink color, photo 1 and 2
➢ Work the next Rd on the BACK LOOP of Rd: 1, below the skirt.
➢ Use Color Pink / Pink wool
Rd: 7 Work in the BACK LOOP of Rd: 1: 3 CH 1 DC at the same point, 3 DC at the following points
* Inc_DC, 3 DC * repeat 9 times, 2 DC, 1 pe at the top of the 3 CH (52 points)
Rd: 8-9 3 CH 51 DC, when Rd: 9 ends, 1 pe at the top of 3 CH (52 points)
Rd: 10 Work on the FRONT LOOP (3 CH, Inc_dc, * 1 DC, Inc_DC * repeat 25 times, eg at the top of 3
CH (78 points)
BACK LOOP of Rd: 1
Rd: 11 3 CH 1 DC, Inc_DC * 2 DC, Inc_DC * repeat 25 times, 1 pe at the top of the 3 CH (104
points)
Rd: 12 3 CH 2 DC, Inc_DC * 3 DC, Inc_DC * repeat 25 times, 1 pe at the top of the 3 CH (130
points)
Rd: 13 3 CH 3 DC, Inc_DC * 4 DC, Inc_DC * repeat 25 times, 1 pe at the top of the 3 CH (156
points)
Rd: 14 3 CH * 1 DC, 3 CH, 1 pe at the top of the same DC, 1 DC * pic 3, 4, repeat 78 times, 1 pe in the
top of 3 CH, cut the thread and lose all the leftovers. (156 points)
Third Flight Turquoise / Turquoise, photo 5
➢ We will work the next Rd in the BACK LOOP of Rd: 9, below the skirt.
➢ Use Turquoise / Turquoise wool
Rd: 15 Work at FRONT LOOP on Rd: 9 below skirt: 3 CH 3 DC, Inc_DC, * 4 DC, Inc_DC *
repeat 30 times, 2 DC, 1 pe at the top of the 3 CH (62 points)
Rd: 16-17 3 CH 61 DC, 1 pe at the top of 3 CH (62 points)
Rd: 18 3 CH Inc_DC, * 1 DC, Inc_DC * repeat 30 times, 1 pe at the top of the 3 CH (93 points)
Rd: 19 3 CH 1 DC, Inc_DC * 2 DC, Inc_DC * repeat 30 times, 1 pe at the top of the 3 CH (124
points)
Rd: 20 3 CH 2 DC, Inc_DC * 3 DC, Inc_DC * repeat 30 times, 1 pe at the top of the 3 CH (155
points)
Rd: 21 3 CH 3 DC, Inc_DC * 4 DC, Inc_DC * repeat 30 times, 1 pe at the top of the 3 CH (186
points)
Rd: 22 3 CH * 1 DC, 3 CH, 1 pe at the top of the same DC, 1 DC * repeat 93 times, 1 pe at the top of the 3 CH, cut the thread and lose all the excess. (186 points)
BACK LOOP of Rd: 8
➢ Place the skirt on the body, we will start the next Rd where we leave the marker on the body,
joining the points of the skirt with those of the body.
Rd: 23 White / White wool tie where I leave the marker on the body: 1 CH, 41 SC (42 points)
Rd: 24 1 SC at the top of 1
er SC of the Rd: 23, 40 SC (41 points) here we lose one point
Rd: 25-30 41 SC (41 points)
Rd: 31 * 6 SC, 1 DEC * repeat 5 times, 1 SC (36 points)
Rd: 32-34 36 SC (36 points)
Rd: 35 * 4 SC, DEC 1 * repeat 6 times (30 points)
Rd: SC 36 30, work 5 SC extra to reach center and start next round, place marker
(30 points)
Marker
Start Rd: 23
➢ We will join the Arms / sleeve with the dress, joining the points of the arm / sleeve as seen in photo 7, at
dress.
➢ To place the arms / sleeve on Rd: 37: Fold the sleeve, insert the hook through two points joining
to one point of the dress (repeat 5 times, photo 8)
Rd: 37 Change to Aran Color wool with SC: 6 SC, Place 1
er Arm / sleeve, 5 SC joining arm / sleeve to
dress, 10 SC, Place 2
do Arm / sleeve, 5 SC attaching arm / sleeve to dress, 4 sc (30 sts)
Rd: 38 * 3 SC, DEC 1 * repeat 6 times (24 points)
Rd: 39 * 1 SC, 1 DEC, 1 SC * repeat 6 times (18 points)
Rd: 40 18 SC (18 points)
Rd: 41 * 2 SC, 1 DEC, 2 SC * repeat 3 times (15 points)
5 SC joining
arm to
dress
Rd: 42-52 15 SC (15 points) at the end of Rd: 56 cut the thread and lose the excess.
➢ Finishing of the edge of the neck: Work 34 CH (first make sure that the 34 chains are sufficient to
cover the entire edge of the neck, make more or less chains if you need) With the payment gun (use
small amounts of glue) glue the chain as seen in photos 10, 11, start with the
back where you made the color change, then with a needle join the ends, tie a knot and lose
all leftovers
➢ Use turquoise / turquoise wool
Flower
➢ Use turquoise wool and G / 4.25MM crochet hook
Rd: 1 Magic Ring, * 3 CH 4 DC in the magic ring, 1 eg * repeat 5 times, pull the thread to
close the magic ring, use Lemon / Yellow wool make stitches in the shape of an asterisk, photo
➢ Waist: work 49 CH (first make sure the 49 chains are enough to cover the entire waist, make more or less CH if necessary) 1 SC on the 2nd CH from the hook, 47 SC on the following chains.
➢ With the glue gun, glue this piece around the waist, start on the right side with the
doll in front of you, then glue the flower, this will cover the joint.
Shoes (make two)
➢ Use G / 4.25MM crochet hook and Lemon / yellow wool.
➢ The sole consists of two parts, 1 sole that will make from Rd: 1 to Rd: 5 (we will call it sole 1) and the other one that
will do from Rd: 1 to Rd: 6 (we will call it sole 2) then we will join them to make a single sole.
Rd: 1 Work the points of this Rd on the 3rd strand of the CH: 8 CH, 1 SC on the 3rd strand of the 1st chain from the
crochet, 7 SC (16 stitches = 8 stitches above and 8 stitches below)
Rd: 2 1 Inc, 6 SC, 3 Inc, 4 SC, 2 Inc (22 points)
Rd: 3 2 Inc, 6 SC, 5 Inc, 7 SC, 2 Inc (31 points)
Rd: 4 2 Inc, 29 SC (33 points)
Rd: 5 14 SC, * 1 Inc, 2 SC * repeat 3 times, 10 SC, (Sole 1, cut the thread and finish the spiral loop) (36 stitches)
Rd: 6 36 SC, (Sole 2, cut the thread and finish the spiral turn) (36 points)
➢ Only for Rd: 7 use Pink / Pink wool
Rd: 7 Place sole 1 on sole 2 with the right sides facing out, insert the hook (calculate the
center of the heel) crossing both soles, pull one strand as seen in the photo 2 and 3: 36 but all
around the sole (36 points)
Sole 1
Rd: 1 to Rd: 5
Sole 2
Rd: 1 to Rd: 6
➢ When the last pe is finished, cut the thread, use a needle, insert the needle in the center of 1
er pe, photo 4, pull the
thread and tie a little knot and lose all the leftovers.
Rd: 8 Tie wool Lemon / yellow color (calculate the center of the heel) in the BACK LOOP of Rd: 7, photo 5: 1 CH, 35 SC, join
at the top of the 1st SC, photo 6 (36 points)
➢ To start Rd: 9 work the first SC where the arrow in photo 7 indicates
Rd: 9-12 36 SC (36 points)
Rd: 13 10 SC * 1 DEC, 3 SC * repeat 3 times, 1 DEC, 9 SC (32 points)
Rd: 14 1 DEC, 10 SC * 1 DEC, 2 SC * repeat 3 times, 8 SC (29 points)
Right Shoe
Rd: 15 7 SC, 1 CH, turn, 13 SC (13 points)
Rd: 16 1 CH, turn, 13 SC (13 points)
Rd: 17 CH 11, turn, 1 SC on the 2nd CH from the hook, 9 SC on the next CH, 13 SC at the following points (23 points)
Rd: 18 1 CH, turn, 23 SC, cut the thread and lose all leftovers (23 points)
Left Shoe
Rd: 15 7 SC, 1 CH, turn, 13 SC (13 points)
Rd: 16 1 CH, turn, 13 SC, cut the thread and lose all leftovers (13 points)
Rd: 17 Strap: With the shoe in front of you, Tie wool to the left side as shown in the photo 8: 11 CH, turn, 1 SC in the 2nd CH from the hook, 9 SC in the next CH, 13 SC in the next points (23 points)
Rd: 18 1 CH, turn, 23 SC, cut the thread and lose all leftovers (23 points)
To finish the shoe:
➢ Work SC all around the hem of the shoe, starting from the middle of the back, photo 9, in the
corners make 2 SC, photo 9 and 10, in the curves make 2 SC together, photo 10.
➢ Embellishment button: Magic Ring, 8 SC in the ring pull the thread and close the ring, 1 pe in 1
er SC, cut the thread and lose the leftovers, stick the button on the edge of the strap as seen in photo 11, use snaps
for the strap.