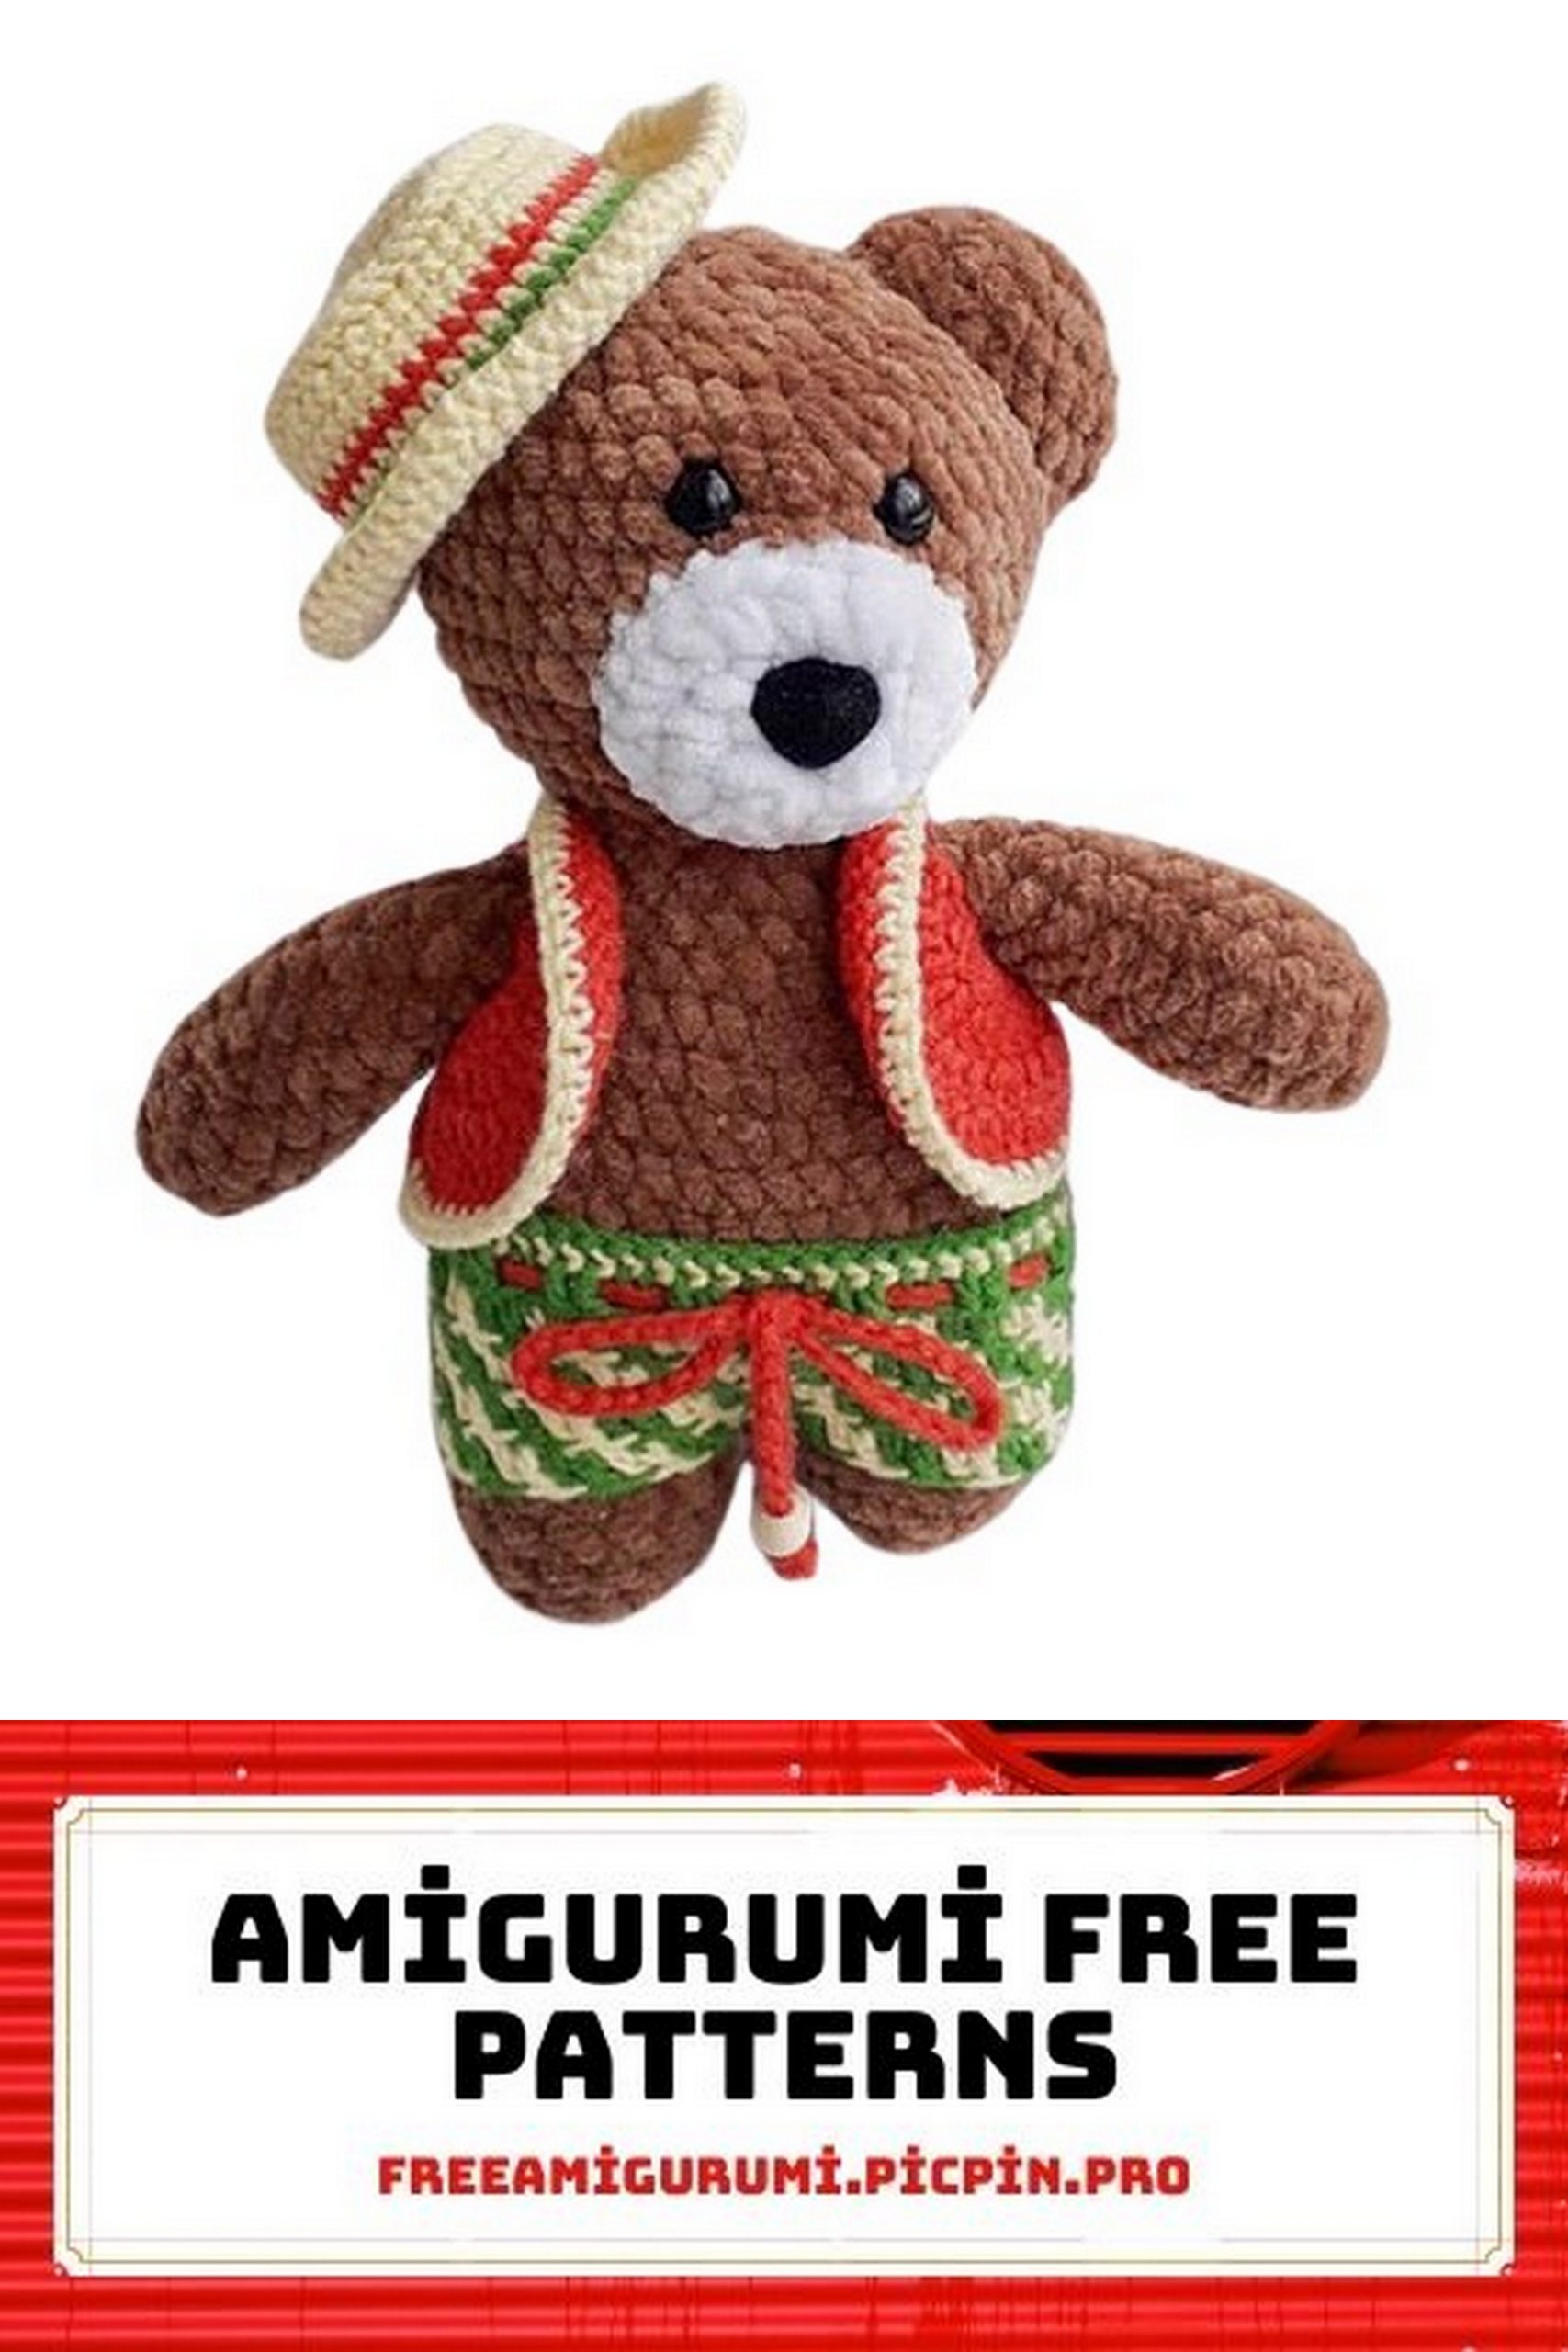
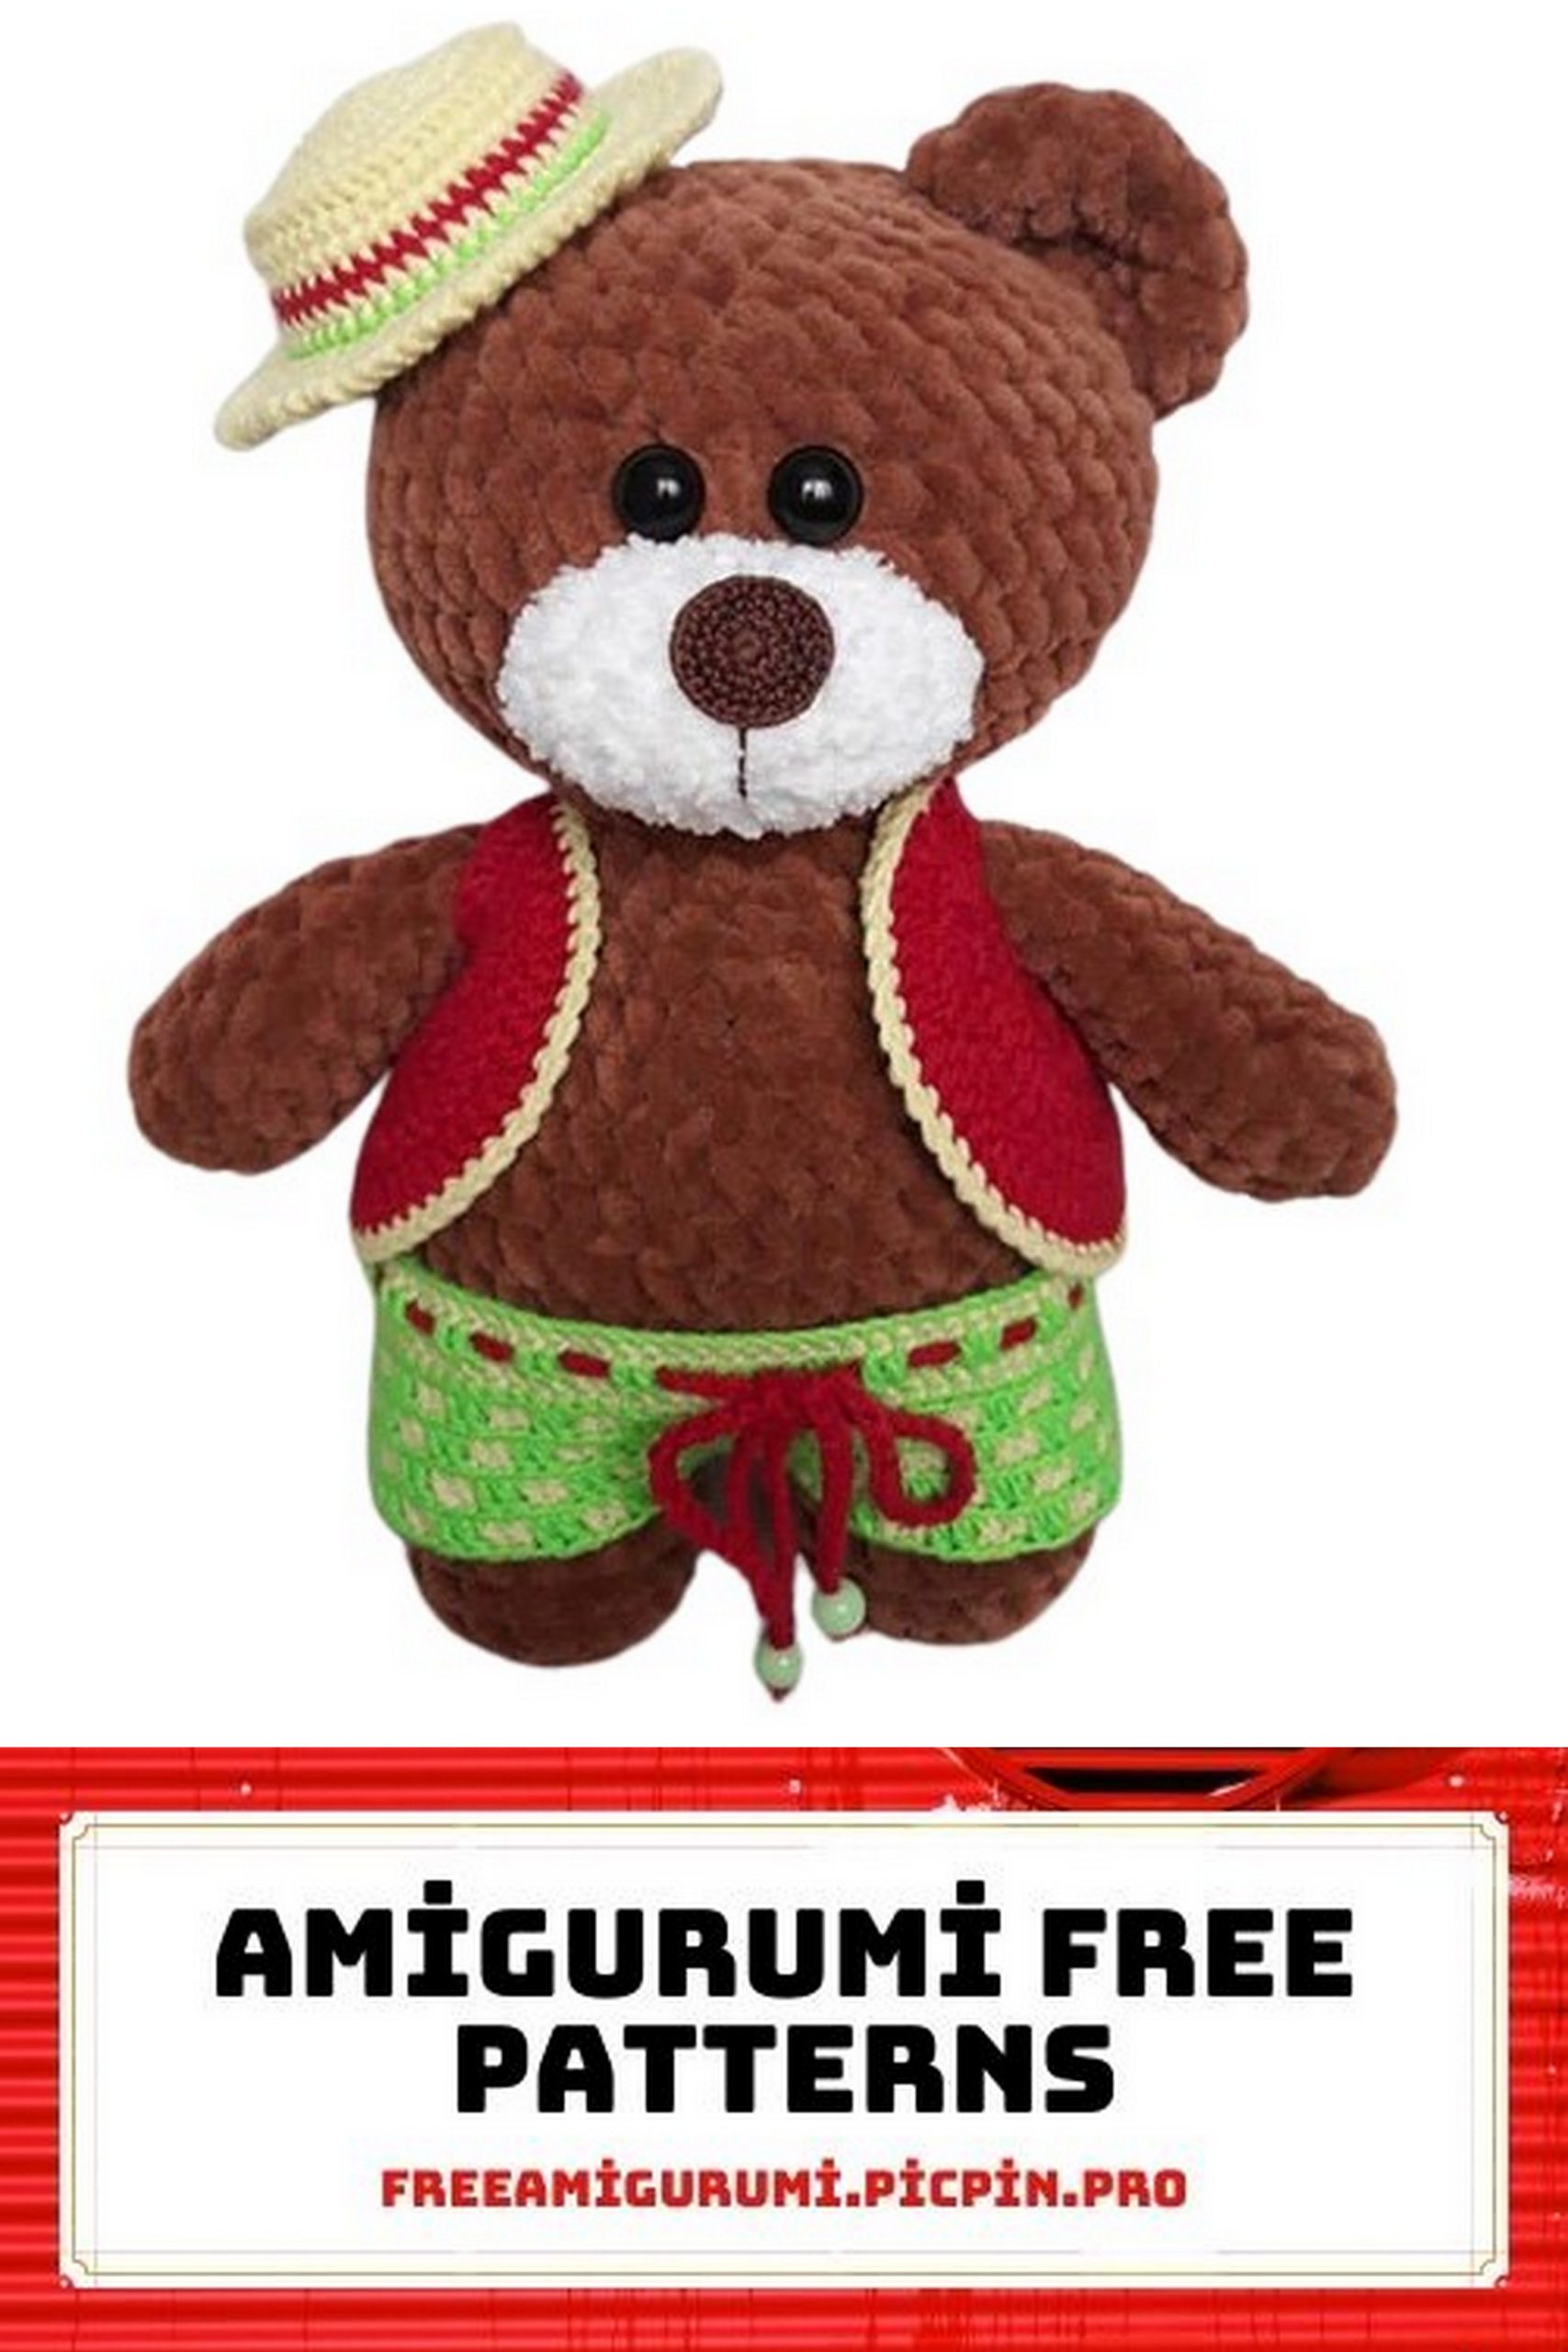
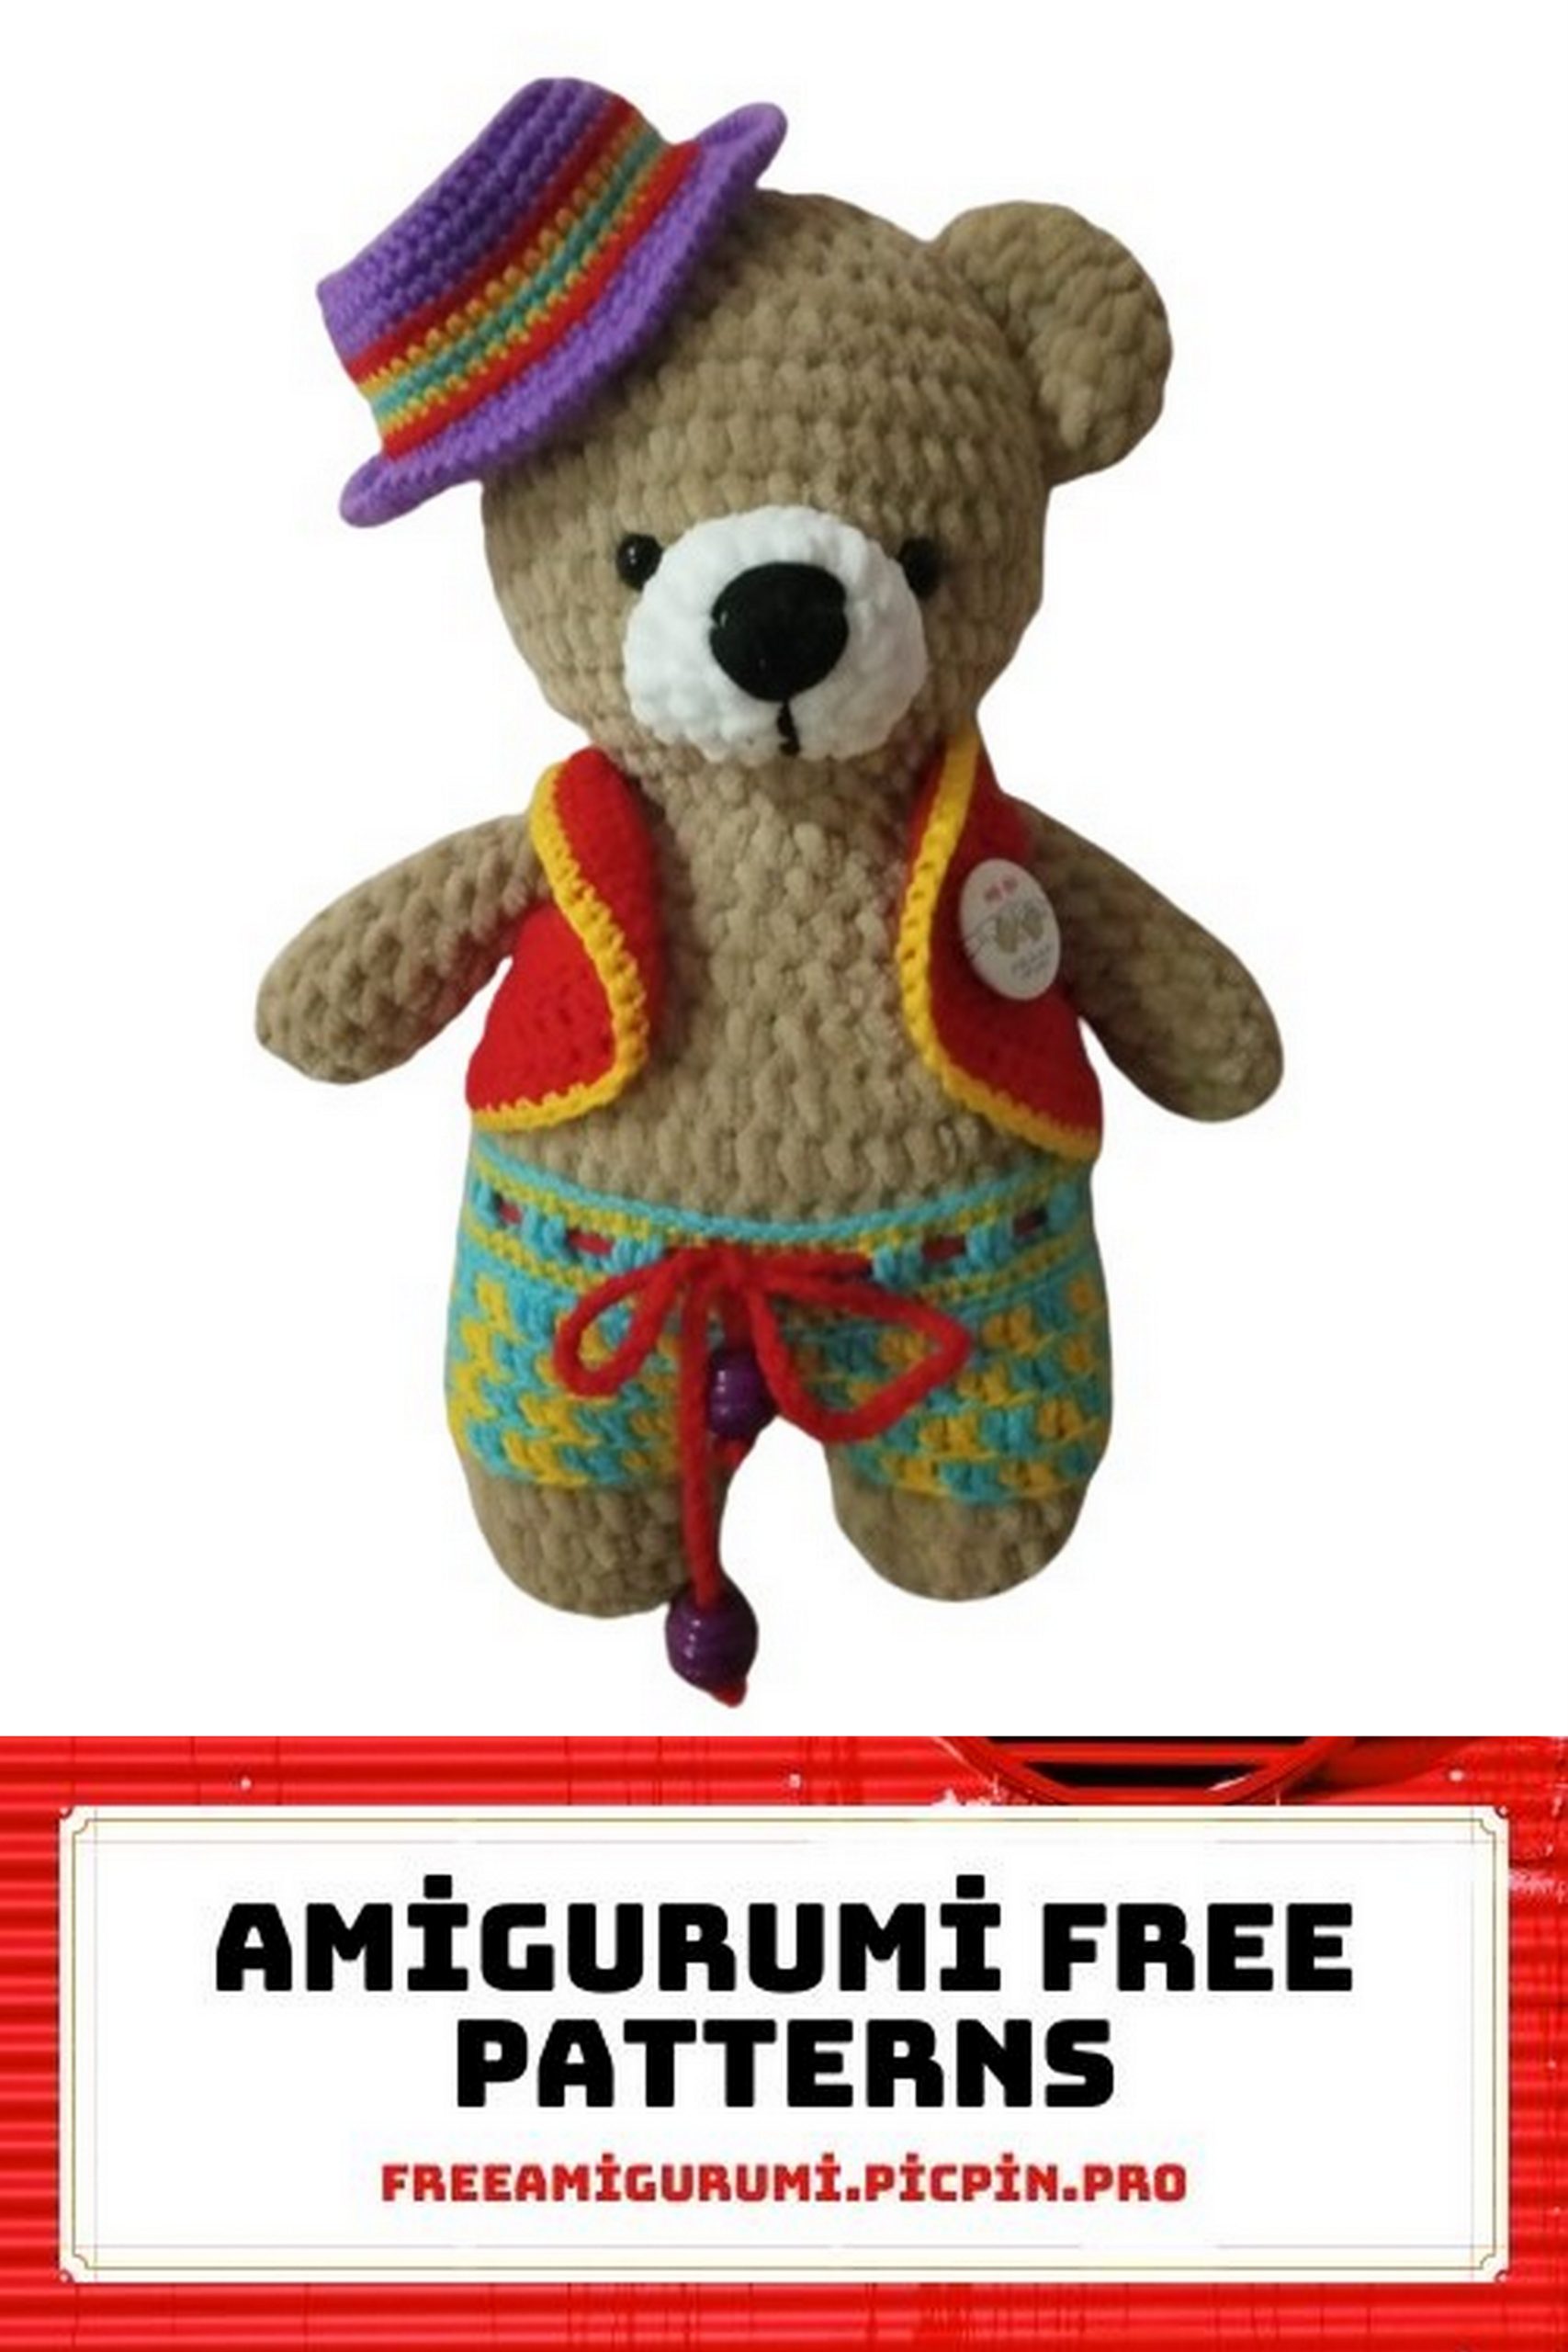
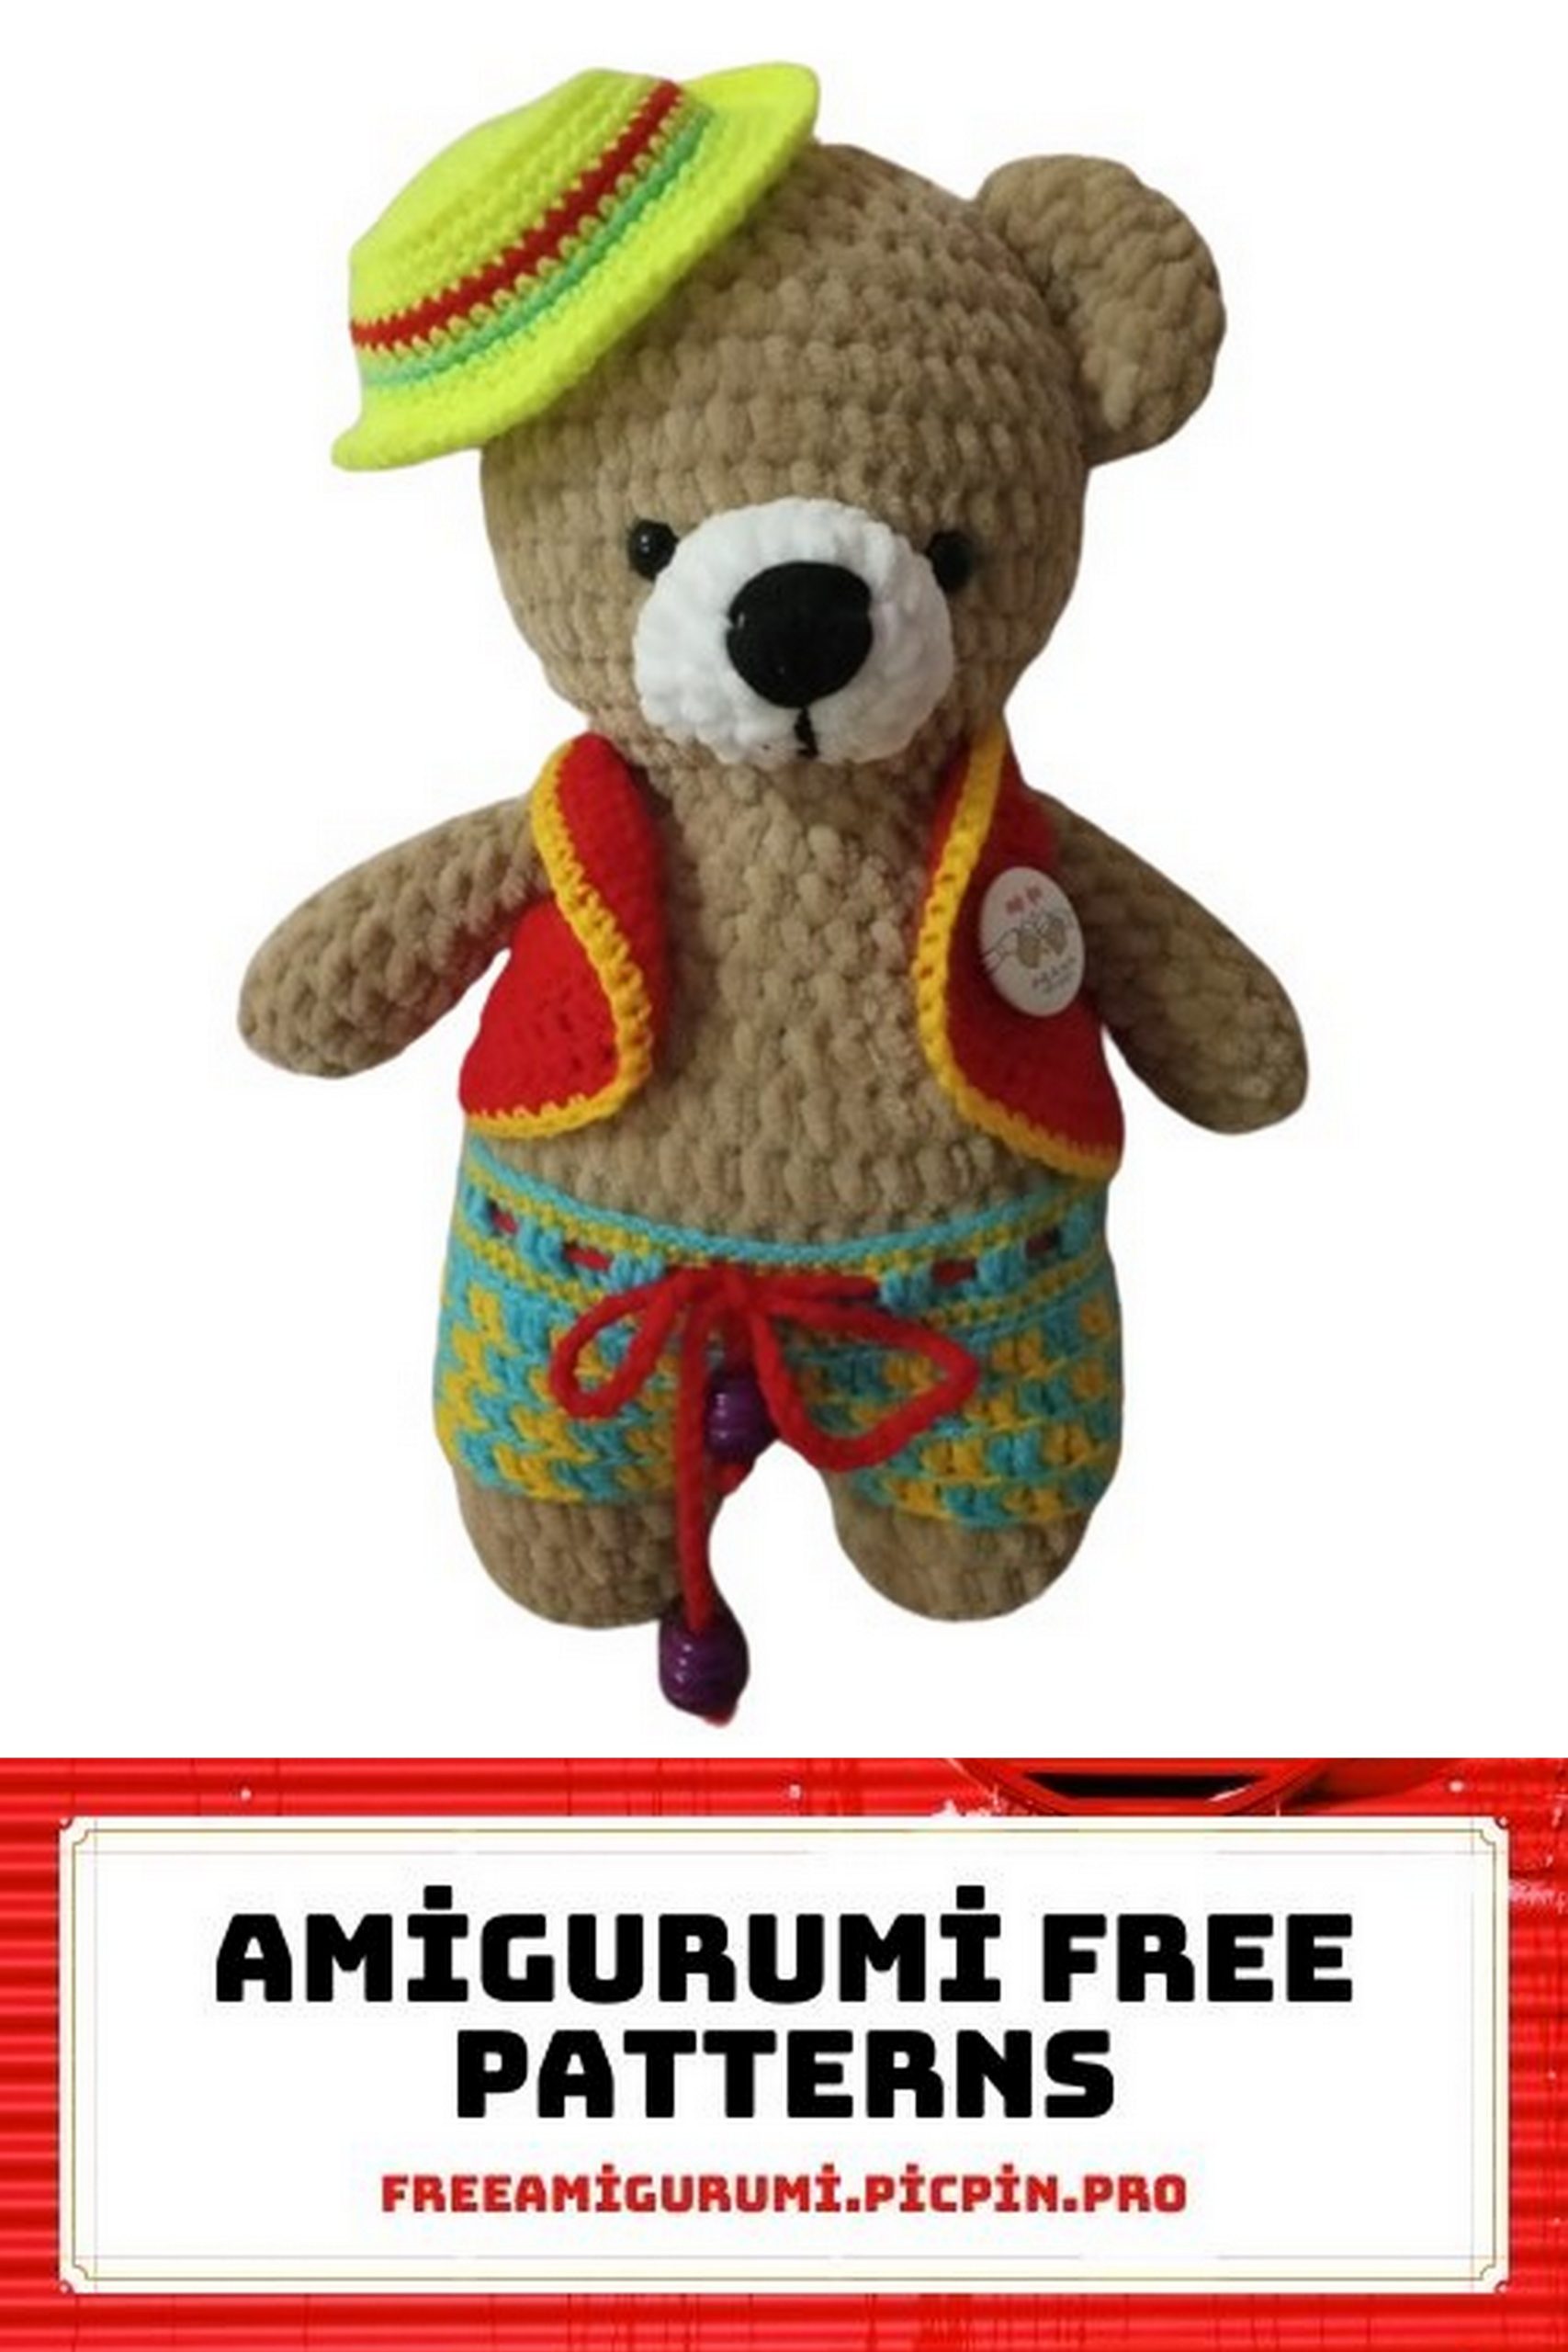
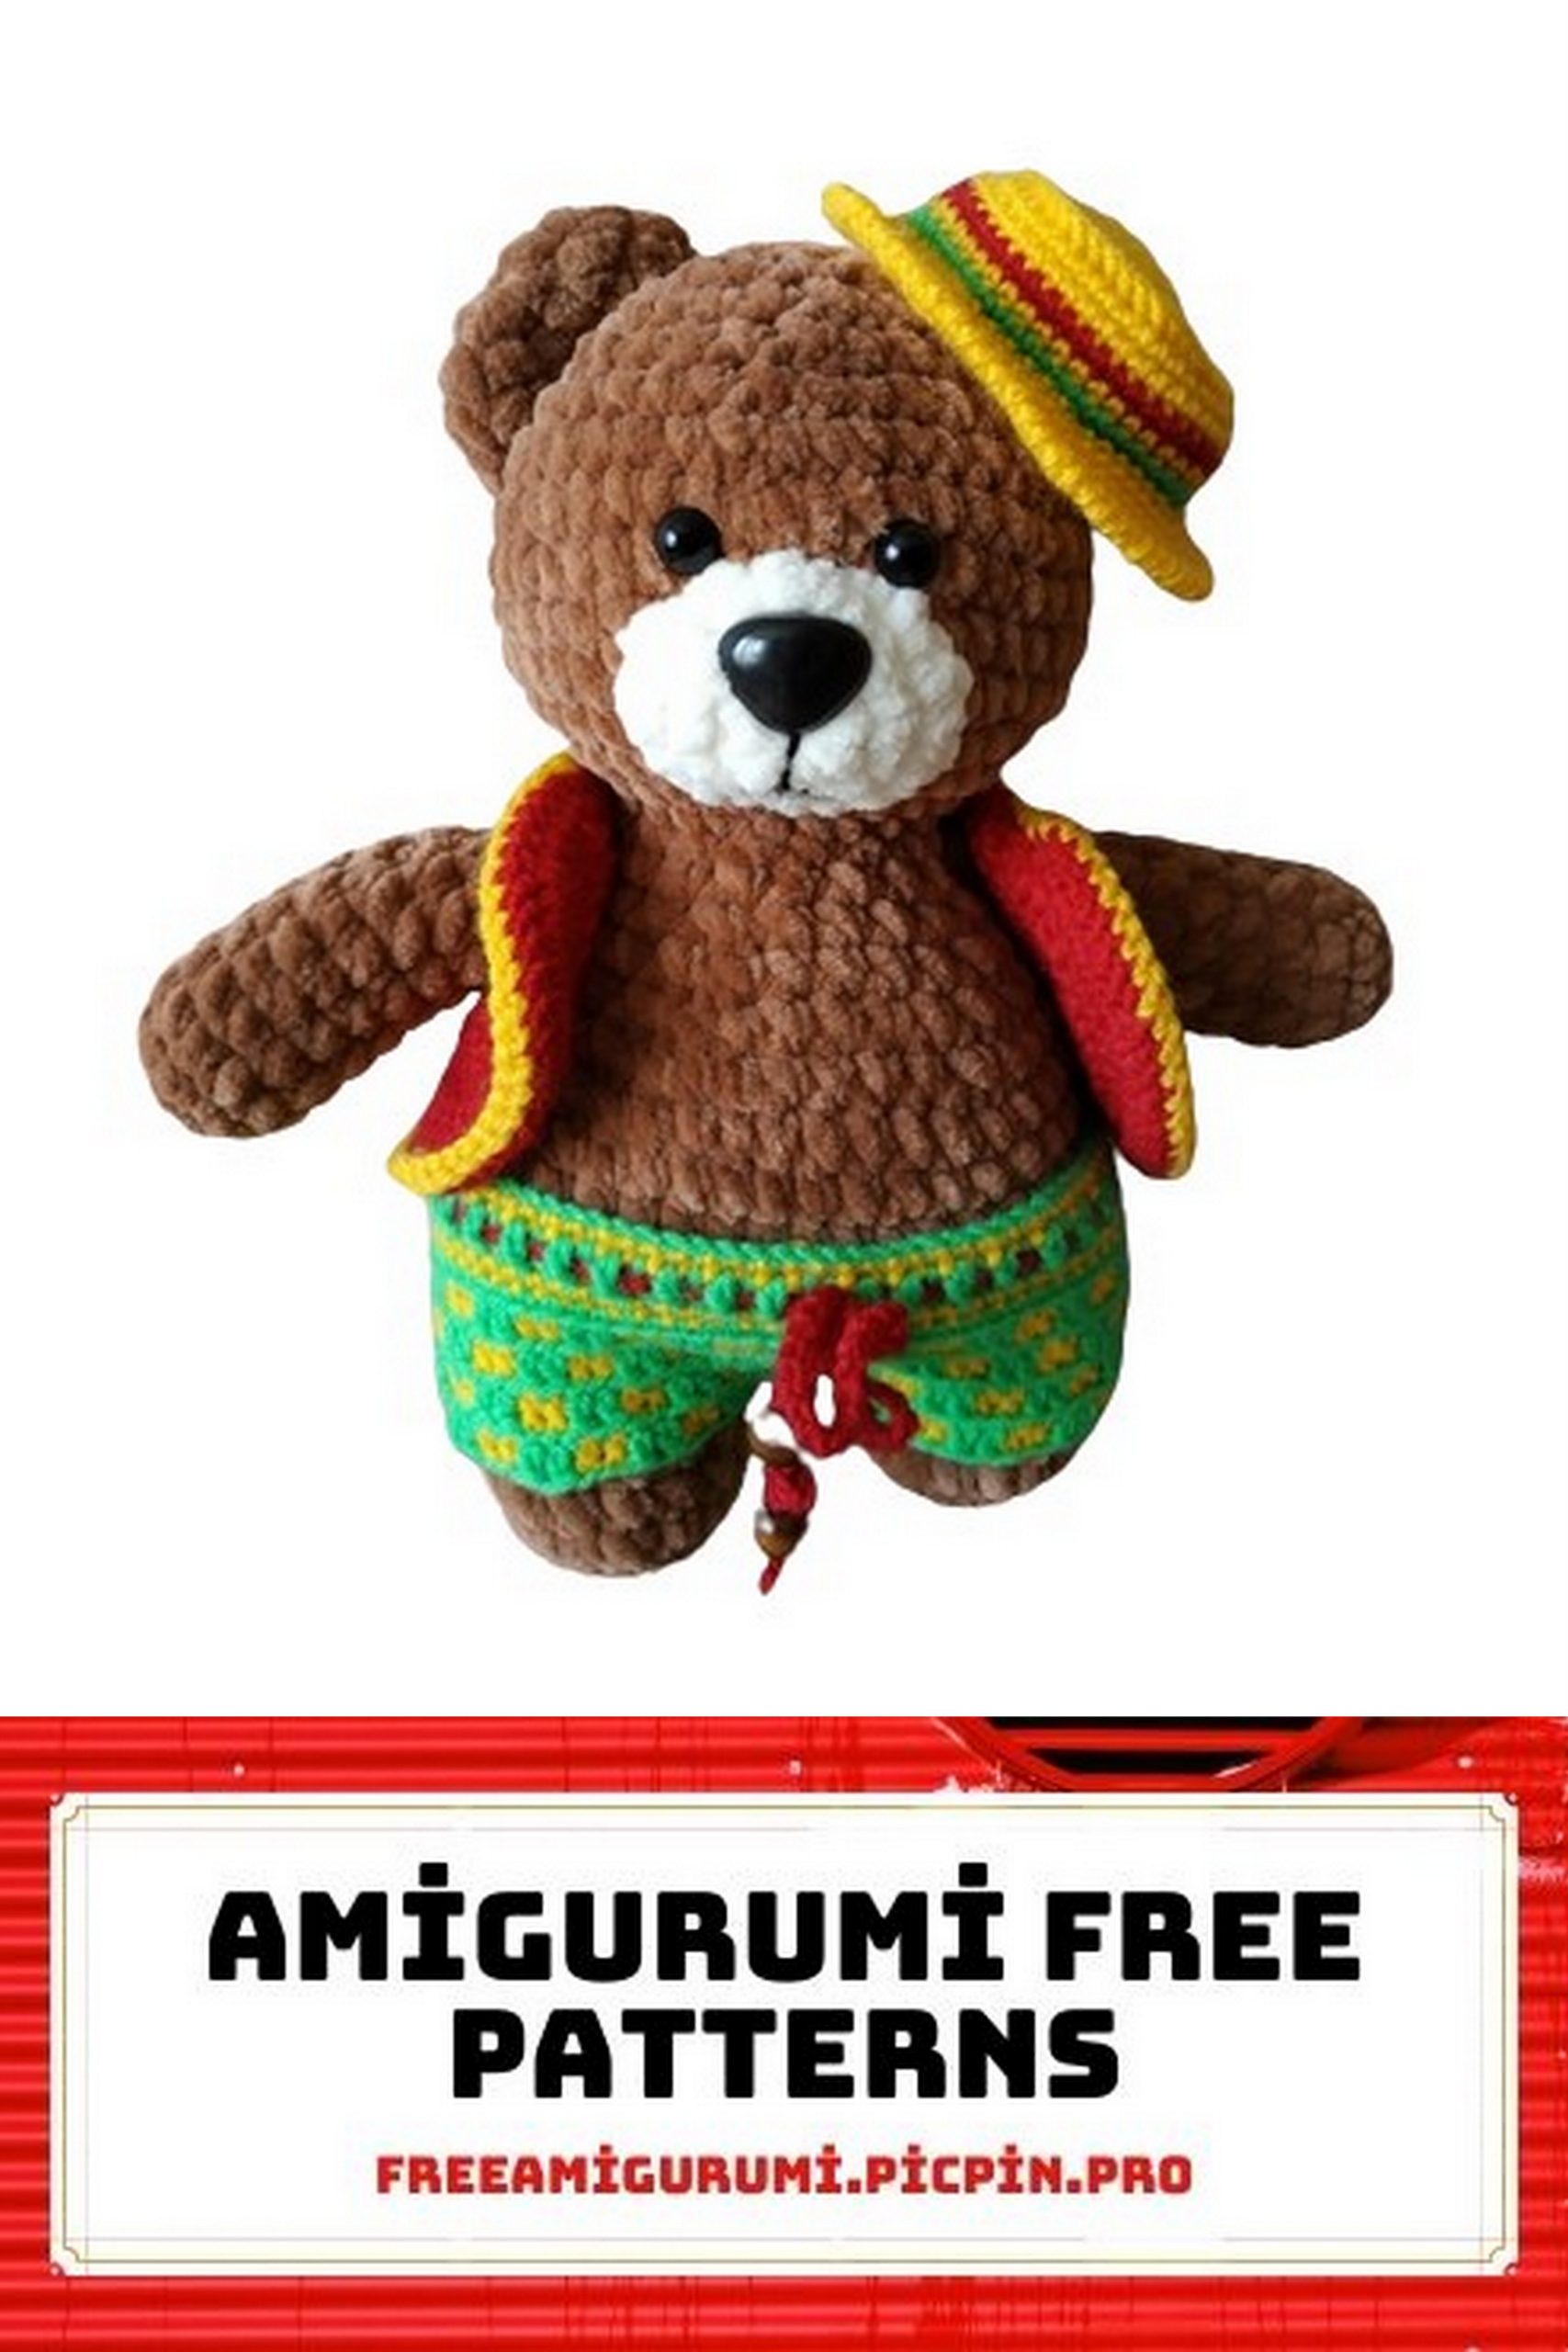
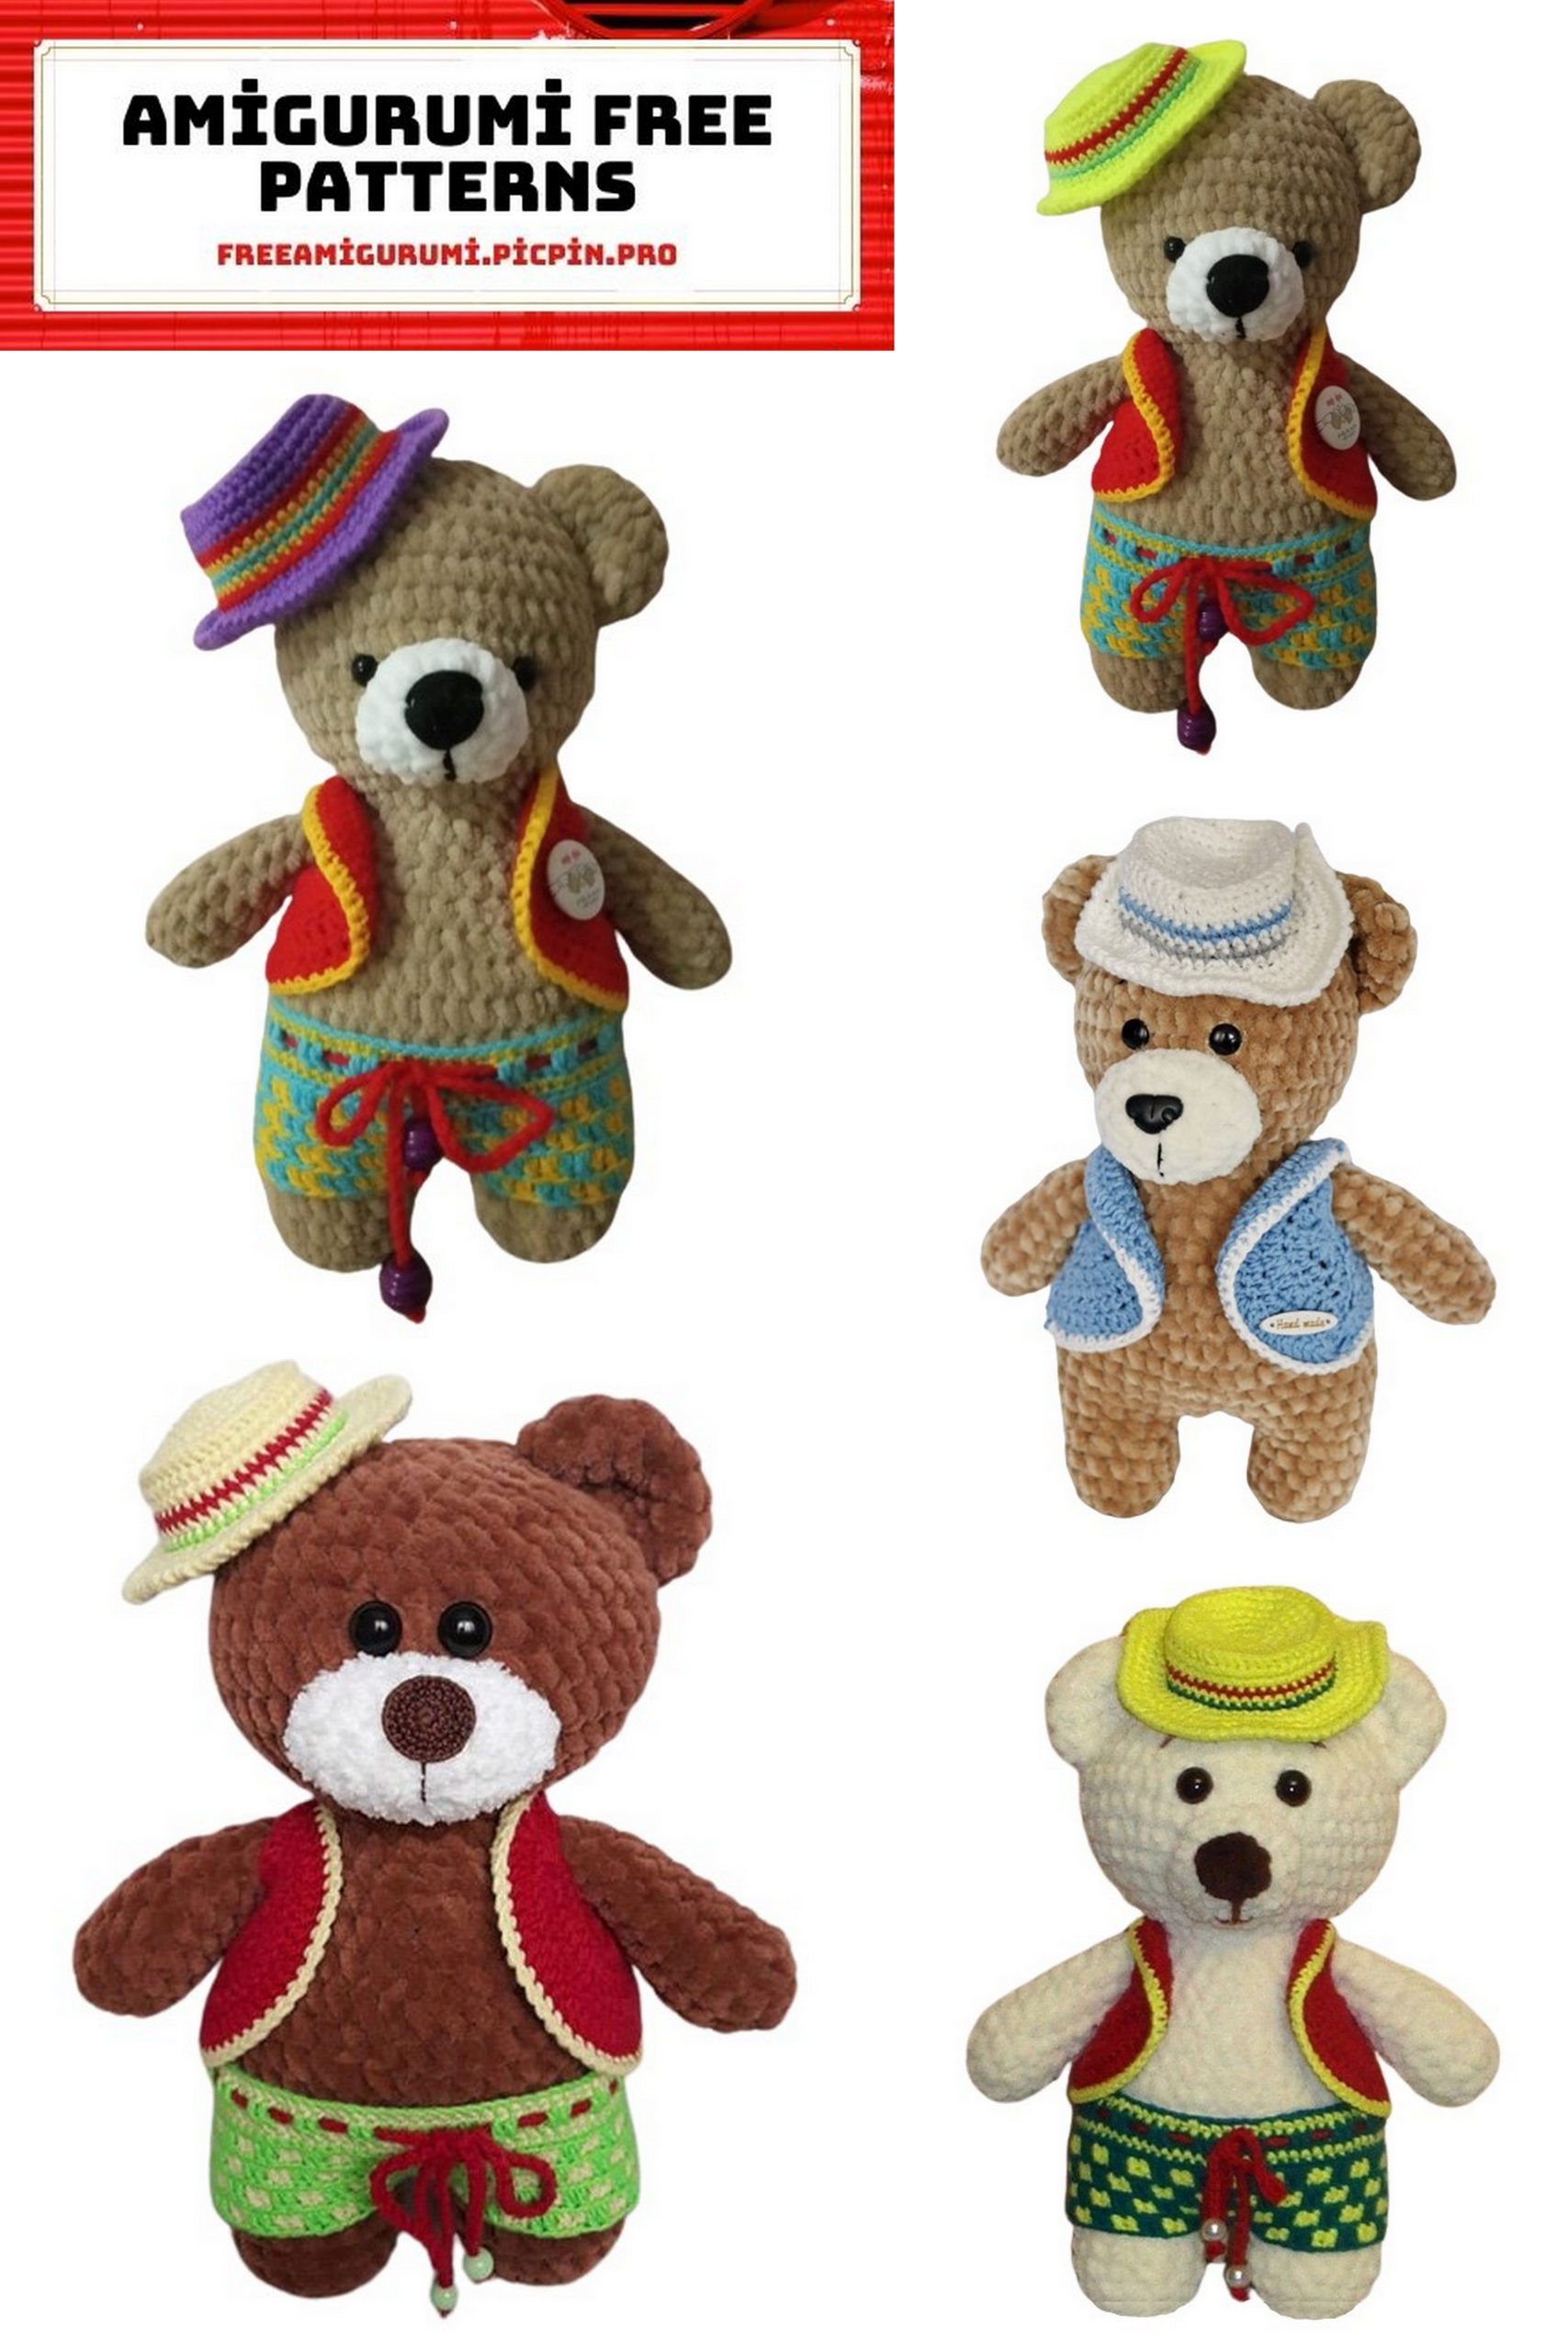
Amigurumi Mexican Teddy Bear Free Pattern
Discover the joy of creating your very own Amigurumi Mexican Teddy Bear with our free crochet pattern! This adorable bear is inspired by the vibrant and colorful culture of Mexico, making it a unique addition to your amigurumi collection. Follow our step-by-step instructions to bring this charming character to life and enjoy the satisfaction of crafting your very own cuddly companion. Get ready to immerse yourself in the world of amigurumi with this exciting project.
We’ll need:
Plush yarn
DOLPHIN BABY (Dolphin Baby)
Colors 80337, 80308
100g, 120m, 100% polyester
1 skein (for making the toy)
Color 80308 (for face decoration)
YarnArt Jeans yarn
Color 40
50g, 160m, 55% cotton, 45% acrylic
Needed for sewing the parts; you can use any suitable color.
Gazzal baby cotton yarn
Colors 3439, 3413, 3449
50g, 165m, 40% cotton, 60% acrylic
A little less than one skein of each color (for clothing)
Crochet hooks: #2 and #4
Safety eyes – 8mm in diameter, 2 pieces
Thread for nose embroidery (I used leftovers of YarnArt Velour color 852)
2 wooden beads, 8mm in diameter (for decorating the red belt on the teddy)
Sewing needle
Polyester fiberfill (stuffing)
Abbreviations:
SC – single crochet
DC – double crochet
CH – chain
(32) – stitch count
INC – increase (2 SC in the same stitch)
DEC – decrease (sc 2 stitches together)
Let’s get started!
PATTERN

Teddy Bear Body
Take the Himalaya Dolphin Baby yarn in color 803337 and crochet hook #4.
Row 1: 8 SC in a magic ring (8)
Row 2: 8 INC (16)
Rows 3-6: 16 SC (4 rows)
You’ve completed one leg. Crochet the second one in the same way.
Now, you need to connect the two legs. To do this, create 3 chain stitches on one leg and then crochet a single crochet in the same stitch of the other leg. This joins the legs. Continue to crochet the next row.
Row 7: Continue crocheting around both legs. Count the stitches; you should have 40 stitches. If you have more or fewer stitches, adjust in the next row. (40)
Rows 8-13: 40 SC (6 rows)
Row 14: (8 SC, 1 DEC)*4 (36)
Row 15: (7 SC, 1 DEC)*4 (32)
Now, stuff the toy.
Row 16: (6 SC, 1 DEC)*4 (28)
Row 17: (5 SC, 1 DEC)*4 (24)
Row 18: (4 SC, 1 DEC)*4 (20)
Row 19: 8 SC, 1 DEC, 8 SC, 1 DEC (18)
Row 20: 7 SC, 1 DEC, 7 SC, 1 DEC (16)
Stuff the toy further.
Row 21: (1 SC, 1 INC)*8 (24)
Row 22: (2 SC, 1 INC)*8 (32)
Row 23: (3 SC, 1 INC)*8 (40)
Row 24: (4 SC, 1 INC)*8 (48)
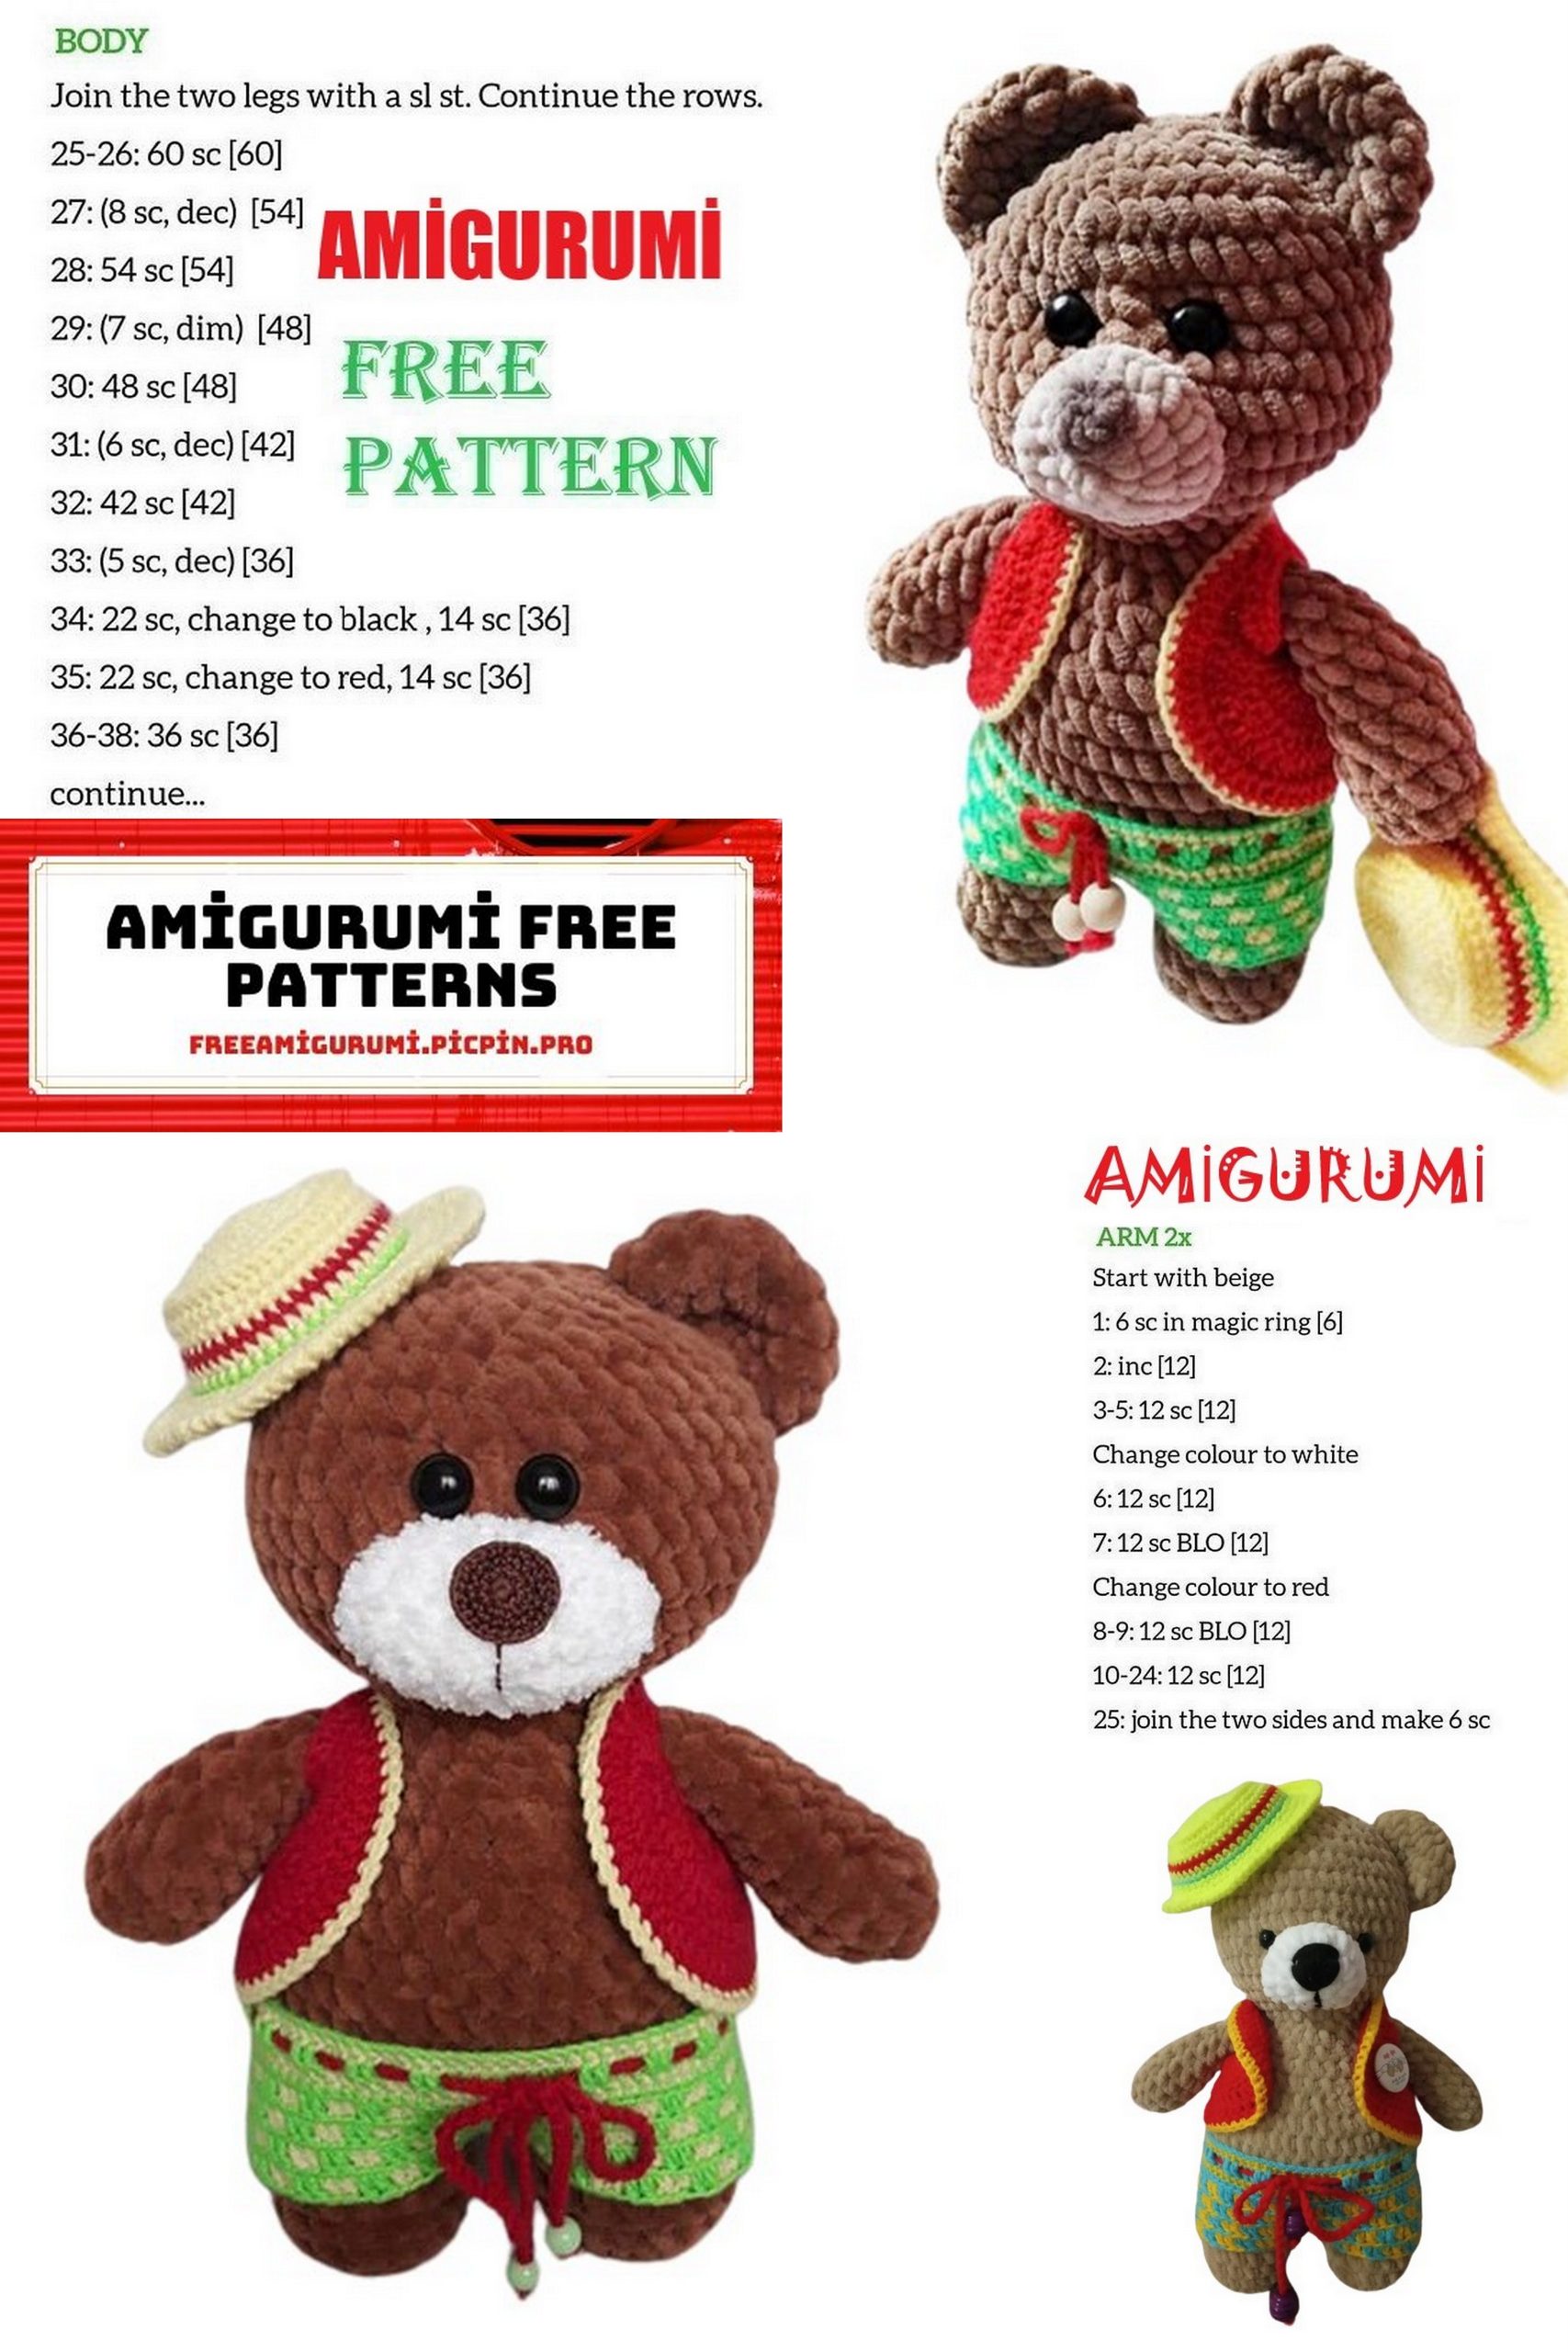
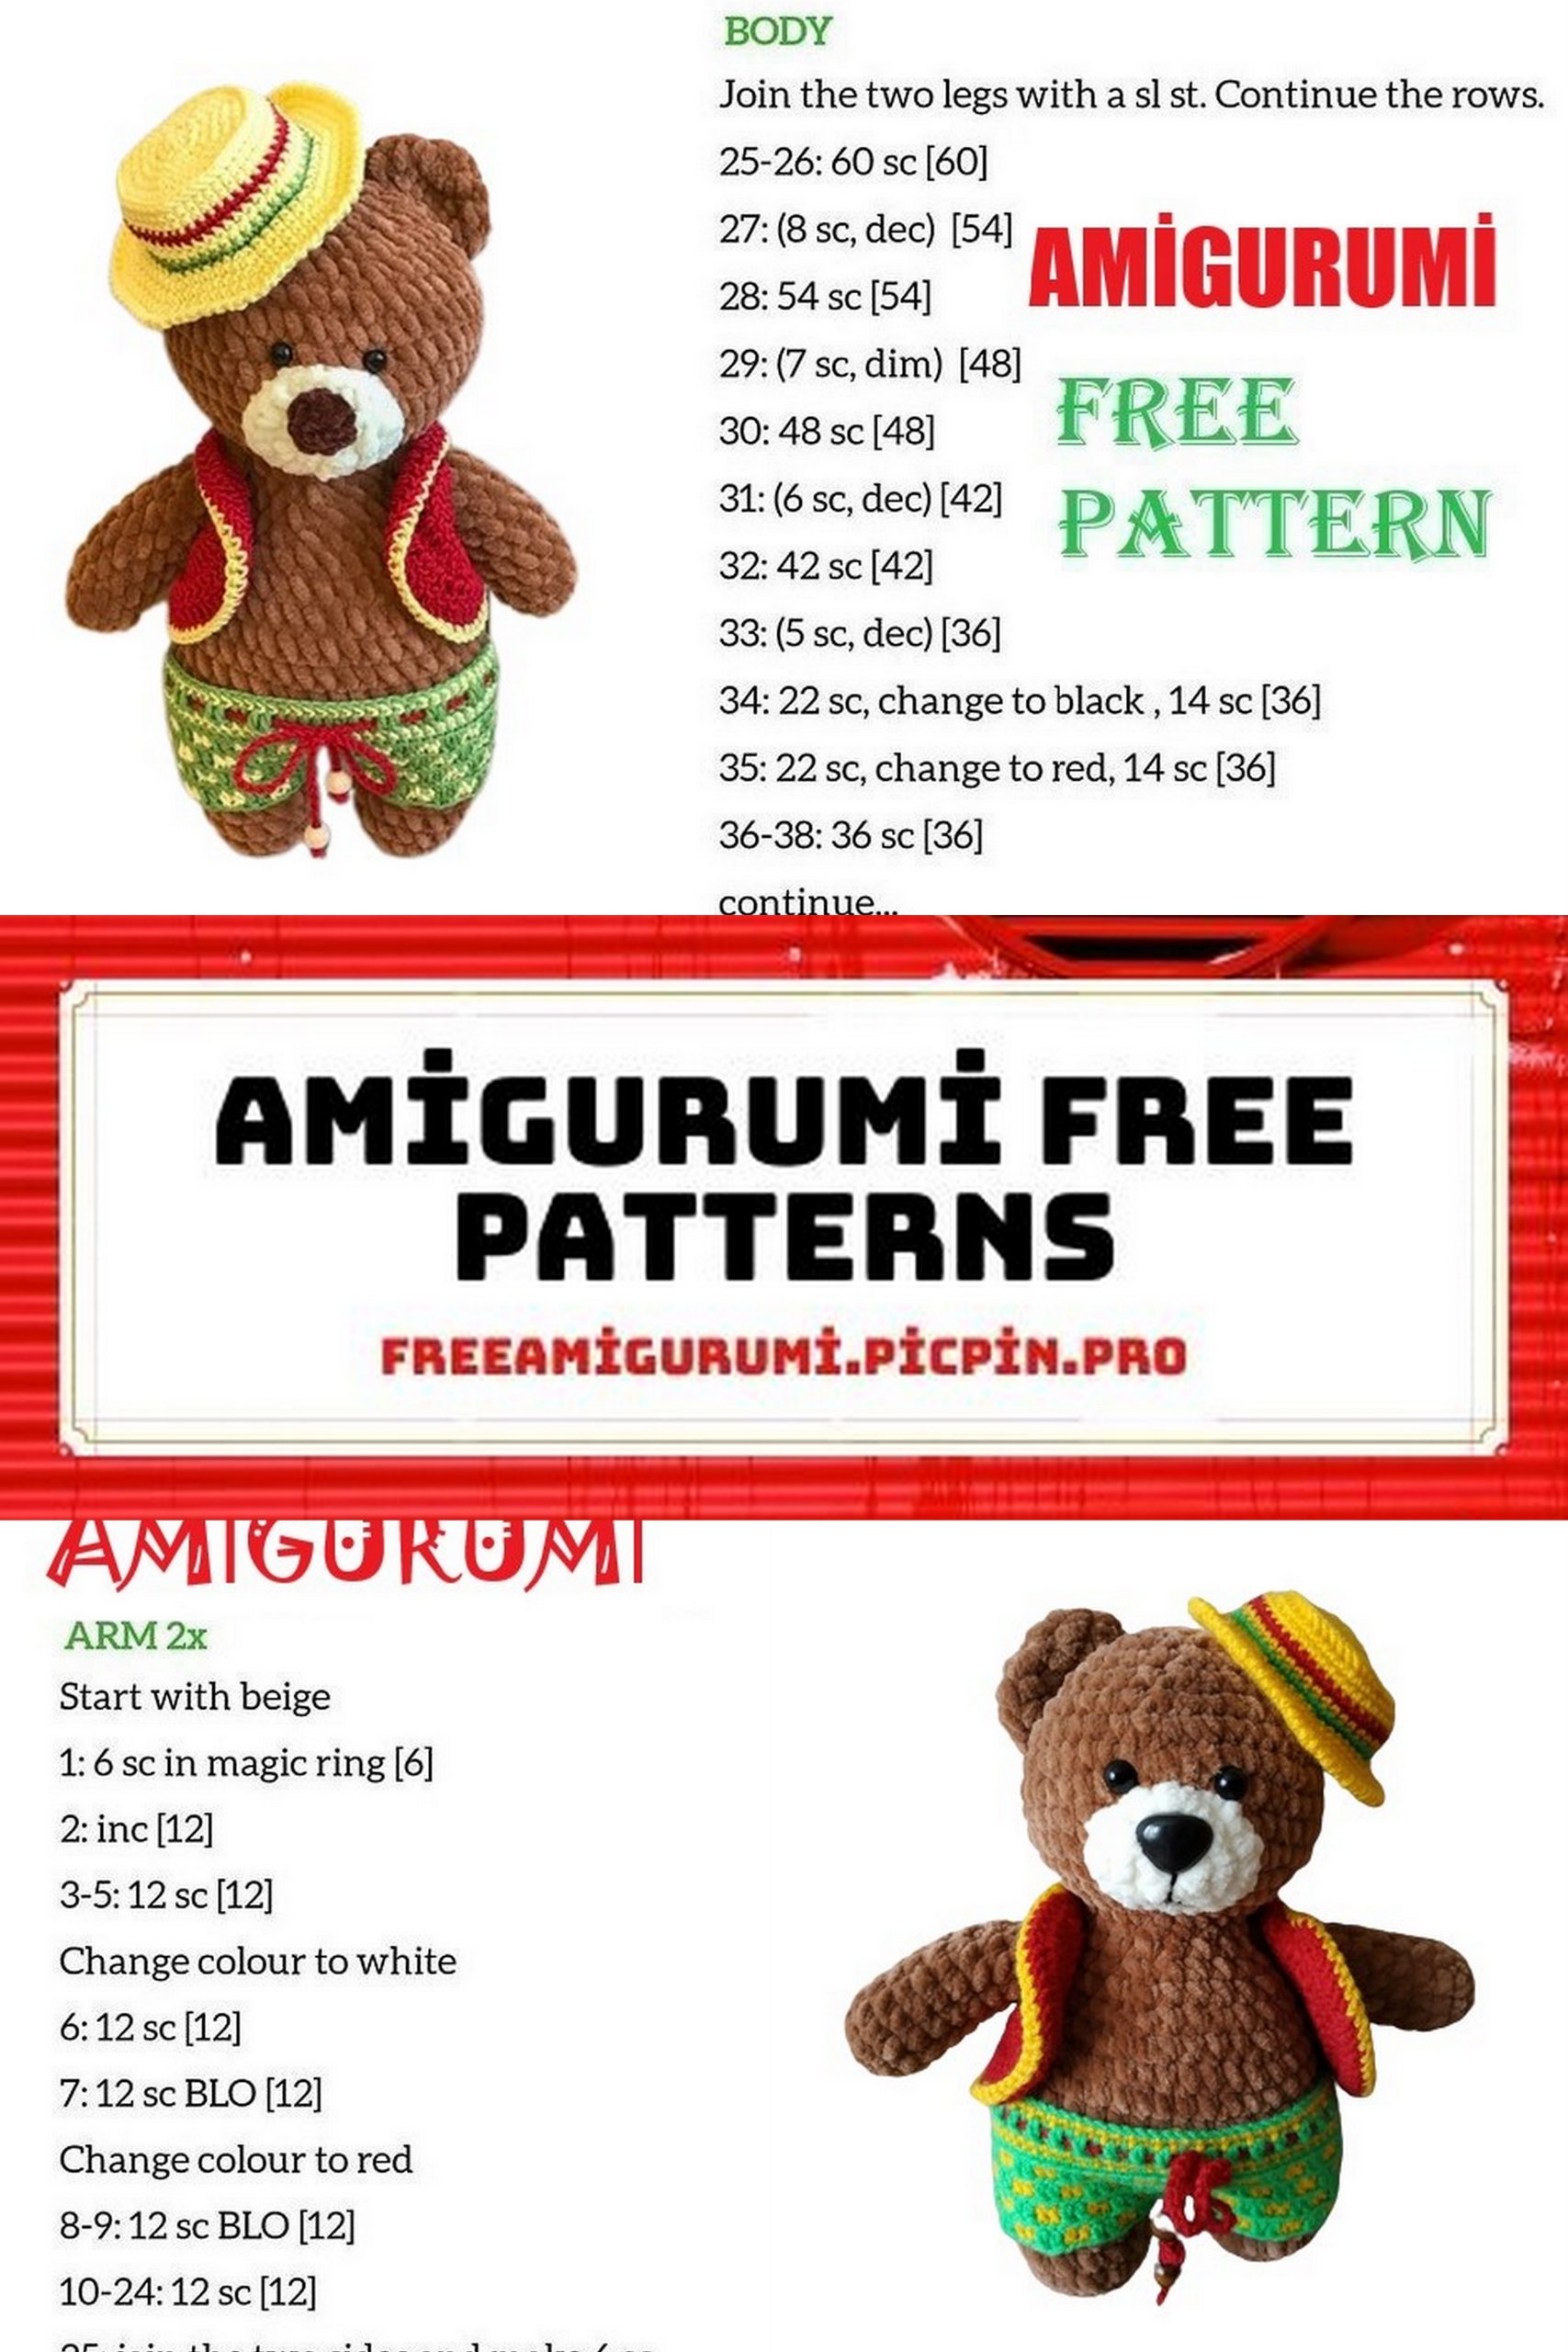
Rows 25-28: 48 SC (4 rows)
Row 29: (6 SC, 1 DEC)*6 (42)
Row 30: (5 SC, 1 DEC)*6 (36)
At this point, it’s a good time to attach the safety eyes, typically between rows 8 and 9 counting from the neck. However, you can also attach them when the body is fully crocheted, as you prefer. Also, continue stuffing the neck area firmly to ensure the head won’t wobble.
Row 31: (4 SC, 1 DEC)*6 (30)
Row 32: (3 SC, 1 DEC)*6 (24)
Row 33: (2 SC, 1 DEC)*6 (18)
Stuff the toy a bit more.
Row 34: (1 SC, 1 DEC)*6 (12)
Row 35: 6 DEC (6)
Fasten off and close the opening.
The teddy bear body is complete.


Crocheting the Legs:
Row 1: 6 SC in a magic ring (6)
Row 2: 6 INC (12)
Rows 3-5: 12 SC (3 rows)
Row 6: 1 DEC, 10 SC (11)
Row 7: 1 DEC, 9 SC (10)
Row 8: 1 DEC, 8 SC (9)
Row 9: 1 DEC, 7 SC (8)
Row 10: 1 DEC, 6 SC (7)
Stuff the leg.
Row 11: 1 DEC, 5 SC (6)
Stuff the leg and sew it shut by crocheting the opposite sides together.
The leg is complete; crochet the second one in the same way.
Crocheting the Ears:
Row 1: 10 SC in a magic ring (10)
Row 2: 10 INC (20)
Rows 3-4: 20 SC
Crocheting the Tail:
Row 1: 6 SC in a magic ring (6)
Row 2: 6 INC (12)
Row 3: (1 SC, 1 INC)*6 (18)
Row 4: 18 SC (18)
Row 5: (1 SC, 1 DEC)*6 (12)
Row 6: 6 DEC (6)
Stuff the tail.
Now, sew all the body parts (ears, legs, and tail) to the teddy bear body.
The Teddy Bear’s Face:
Take the DOLPHIN BABY yarn in color 80308 and crochet hook #4.
Row 1: 8 SC in a magic ring (8)
Row 2: 8 INC (16)
Row 3: (1 SC, 1 INC)*8 (24)
Use YarnArt Velour yarn color 852 to make the nose. Crochet 8 SC in a magic ring. Attach the nose and embroider the mouth. The face can be sewn to the body. Make sure to stuff the head area firmly to prevent it from wobbling.
The teddy bear is complete!


Crocheting the Hat:
You’ll need Gazzal baby cotton yarn in three colors: 3439, 3413, 3449, and crochet hook #2.
Row 1: Using yellow yarn, crochet 8 SC in a magic ring (8)
Row 2: 8 INC (16)
Row 3: (1 SC, 1 INC)*8 (24)
Row 4: (2 SC, 1 INC)*8 (32)
Row 5: (3 SC, 1 INC)*8 (40)
Row 6: (4 SC, 1 INC)*8 (48)
Row 7: Crochet 48 front post double crochets (FPDC) (48)
Rows 8-9: 48 SC (48)
Row 10: Switch to red yarn and crochet 48 SC (48)
Row 11: Switch back to yellow yarn and crochet 48 SC (48)
Row 12: Switch to green yarn and crochet 48 SC (48)
Row 13: Switch back to yellow yarn and crochet (5 SC, 1 INC)*8 (56)
Row 14: (6 SC, 1 INC)*8 (64)
Row 15: (7 SC, 1 INC)*8 (72)
Row 16: (8 SC, 1 INC)*8 (80)
Row 17: Edge the hat with slip stitches (80) and fasten off.
The hat is complete!
Crocheting the Shorts:
You’ll need Gazzal baby cotton yarn in three colors: 3439, 3413, 3449, and crochet hook #2.
Row 1: Using green yarn, chain 72, join with a slip stitch to form a circle. Make sure the shorts fit the teddy bear. If necessary, add or remove chains.
Row 2: Switch to yellow yarn, chain 1, and crochet 71 SC (72)
Row 3: Switch to green yarn, chain 3, and crochet 71 DC (72)
Row 4: Switch to yellow yarn, chain 1, and crochet 71 SC (72)
Row 5: Switch to green yarn, chain 1, and crochet 71 SC (72)
Rows 6-9: Crochet in the back loops only. Chain 3 with green yarn, then crochet 2 DC with yellow, 2 DC with green, and 2 DC with yellow. Continue this pattern across the row. When you reach the center between the legs, crochet 4 SC together through both layers of the shorts to create a space for the teddy bear’s legs. Then continue the pattern on the other side of the shorts. (Make sure to watch the video for guidance: [link to video])
Try the shorts on the teddy bear and determine the midpoint between the legs. Crochet 4 SC together from the inside to close the gap.
Now, take red yarn, chain 150 (or as needed), this will be the waistband of the shorts. Thread it through the shorts and tie the ends with beads.
The shorts are complete!


Teddy Bear Vest:
You’ll need Gazzal baby cotton yarn in three colors: 3439, 3413, crochet hook #2.
Row 1: Using red yarn, chain 6, join to form a ring.
Row 2: Turn your work, chain 3, crochet another DC in the same stitch, then crochet 5 more DC (6)
Row 3: Turn your work, chain 3, 1 DC, (1 SC, 1 DC) in the next stitch, (2 DC, 1 SC, 1 DC) in each stitch across (12)
Row 4: Turn your work, chain 3, 1 DC, (2 DC, 1 SC, 1 DC) in the next stitch, (3 DC, 1 SC, 1 DC) in each stitch across (18)
Row 5: Turn your work, chain 3, 1 DC, (3 DC, 1 SC, 1 DC) in the next stitch, (4 DC, 1 SC, 1 DC) in each stitch across (24)
Row 6: Turn your work, chain 1, SC around the edge, with 20 SC on each side, 6 SC across the bottom (52)
The first semi-circle is complete. Crochet the second one in the same way.
Row 1: For the second semi-circle, chain 28. Then, join both semi-circles as shown in the picture.
Row 2: Turn your work, make a chain of 3.
Row 3: Continue in the same way, working 1 DC in each stitch (28)
Row 4: Turn your work, chain 3, crochet 1 SC, and 1 DC in the next stitch, 4 DC (6), 1 SC, 1 DC, 10 DC (12), 1 SC, 1 DC, 4 DC (6), 1 SC, 1 DC, 2 DC (28)
Row 5: Turn your work, chain 3, 1 SC, 2 DC in the next stitch, 6 DC (8), 1 SC, 2 DC in the next stitch, 12 DC (14), 1 SC, 2 DC in the next stitch, 6 DC (8), 1 SC, 2 DC in the next stitch, 2 DC (32)
Row 6: Turn your work, chain 3, 1 SC, 2 DC in the next stitch, 8 DC (10), 1 SC, 2 DC in the next stitch, 14 DC (16), 1 SC, 2 DC in the next stitch, 8 DC (10), 1 SC, 2 DC in the next stitch, 4 DC (36)
Row 7: Turn your work, chain 3, 1 SC, 2 DC in the next stitch, 10 DC (12), 1 SC, 2 DC in the next stitch, 16 DC (18), 1 SC, 2 DC in the next stitch, 10 DC (12), 1 SC, 2 DC in the next stitch, 6 DC (40)
Row 8: Turn your work, chain 3, 1 SC, 2 DC in the next stitch, 12 DC (14), 1 SC, 2 DC in the next stitch, 18 DC (20), 1 SC, 2 DC in the next stitch, 12 DC (14), 1 SC, 2 DC in the next stitch, 8 DC (44)
Row 9: Edge the vest with slip stitches (44) and fasten off.
For the armholes and neck opening, crochet in the back loops and front loops as needed to maintain the pattern.
Now, crochet the bottom edge of the vest with red yarn, using single crochets. Crochet the edges of the armholes with red yarn as well, using single crochets.
The teddy bear’s vest is complete!