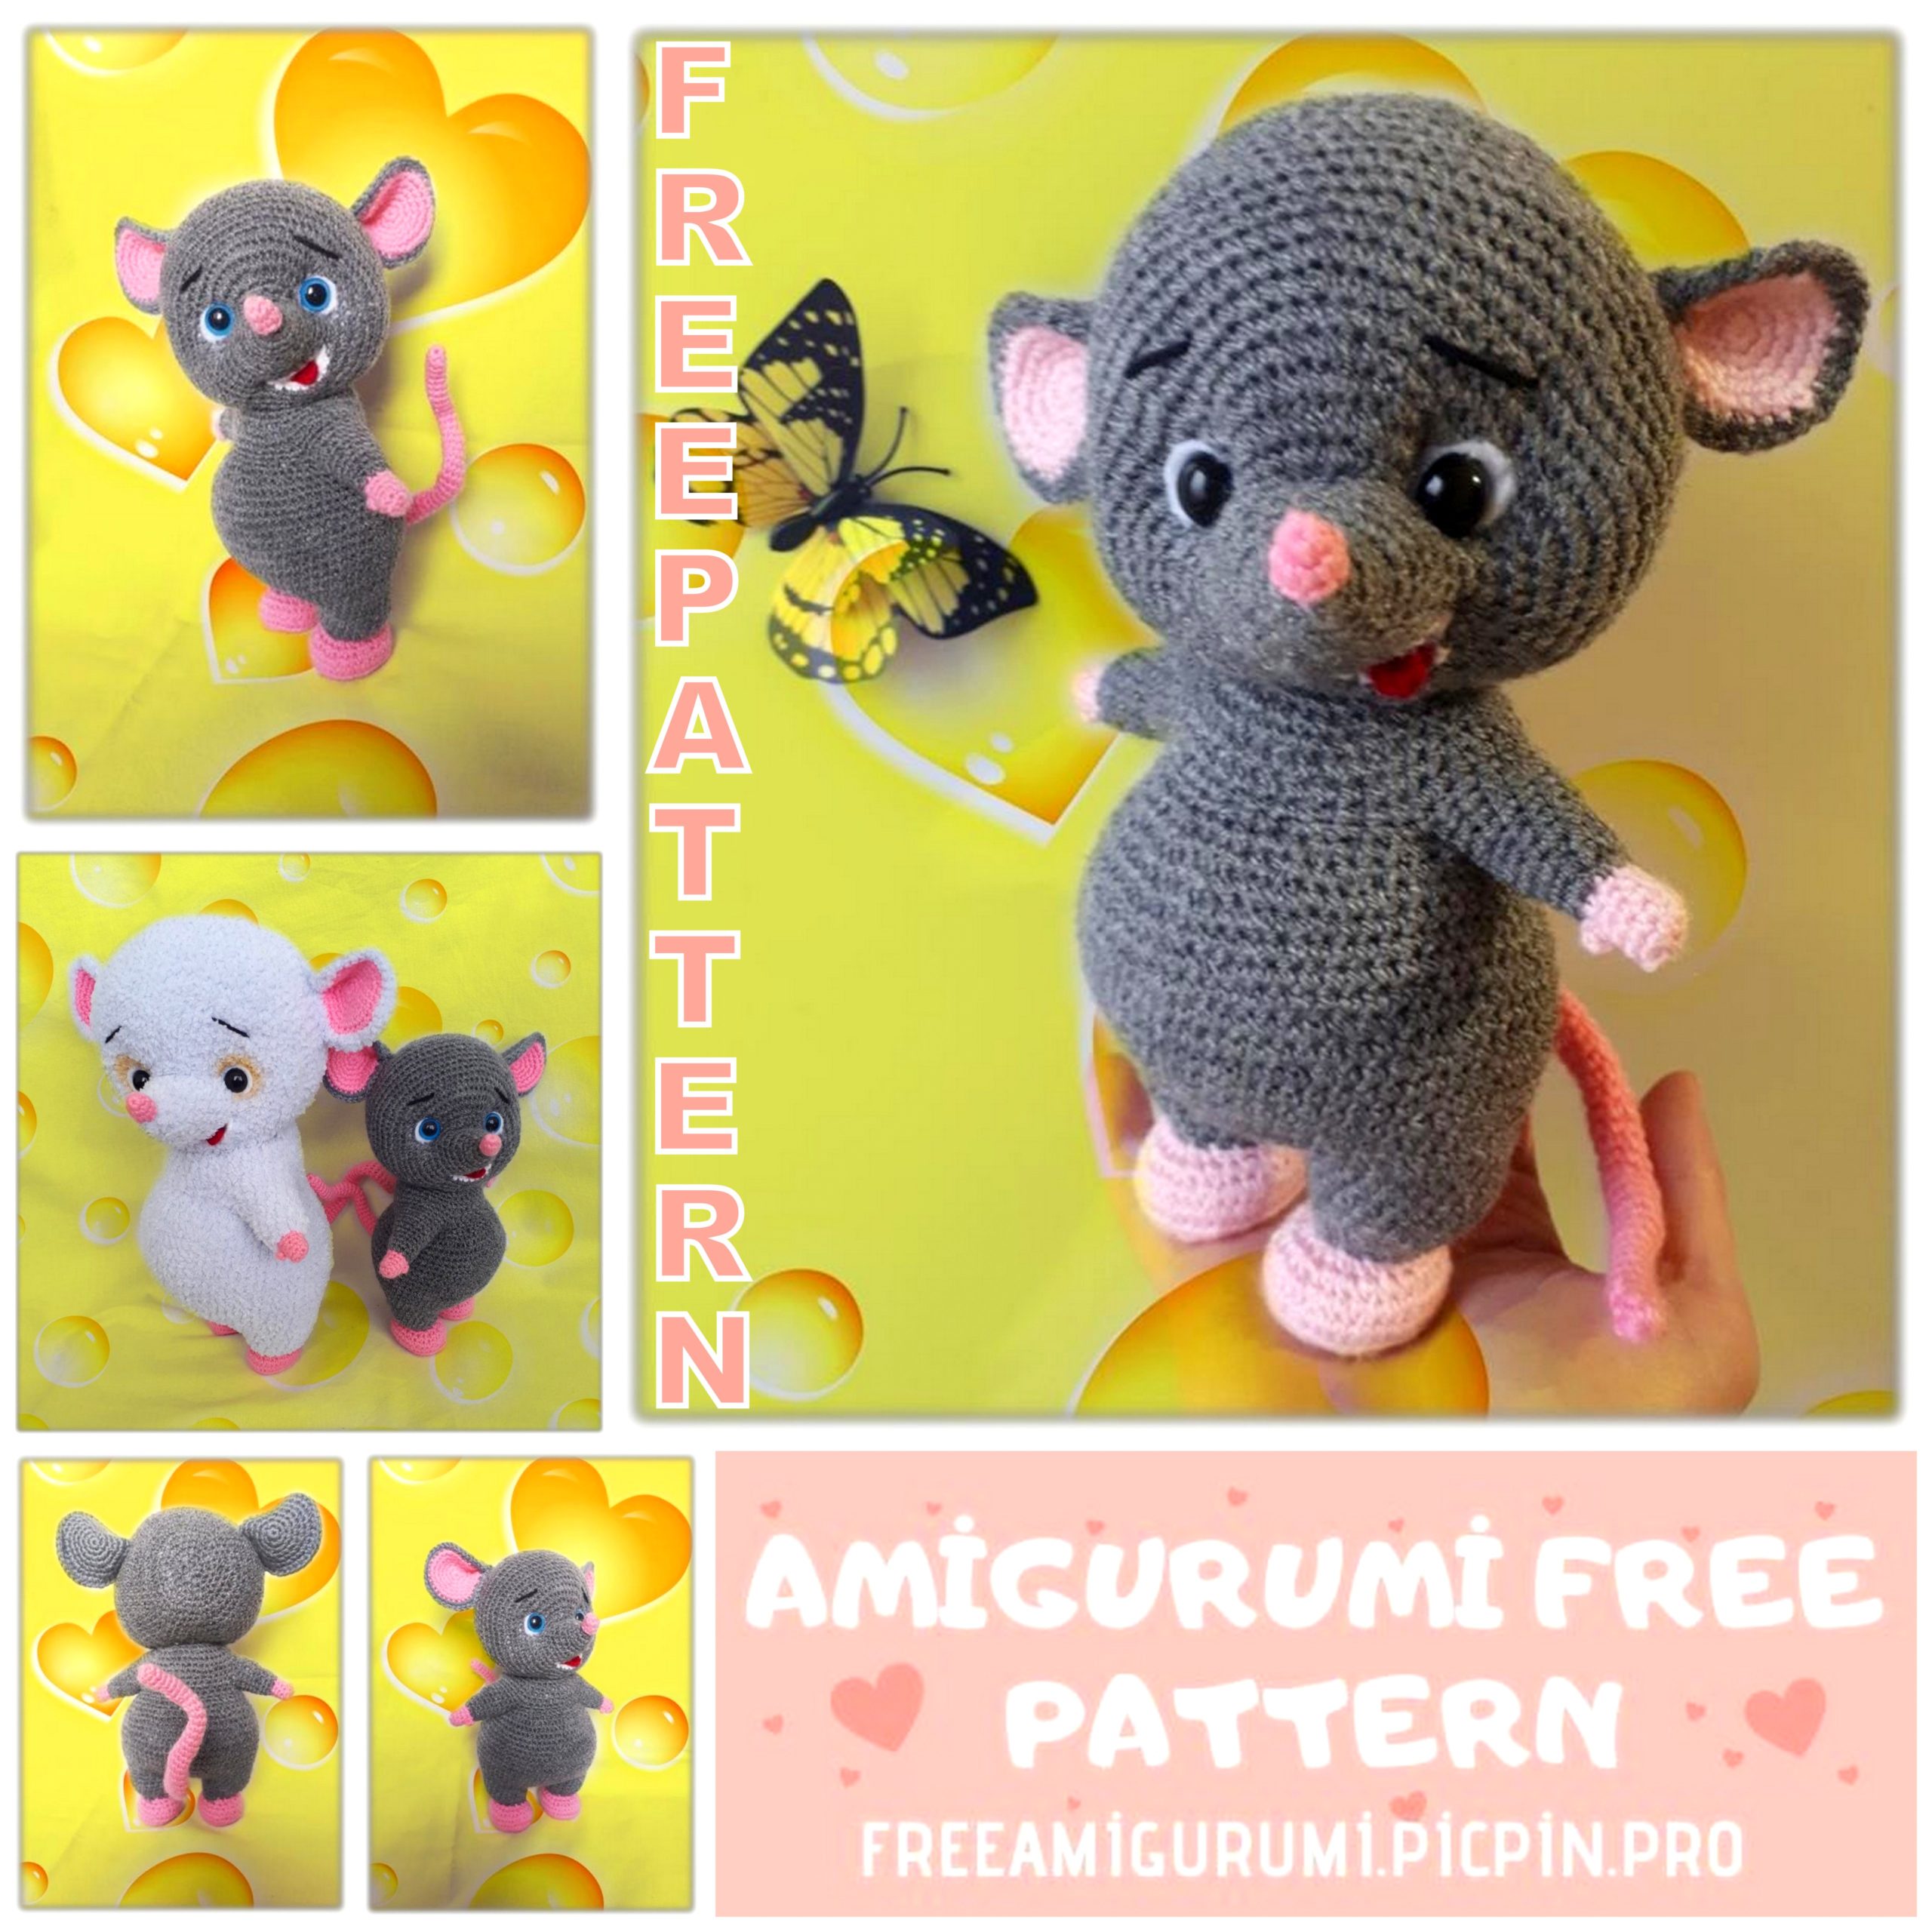
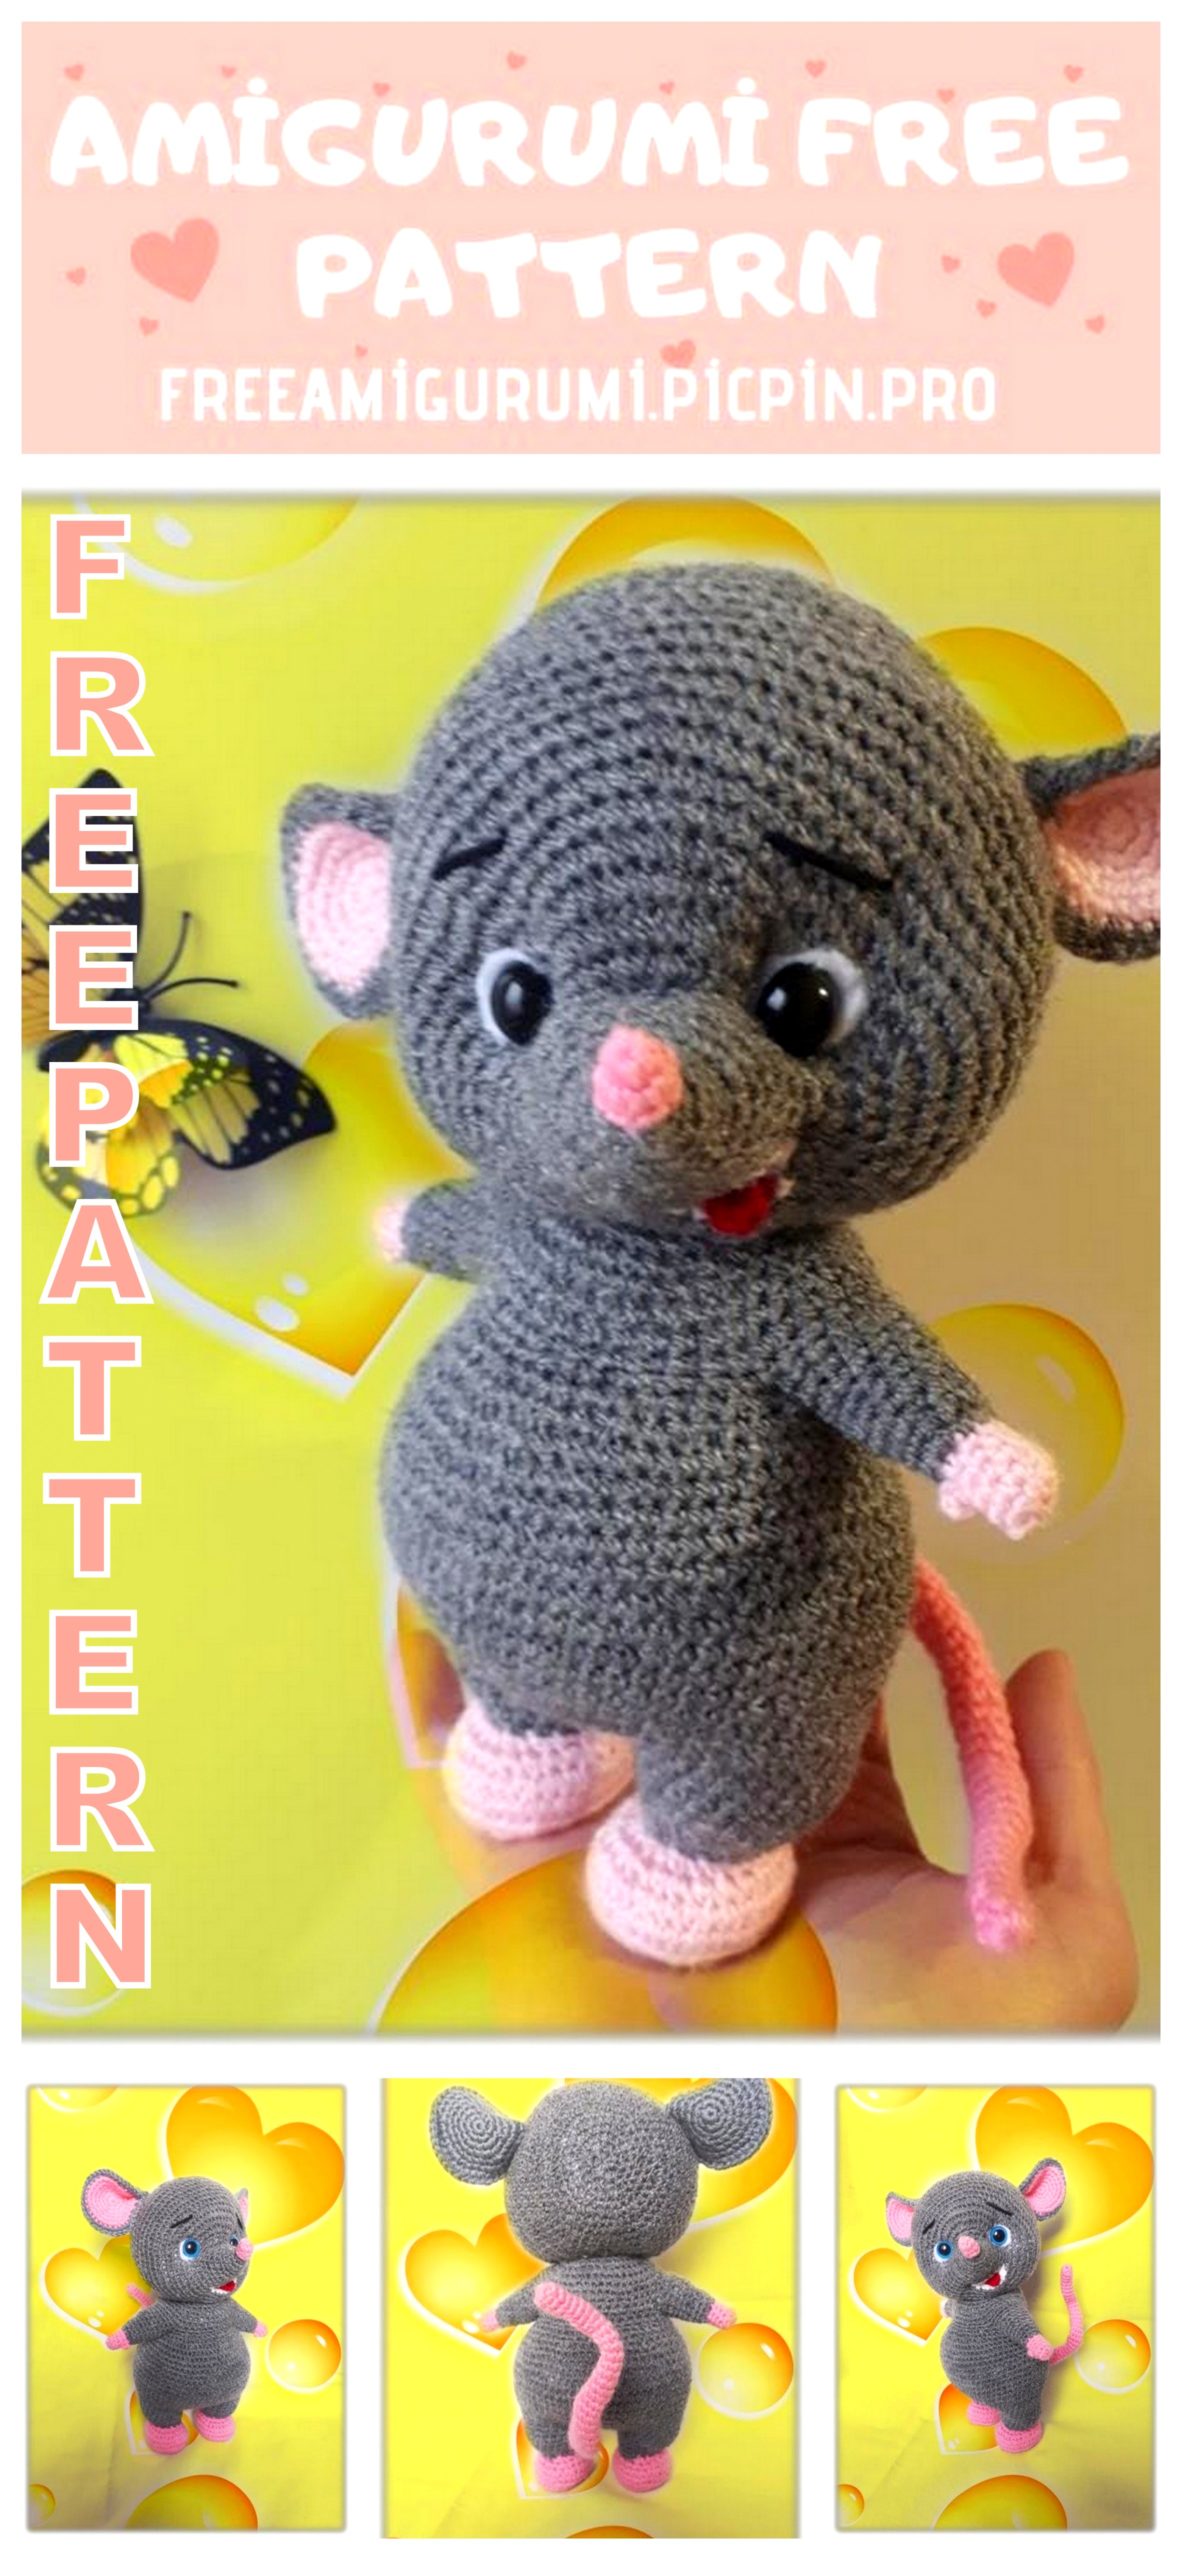
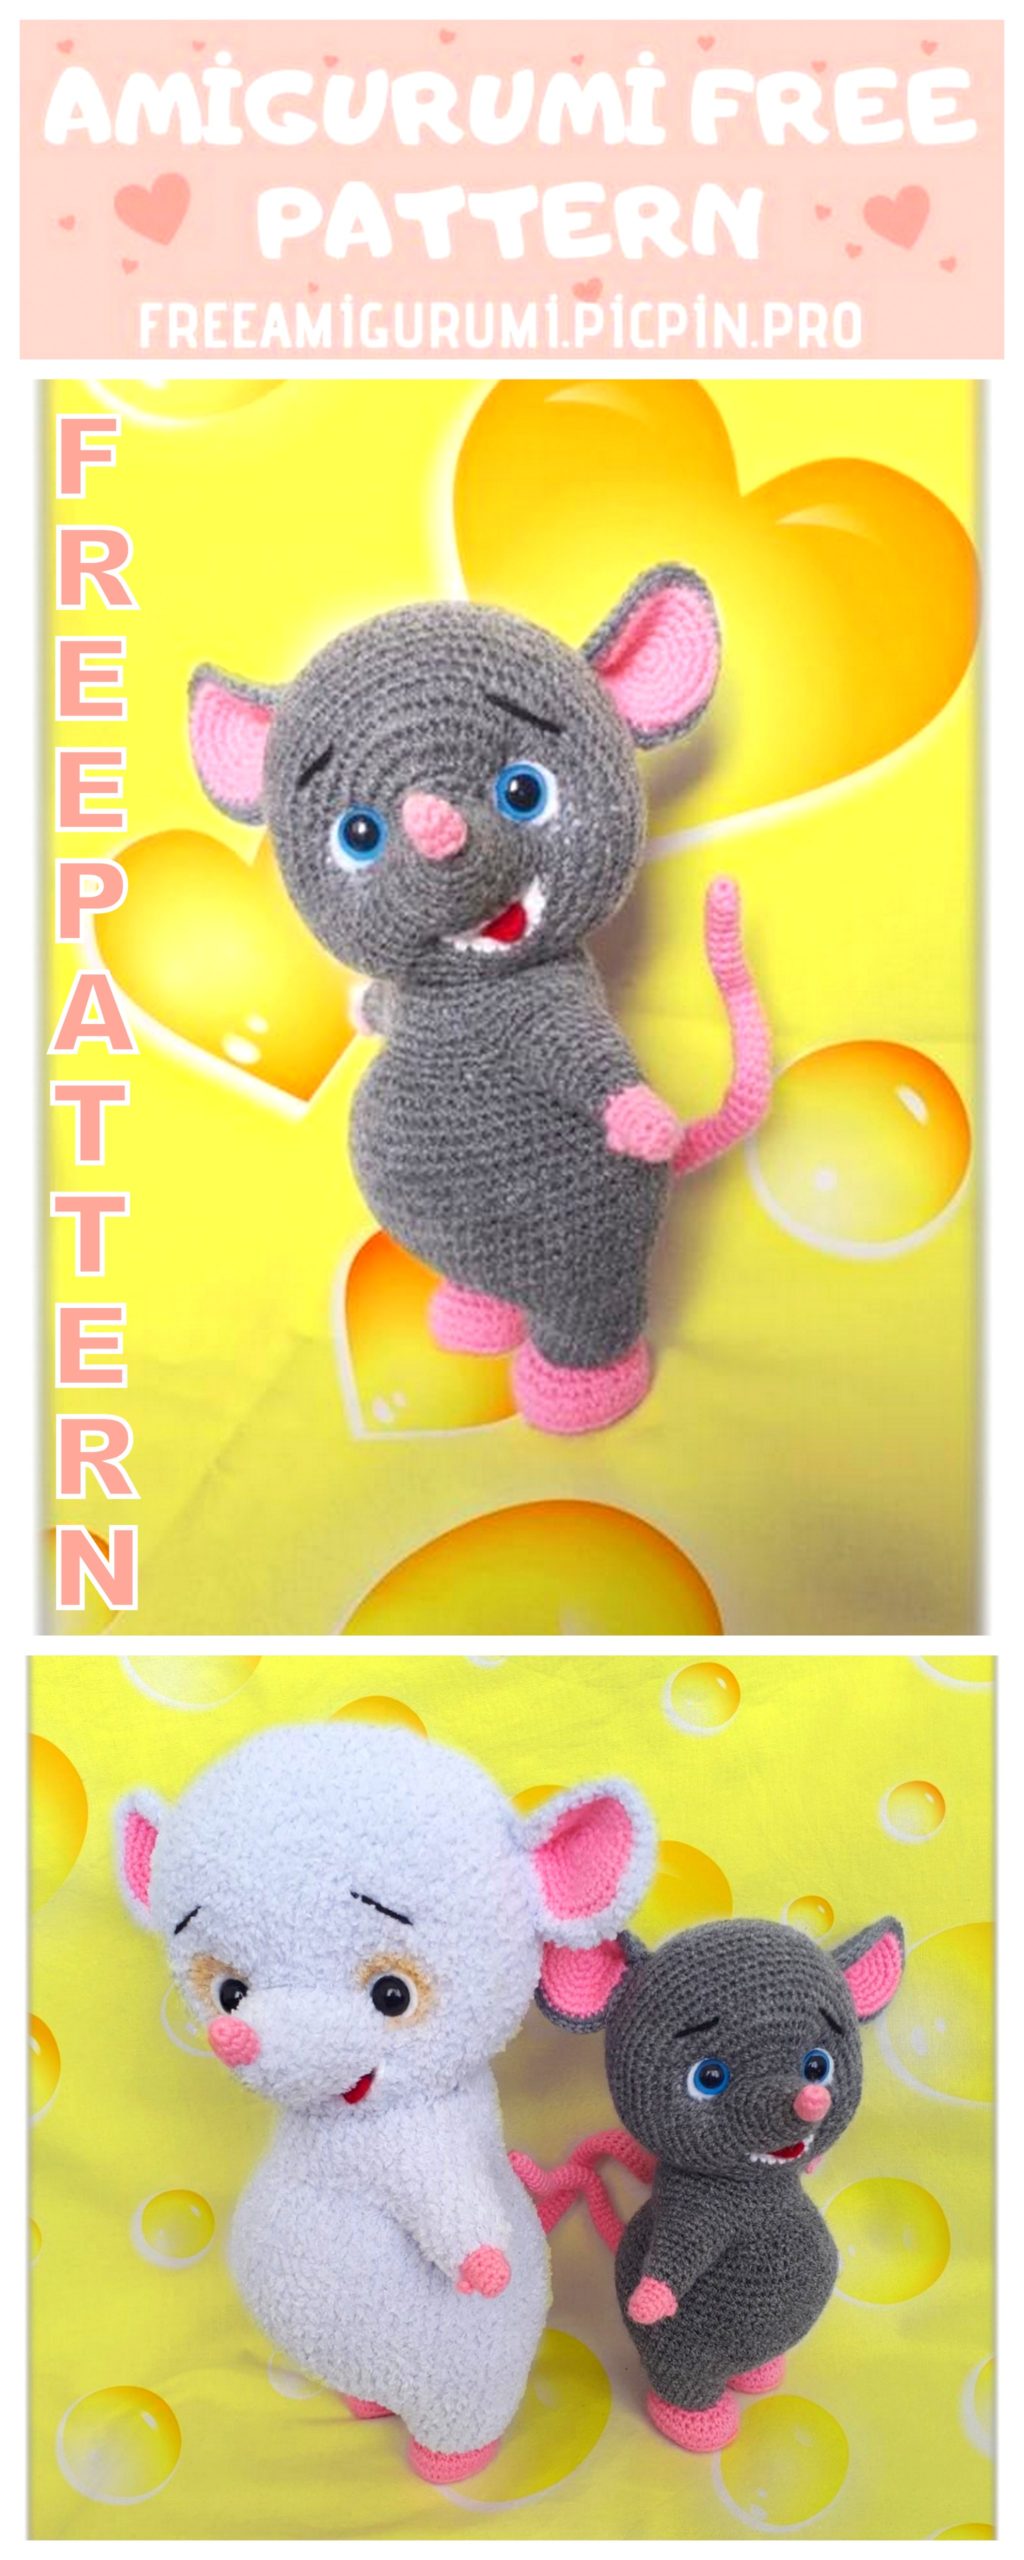
Amigurumi Little Cute Mouse Free Crochet Pattern
Welcome to our website where you can find the most beautiful and highest quality samples of Amigurumi patterns. All the amigurumi patterns you can’t find are available on our website. Every day we continue to share new amigurumi patterns for you. Stay tuned to reach these amigurumi patterns before anyone else
Term Used:
slst – slip stitch
ch – chain
sc – single crochet
inc – increase
dec – decrease
t-dec : double decrease (three loops together)
Material List
1. YarnArt SuperPerlee (acrylic 100%, 100g-400m) gray, pink
color, a little red for the tongue, white for the mouth.
2. Eyes are sewn. For the declared yarn, the diameter is 13mm. (Having
certain experience, you can use eyes on a secure mount)
3. White felt for eyes
4. Durable thread and long needle for tightening
5. Hook number 1.5
6. Neck mount. I used a cotter pin, I
I needed drives with a diameter of 40 mm.
7. Plastic for insoles in paws
8. Well, that’s it! How little is necessary for happiness, yes ?!

Upper paws.
The marker in this part can not be aligned, but in the end
look to get this: – on the left foot the end of the last
a row on the same level with the PSU (thumb)
– on the right foot, the end of the last row in the middle of the outer side.
If necessary, either knit an extra column or
dissolve.
1. Dial a chain of 4 CH in pink: 2 sc, 3sc into the last loop,
sc, inc (8)
2. – 4p (3 rows) 8 sc
Left foot
5. In this row we knit the thumb (BP). We put the hook in the loop
pull the working thread and dial 4CH, then enter the hook into
the same loop and knit a regular column without
Nakida: BP, 7 sc (8) Change the thread to gray.
6. (Sc, inc) * 4 (12)
7.-9 p (3 rows) 12 sc
10. (inc, 5sc) * 2 (14)
11.-12p (2 rows) 14 sc
13. (inc, 6 sc) * 2 (16)
14.– 15p (2 rows) 16 sc. Thread cut, fasten
Right foot
5. In this row we knit the thumb (BP). We put the hook in the loop
pull the working thread and dial 4CH, then enter the hook into
the same loop and knit a regular single crochet: 3 sc, PSU, 4 sc (8)
change thread
6. (sc, inc) * 4 (12)
7. -9 (3 rows) 12 sc
10. (5 sc, inc) * 2 (14)
11.-12 (2 rows) 14 sc
13. (6 sc, inc) * 2 (16)
14.-15r (2 rows) 16 sc. Thread cut, fasten
Lower paws
The marker of this part runs in the middle of the back of the legs. AT
align the process if necessary.
1. Dial a chain of 6CH in pink: inc, 3 sc, 4 sc to the last
loop, 3 sc, inc, (14)
2. Sc, inc, 3 sc, inc * 4, 3 sc, inc, sc (20)
3. İnc, sc, inc, 3 sc, (inc, sc) * 4, inc, 2 sc, inc, sc, inc (29)
4. Sc, inc, 2 sc, inc, 3 sc, (inc, 2 sc) * 4, inc, 3 sc, inc, 2 sc, inc, sc (38)
5.38 sc for the back half loop. At this stage, we cut out the shape of the foot from plastic.
We put it in the foot at your convenience.
6. Sc, dec, 7 sc, (dec, 2 sc) * 4, dec, 7 sc, dec, sc (31)
7. Dec, 3 sc, dec, sc, (dec, sc) * 4, dec, sc, dec, 4 sc, dec (22)
8.2 sc, dec, 2 sc, dec * 5, 1 sc, dec, sc, dec (14)
Left foot
9. Attach the gray thread: 14 sc per
front half loop.
10. (inc, 2 sc) * 2, inc, 6 sc, inc (18)
11. (inc, 2 sc) * 2, inc, 11 sc (21)
12. (3 sc, inc) * 3, 9 sc (24)
13.24 sc.
14.18 sc. We cut the thread, fasten
Right foot
9. Attach the gray thread: 14 sc for the front half loop
10. İnc, 6 sc, inc, (2 sc, inc) * 2 (18)
11.11 sc, inc, (2 sc, inc) * 2 (21)
12.9 sc, (3 sc, inc) * 3 (24)
13.-14p 24 sc.
Knit another 5 sc. Do not cut the thread, continue knitting.
Body
The marker runs in the middle of the back. In the process of knitting
align.
1.3CH, on the left foot 24 sc, on a chain of CH
inc * 3, 24 sc, on the other side of the CH chain
inc * 2 (58) Put the marker here. Goes through
mid back, knitting
we unearth.
2. İnc in the last half loop of the CH chain, 56 sc.
Transfer marker. (59)
3. 59 sc
4. 58 sc, inc (60)
5. 60 sc
6. (9 sc, inc) * 6 (66)
7.5 sc, inc, (10 sc, inc) * 5, 5 sc (72)
8 – 13 (6 rows) 72 sc
14. 56 sc, dec, (4 sc, dec) * 2, 2 sc (69)
15.2 sc, dec, (4 sc, dec) * 2, 53 sc (66)
16.50 sc, (3 sc, dec) * 3, sc (63)
17.2 sc, dec, (3 sc, dec) * 2, 49 sc (60)
it’s convenient here to fill the legs
filler, tight so that clearly
their puffiness loomed.
18. 48 sc, (dec, 2 sc) * 3 (57)
19. (2 sc, dec) * 3, 45 sc (54)
20. 16 sc, dec, (2 sc, dec) * 5, 16 sc (48)
21. İnc, 4 sc, inc, 6 sc on the left hand (count
on the foot along the knitting 5 sc, and insert the hook
through the 6th loop of the foot and body at the same time), sc,
dec, (2 sc, dec) * 5, sc, 6 sc on the right foot
(countdown similar to left), inc, 5 sc (45) In this row I knit
loop offset to align the marker.
22. 6 sc, inc, 10 sc on the free loops of the left foot, (sc, dec) * 6, 10 sc on
right foot free loops, inc, 6 sc, inc (50)
23.– 24 p (2 rows) 50 sc. At this stage, we fill the body with the filler,
distributing it especially on the ass and belly.
25. 13 sc, dec, 20 sc, dec, 13 sc (48)
26. 12 sc, T-dec, 3sc, dec, 8 sc, dec, 3 sc, T-dec, 12 sc (42)
27. (5 sc, dec) * 6 (36)
28.36 sc. We measure the diameter of the hole for mounting. I have a drive
40mm diameter.
29.2sc, dec, (4 sc, dec) * 5, 2 sc (30) We fill the body with filler to the end,
especially paying attention to the shoulders. Put the filler more tightly
in the area of double decreases in the shoulders. This will form a beautiful line. Throughout
the foot is tight it’s not worth typing, otherwise it will turn out just a thick sausage.
We insert the mount.
30. (3 sc, dec) * 6 (24)
31. Sc, dec, (2 sc, dec) * 5, sc (18)
32. (sc, dec) * 6 (12)
33.Dec * 6
Cut the thread, fasten.
HEAD
A head marker runs in the middle of the chin.
1.6 sc into magic ring
2.6 sc
3. İnc * 6 (12)
4. -5 (2 rows) 12 sc
6. (sc, inc) * 6 (18)
7. (5 sc, inc) * 3 (21)
8.21 sc
9. (6 sc, inc) * 3 (24)
10.16 sc, (inc, 3 sc) * 2 (26)
11. (inc, 3 sc) * 2, 18 sc (28) Here I recommend aligning the marker.
12.8 CH, 6 sc skip, inc, 3 sc, inc * 8, 3 sc, inc, 6 sc. (40)
13.8 sc in the chain of CH, (inc, sc) * 2, inc, (sc, inc) * 10, 7 sc (53)
14. 3 sc, dec, sc, dec, (inc, 2 sc) * 2, 24 sc, (2 sc, inc) * 2, dec, 7 sc (54)
15.13 sc, inc * 2, 26 sc, inc * 2, 11 sc (58)
16. 12 sc, inc * 2, 26 sc, inc * 2, sc, inc, 12 (64)
17. (2 sc, inc) * 5, 5 sc, inc, (10 sc, inc) * 2, 5 sc, (inc, 2 sc) * 5, inc (78)
At this stage, we knit a mouth. Attach a white thread to the first
CH and then we knit:
1. In the corner of the mouth 2 sc, 6 sc on the missed
hinges, 2 sc in a corner, 8 sc in a chain from CH (18)
2.18 sc
3. (dec, sc) * 6 (12)
4. Dec * 6. Fasten the thread and
crop. Rotate the mouth
inside the head.
We continue to knit a head.
18.– 29 (12 rows) 78 sc (After knitting 4 rows, put a marker for
fastenings. If you have a plastic joint, then in the 4th row we knit 76 sc, 2CH.
Fifth row: 2CH, 76 sc. Further description unchanged)
30. (11 sc, dec) * 6 (72)
31.5 sc, dec, (10 sc, dec) * 5, 5 sc (66)
32. (9 sc, dec) * 6 (60)
33.4 sc, dec, (8 sc, dec) * 5, 4 sc (54)
34. (7 sc, dec) * 6 (48)
35. 3 sc, dec, (6 sc, dec) * 5, 3 sc (42) At this stage, we attach the head to
the body, spinning the cotter pin. See that the mouth was a little sideways .-
Those who use eyes on safe
fastening, I recommend fixing them now,
then it will be problematic. Fasten
approximately in the 12th row, approximate
distance between eyes 12 columns. But
look carefully, each has an eye size
different, knitting density too. Landmark i
I give an approximate. Do not forget under the eyes
put a white felt for eye proteins more. Because the true look of the face
will be visible only after tightening. And much
it’s easier then just to cut off the excess felt.
If you have sewn eyes, then the data
manipulation is not for you.
36. (5 sc, dec) * 6 (36)
37.2 sc, dec (4 sc, dec) * 5, 2 sc (30)
38. (3 sc, dec) * 6 (24) We stuff our head
filler. Especially the cheeks and forehead. Rotik
hold with your finger so that it stays
inside.
39. Sc, dec (2 sc, dec) * 5, sc (18)
40. (sc, dec) * 6 (12)
41. Dec * 6. Fasten and cut the thread.
Here is the next stage. The photo shows a variant of a rat with
eyes on a secure mount. Fasting ducks you will immediately see where
It’s worth cutting off excess felt. For now, leave it like that.
EARS
Knit 2 pieces in pink
1.6 sc into magic ring
2. İnc * 6 (12)
3. (sc, inc) * 6 (18)
4. Sc, inc (2 sc, inc) * 5, sc (24)
5. (3 sc, inc) * 6 (30)
6. 2 sc, inc (4 sc, inc) * 5, 2 sc, SL-ST (36) Cut and fasten the thread.
We knit in the same way 2 details of gray color, but
after knitting 6 rows, we do not cut the thread.
We attach the gray part and the pink
the wrong side to each other and tie
them together.
7. (5 sc, inc) * 6 (42)
8. Making the harness
SL-ST in a circle. A thread
crop leaving
long end
for sewing.
Fold edge
abalone in half and
to make a couple of stitches left thread.
NOSE
1. Pink 6 sc into magic ring. Received
the end of the thread after tightening into the ring does not
cut, and lay along the knitting.
2. İnc * 6 (12)
Depending on the size of your toy,
you may need to knit another
one additional row. Knit it like this:
(2 sc, dec) * 3
Strongly pull on the thread laid along the knitting, tightening the row
as tight as possible. We put the resulting part on the tip of the nose of the head and
sew on.
TAIL
1.6 sc into magic ring
2. -14 (13 rows) 6 sc
15. İnc, 5 sc (7)
16.-29 (14 rows) 7sc
30.İnc, 6 sc (8)
31.-40 (10 rows) 8 sc.
Thread cut, leaving the end for
sewing on. Optionally
insert a thin wire inside.
LANGUAGE
In red, dial the chain of 4CH: from the second loop from the hook of the SL-ST,
sc, 4 sc to the last loop, on the other side of the chain: sc, SL-ST. A thread
trim, leaving an end for sewing.
Sew a tongue deep into the mouth (to the last row with decreases) literally
one stitch. And hide the end of the thread
inside the head.
Muzzle Design
Here are two head options for example:
eyes on a secure mount and weights will do with them already.
Difficult, but possible. On the left head I will use
sewn eyes, i.e. it will be easier here. First a tightening, then already
we sew eyes.
The photo on the left shows the places where you should make a weight loss.
Unless otherwise indicated, I always insert a needle and thread into the base of the neck.
(even along the edge of the mount so that no further traces are visible
shorts).
We drive the needle with the thread into the corner of the mouth and grab 1 loop.
We withdraw from one side of the nose, lay the thread on top
webs and insert the needle on the other side of the nose (in my case 4
loops are enough). We withdraw the needle in another corner of the mouth and also
behind grab one loop. Pull up. We fix the ends of the threads and hide
inside the head.
We make eye shadow marked in black on the photo.
We introduce a needle with a thread at the base of the neck, output in the outer corner of the eye,
insert the needle into the inner corner of the eye (thread over the canvas), display
thread in the inner corner of the other eye and insert into the outer corner of the eye,
leading the thread to the original point at the base of the neck. Pull up as
can be stronger!
In the same way, make the weight marked in the photo
in red. Tighten up!
I repeated each of these 3 times so that the result was
perfect. Do not be lazy, do the same and the result will please you!
After you finish with the pulls, sew the eyes and ears there,
where it seems to you most successfully!
Sew tail and tongue.
Correct, if necessary, felt around the eyes and embroider the eyebrows.
Since I am not a fan of clothing on animals, then it will not be on Pukhlik.
Yes Yes! Even despite the fashion. In my opinion, clothes can hide
all the charms of a rat. This chubby little rat! The maximum that I see on
This cute creature is a scarf. Soft, New Year scarf! Therefore,
needlewomen, do not blame me, but there will be no clothes. She is completely yours
discretion if someone sees Pukhlik differently. All in your hands.
So the master class came to an end. Personally, I’m sorry … But! When something
ends, something new must begin. Therefore I am not with you
I say goodbye and hope to see you in my next master class.
I hope knitting is easy and the result makes you smile.