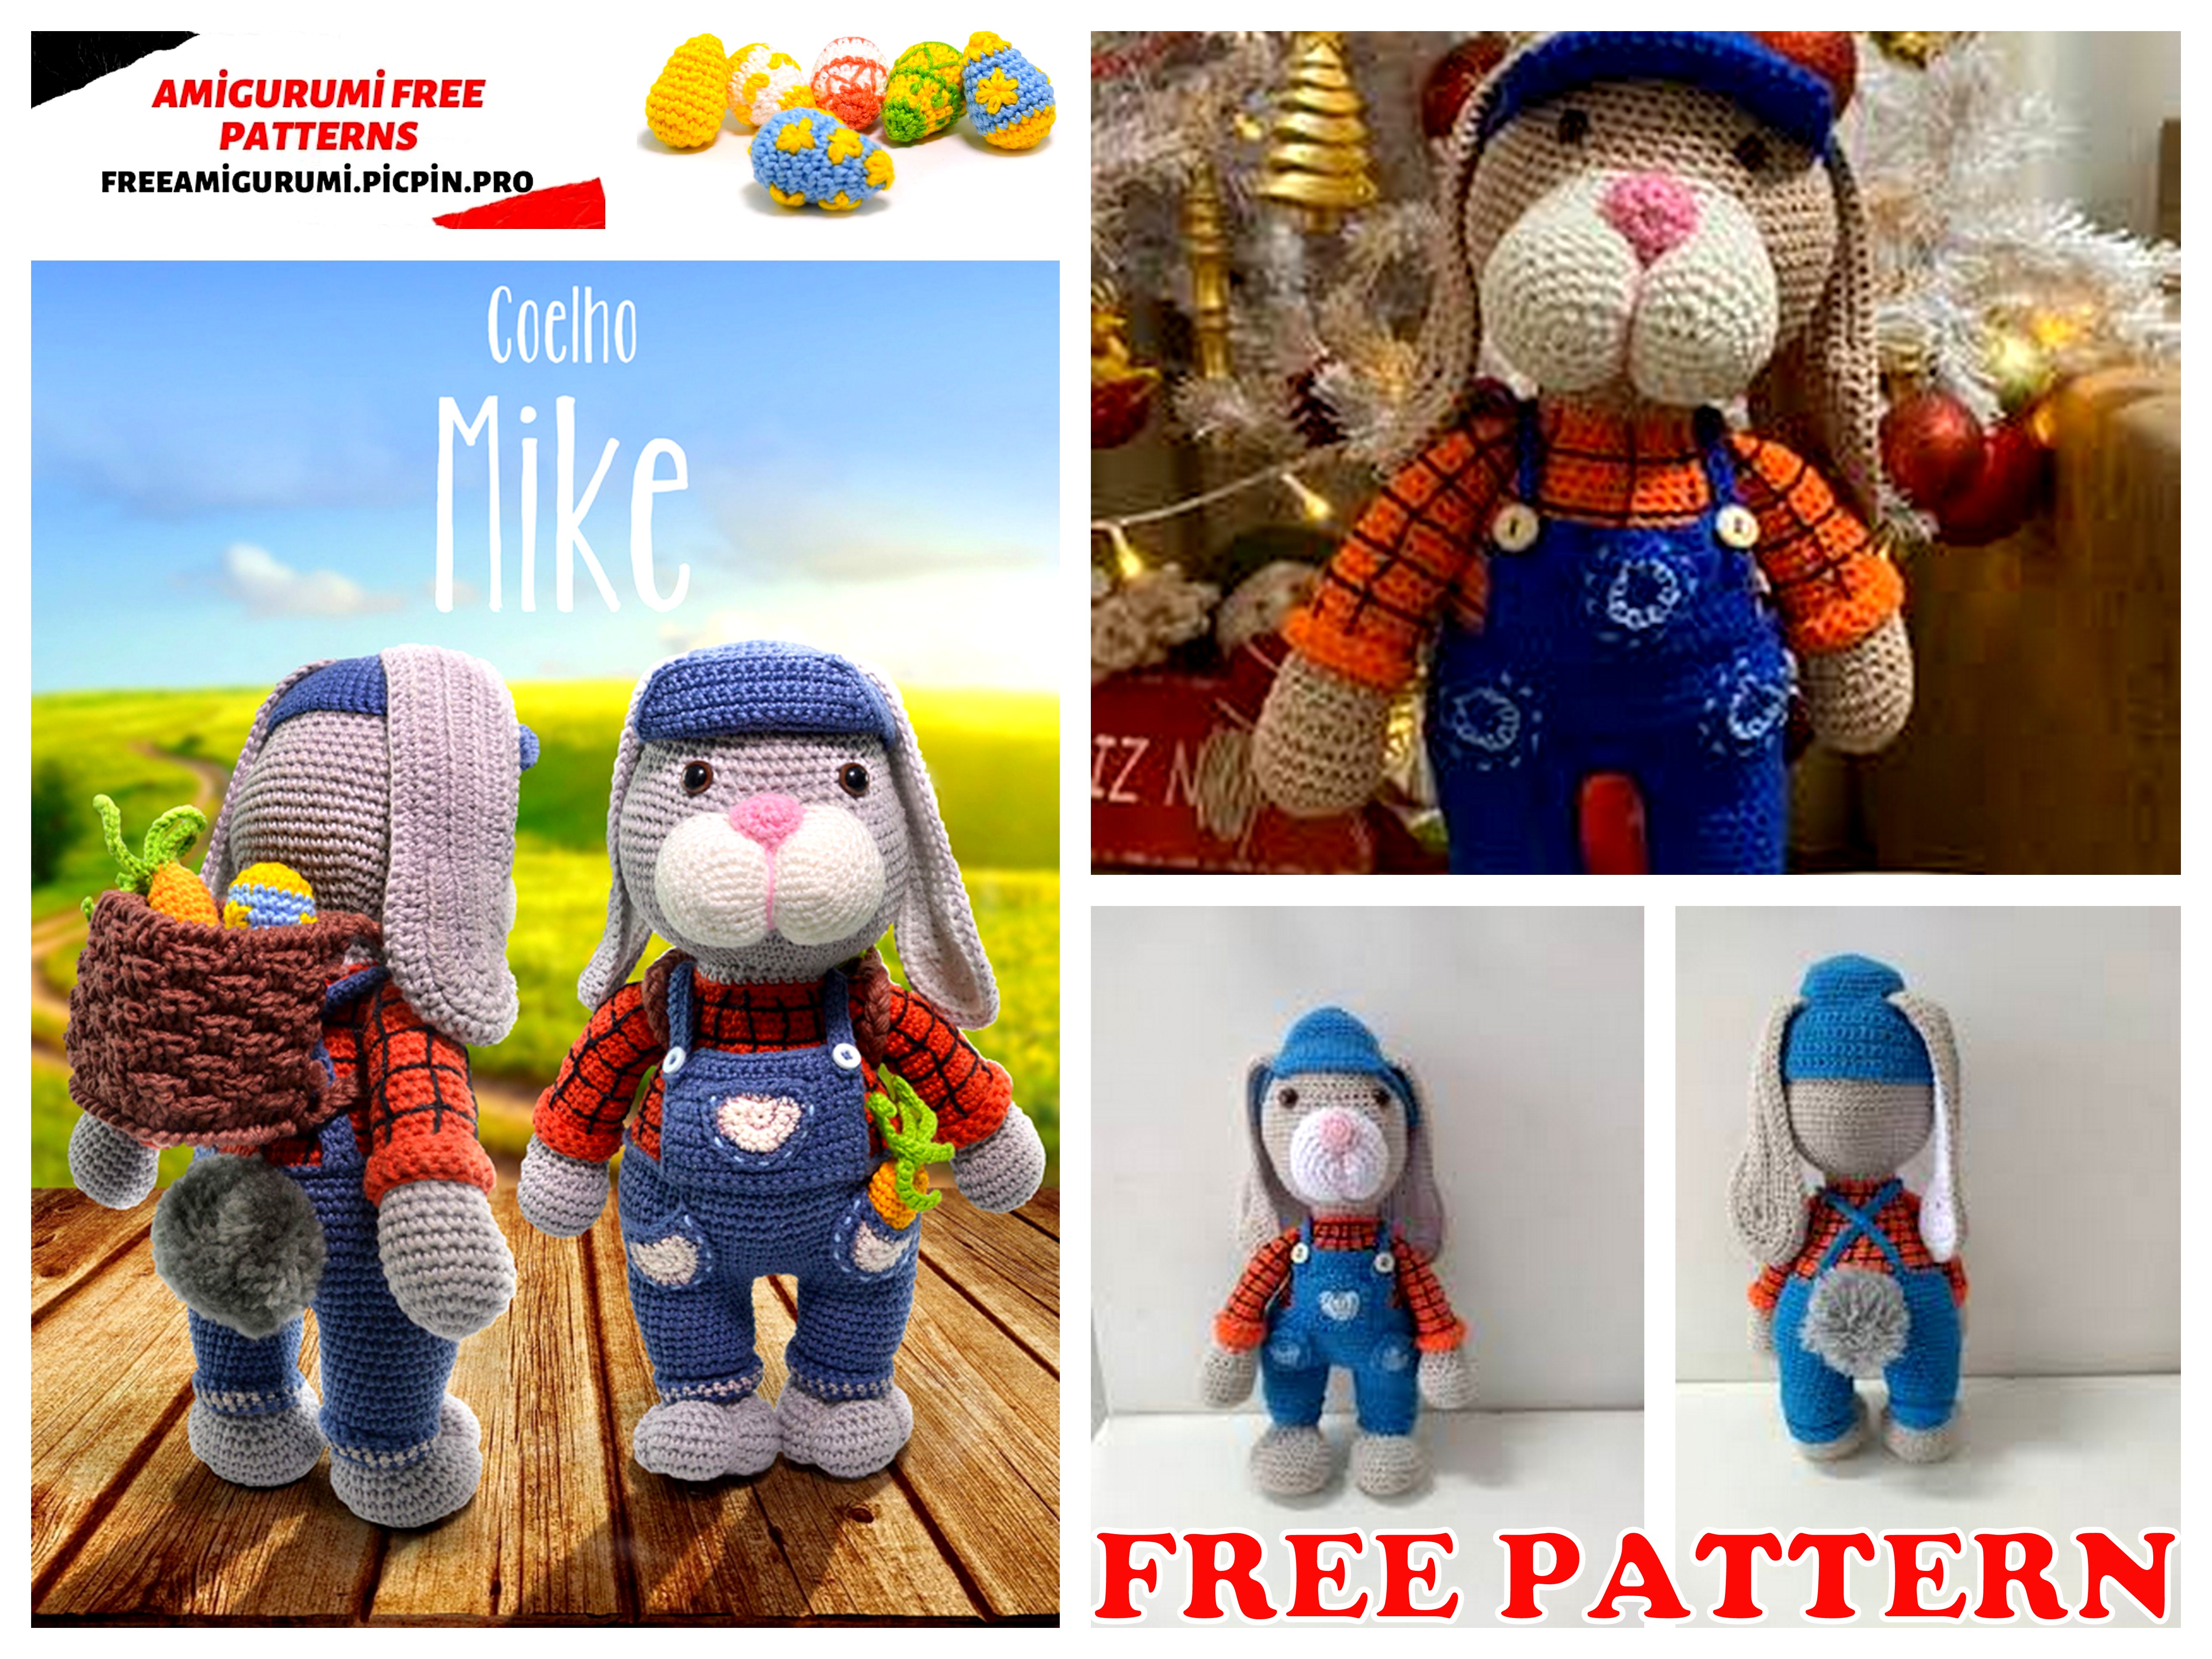
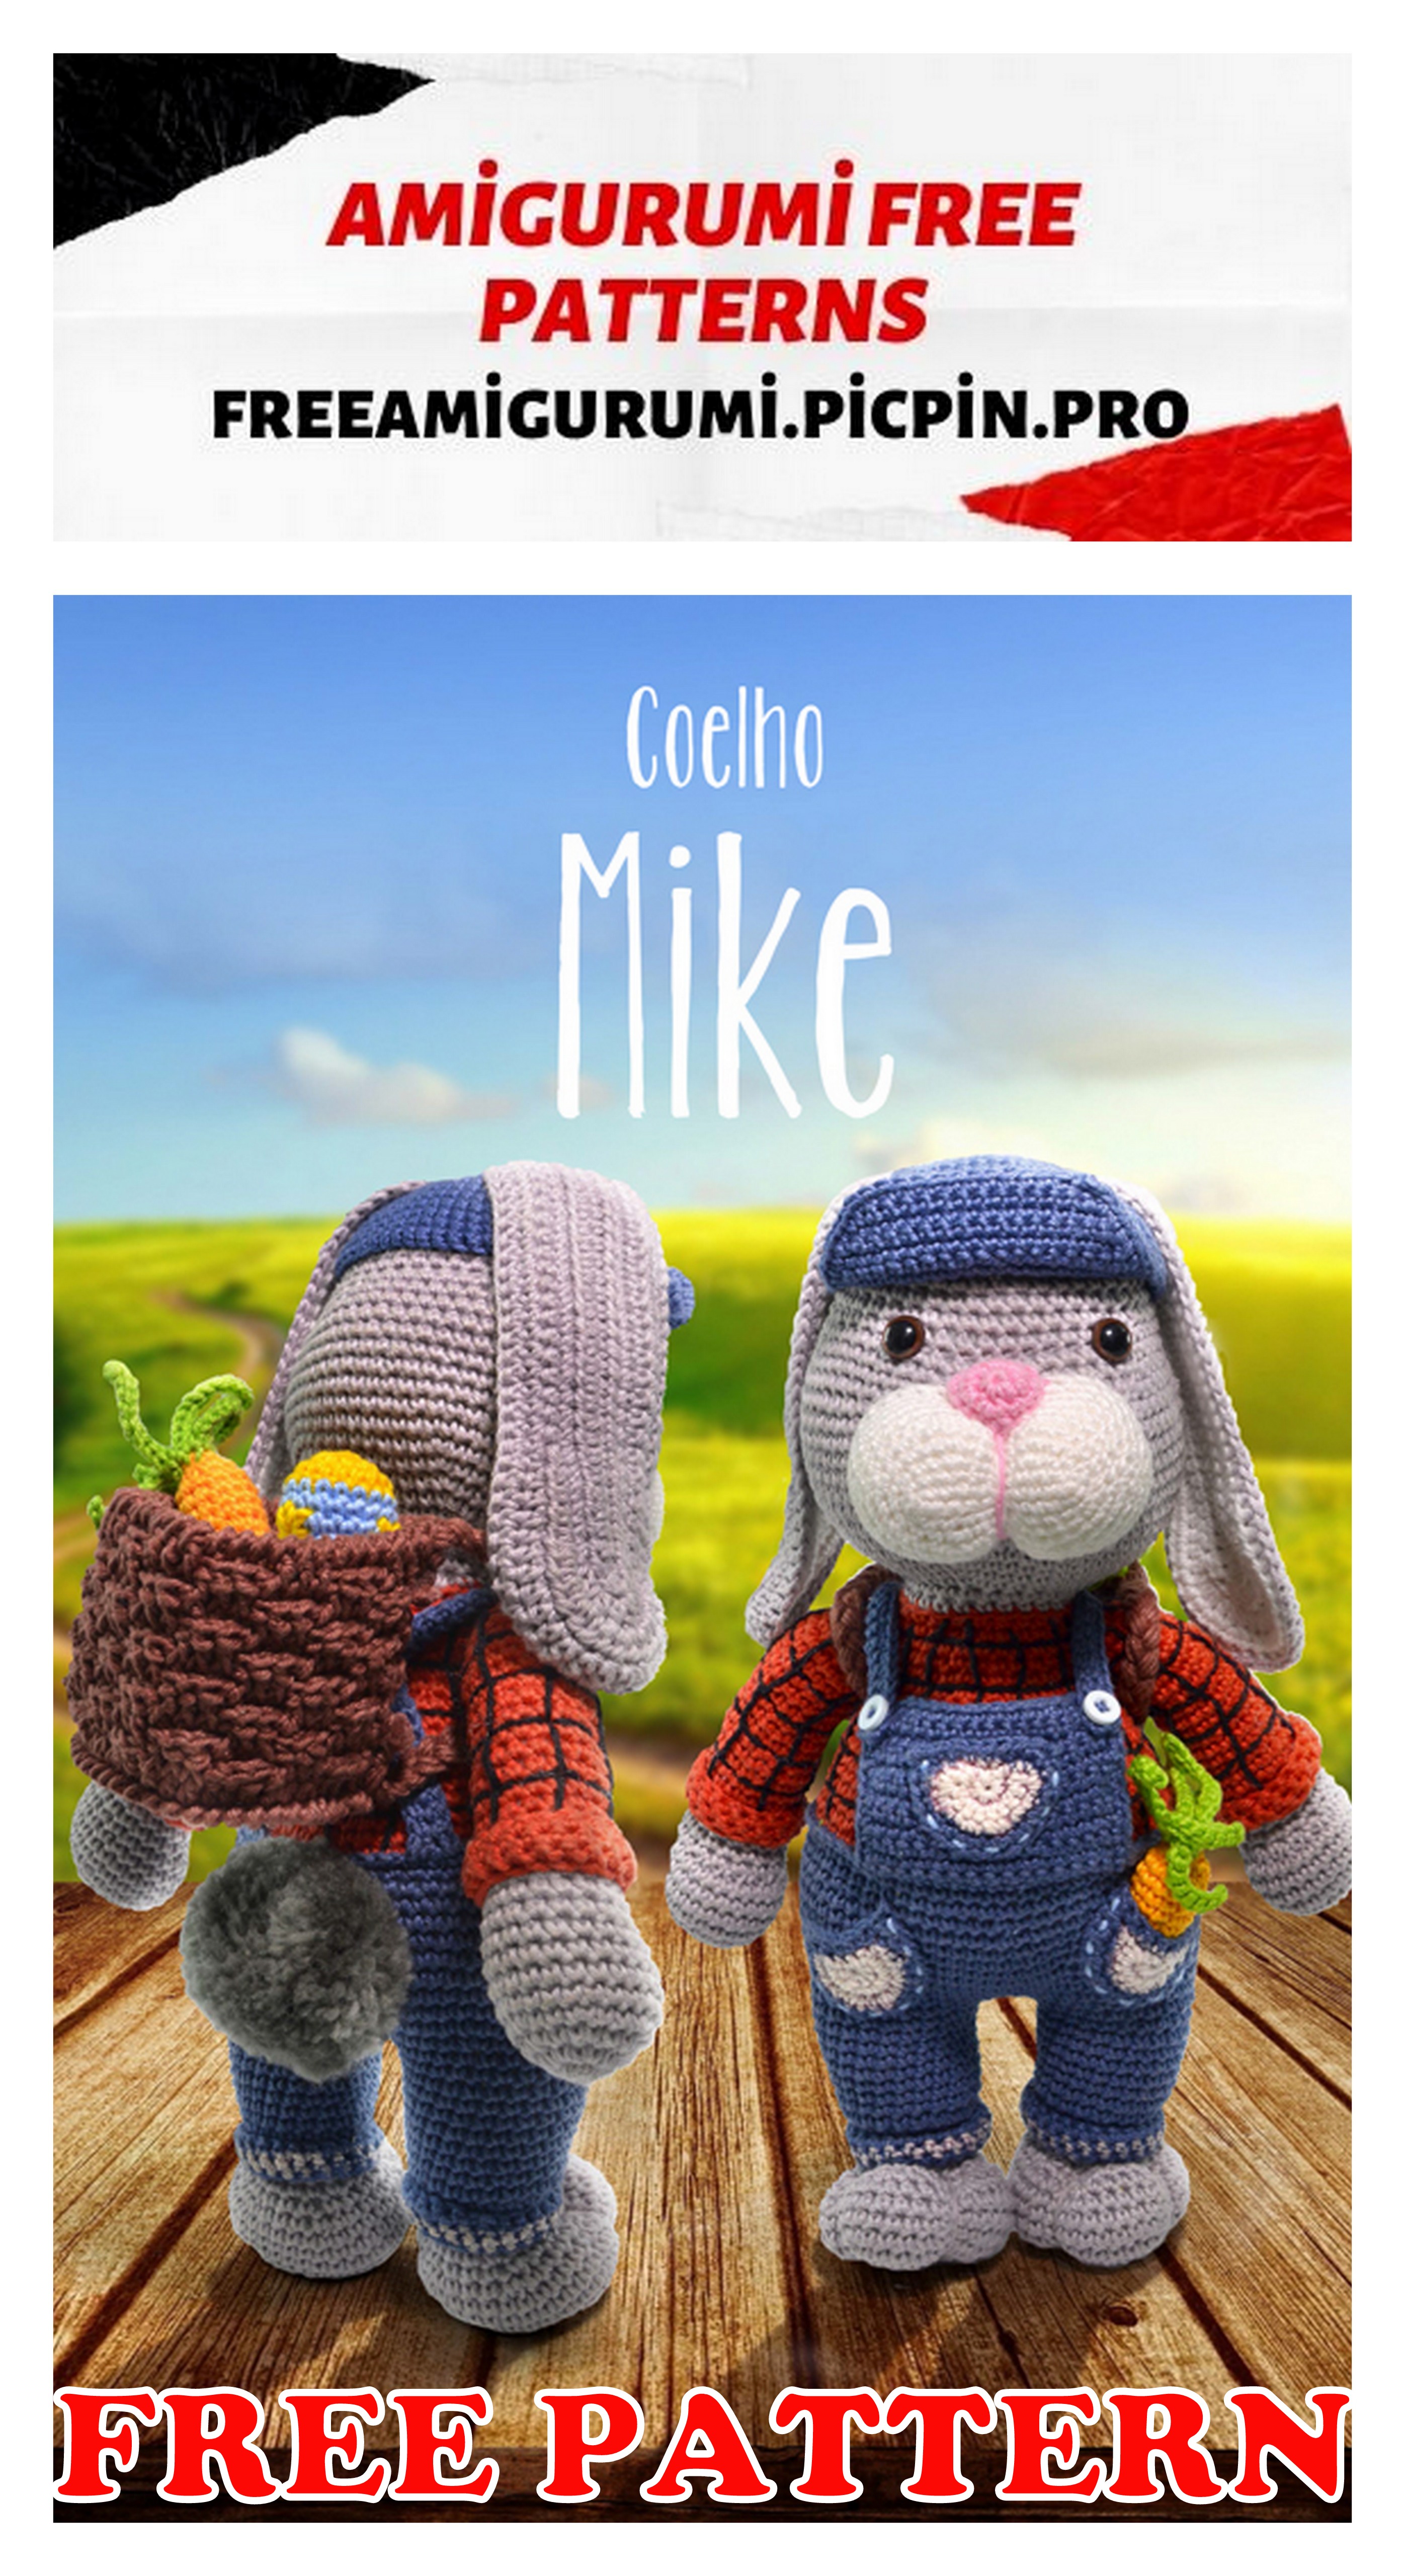
Amigurumi Easter Bunny And Egg Free Crochet Pattern
Welcome to our website where you can find the most beautiful and highest quality samples of Amigurumi patterns. All the amigurumi patterns you can’t find are available on our website. Every day we continue to share new amigurumi patterns for you. Stay tuned to reach these amigurumi patterns before anyone else
Abbreviations:
Sc – single crochet,
inc – increase,
Dec – decrease
Hdc – half crochet
CH – chain
Material used:
– Amigurumi Line from Círculo: 8008 (Quarry), 2931 (blue nautical), 3583 (cherry), 8990 (black), 8001 (white), 3131 (pink gum), 7567 (cocoa), 2137 (Blue hydrangea), 4146 (yolk), 5203 (greenery), 1289 (canary), 4456 (orange).
– Mollet Wool: Color 0700
– Crochet Needle 2mm
– Tapestry Needle nº16
– 1 pair of eyes for 12mm brown Amigurumi
– Two blue buttons 0.5 cm in diameter.
– 5.5 pattern of the kit makes pompom circle
– Resin Harden for Crochet
– Sanitary water
– Flexible stem with cotton
– Acrylic Fiber for Filling
Size: 30cm
Execution
Foot / Legs 2x
Start with wire 8008 (quarry)
1 row – 6sc in the magic ring = 6sc
2 row – İnc 6x = 12sc
3 row – 1sc 1inc 6x = 18sc
4 row – 2sc 1 inc 6x = 24sc
5 row – 3sc 1 inc 6x = 30sc
6 row – 4sc 1 inc 6x = 36 sc
7 to 9 row – 1sc over each sc 36x = 36sc
10 row – 4sc 1 dec 6x = 30sc
11 row – 3sc 1 dec 6x = 24sc
12 row – (1 dec 6x) 1sc over each sc 12x = 18sc
13 row – (1 dec 3x) 1sc over each sc 12x 12x = 15sc
14 row – 1sc over each sc 15x = 15sc
Change to wire 2931 (blue nautical)
15 row – 2sc 1 inc 5x = 20sc
16 row – Work only the back handle of each sc 4sc 1 inc 4x = 24sc
17 to 24 row 1sc About each sc 24x = 24sc
Finish off the first leg, and on the second, make 3 ch fasten on the first leg with sc so that the part that got bigger after the decreases is facing forward.
With the help of a tapestry needle No. 16 and thread 8008 (quarry), divide the little toes of the Rabbit, passing the thread from the bottom of the foot from row 2 and passing over to row 11. Make two scratches with approximately 6 sc between them.
Body
Start with 2931 thread (blue nautical)
25 row – 1sc over each sc 24x. (1sc on each 3x tea) 1sc on each sc 24x (Work the other side of tea 1sc on each 3x tea) = 54sc
26 row – 1sc over each sc 54x = 54sc
27 row – 8sc 1 inc 6x = 60sc
28 row – 9sc 1 inc 6x = 66sc
29 to 34 row – 1sc over each sc 66x = 66sc
35 row – 9sc 1 dec 6x = 60sc
36 and 37 – 1sc over each sc 60x = 60sc
Change to wire 3583 (cherry)
38 row – Work only the handle inside each sc 1sc over each sc 60x = 60sc
39 row – 8sc 1 dec 6x = 54sc
40 row – 1sc over each sc 54x = 54sc
41 row – 7sc 1dec 6x = 48sc
42 to 44 row – 1sc over each sc 48x = 48sc
45 row – 6sc 1 dec 6x = 42sc
46 and 47 row – 1sc over each sc 42x = 42sc
48 row – 5sc 1 dec 6x = 36sc
49 and 50 row – 1sc over each sc 36x = 36sc
51 row – 4sc 1 dec 6x = 30sc
52 and 53 row – 1sc over each sc 30x = 30sc
54 row – 3sc 1 dec 6x = 24sc
Switch to wire 8008 (quarry)
55 row – Work only the handle inside each sc 1sc over each sc 24x = 24sc
56 row – 1sc over each sc 24x = 24sc
57 row – Work only the front handle of each sc 3sc 1 inc 6x = 30sc
58 row – 4sc 1 inc 6x = 36sc
59 row – 5sc 1 inc 6x = 42sc
60 row – 6sc 1 inc 6x = 48 sc
61 row – 7sc 1 inc 6x = 54sc
62 row – 8sc 1 inc 6x = 60sc
63 row – 9sc 1 inc 6x = 66sc
64 to 71 row – 1sc over each sc 66x = 66sc
72 row – 9sc 1 dec 6x = 60sc
73 row – 8sc 1 dec 6x = 54sc
74 row – 7sc 1 dec 6x = 48sc
75 row – Work only the handle outside each sc 1sc over each sc 48x = 48sc
76 to 80 row – 1sc over each sc 48x = 48 sc
Place the eyes between row 75 and 76 approximately 8sc apart.
81 row – 6sc 1 dec 6x = 42sc
82 row – 5sc 1 dec 6x = 36sc
83 row – 4sc 1 dec 6x = 30sc
84 row – 3sc 1 dec 6x = 24sc
85 row – 2sc 1 dec 6x = 18sc
86 row – 1sc 1 dec 6x = 12sc
87 row – 1 Dec 6x = 6sc
Close with fake magic ring.
Finish.
amigurumi
2x pants bar
Start with 2931 thread (blue nautical)
Attach the thread to the last outside loop, from row 16 of the leg.
1 row – Work only the handle outside each sc 1sc over each sc 24x = 24sc
2 and 3 row – Work only the front handle of each sc 1sc over each sc 24x = 24sc
4 and 5 row – 1sc over each sc24x = 24sc
Fold the bar upwards.
Soak the flexible cotton swab in the bleach and pass all the way around the bar on row 3 and 4, giving the appearance of wear on the pants.
2x Arms
Start with wire 8008 (quarry)
1 row – 6sc in the magic ring = 6sc
2 row – İnc 6x = 12sc
3 row – 1sc 1inc 6x = 18sc
4 row – 2sc 1 inc 6x = 24sc
5 to 8 row – 1sc over each sc 24x = 24sc
9 row – (1 dec 6x) 1sc over each sc 12x = 18sc
10 and 11 row – 1sc over each sc 18x = 18sc
Change to wire 3583 (cherry)
12 row – 1sc over each sc 18x = 18sc
13 row – Work only the back handle of each sc 1sc over each sc 18x = 18sc
14 to 25 row 1sc over each sc 18x = 18sc
26 row 1sc 1 dec 6x = 12sc
27 to 29 row – 1sc about each sc 12x = 12sc
30 row – 1dec 6x = 6sc
Close with fake magic ring.
Finish and leave thread to sew.
With the help of a No. 16 tapestry needle, sew the arms on the side of the body between row 52 and 53 with approximately 12 sc of distance between each other. Sew by passing the thread under the fake magic ring that closed the arm and inside the little body. Do this until the seam is firm.
Finish.
With 8990 thread and tapestry needle No. 16, make the part that was woven with thread 3583 (cherry) of the body and arms vertical streaks with a space of 3 sc between each other.
Do this all the way around, then make horizontal streaks with the 3 row space between them, thus giving the bunny the appearance of wearing a plaid shirt.
Finish.
2x shirt hem
Start with 3583 cord (cherry)
Attach the wire to the outside row 13 handle of the arm at the last sc
1 row – Work only the handle outside each sc 1sc over each sc 18x = 18sc
2 row – 1sc over each sc 18x = 18sc
3 row – Work only the handle outside each sc 1sc over each sc 18x = 18sc
4 and 5 row – 1sc over each sc 18x = 18sc
Finish.
Fold the hem of the shirt upwards.
Front of overalls
Start wired 2931 (blue nautical)
Mark sc that is right in the center of the rabbit’s tummy in row 38, and count 8 sc for each side so that there is a space of 16 sc where the front of the jumpsuit will be woven, attach the thread to the first sc of this marking.
1 row – Work only the handle outside each sc 1sc over each sc 16x = 16sc
2 to 12 – 1sc over each sc 16x = 16 sc
To finish, make 1sc on each gap between a row and another on the front side of the suit, and then 1sc on each sc 44x, go up the other side of the suit doing the same thing you did on the other side 1sc in the gaps between one row and another .
Finish.
2x jumpsuit strap
Start wired 2931 (blue nautical)
Count 14 sc backwards from the sides of the suit and secure the thread to the 15th sc
1 row – 36 Ch
2 row – Start on the second ch 1sc over each ch 35x = 35sc
Fasten with sl st in row again
Finish.
Cross the two straps on the back and attach them to the front of the jumpsuit with the help of a tapestry needle with 2931 thread (blue nautical) and buttons.
Finish.
3x Pockets
Start with 2931 thread (blue nautical)
Do not close the magic ring work in half moon, with each new row make 1 ch and turn the work.
1 row – 6sc inside the magic ring = 6sc
2 row – 1 İnc 6x = 12sc
3 row – 1sc 1 inc 6x = 18sc
4 row – To finish the pockets, make 1 sc between the spans of a row and another at the top of the piece when finished, continue doing 1 sc over each sc 18x until you reach the last sc
Finish and leave thread to sew.
With the help of a # 16 tapestry needle, sew the pockets, one on each side of the rabbit’s legs at the front between row 25 and 35 with approximately 11sc of distance between them, sew the third pocket on the front of the jumpsuit between row 4 and 10. Sew the pockets taking only the strap outside each sc Passing the thread over the pocket strap and inside the body, do not sew the top so that the pockets are open.
When finishing the sewing with the help of a tapestry needle nº 16 and thread 2137 (Blue hydrangea), make at the edges of the scratchy pockets passing over one sc yes another sc Do not make these scratches at the top of the pockets.
To “wash” the pockets, soak the swab in the bleach and pass over the rows 1,2,3, being careful not to drip on any other part of the piece.
publicity
Tail
Start with 0700 mollet wire (aluminum)
Use the 5.5 cm template of the Kit Faz Pompom Círculo, to make a pompom with the mollet 0700 yarn, and with universal glue for Circle crafts, glue the tail on the rabbit’s butt between row 31 and 33.
Snout
Start wired 8001 (white)
1 row – 13 Ch
2 row – Start on the second ch 1sc on each 12x ch. Work the other side of the 1sc ch on each 12x = 24sc ch
3 row – 1sc over each sc 24x = 24sc
4 row – 3sc 1 inc 6x = 30sc
5 row – 4sc 1 inc 6x = 36sc
6 row – 5sc 1 inc 6x = 42sc
7 to 11 row – 1sc over each sc 42x = 42sc
Finish and leave thread to sew.
With the help of a No. 16 tapestry needle, sew the 1row muzzle below the eyes, so that the muzzle is centered in relation to them. Sew by passing the thread over the sc of the muzzle and inside the face. To make the muzzle filling easier, when 3 or 4sc is missing to finish the seam, place the filling until the muzzle is fluffy.
Finish.
Nose
Start with 3131 thread (pink gum)
1 row – 6sc inside the magic ring = 6sc
2 row – 1sc 1 inc 6x = 12sc
3 row – 1sc over each sc 12x 12x = 12sc
Finish and leave a long thread to sew and mark the muzzle.
With the help of a No. 16 tapestry needle, sew the nose between rows 7 and 11 at the top of the muzzle, sew the nose by passing the thread over the nose sc and inside the muzzle until you have sewed all the sc From the nose , still with the 3131 thread (pink gum) make a streak that comes out of the tip of the nose and goes to the bottom of the snout. Pass the needle inside and get out again on the tip of the nose. Repeat the process and pull the wire tightly, so that the center of the snout is well marked.
Finish.
4x ears
Make two parts with wire 8001 (white) to be the inner part of the ear and two with wire 8008 (quarry) to be the outer part.
1 row – 28 Ch
2 row – Start on the third ch 1hdc over each 25x ch. (4hdc on the same 1x ch) work the other side of the 1hdc ch on each 25x ch. = 54hdc
3 row – Make 1 tea and turn the work. 1sc on each 25x hdc. (1 inc in 4x hdc) 1sc over each 25x hdc = 58sc
4 row – Make 1 tea and turn the work. 1sc over each 20x sc. (1hdc on each 5x sc) 1 inc in hdc on each 8x sc, (1hdc on each 5x sc). 1sc over each sc 20x = 66sc
5 row – Make 1 tea and turn the work. 1sc on each sc 20x (1hdc on each sc 26x) 1sc on each sc 20x = 66sc
Join the two parts of the ear using wire 8008 (quarry) making 1sc over each sc 66x = 66sc around the ear, and 1 sc over each gap between a row and another in the part that was straight from the ear.
Finish and leave thread to sew.
With the help of a # 16 tapestry needle, sew the ears on the side of the rabbit’s head between rows 83 and 84 with approximately 16 sc of distance between each other in front and 3 sc of distance behind, with the gray part facing up and the white part down, it is important to respect this distance so that the cap fits snugly on the head.
Sew the ears by passing the thread over the sc of the ear and inside the head, sew only the straight part of the ears.
Finish.
Hat
Start with 2931 thread (blue nautical)
1 row – 6sc In the magic ring = 6sc
2 row – İnc 6x = 12sc
3 row – 1sc 1inc 6x = 18sc
4 row – 2sc 1 inc 6x = 24sc
5 row – 3sc 1 inc 6x = 30sc
6 row – 4sc 1 inc 6x = 36 sc
7 row – 1sc over each 4x sc. (go up 12 ch skip 7sc and fasten again in the row with 1sc 1x) 1sc over each sc 4x. (go up 12 ch skip 7sc and fasten again in the row with 1sc 1x) 1sc over each sc 12x = 46sc
8 row – 1sc on each sc 4x (1sc on each sc 12x) 1sc on each sc 5x (1sc on each 12x sc.) 1sc on each sc 13x = 46sc
9 row – (1 inc 1x) 1sc over each sc33x (1 inc 1 x) 1sc over each sc 11x = 48sc
10 row – 7sc 1 inc 6x = 54sc
11 row – 8sc 1 inc 6x = 60sc
12 to 14 row – 1sc on each sc 60x = 60sc 15 row – 1sc on each sc 5x. Do not work the rest of the row
Cap flap
Start with 2931 thread (blue nautical)
16 row – Make 1 tea and turn the work. Work only the handle off each sc 1sc over each sc 20x = 20sc
17 row – Make 1 tea and turn the work. 1sc over each sc 19x = 19 sc Do not work the last sc in the row
18 row – Make 1 tea and turn the work. 1sc over each sc 18x = 18 sc Do not work the last sc in the row
19 row – Make 1 tea and turn the work. 1sc over each sc 17x = 17 sc Do not work the last sc from row
20 row – Make 1 tea and turn the work. 1sc over each sc 16x = 16 sc Do not work the last sc in the row
21 row – Make 1 tea and turn the work. 1sc over each sc 15x = 15 sc Do not work the last sc in the row
22 row – Make 1 tea and turn the work. 1sc over each sc 14x = 14 sc Do not work the last sc in the row
23 car. – Make 1 tea and turn the work. 1sc over each sc 13x = 13 sc Do not work the last sc in the row
To finish the cap make 2sc within the last sc of row 23 and then 1sc between each span of a row and another on the side of the cap, make 2sc in the gap between row 15 and 16 that started the cap flap and then 1 sc over each sc 40x around the cap, when you reach the last sc in row 17 make 2 sc between the span of row 16 and 17, go up the side of the cap flap making 1 sc between each span of a row and another, when reaching the last sc of row 23 do 1 scx
Finish.
Put the cap on the bunny.
Basket
Start with thread 7567 (cocoa)
1 row – 6sc in the magic ring = 6sc
2 row – inc 6x = 12sc
3 row – 1sc 1inc 6x = 18sc
4 row – 2sc 1 inc 6x = 24sc
5 row – 3sc 1 inc 6x = 30sc
6 row – 4sc 1 inc 6x = 36 sc
7 row – 5sc 1 inc 6x = 42 sc
8 row – 6sc 1 inc 6x = 48sc
9 row – Work only the handle inside each sc, go up 3 ch and make 1dc over each sc 48x. = 48dc Close the row
10 to 17 row – Climb 3 ch Work in basketwork. 1dc over each 3x dc. caught by the back of the stitch and 1dc on each dc 3x caught by the front of the stitch. 8x = 48dc Close the row
18 row – 1p. crab (low point done backwards) on each dc 48x = 48p. crab.
Finish.
To finish the basket, attach the wire 7567 (cocoa) to the handle outside the first sc of row 9 and make 1 foot. crab in each sc 48x = 48p. crab.
Finish.
2x basket handle
Start with thread 7567 (cocoa)
Cut 12 pieces of wire approximately 20 cm long. Glue the basket with universal glue for circle crafts so that it looks like a backpack strap.
Pass Resin Harden Circle Crochet inside the basket so that it stays firm.
Dress the backpack on the rabbit.
Carrot 2x
Start with wire 4146 (yolk)
1 row – 6sc inside the magic ring = 6sc
2 row – 1sc over each sc 6x = 6sc
3 row – 1sc 1 inc 3x = 9sc
4 row – 1sc over each sc 9x = 9sc
5 row 2sc 1 inc 3x = 12sc
6 to 9 – 1sc over each sc 12x = 12sc
10 row – 1 Dec 6x = 6sc
Foliage
Change to 5203 wire (greenery)
11 row – 1 scx (go up 12 ch down 1scx over each 12x ch). Attach it to the row again with 1pbx, do this same process 6x, thus forming the carrot foliage.
Finish.
Place the carrots in the Easter Bunny basket.
Little Egg 1
Start with 1289 wire (canary)
1 row – 6sc inside the magic ring = 6sc
2 row – 1 İnc 6x = 12sc
3 row – 1sc 1 inc 6x = 18sc
4 to 6 row – 1sc over each sc 18x = 18sc
7 row – 1sc 1 dec 6x = 12sc
8 to 10 row – 1sc over each 12x sc = 12sc
11 row – 1 Dec 6x = 6sc
Close with fake magic ring.
Finish.
Little Egg 2
Start with cord 2137 (Blue Hydrangea)
1 row – 6sc inside the magic ring = 6sc
2 row – 1 İnc 6x = 12sc
3 row – 1sc 1 inc 6x = 18sc
4 to 6 row – 1sc over each sc 18x = 18sc
7 row – 1sc 1 dec 6x = 12sc
8 to 10 row – 1sc over each 12x sc = 12sc
11 row – 1 Dec 6x = 6sc
Close with fake magic ring.
Finish.
With the aid of a tapestry needle nº16 and thread 1289 (canary) embroider floret all around the egg and above the initial magic ring, and the false magic ring.
Finish.
Little Egg 3
Start with 1289 wire (canary)
1 row – 6sc inside the magic ring = 6sc
2 row – 1 İnc 6x = 12sc
3 row – 1sc 1 inc 6x = 18sc
Change to wire 2137 (Blue hydrangea),
4 to 6 row – 1sc over each sc 18x = 18sc
7 row – 1sc 1 dec 6x = 12sc
8 to 10 row – 1sc over each 12x sc = 12sc
Change to wire 1289 (canary)
11 row – 1 Dec 6x = 6sc
Close with fake magic ring.
Finish.
With the aid of a tapestry needle nº16 and thread 1289 (canary) embroider floret in the part that was woven with thread 2137 (Blue hydrangea).
Finish.
Little Egg 4
Start with 1289 wire (canary)
1 row – 6sc Inside the magic ring = 6sc
2 row – 1 İnc 6x = 12sc
3 row – 1sc 1 inc 6x = 18sc
Change to wire 8001 (white)
4 to 6 row – 1sc over each sc 18x = 18sc
7 row – 1sc 1 dec 6x = 12sc
8 to 10 row – 1sc over each 12x sc = 12sc
Change to wire 1289 (canary)
11 row – 1 Dec 6x = 6sc
Close with fake magic ring.
Finish.
With the aid of a tapestry needle nº16 and thread 1289 (canary) embroider small “v” on the part that was woven with thread 8001 (white).
Finish.
Little Egg 5
Start with 5203 wire (greenery)
1 row – 6sc inside the magic ring = 6sc
2 row – 1 İnc 6x = 12sc
3 row – 1sc 1 inc 6x = 18sc
Change to wire 1289 (canary)
4 to 6 row – 1sc over each sc 18x = 18sc
7 row – 1sc 1 dec 6x = 12sc
Change to wire 5203 (greenery)
8 row – 1sc about each sc 12x = 12sc
Change to wire 1289 (canary)
9 and 10 row – 1sc over each 12x sc = 12sc
Change to wire 5203 (greenery)
11 row – 1 Dec 6x = 6sc
Close with fake magic ring.
Finish.
With the aid of a tapestry needle nº16 and thread 5203 (greenery) border between row 4 and 7 streaks in zigzag and between rows 9 and 10 small vertical streaks.
Finish.
Little Egg 6
Start with wire 4456 (orange).
1 row – 6sc Inside the magic ring = 6sc
2 row – 1 İnc 6x = 12sc
3 row – 1sc 1 inc 6x = 18sc
Change to wire 8001 (white)
4 to 6 row – 1sc over each sc 18x = 18sc
7 row – 1sc 1 dec 6x = 12sc
Change to wire 4456 (orange).
8 row – 1sc about each sc 12x = 12sc
Change to wire 8001 (white)
9 and 10 row – 1sc over each 12x sc = 12sc
Change to wire 4456 (orange).
11 row – 1 Dec 6x = 6sc
Close with fake magic ring.
Finish.
With the aid of a tapestry needle nº16 and thread 4456 (orange) border between row 9 and 10 zigzag stripes.
Finish.
Place the eggs in the bunny basket.